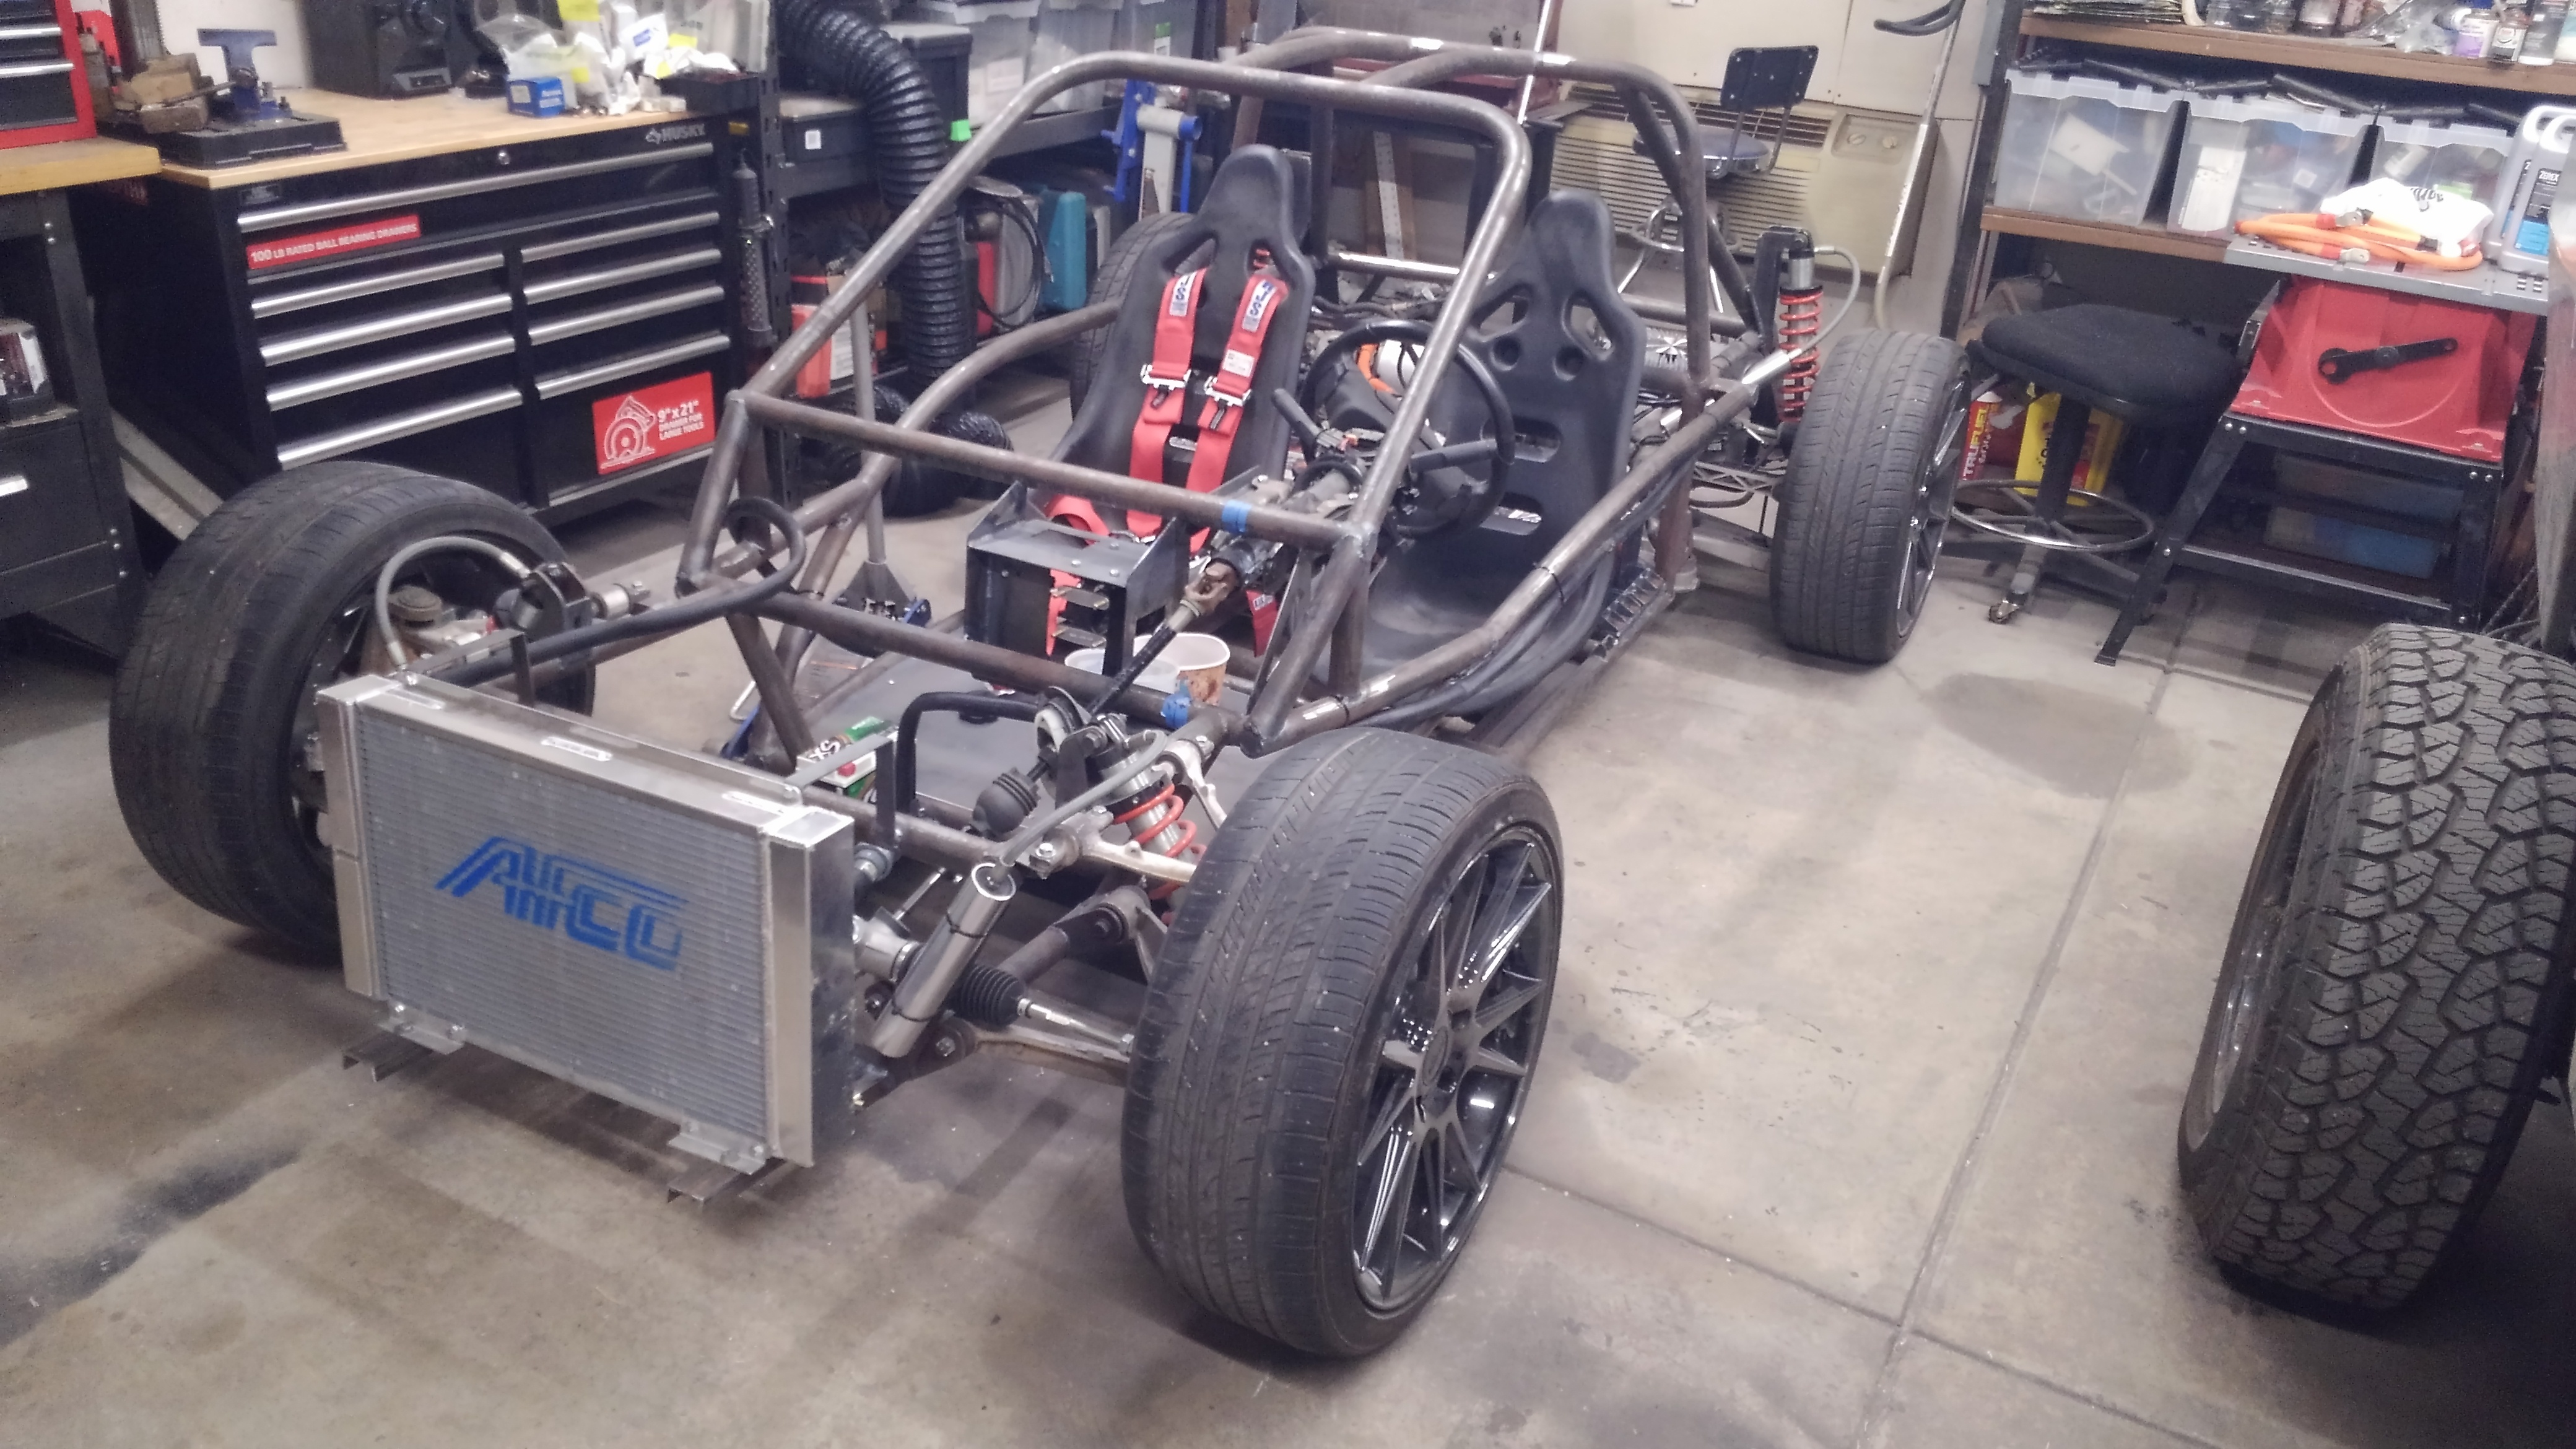
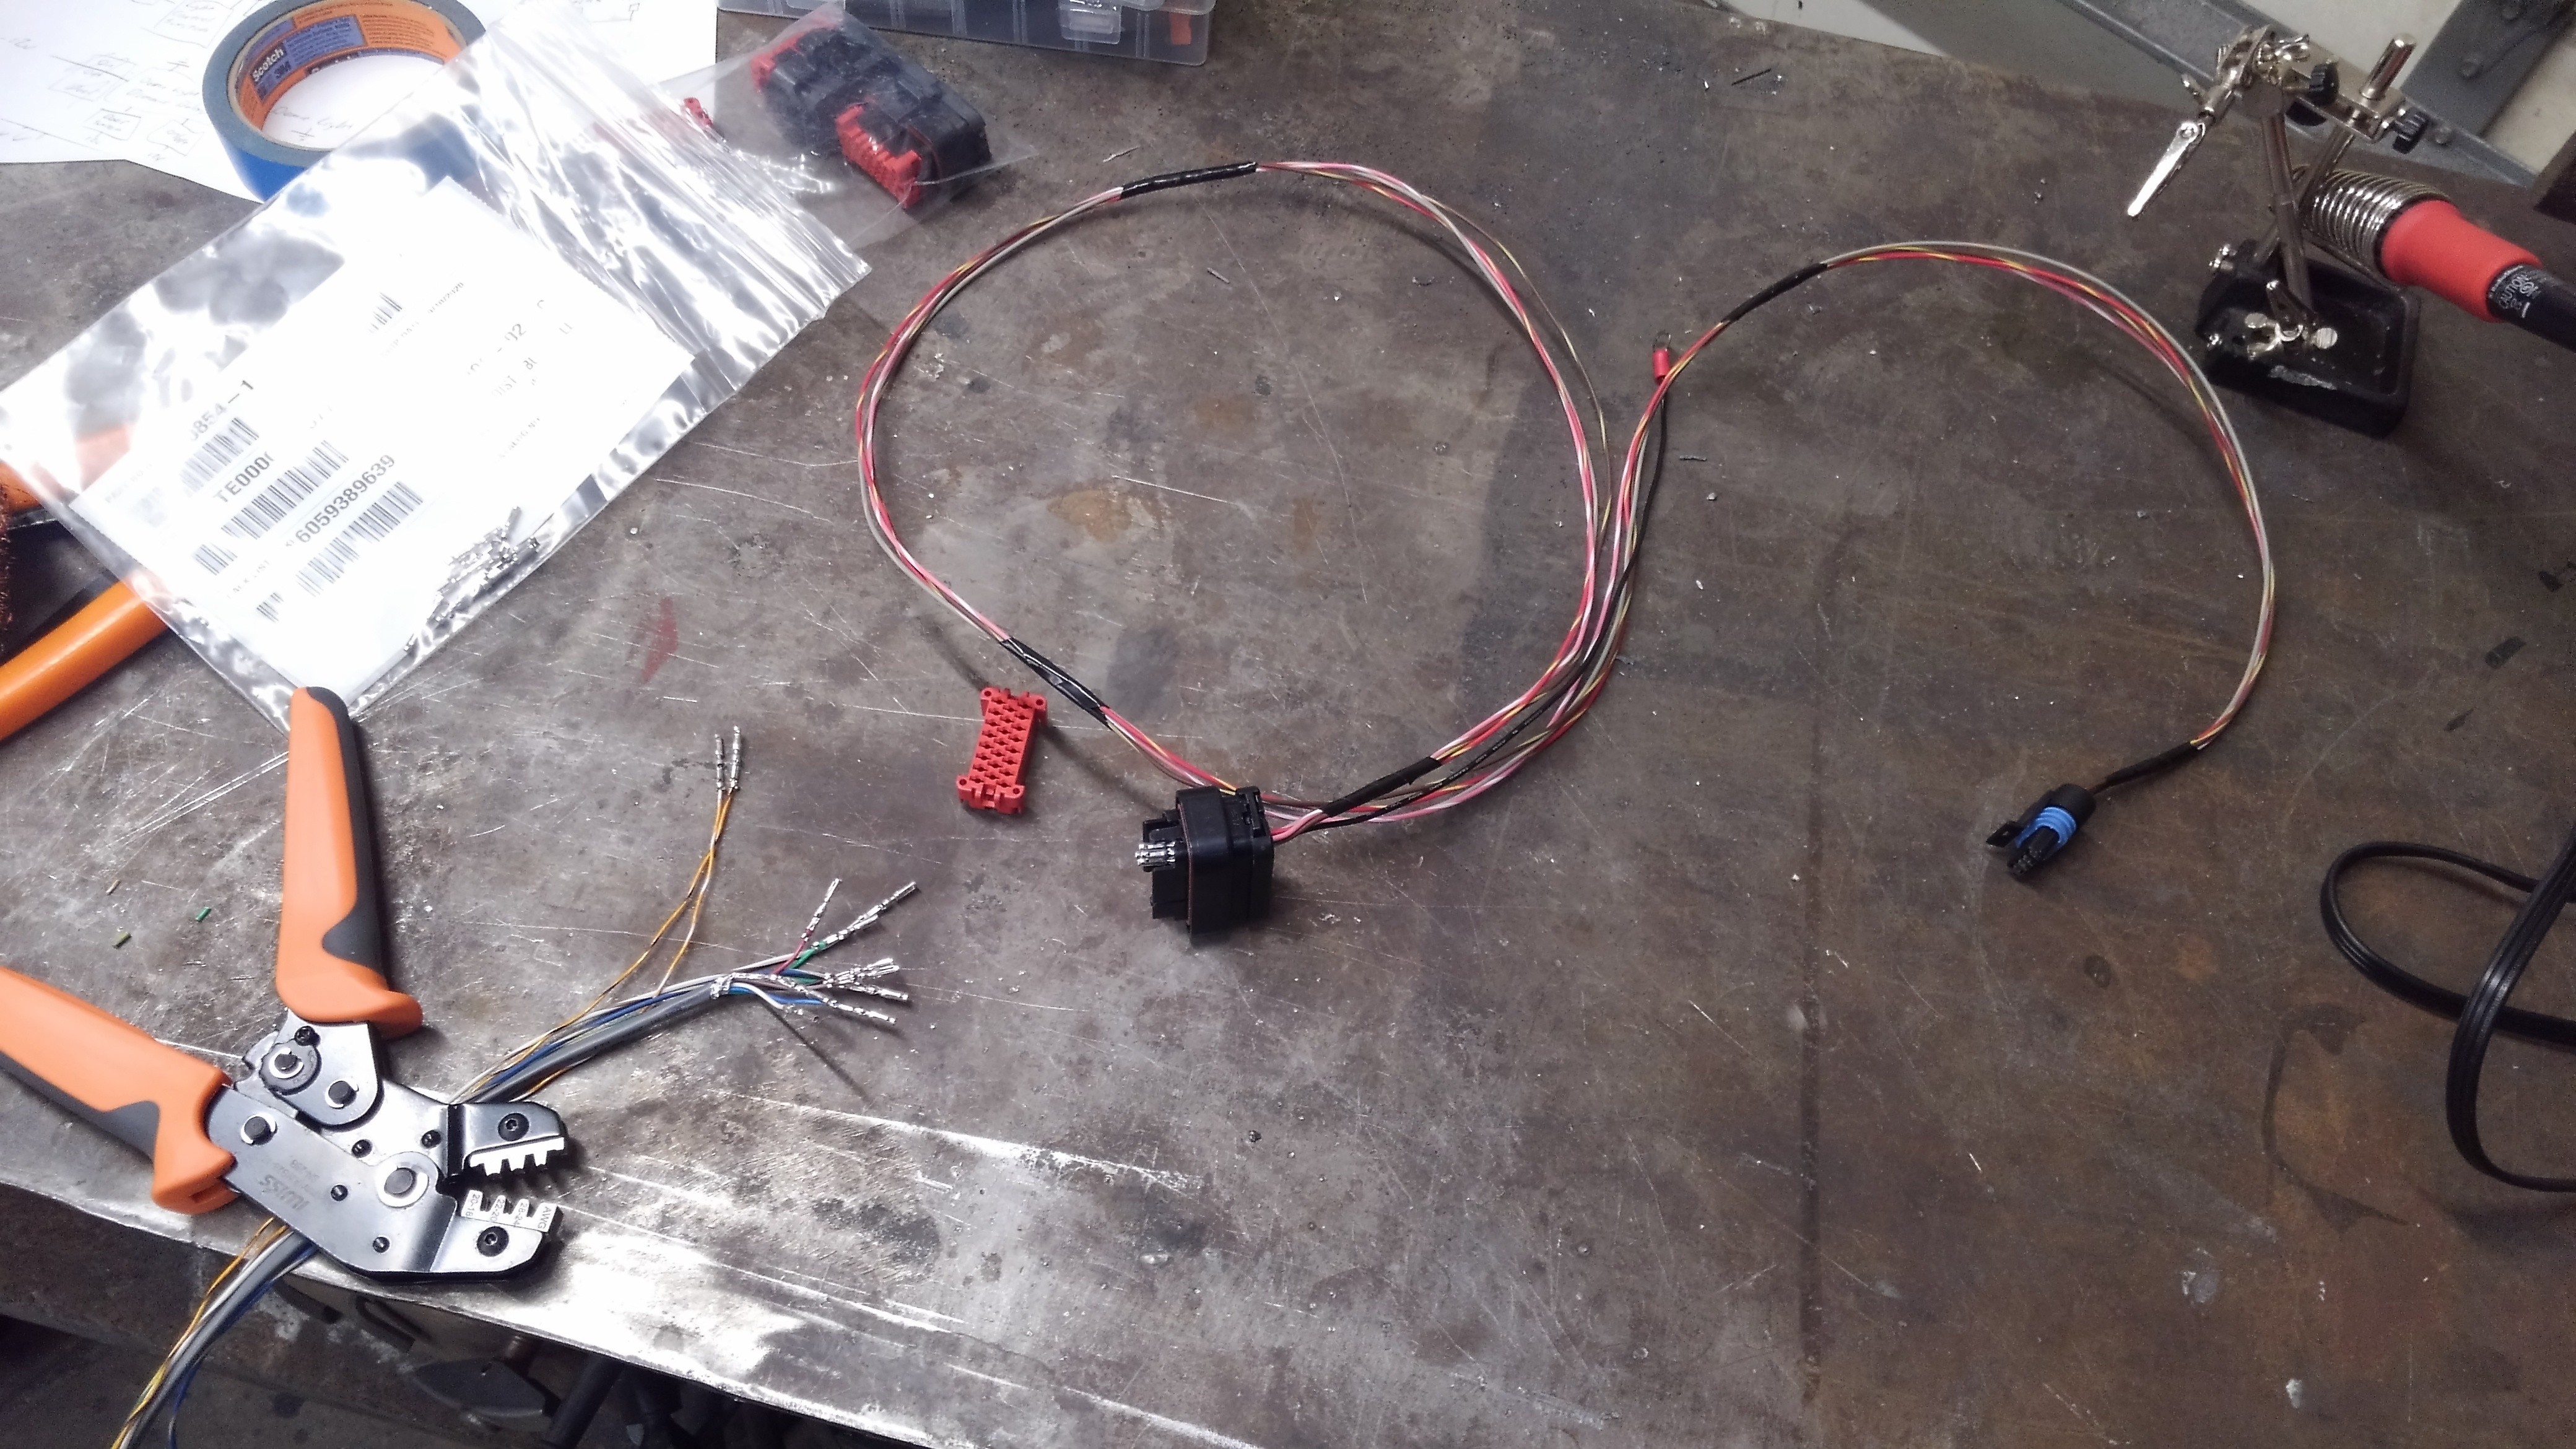
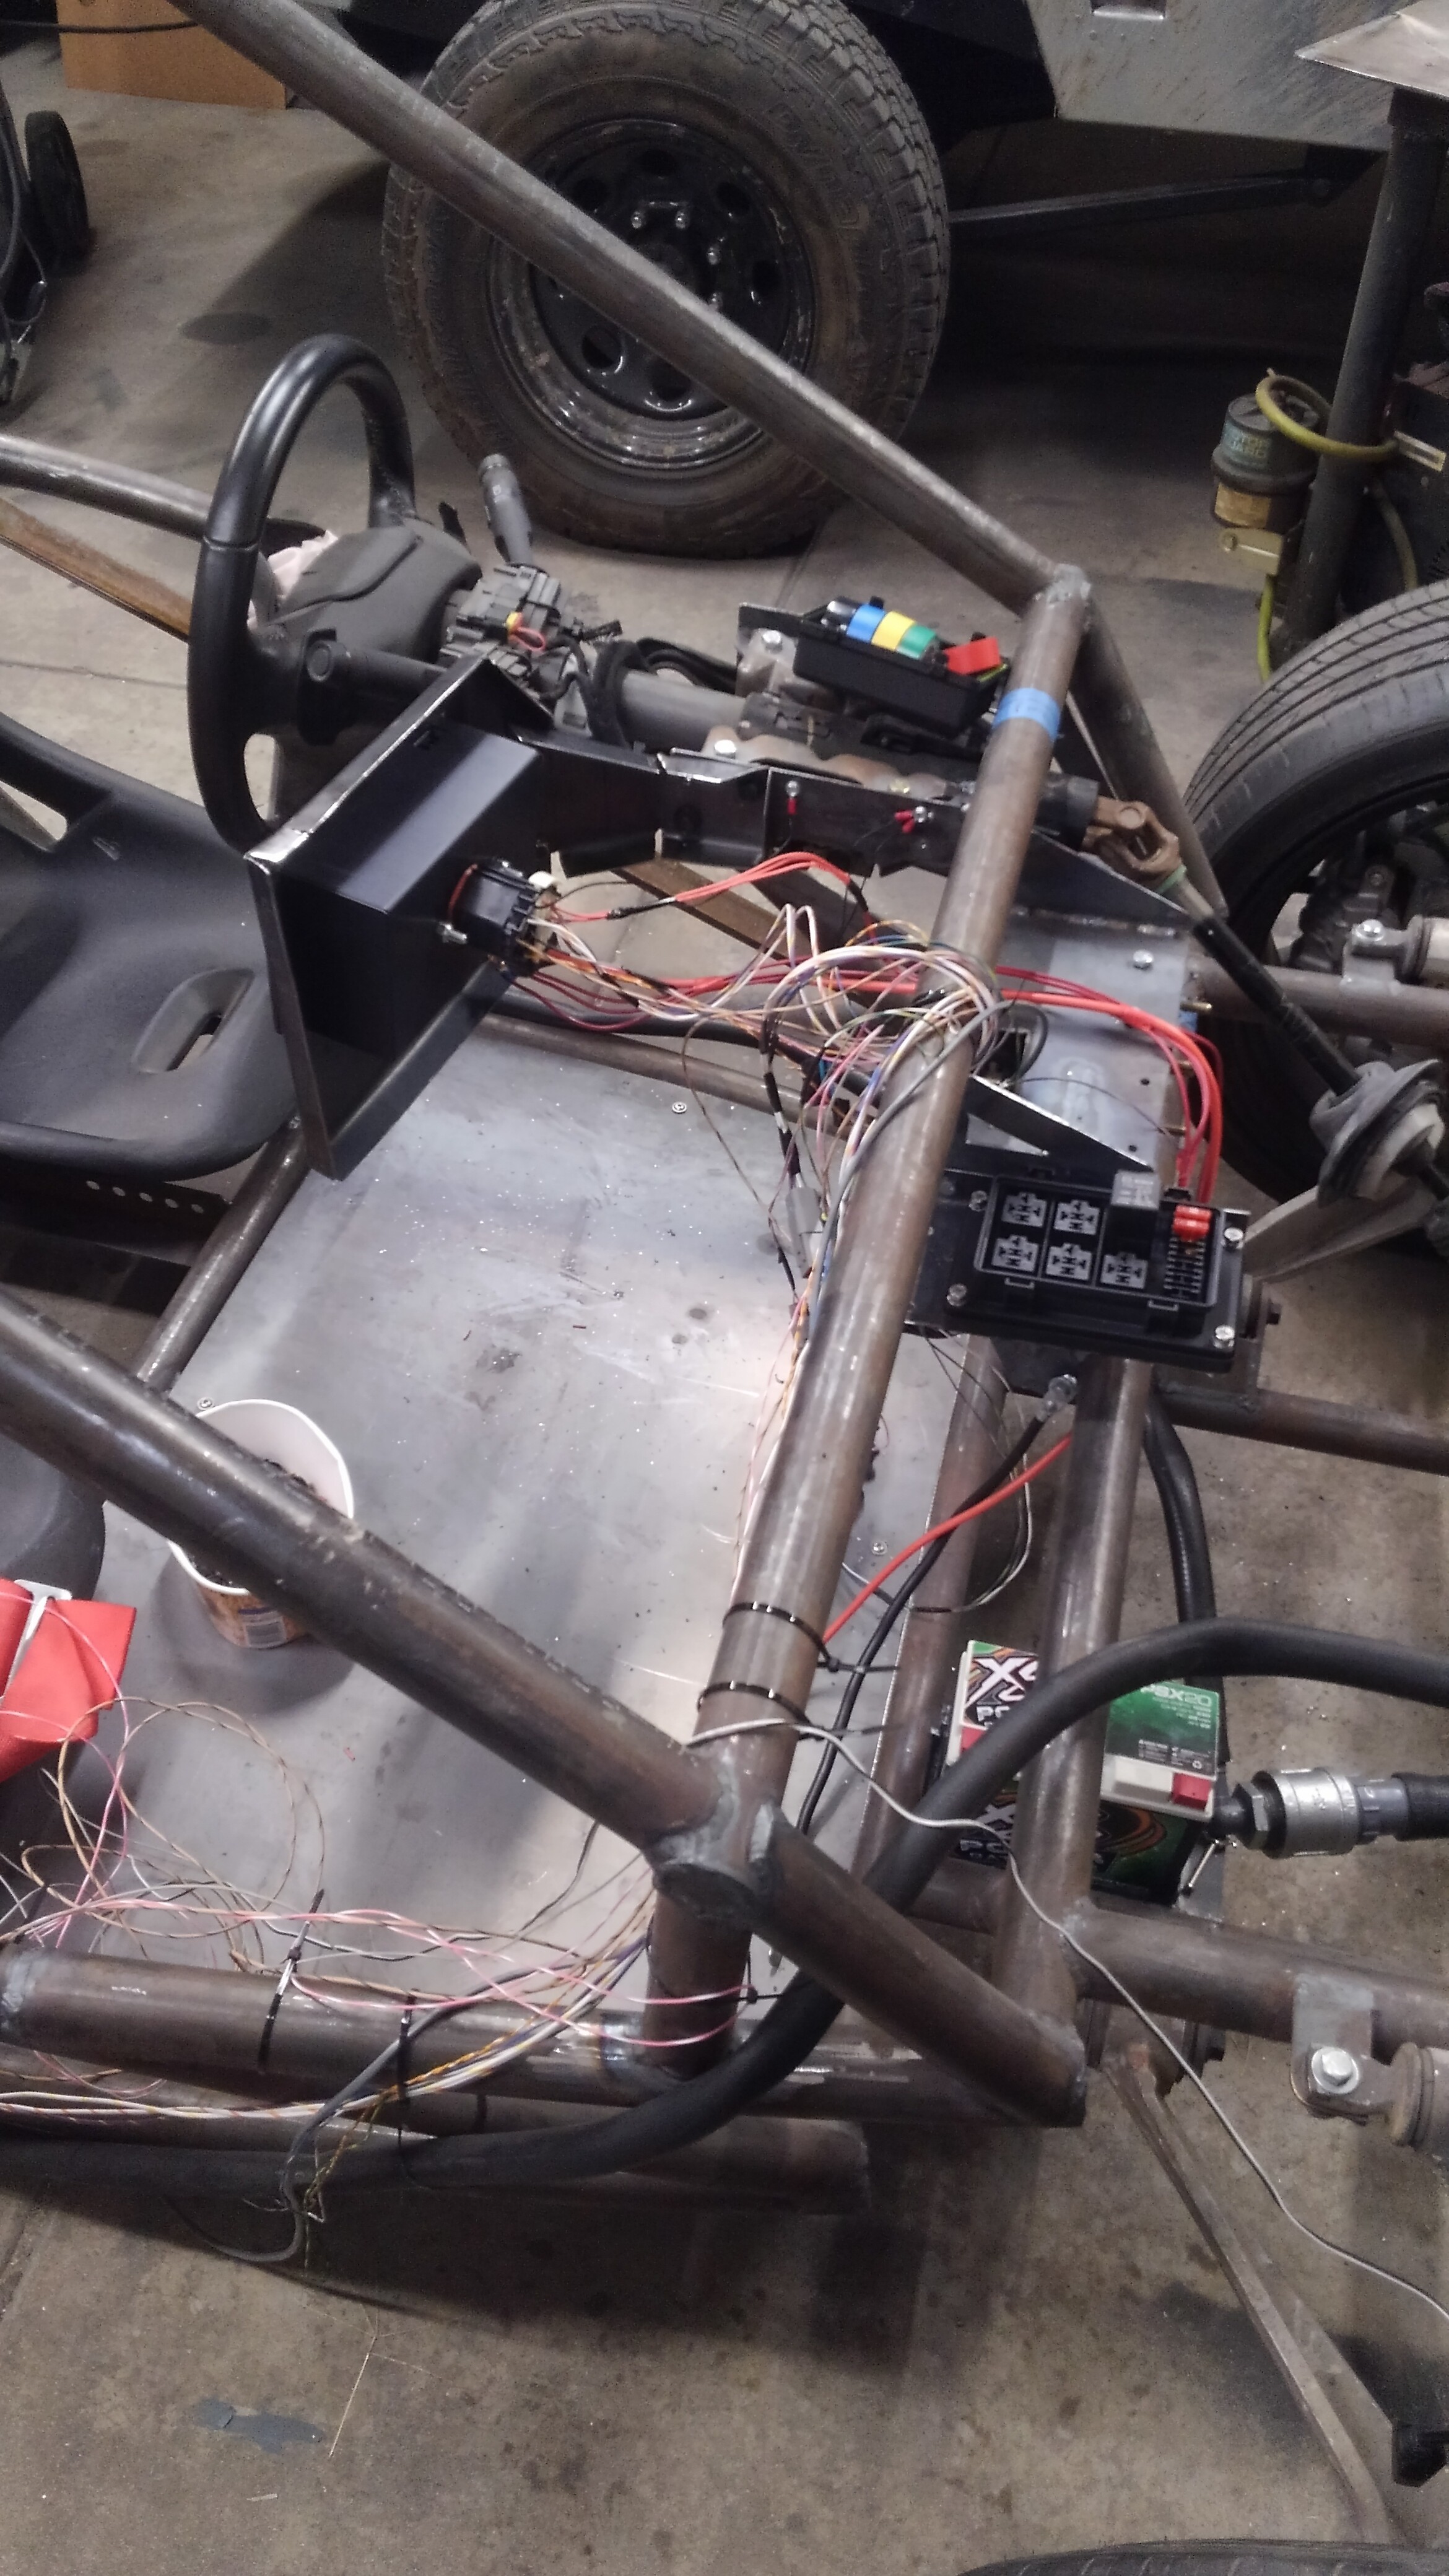
Small progress update. The back of the roadster isn’t looking like a rats nest of wires that I was expecting at this point (it took 120 wires to re-wire an off-road project truck, this may have less than 30 wires to turn the wheels).
Thanks Steve for the use of those crimpers! They really made quick work of those terminals.
These cables are definitely something more serious than the average home electrician runs across.
I was even a bit surprised when the hot air gun wasn’t really doing the job for the heat shrink… It took a bit of time with a propane torch to get these shrinky dinks to do their thing…
And thank you all for the encouraging words in person this evening, I really appreciated it.
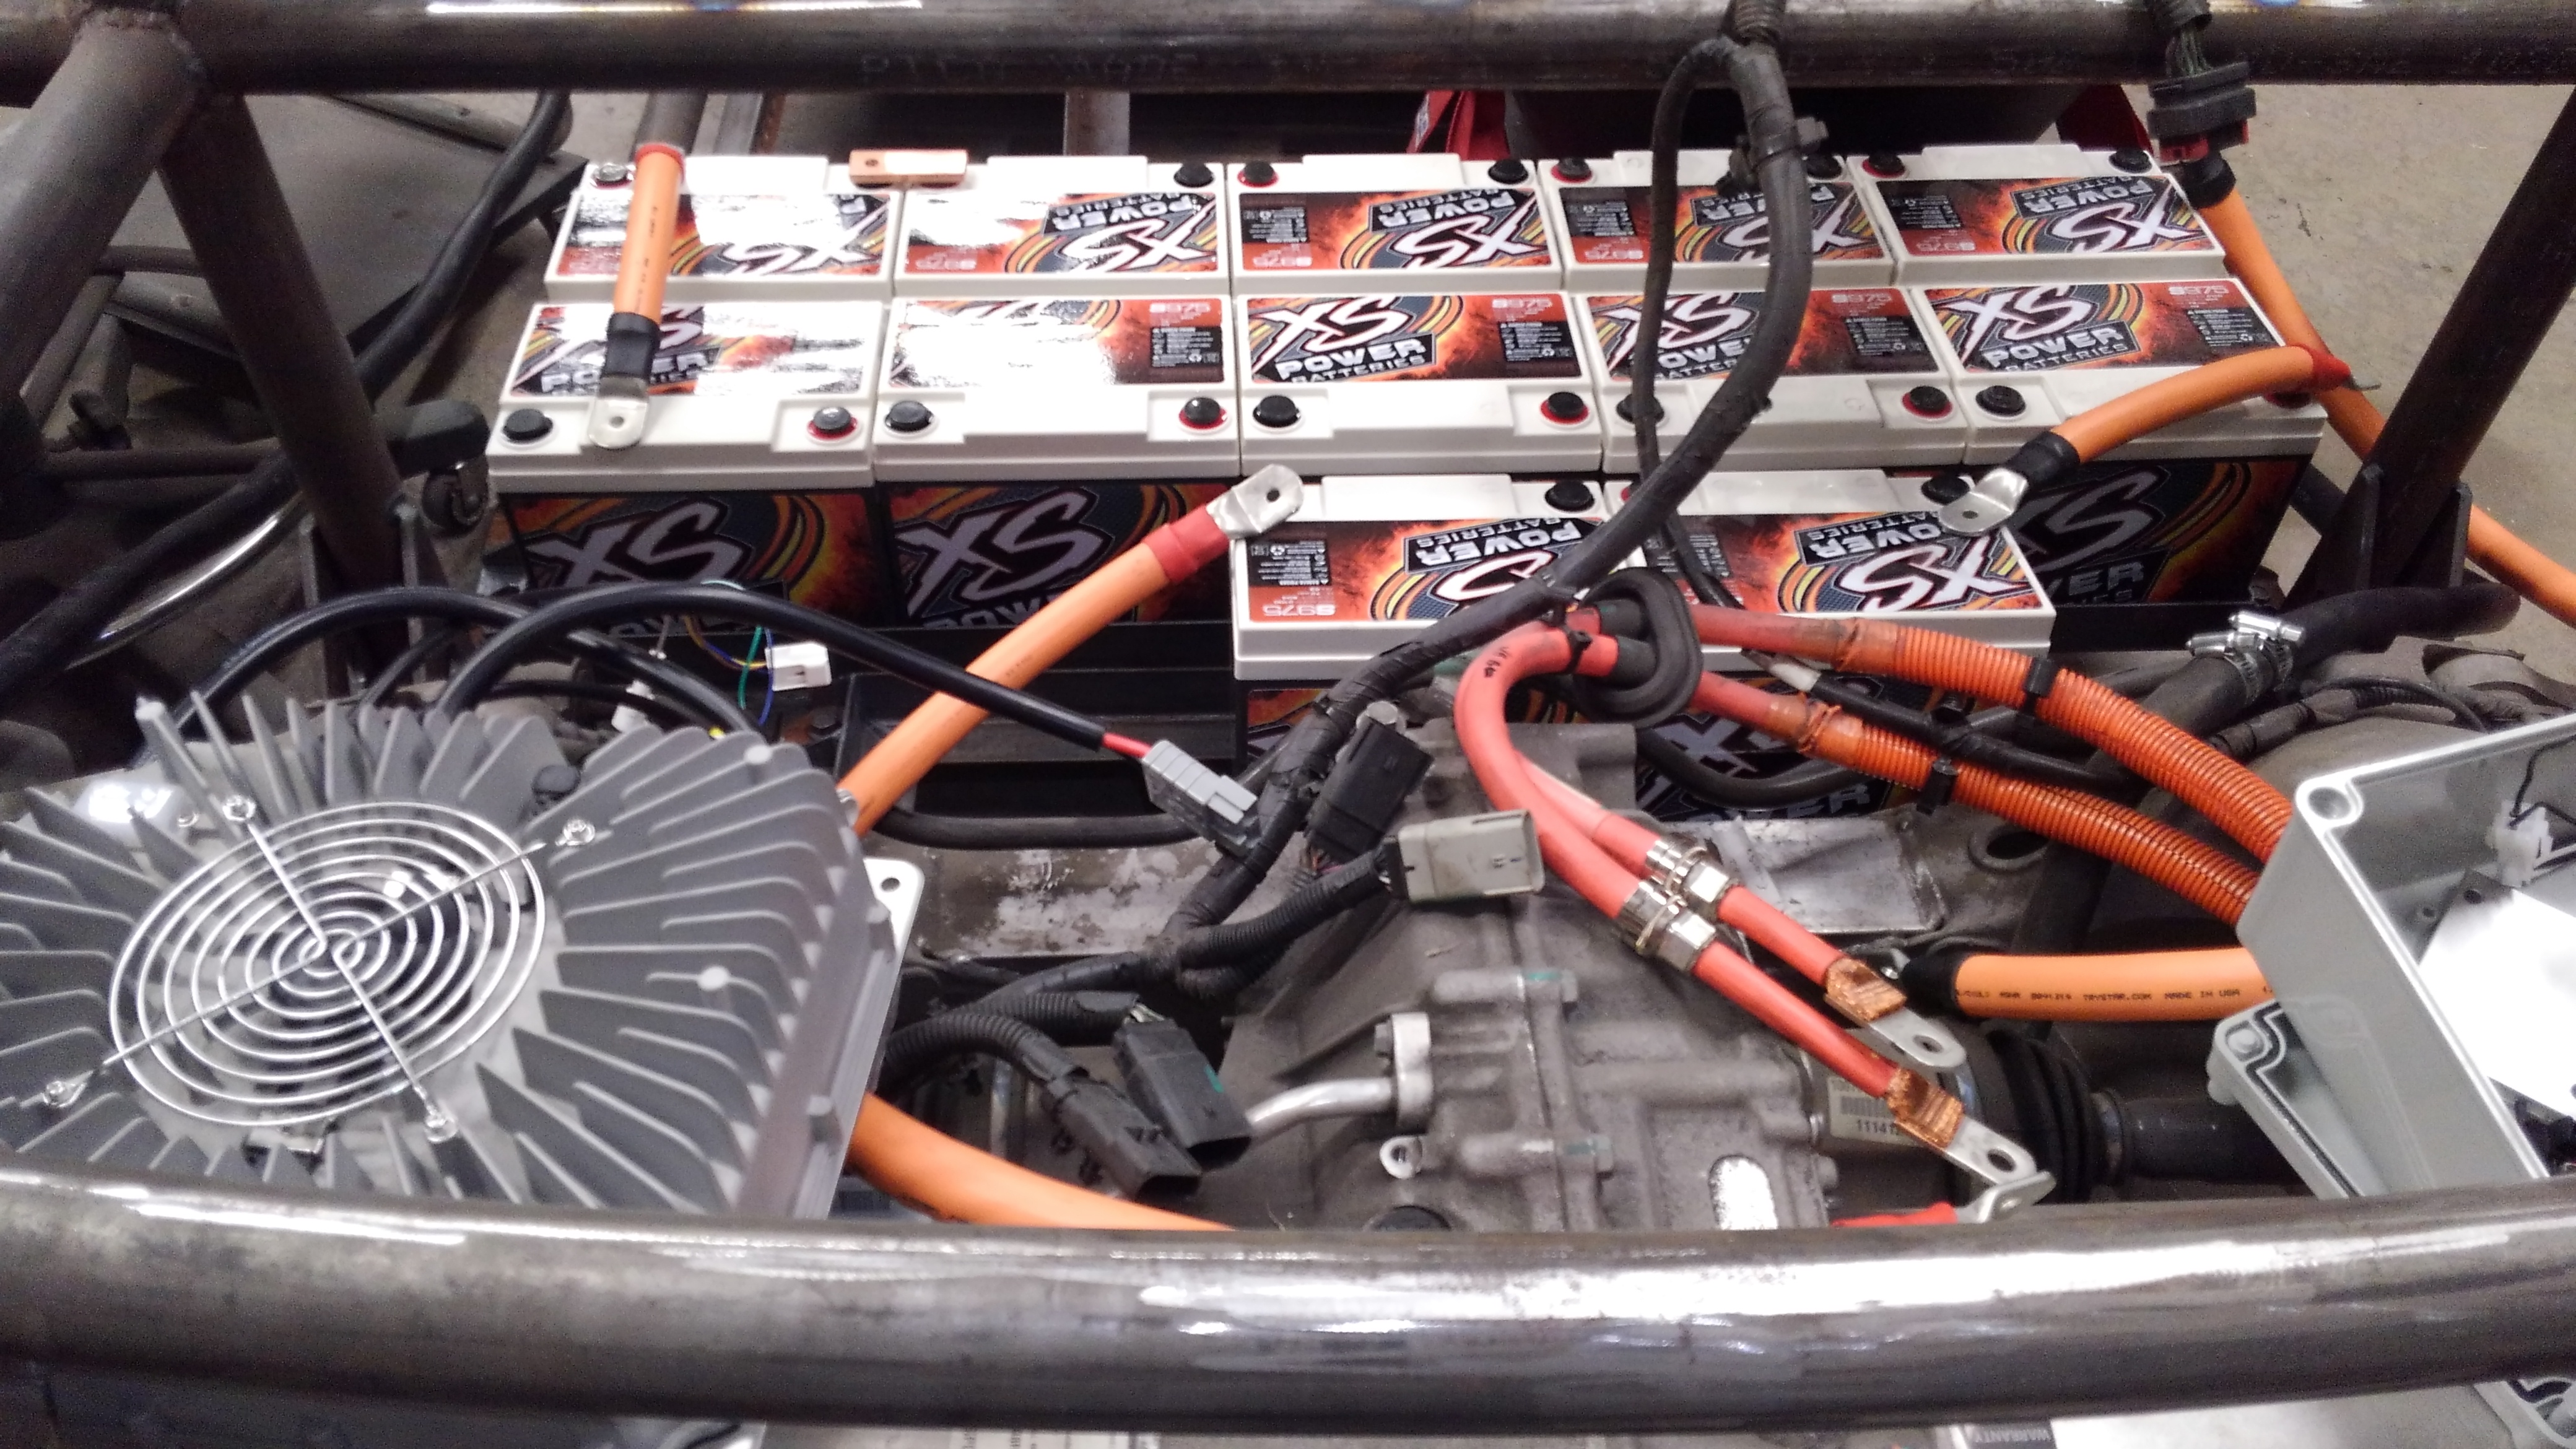
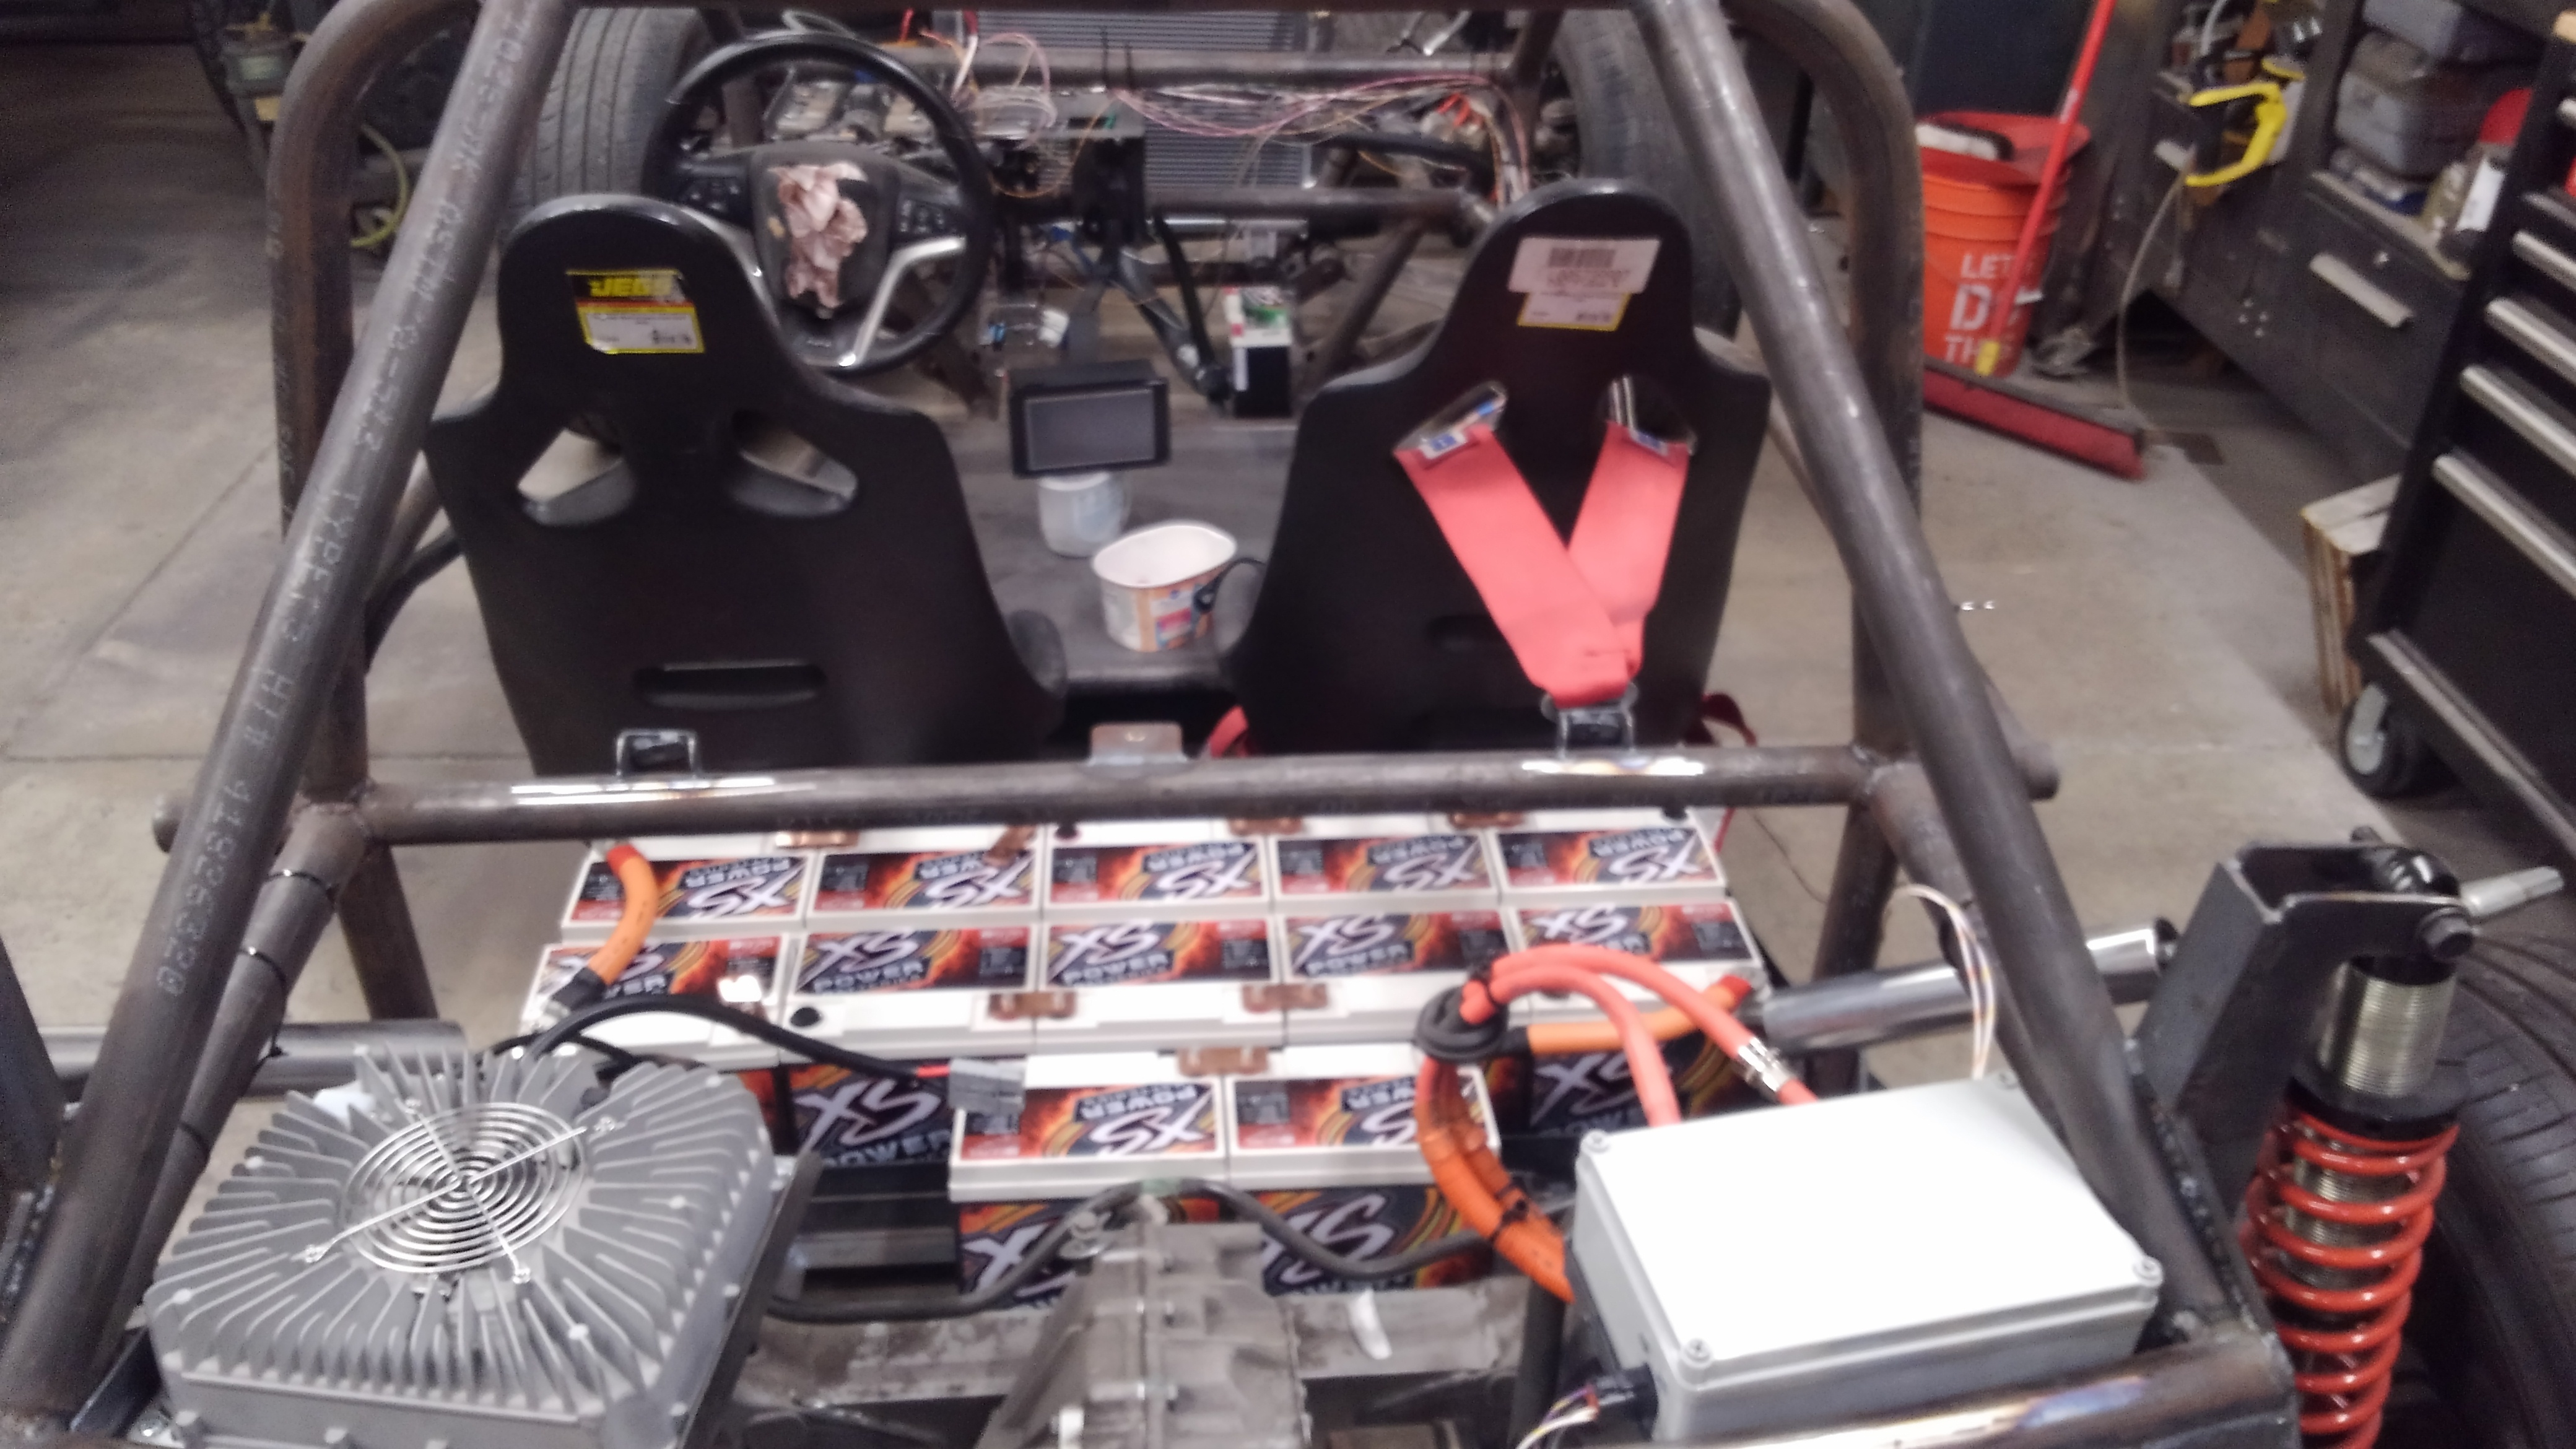
The bus bars were installed and checked the pack voltage. The voltage came out to 156.3v (or about 13v in each battery).
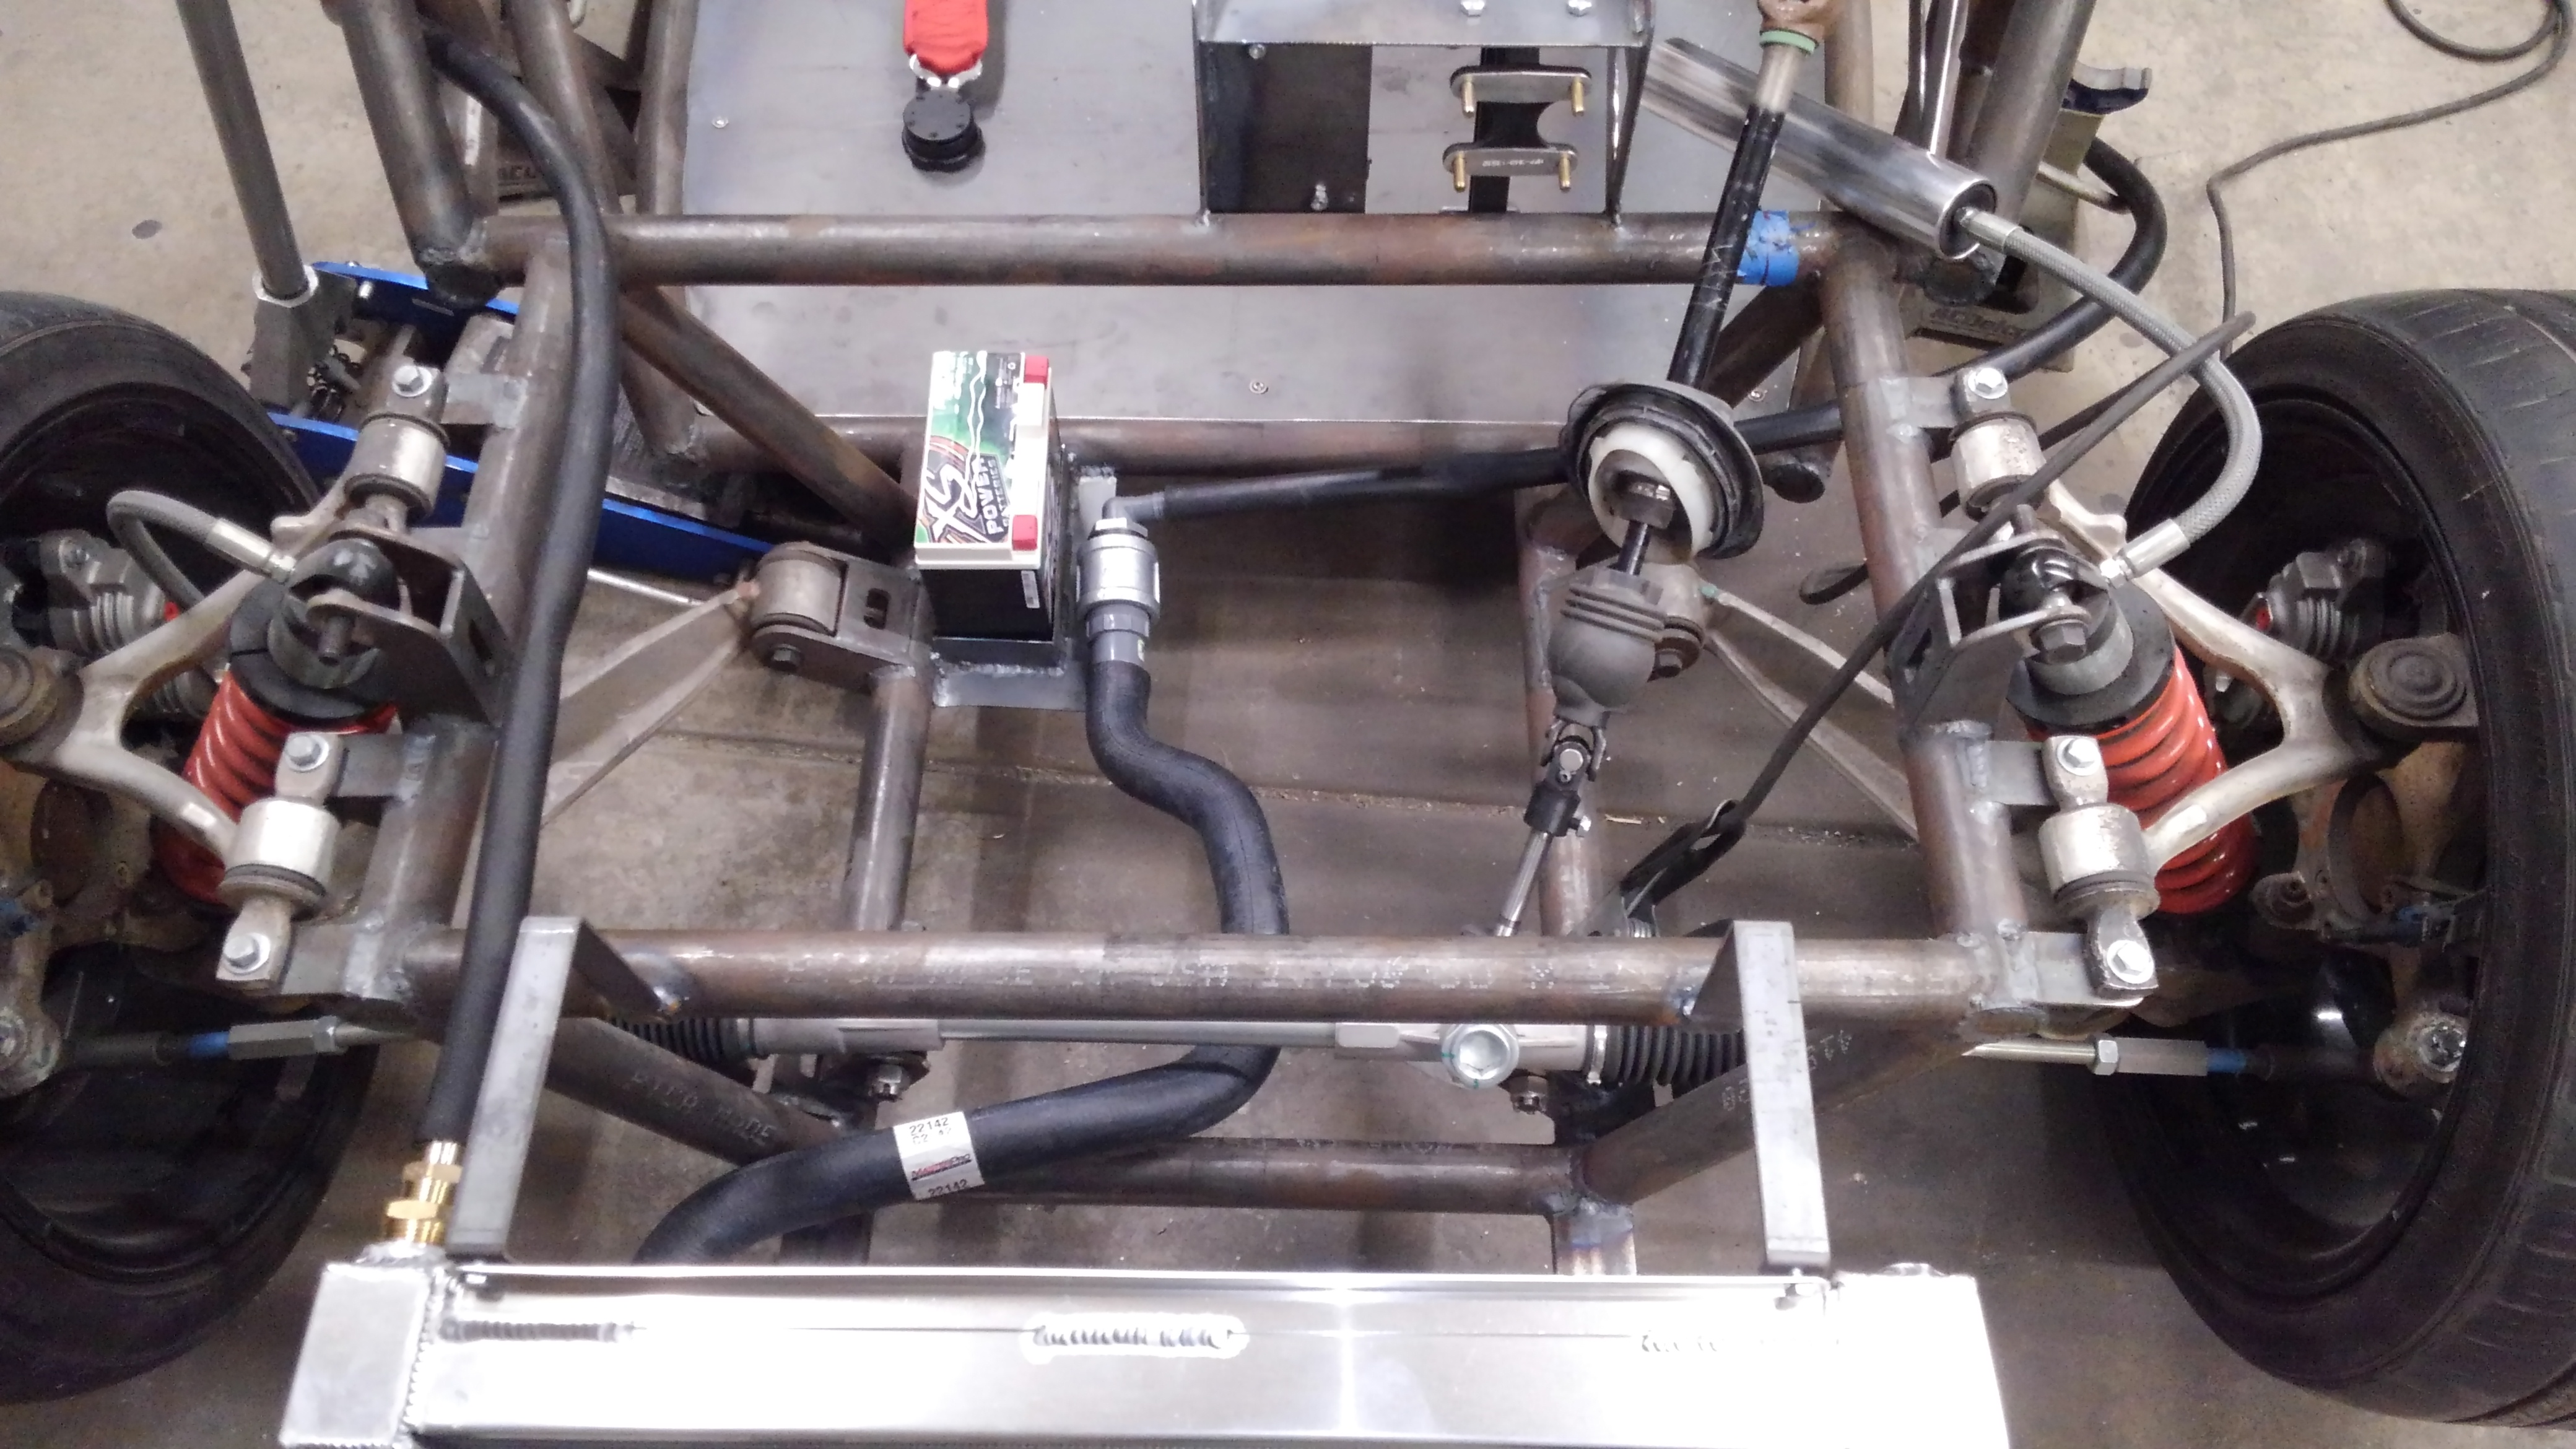
I also managed to get the mounts for the radiator welded on while also plumbing up the radiator. The plumbing is a little mickey mouse’d, but that’s what I get for not ordering a radiator with AN pipe threads instead of standard 1 3/4in automotive barbed coolant hose connectors (tesla runs tiny 3/4in coolant hoses)
I’ve still got to mount the contactor box, but after that, I should be ready to do the rest of the wiring.
I did get close to powering up the roadster today.
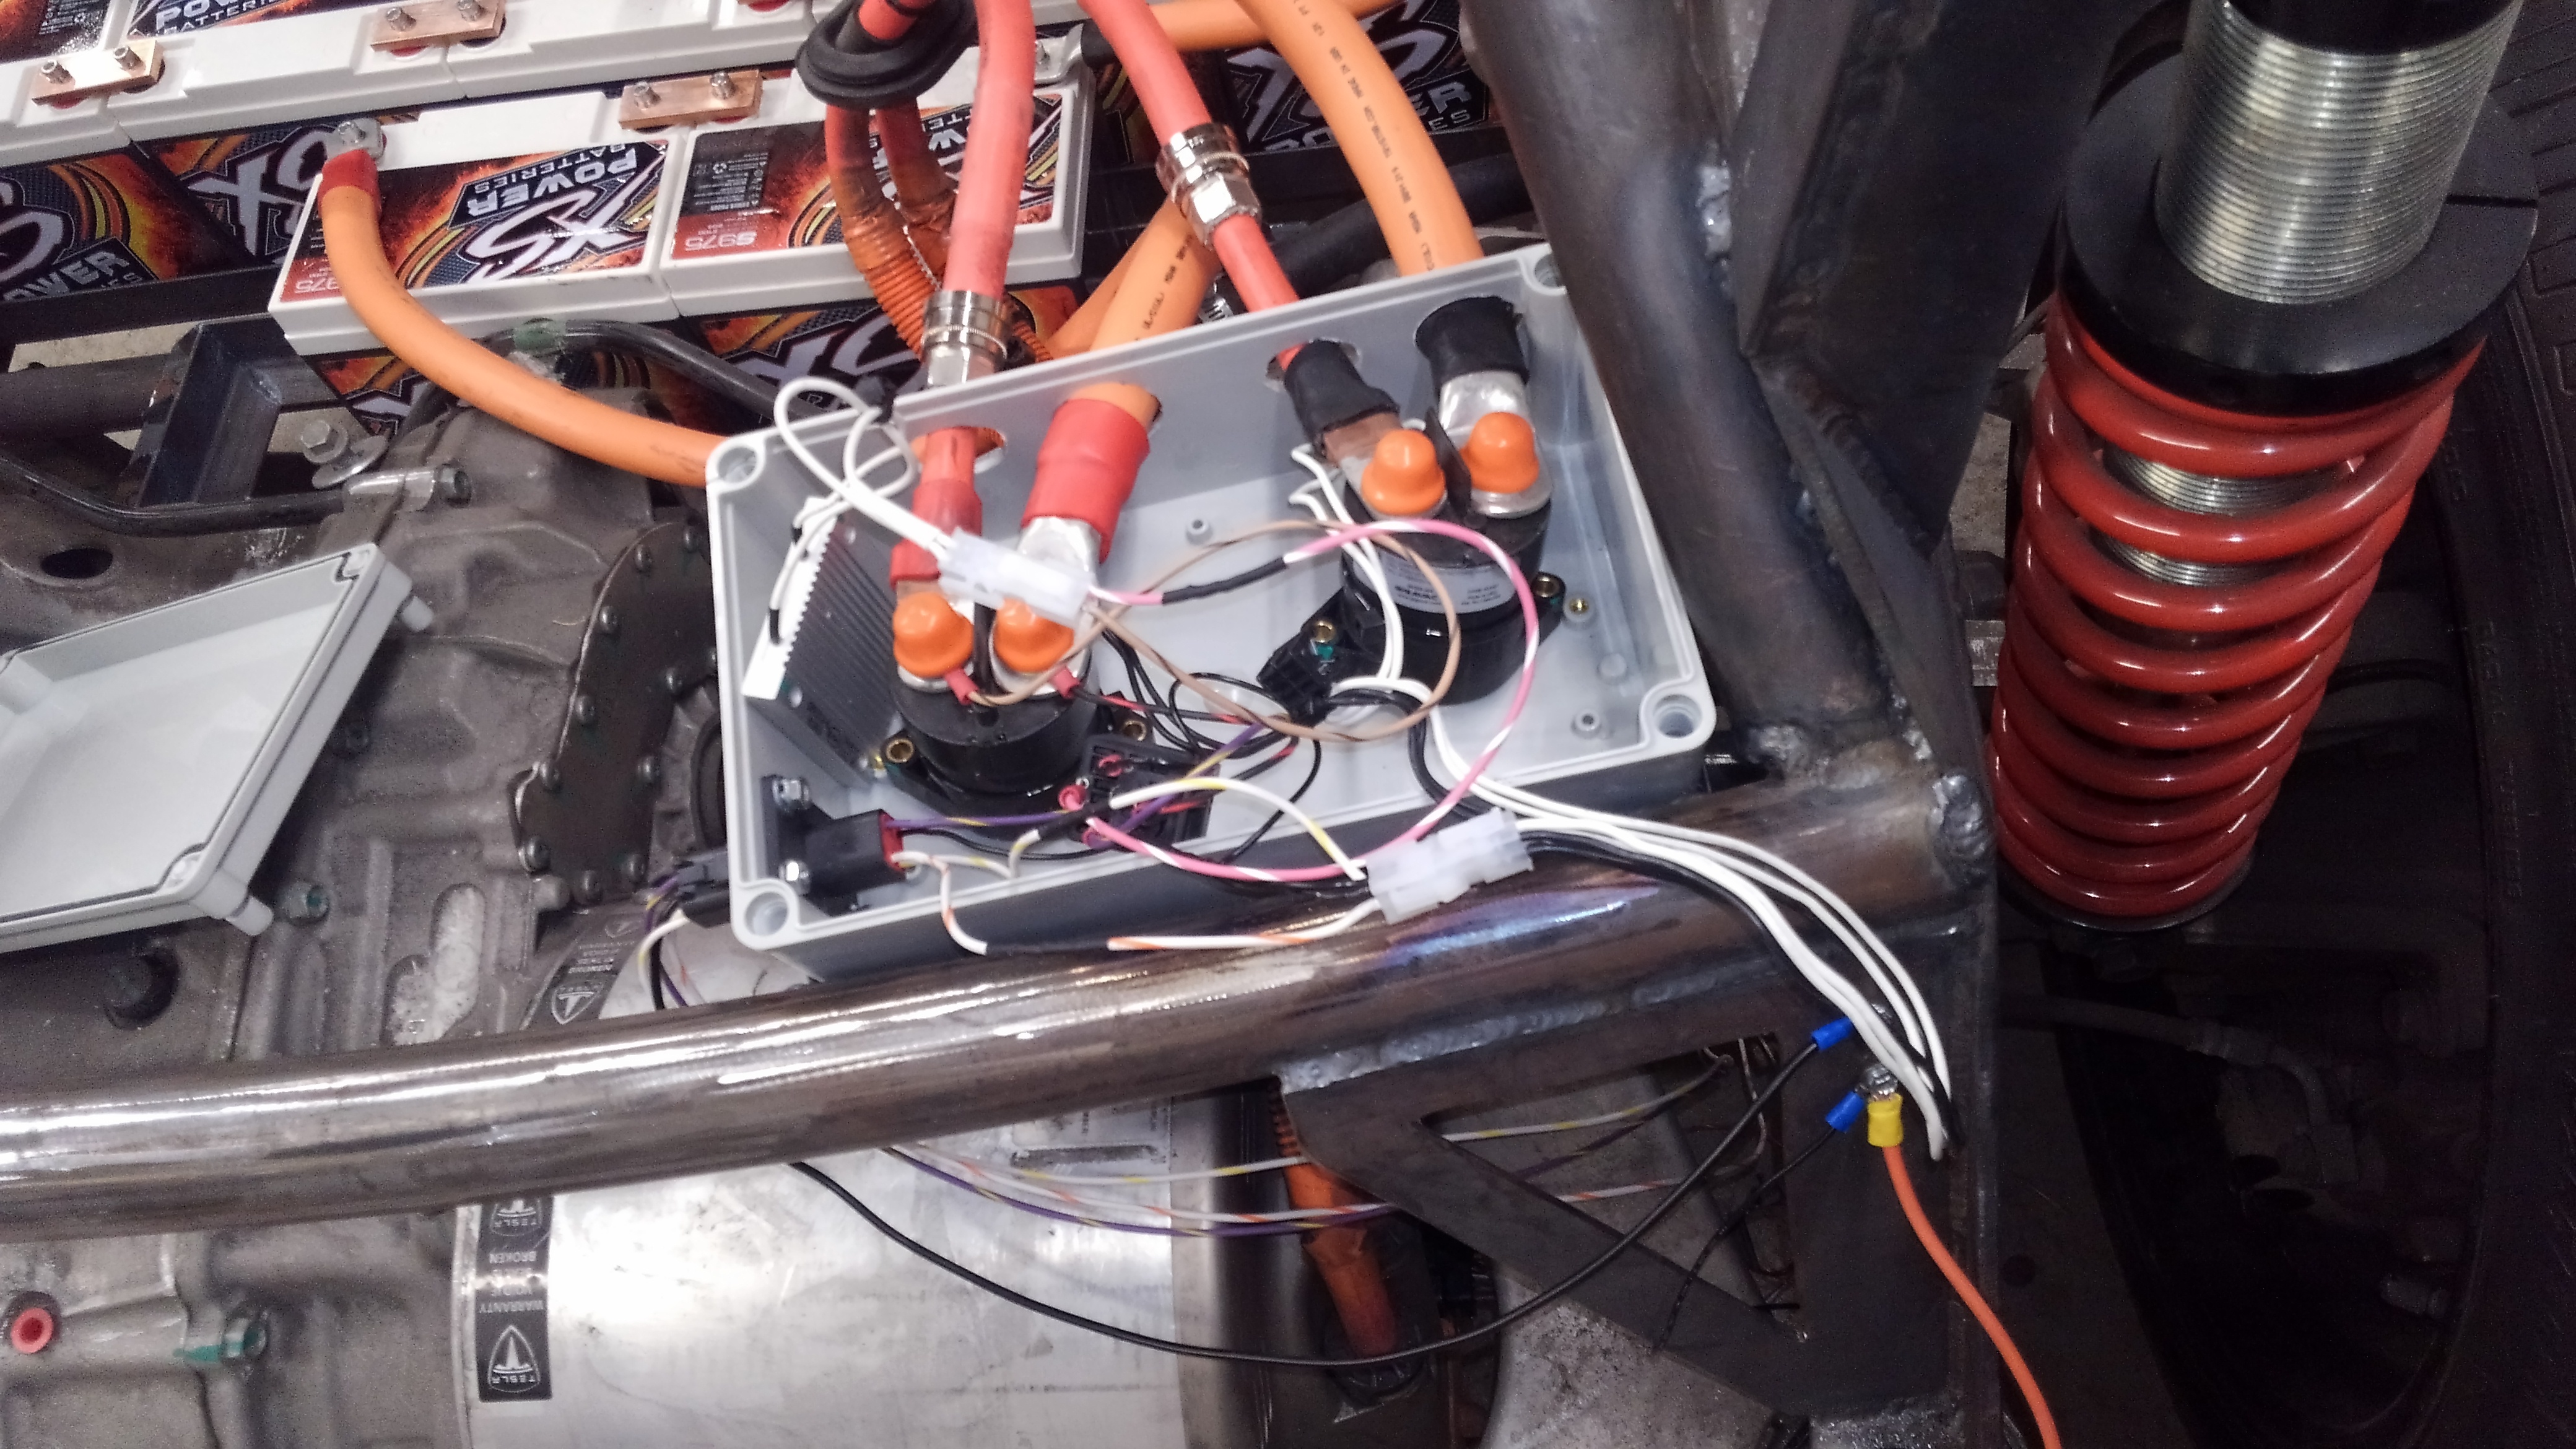
The contactors box and the charger box are both mounted, and a large chunk of the wiring was laid out today.
I still have about a dozen wires to put into a connector, but after that, I should be able to power up the controller and see if it will talk to that tesla motor.
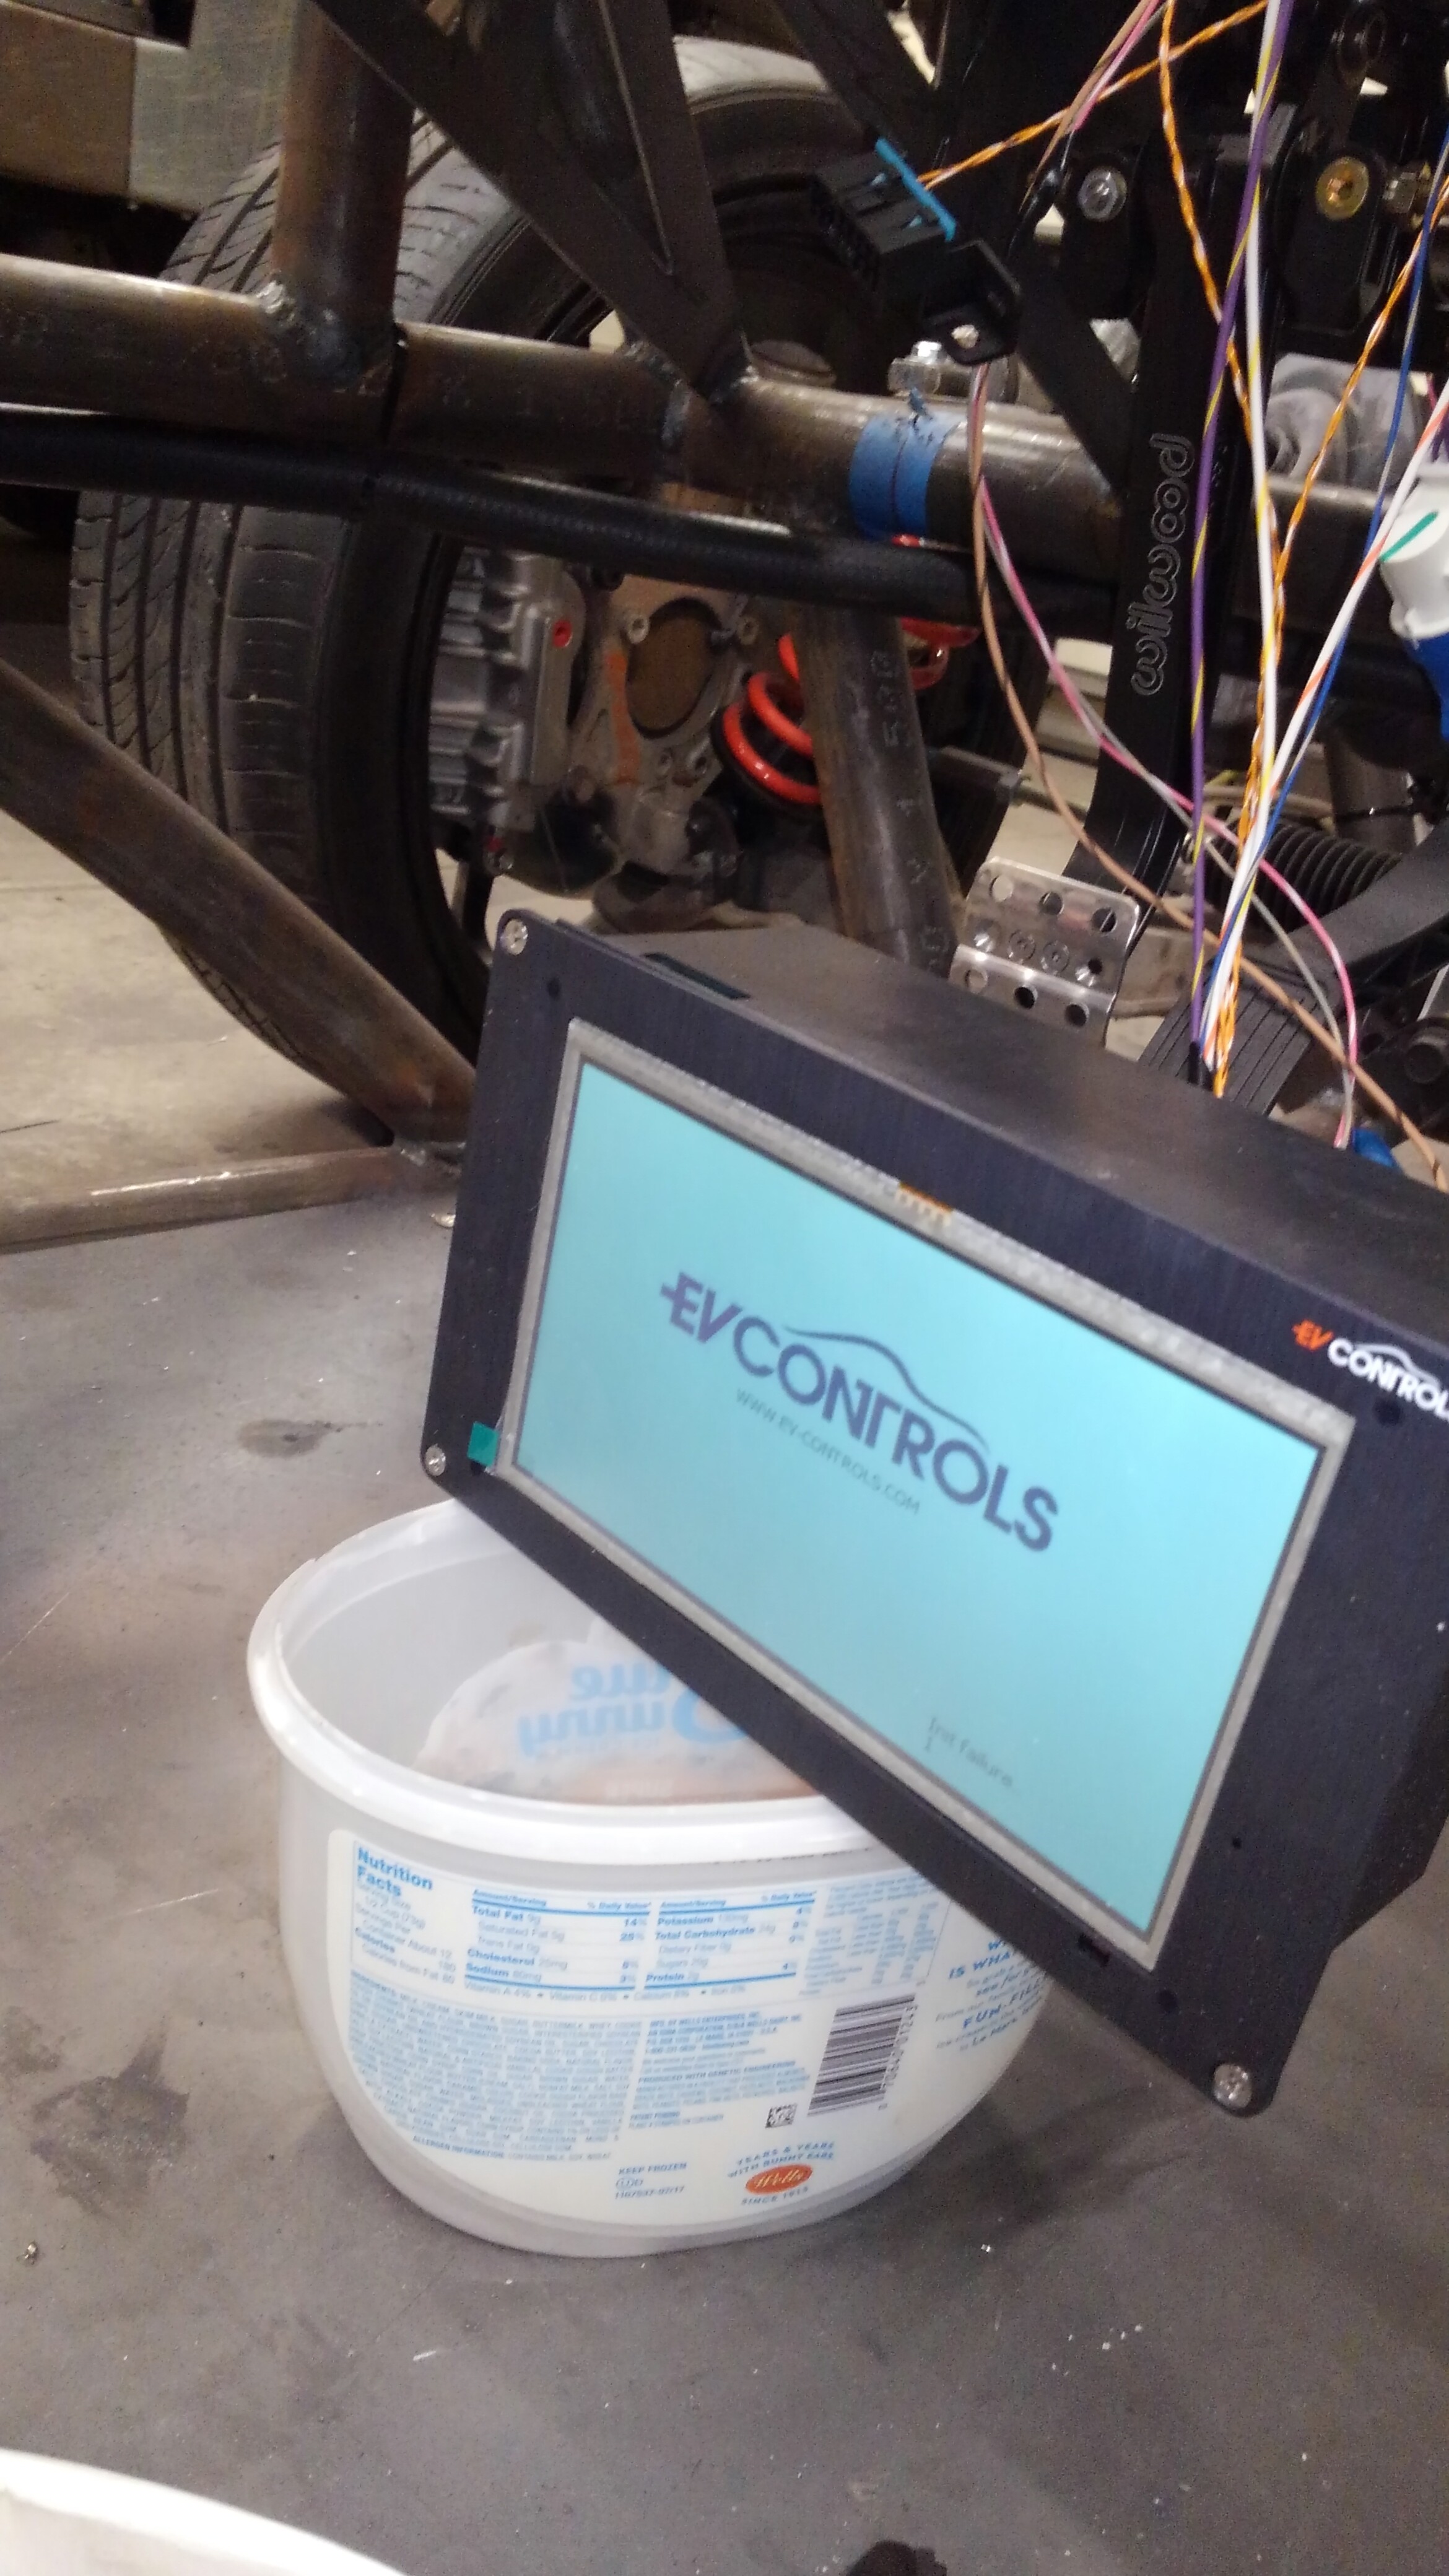
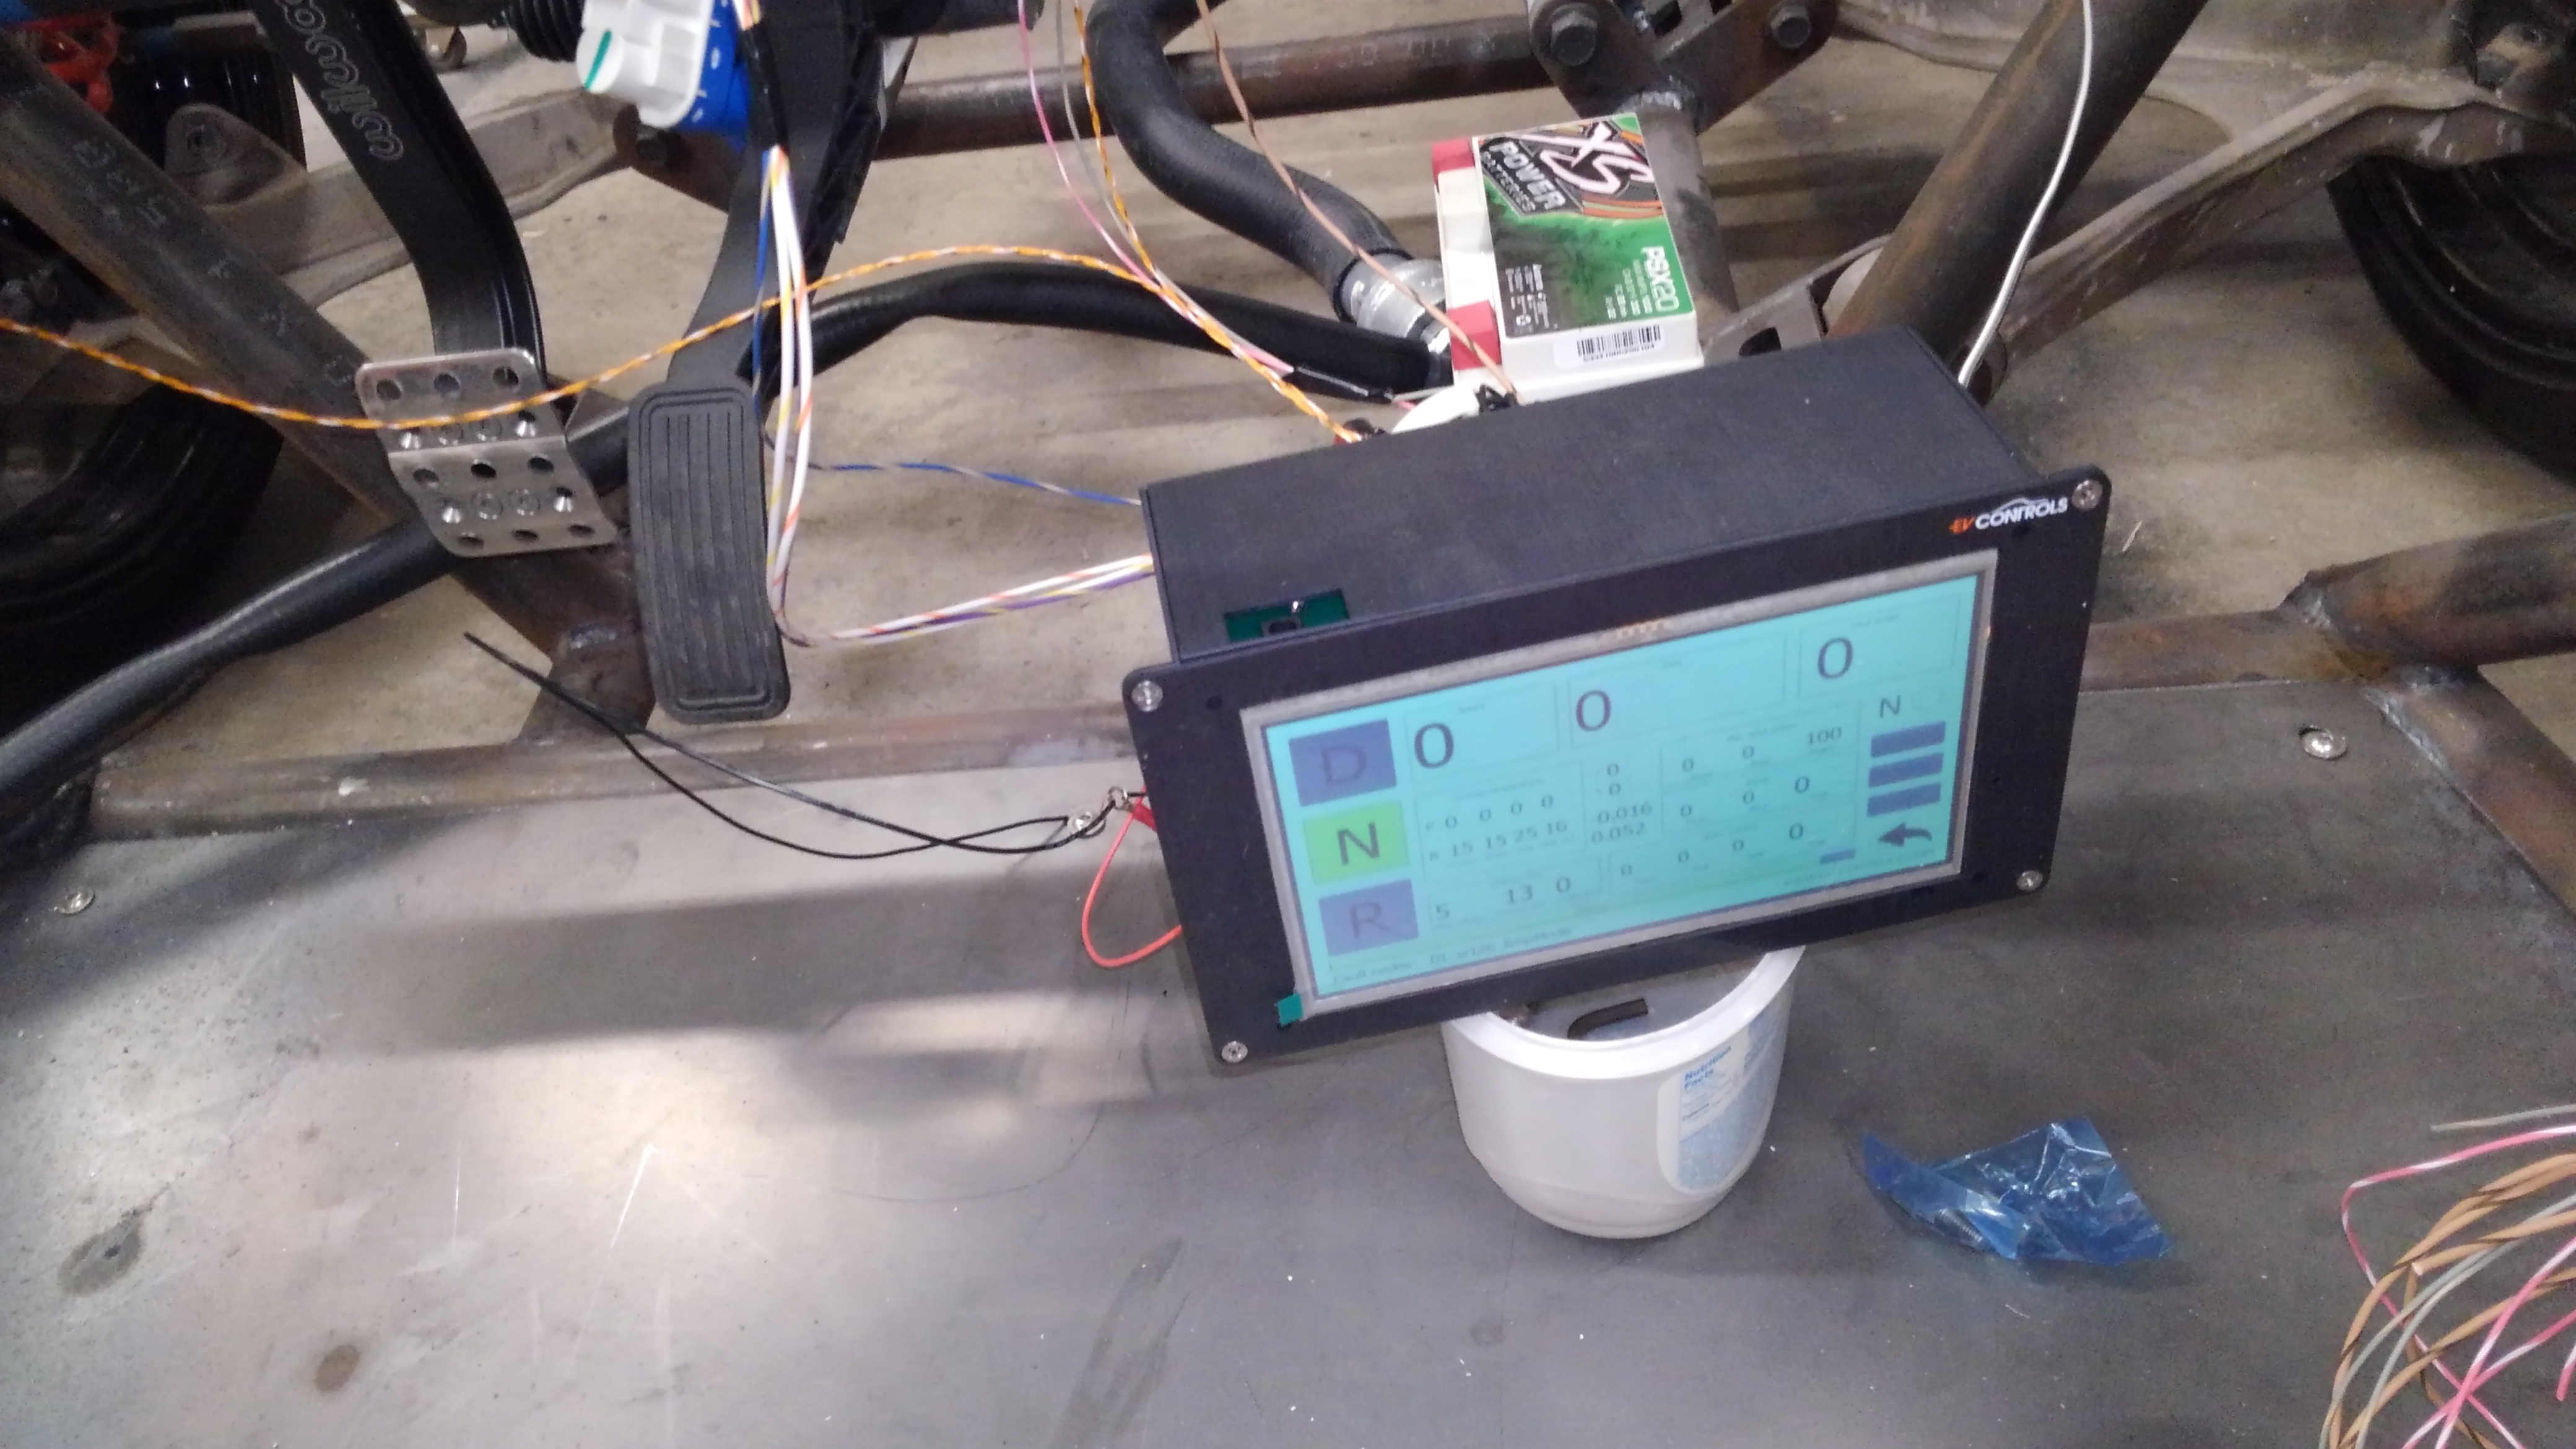
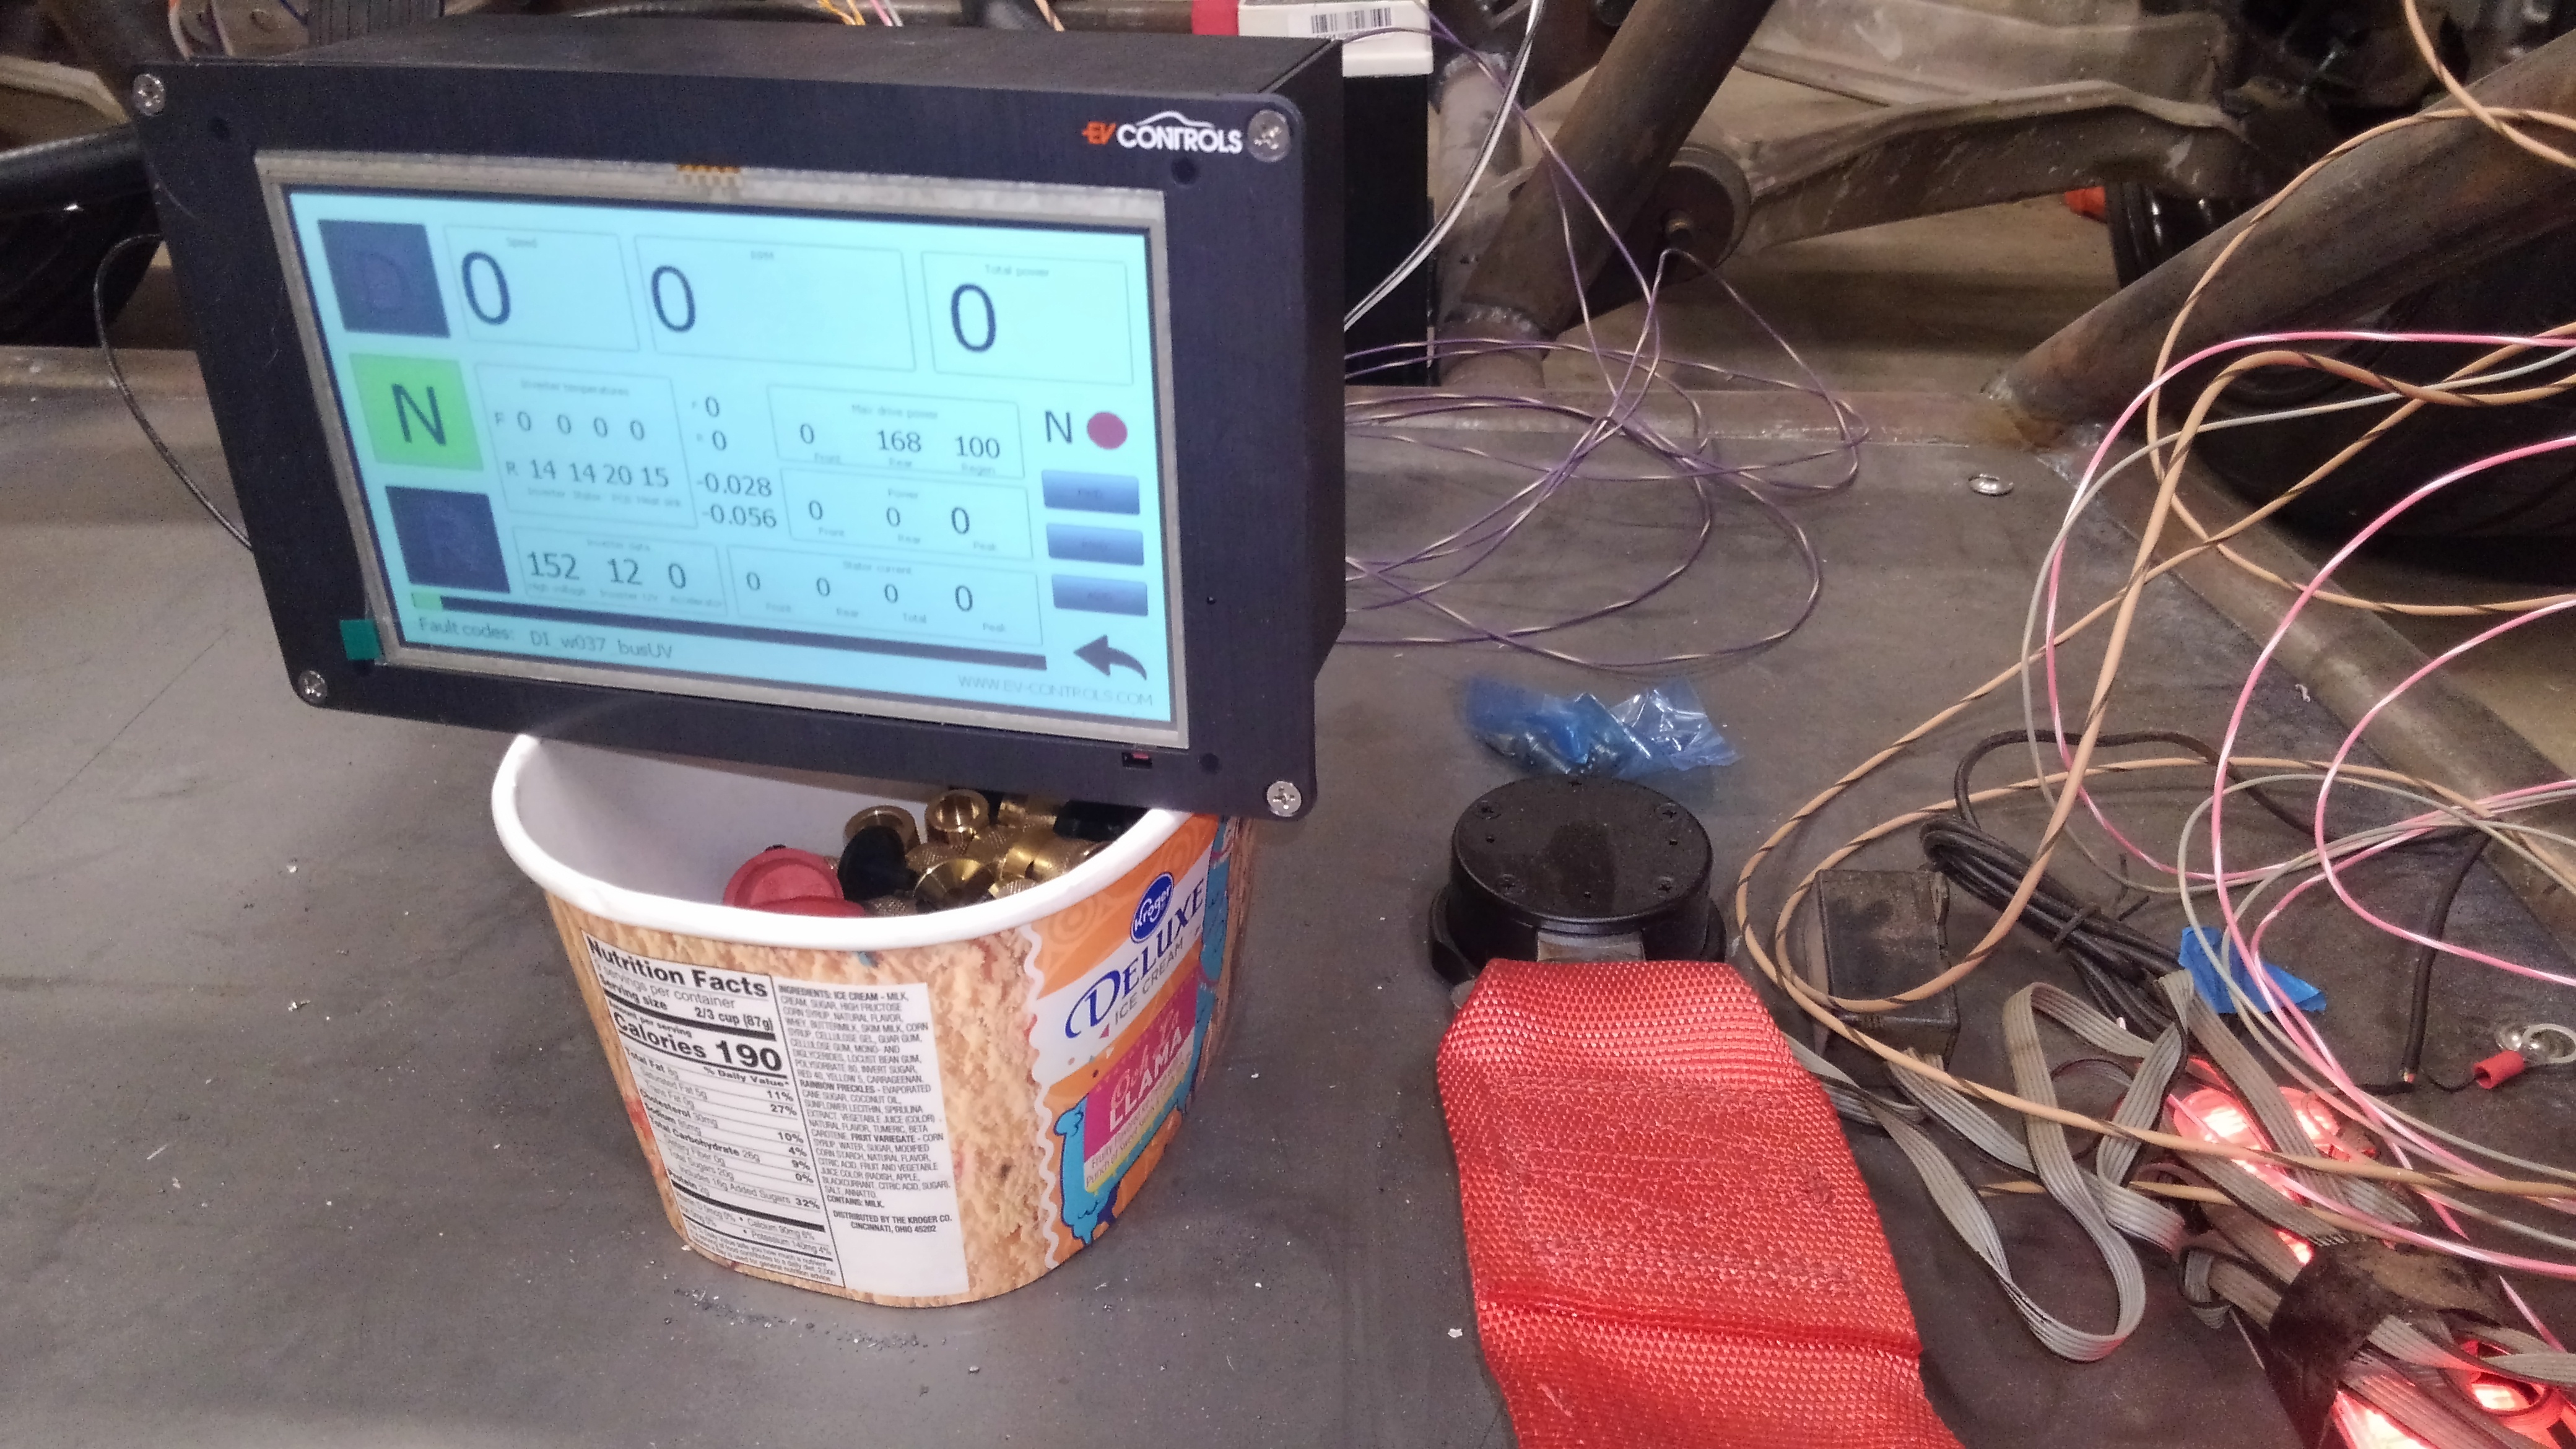
Well… I think I’m officially in the trouble shooting stage of wiring. The monitor powers up and starts going through self checks, but fails on initialization… I’m hoping that just means it’s not getting the 10amps it needs to drive everything from my little hobby DC bench power supply.
Just wish the 'getting my aggressions out on the connector’s was the step after trouble shooting. I thought the gal from TE was joking about using a sledgehammer to close my big connector, but that’s what it took to push all 19 pins in at once…
So ummm… Yeah… Got another bug figured out… So as it turns out, to use the chassis of a vehicle as a ground you must first connect the ground terminal of the battery to the chassis…
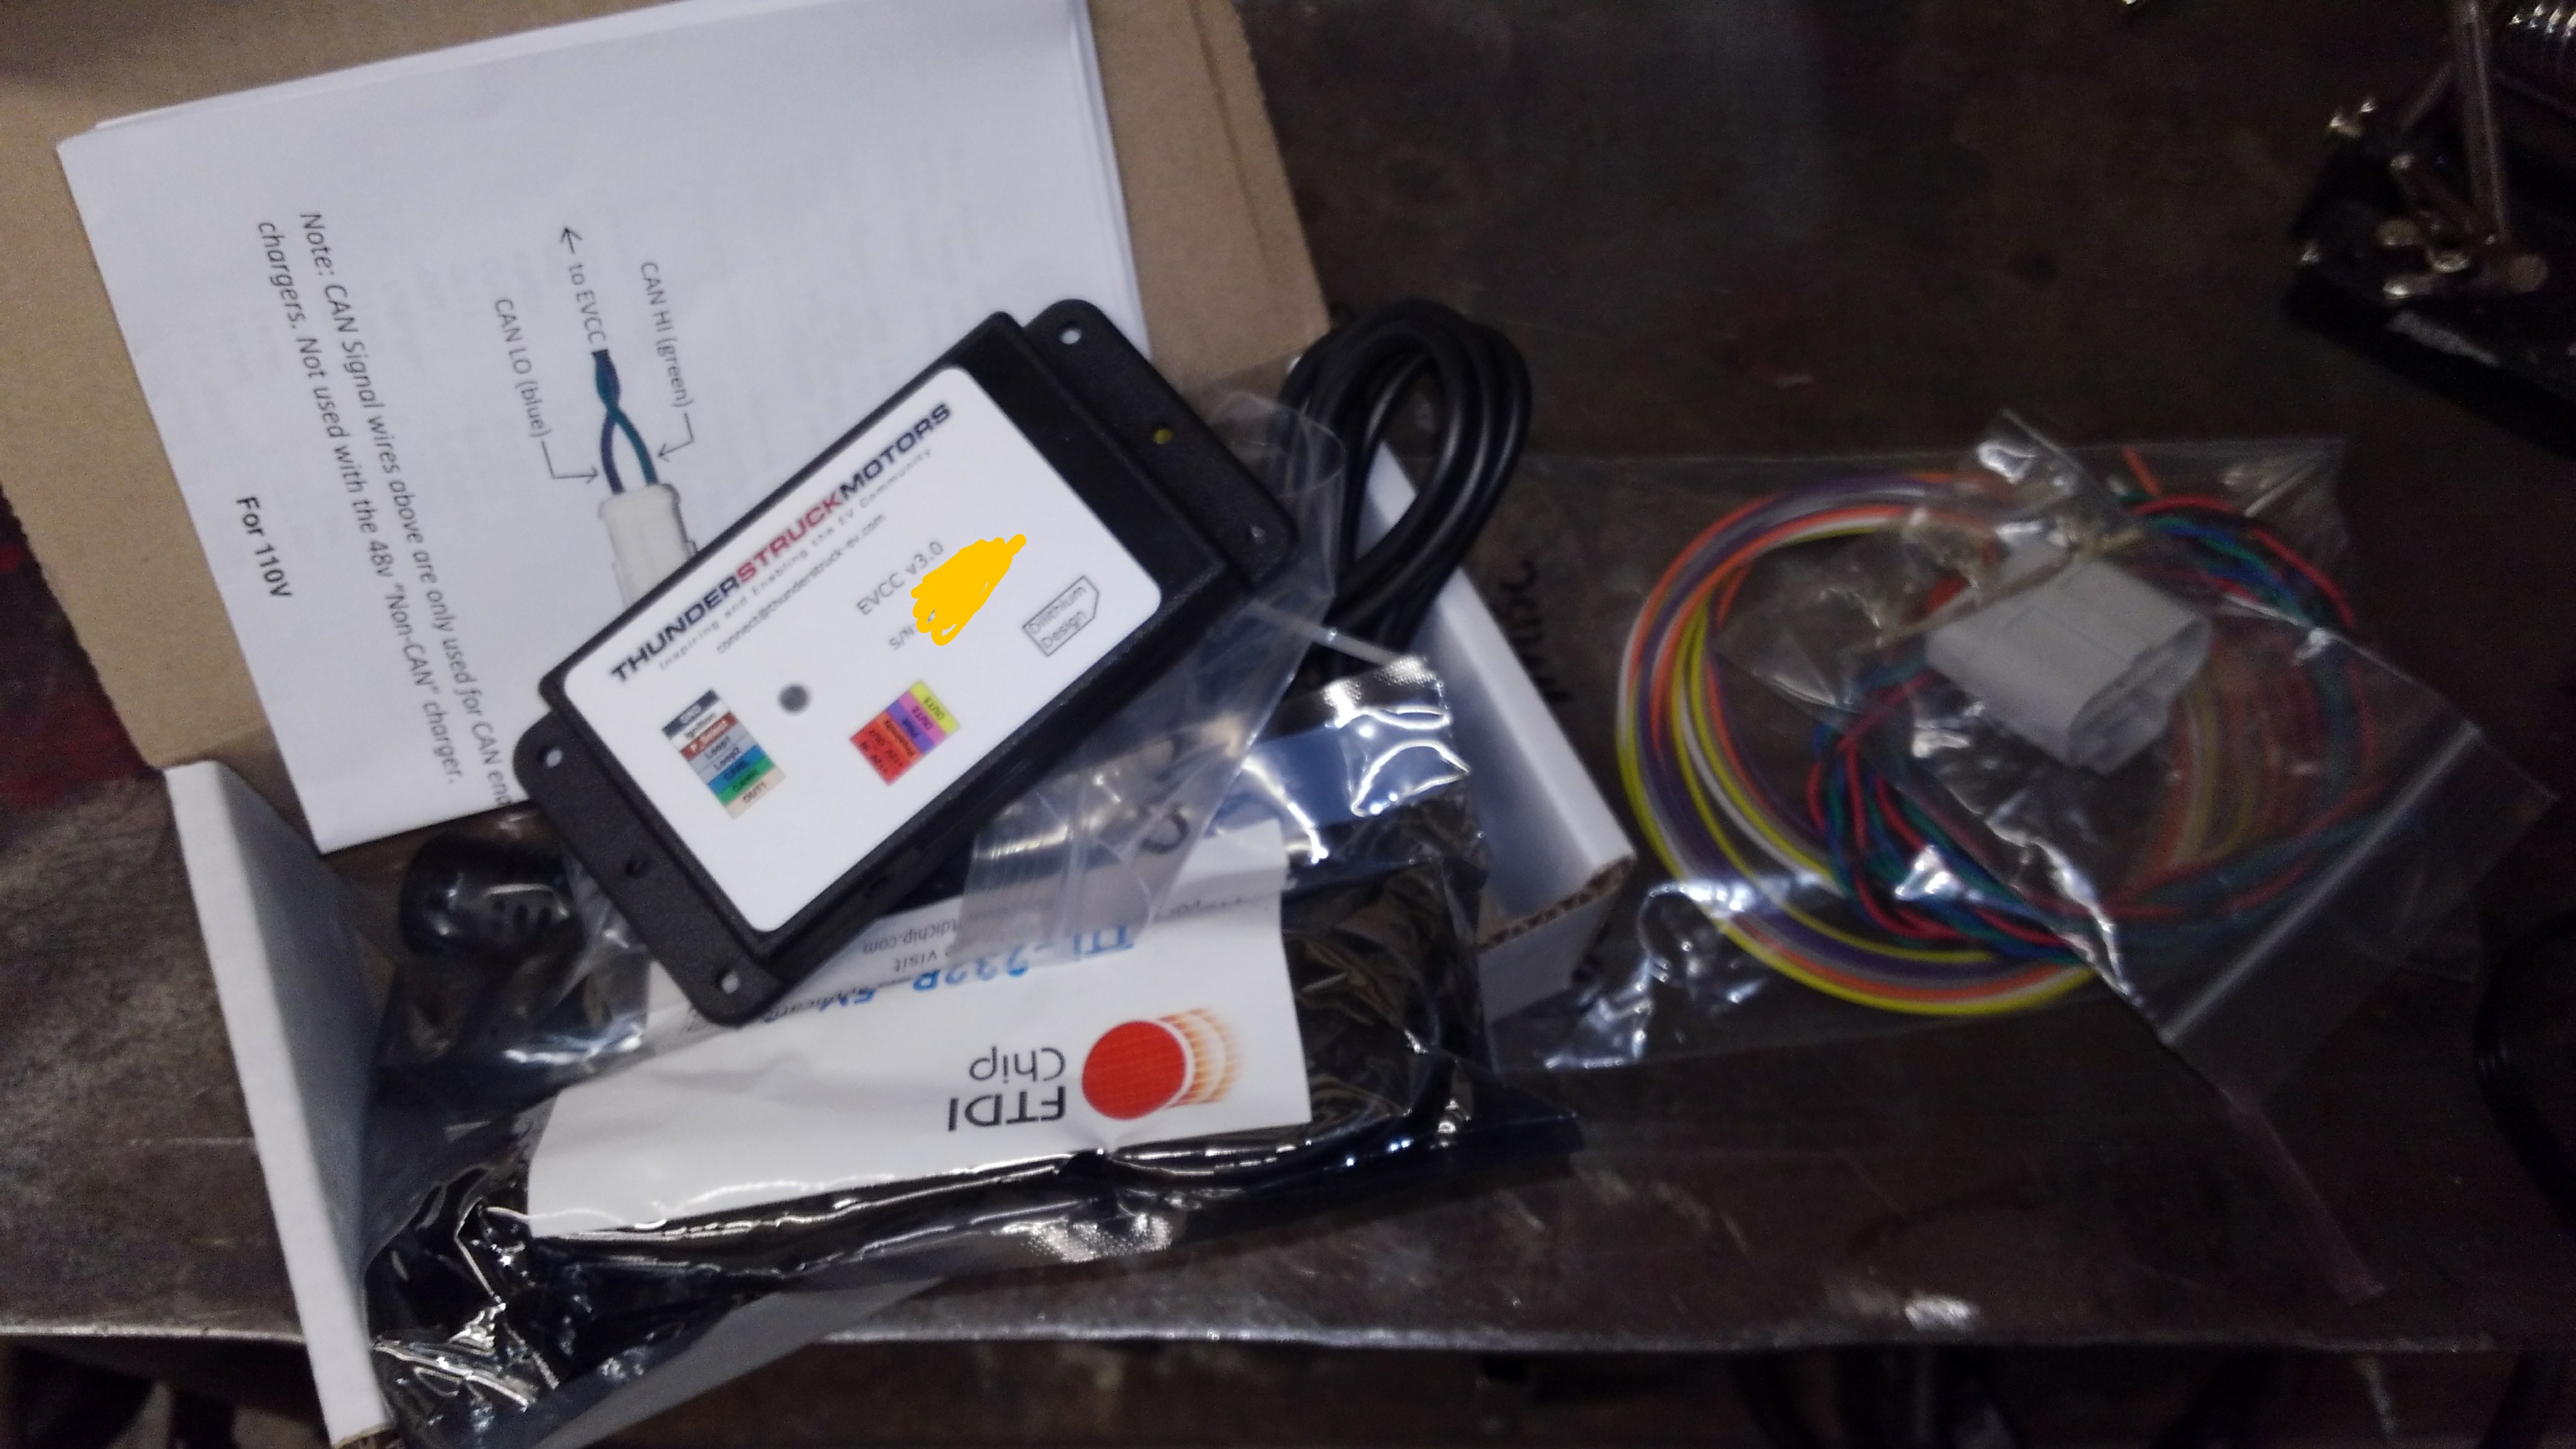
Unfortunately, I still have more wiring to do before the roadster can move under it’s own power. Neither the controller nor the tesla inverter have a way to tell how much voltage is in the main battery pack. Without knowing how much juice the inverter is getting, the controller freaks out and goes into limp home mode where the motor is left in neutral. This is where an electric vehicle charge controller (evcc) steps in. The evcc not only tells the charger how fast or long to charge for but also talks to the inverter and controller over the CAN BUS network to tell them what voltage is in the pack and if the voltage is dangerously low.
So, another few wires and hopefully that will get us another step closer to getting the roadster rolling under it’s own power.
Yeah… I’ll put some on order along with more copper bus bar…
So, I think I’ve worked out the major bugs except for one after talking to the guys I bought my controller from…
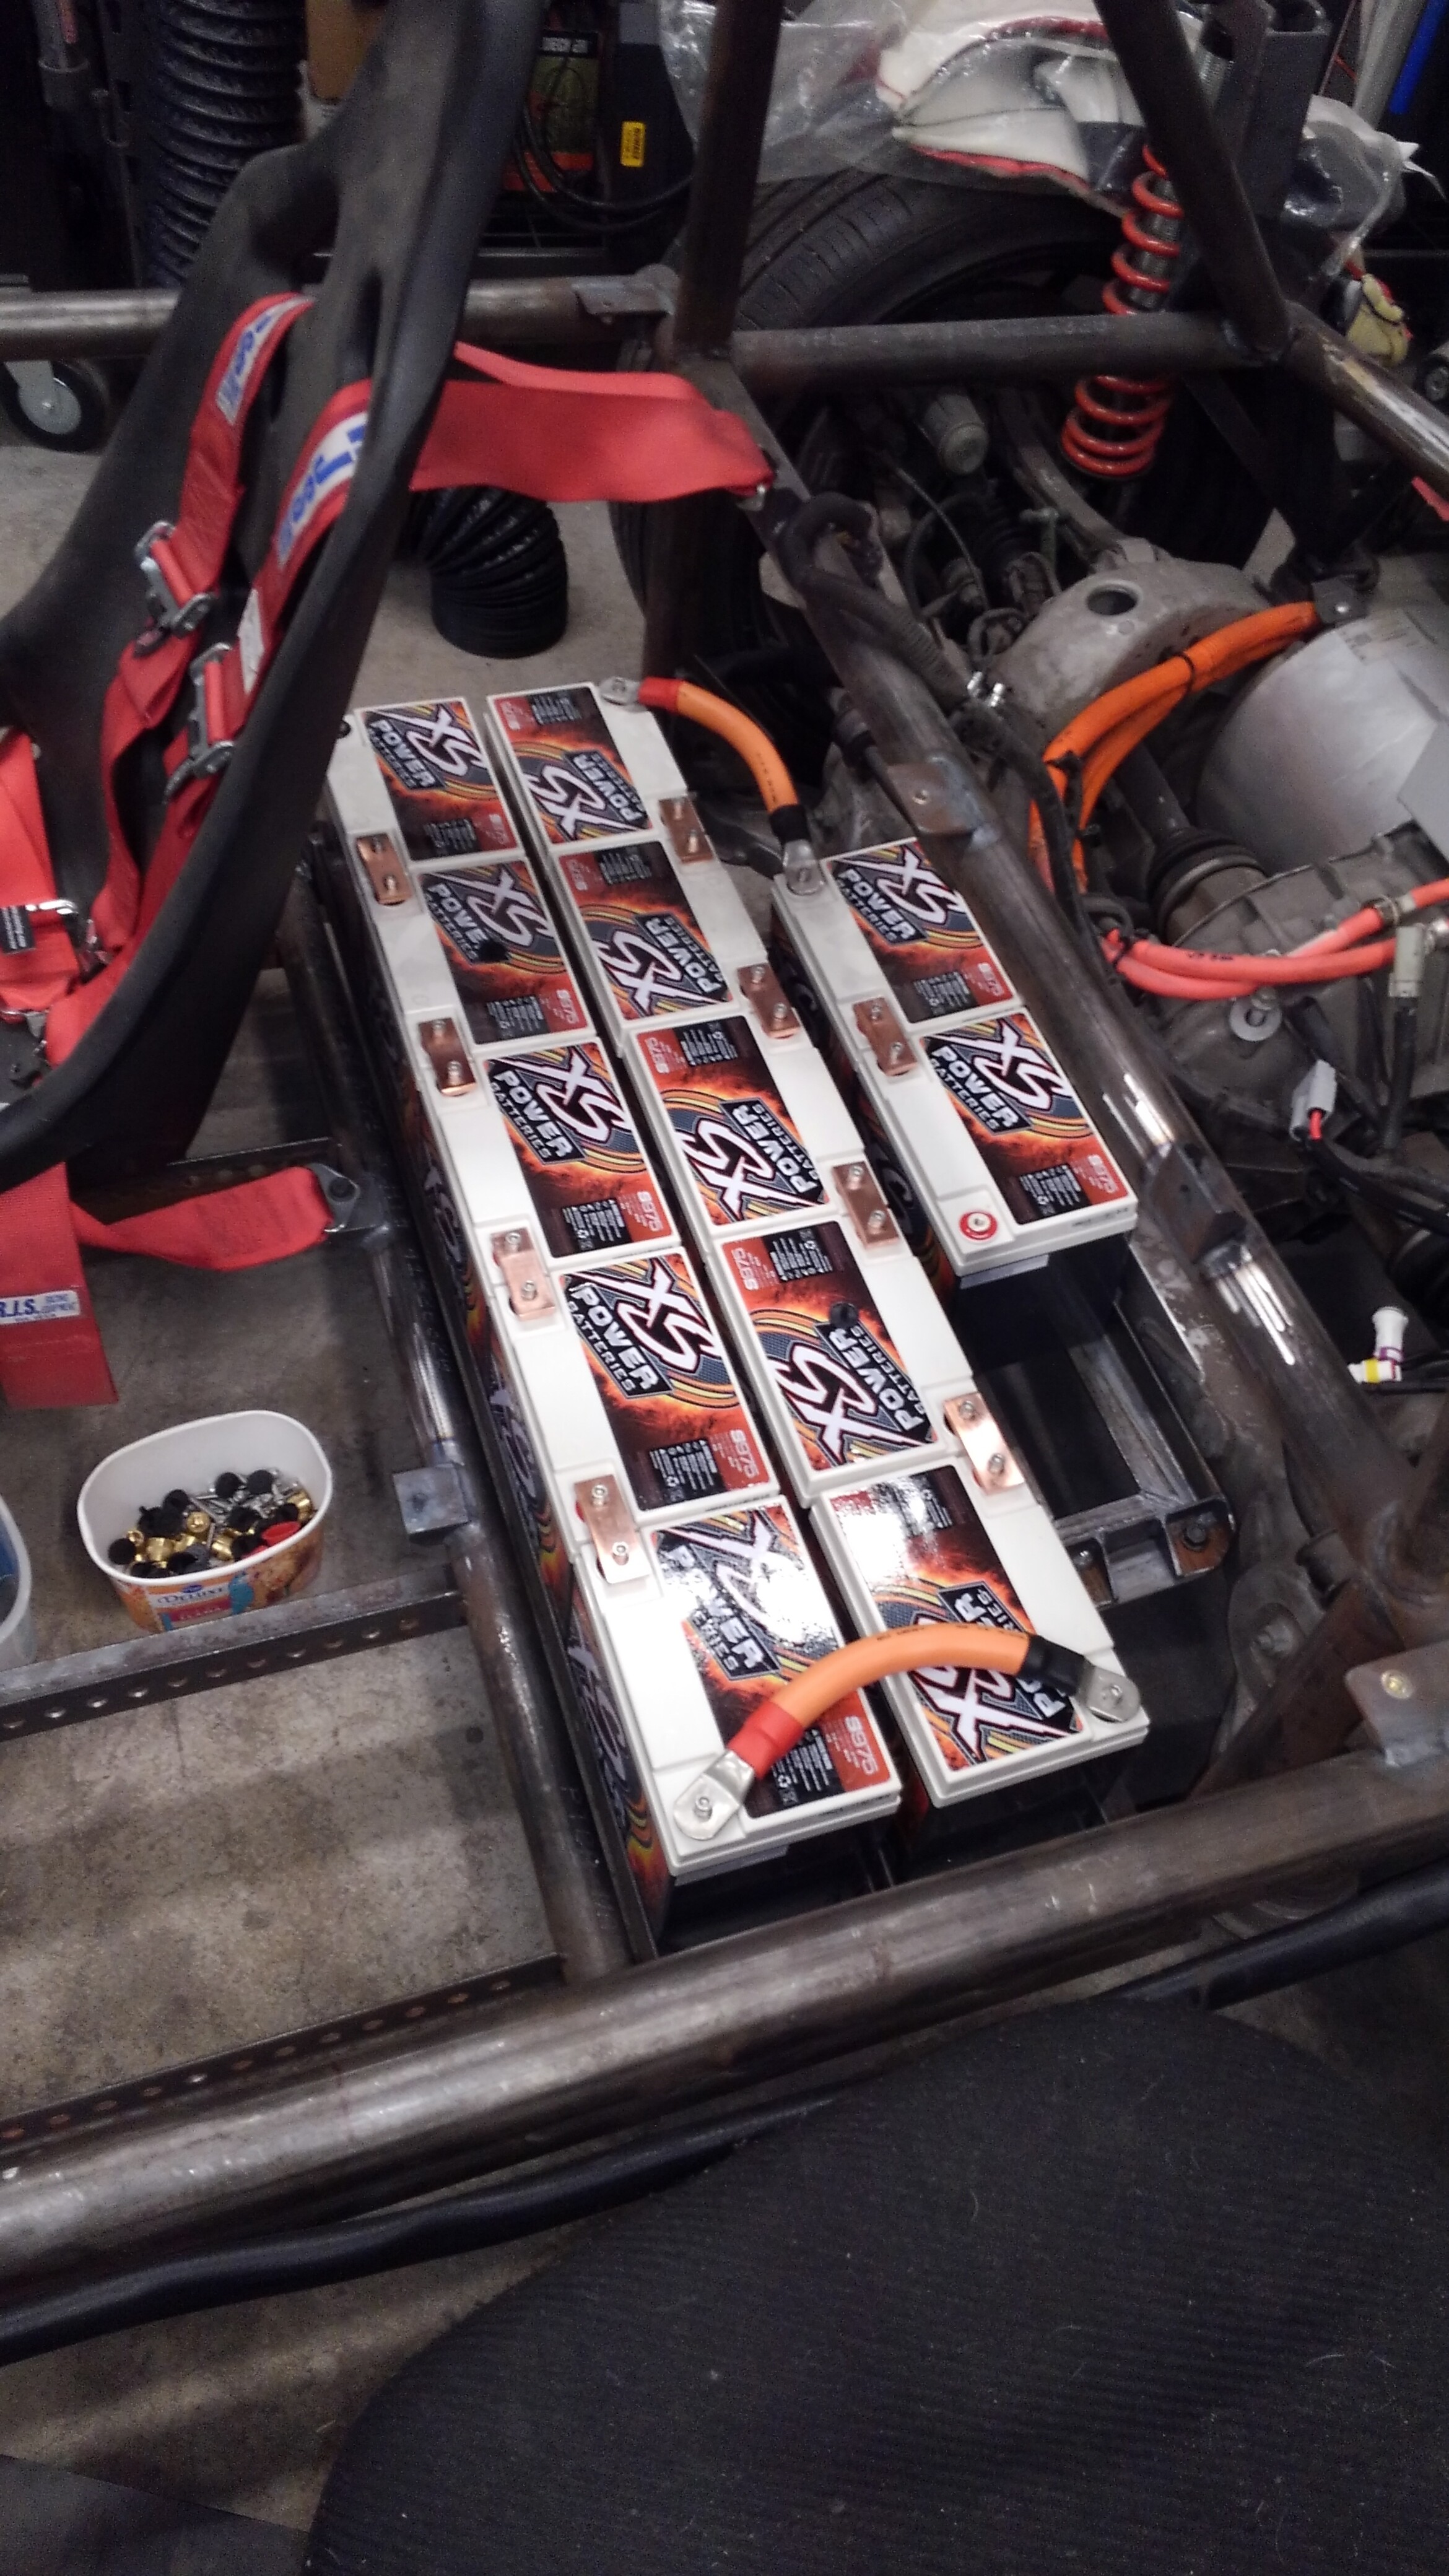
So my thought that surely a big friggin’ 156v battery bank would be enough to make a tesla motor happy was a bit off… It turns out the tesla motor is a pig that absolutely most have at least 340v minimum to get past it’s programmed low voltage cut off… Looks like it’s time to fabricate more battery boxes…
Inside the contactor box. So… Small annoyance… One contactor had 2 black wires, the other 2 white wires… My mind defaulted to thinking house wiring and had both my signal wires for the contactors going to one contactor, and both my grounds going to the other contractor…
So is 340vdc the start of limp-home protection or is it lower? Our refurbished electric buses have three stages of operation: 520vdc to 670vdc normal operation, 520 to 500 is derate mode where speed is limited to 5mph to try to stretch the last bit of useful voltage to 20miles, and then hard 490 for ‘limp home’ which just means you’re dead in the water.
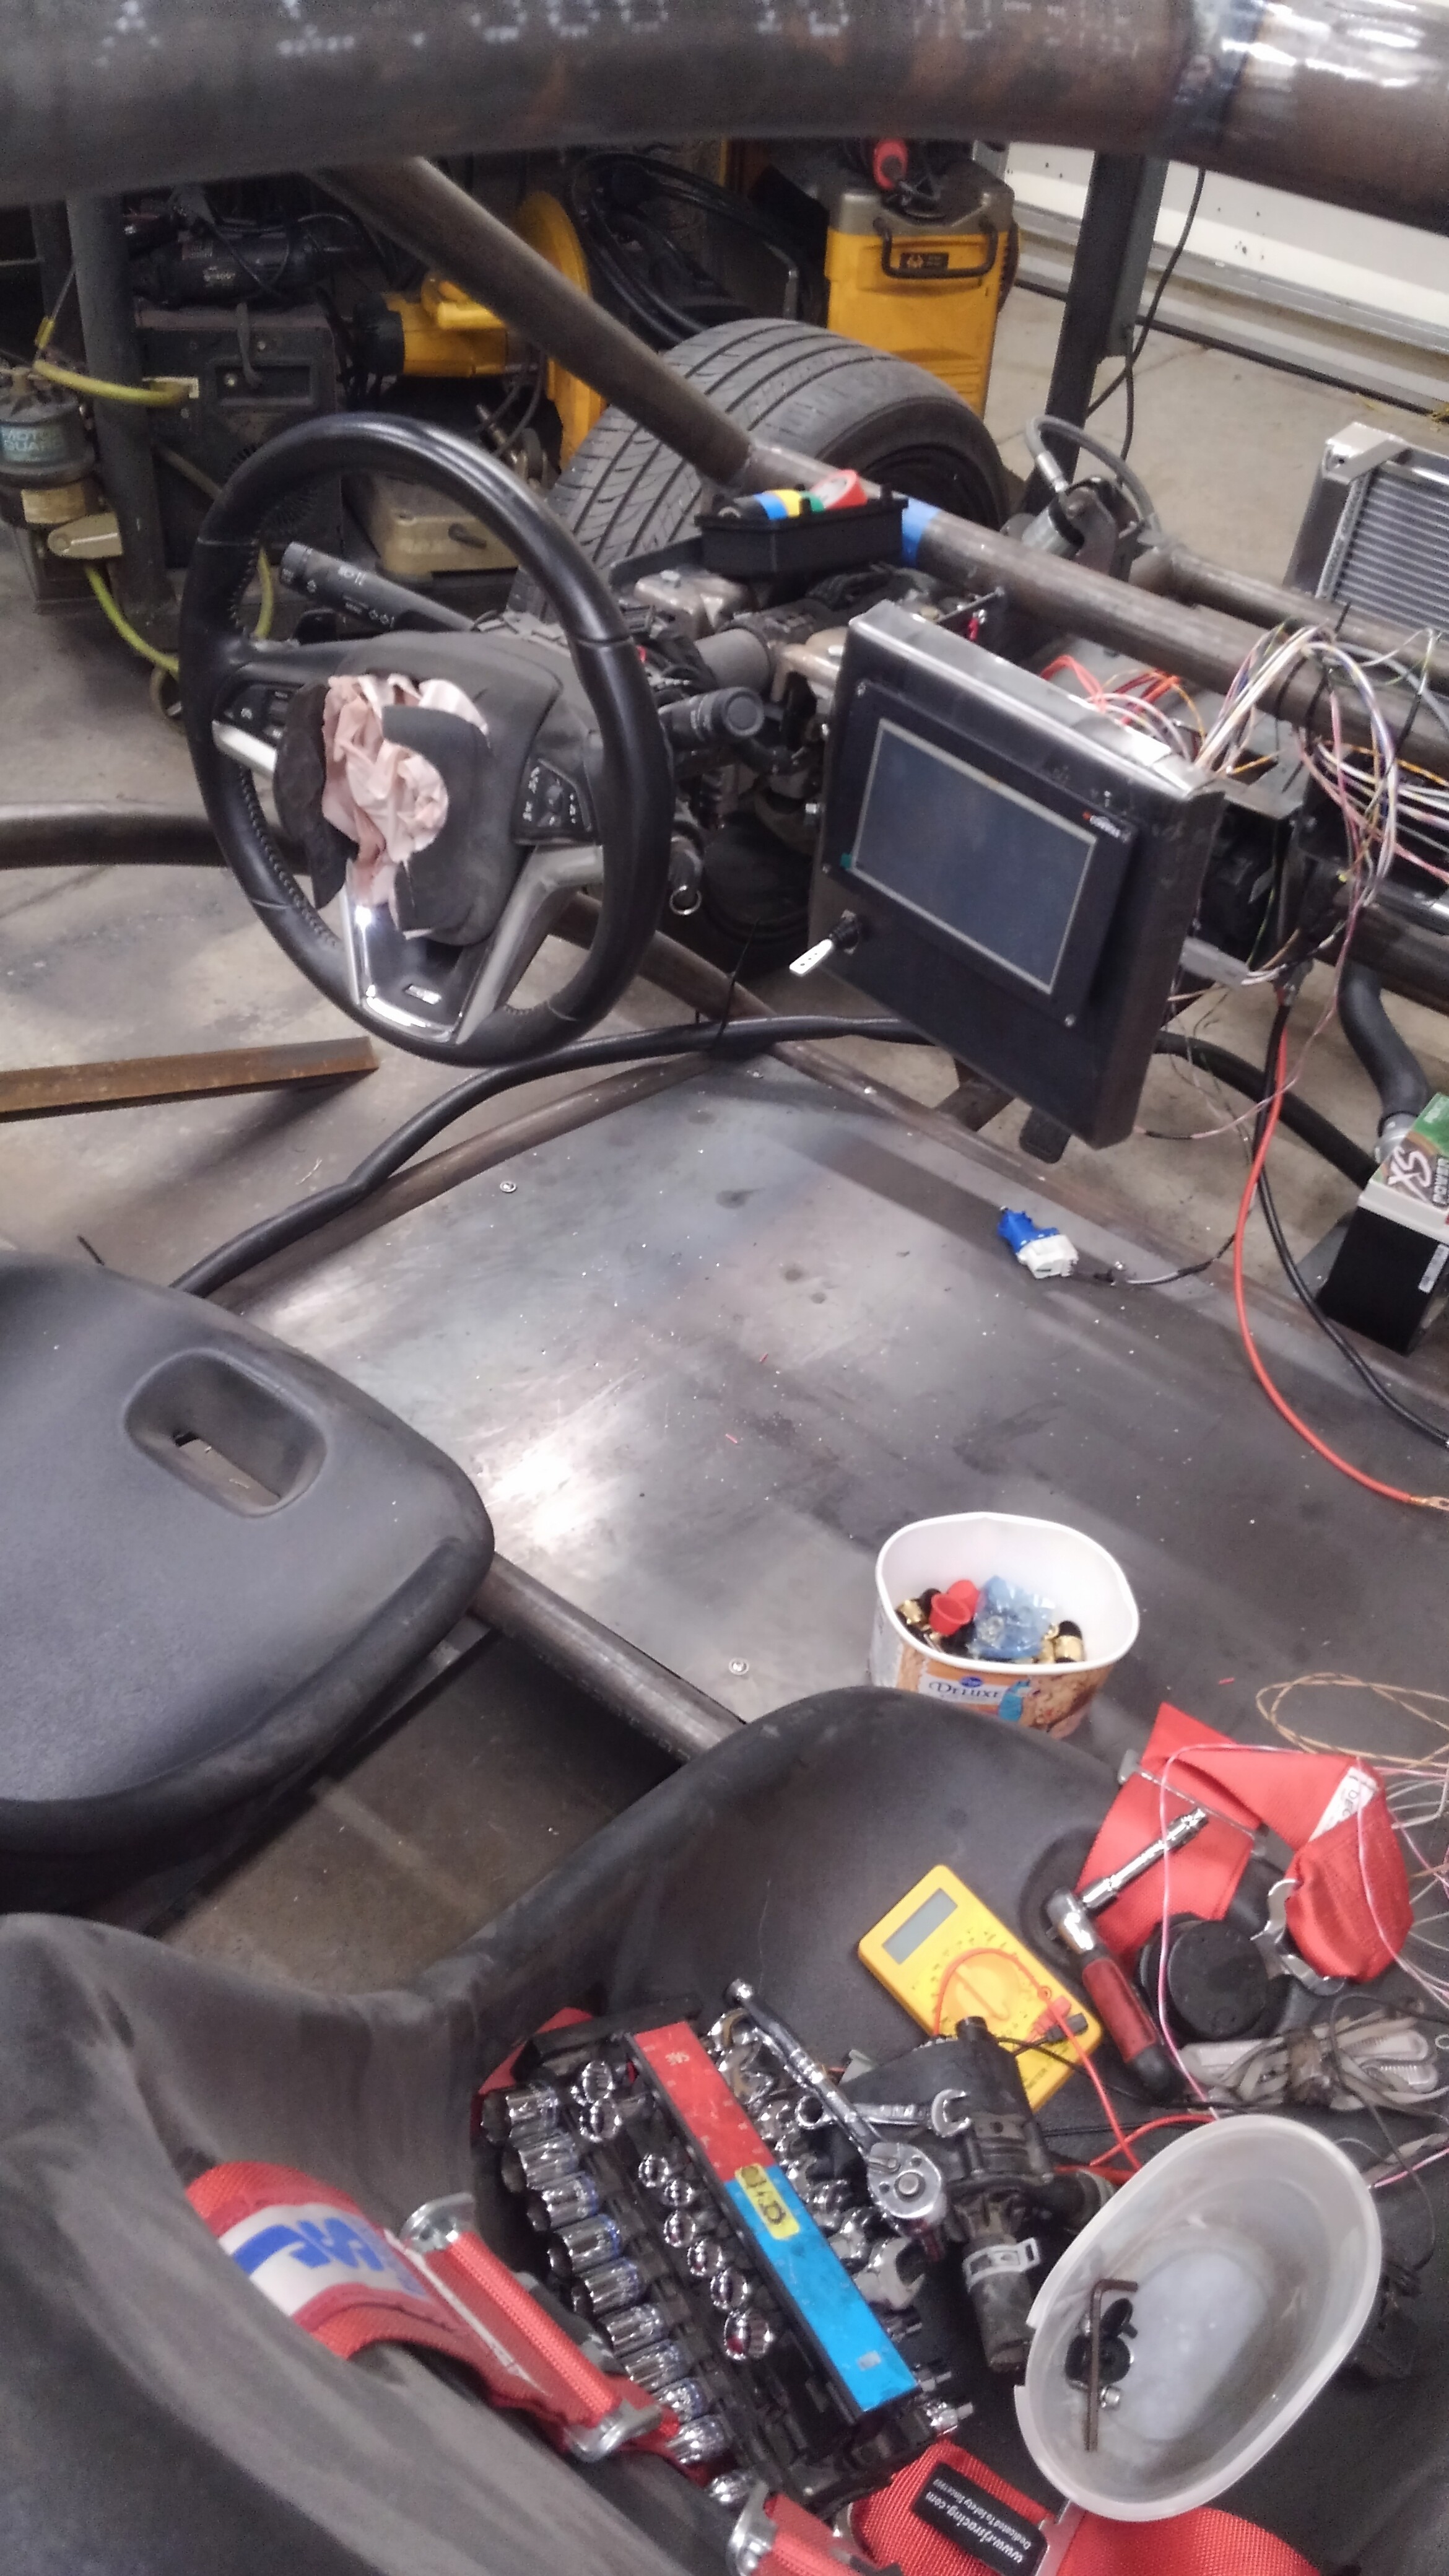
I’m not digging the chunkiness of the mount for the controller, so I may redo it with a significantly smaller frame. I’m happy with it’s placement, but I’m starting to think maybe I should also figure out a spot for a stereo/backup camera.
That is the plan, to actually make this a grocery getter. Kansas is pretty lax on titles and issuing vin numbers. From what I’ve heard from a couple guys, you drag the car down to highway patrol for the inspection (they won’t even have you pull the vehicle off a trailer), along with all your paperwork that proves over 70% of the parts weren’t stolen. After that, they’ll issue a kansas unique vin number… And then I’ll probably have to talk to Hagerty for insurance since most insurance companies won’t insure kit cars.
If there are any fees for registration he can pick up some cash at the ATM machine, as long as he remembers his PIN number and the LCD Display on the machine isn’t broken and the GUI interface works properly.
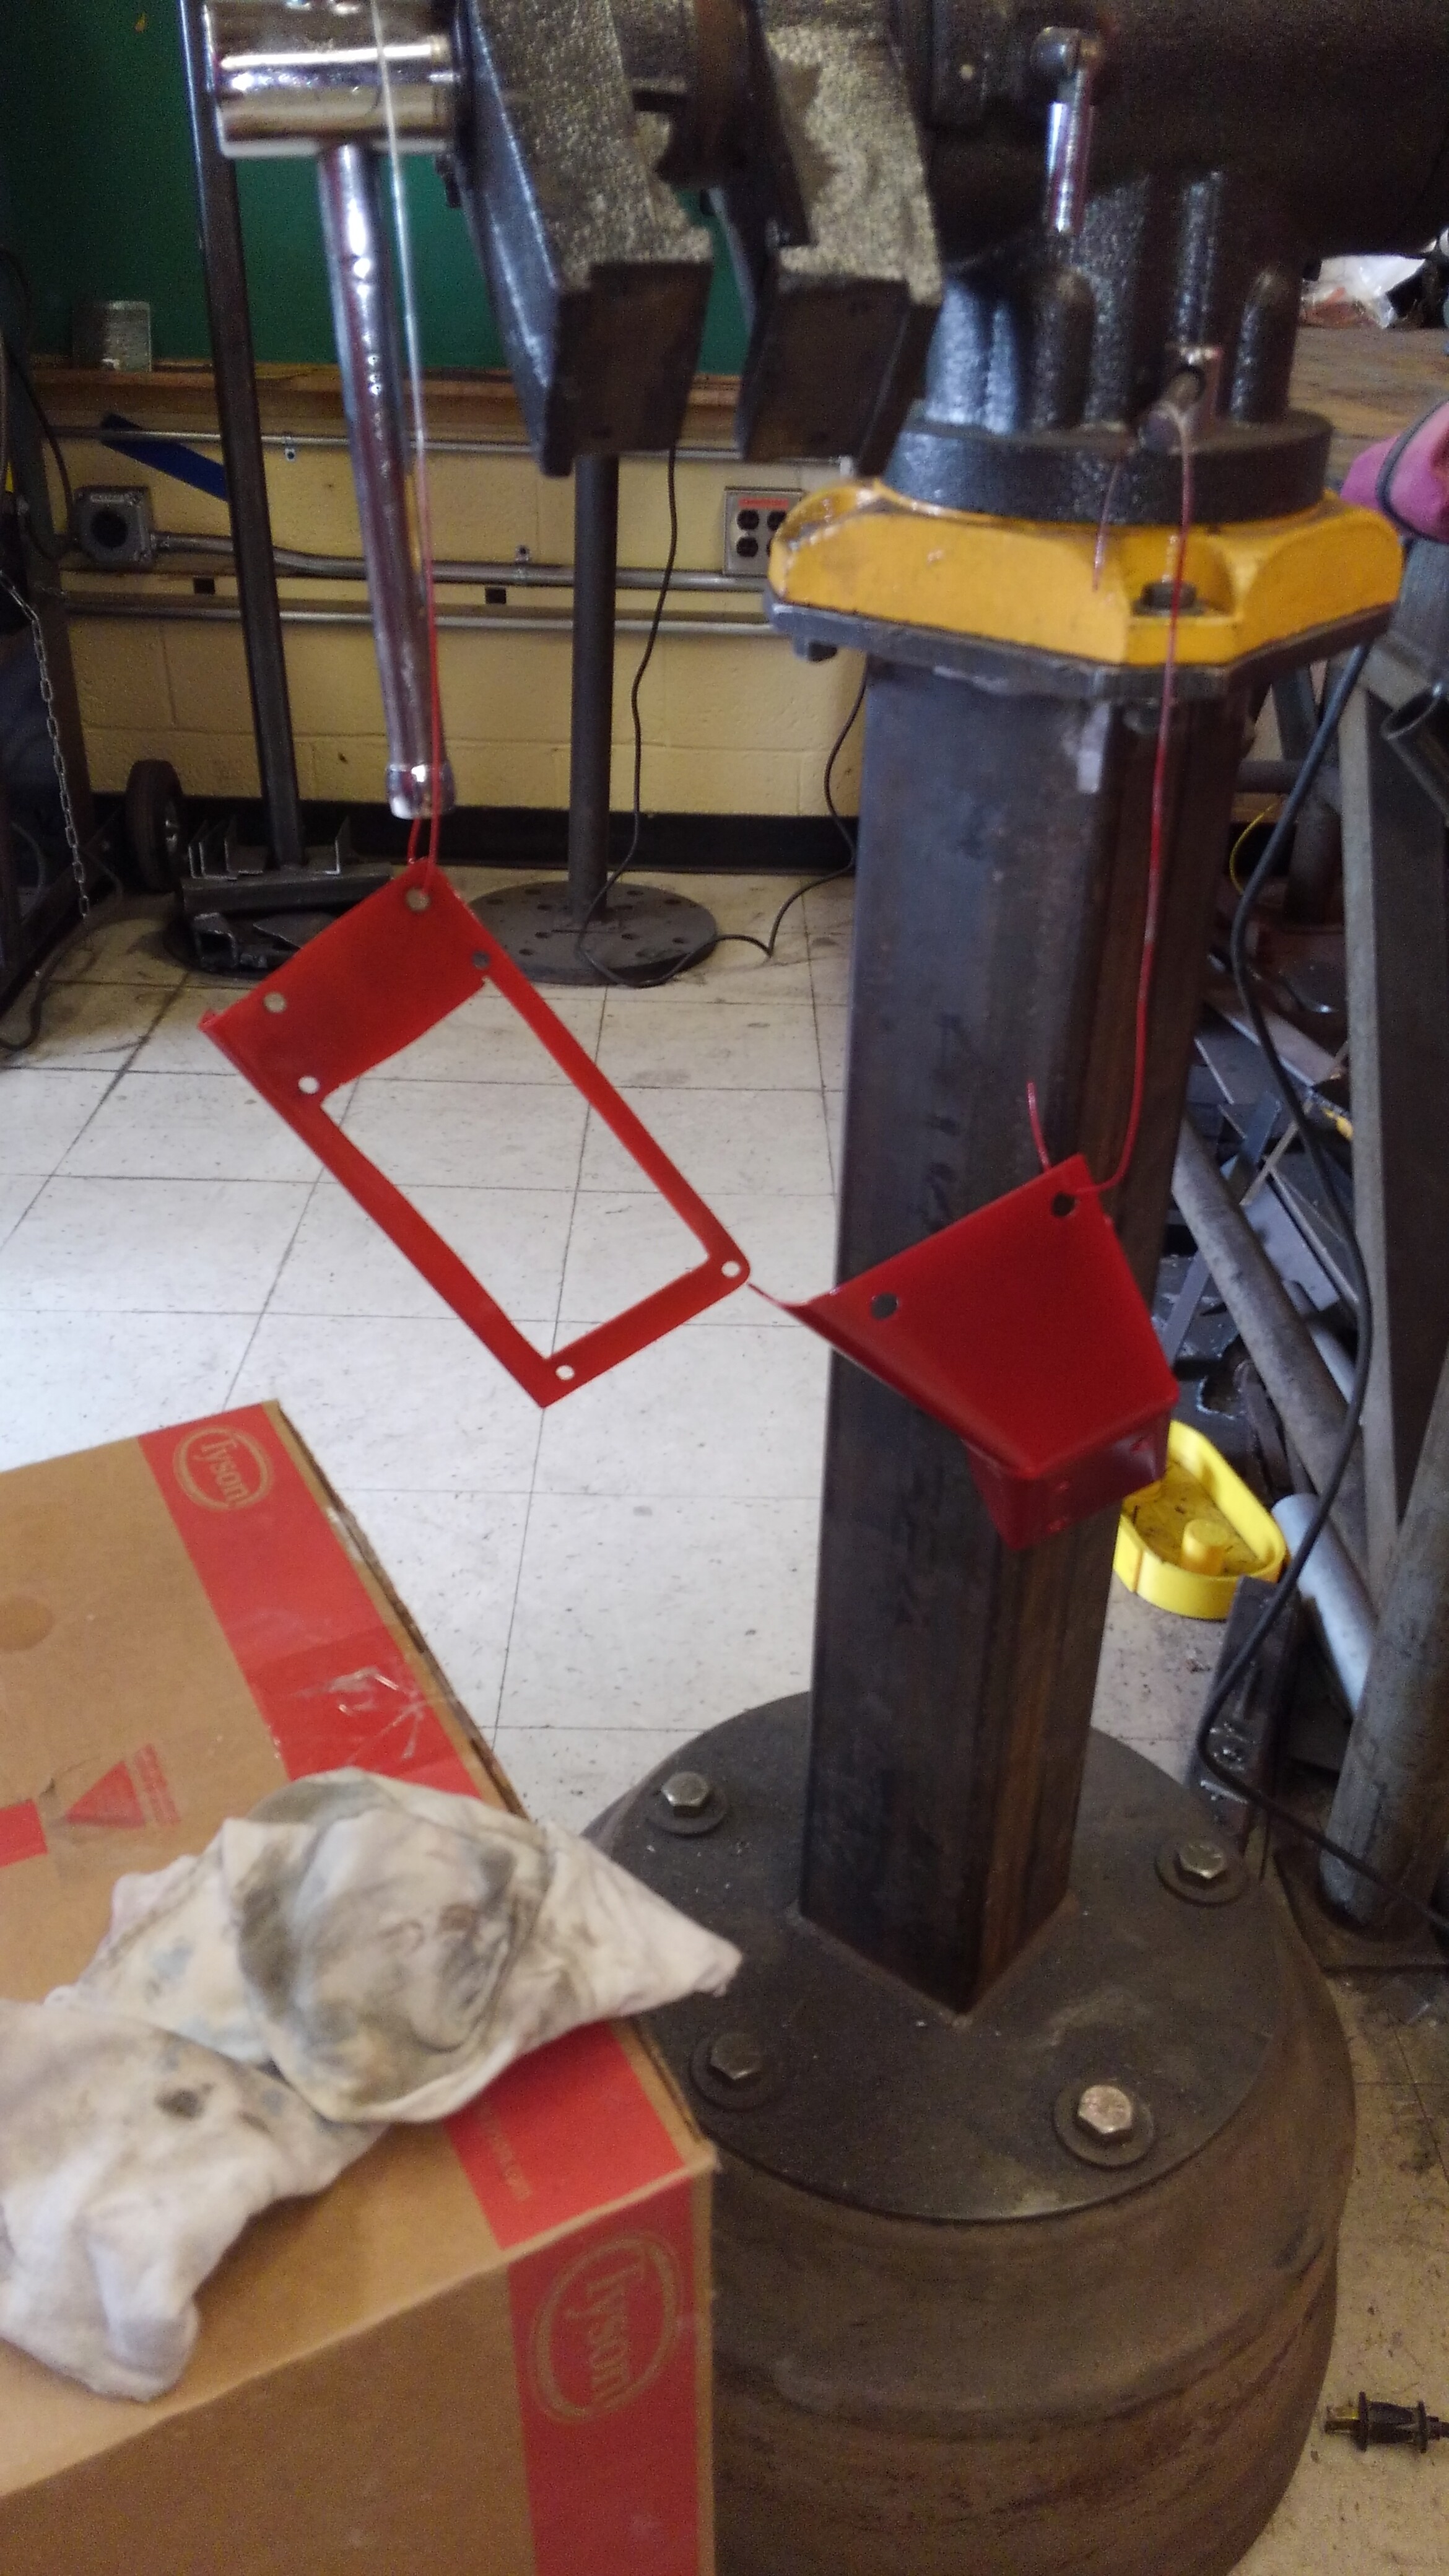
Tried out the powder coating system at MakeICT today.
I had a great teacher (Wallis Mead) show me the ropes and explain how powder coating works. Bent parts are a bit more difficult to coat but I was surprised how huge of a difference a good powder coat gun makes.
I’m really happy with how the parts turned out but I’m definitely going to leave powder coating the frame to a shop with a large enough oven. Lol
It doesn’t feel like I’ve gotten much accomplished on the roadster in the past couple of months…
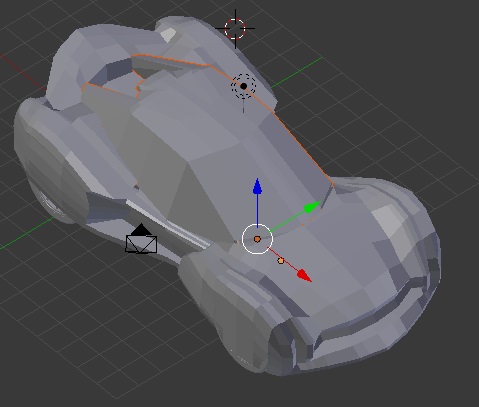
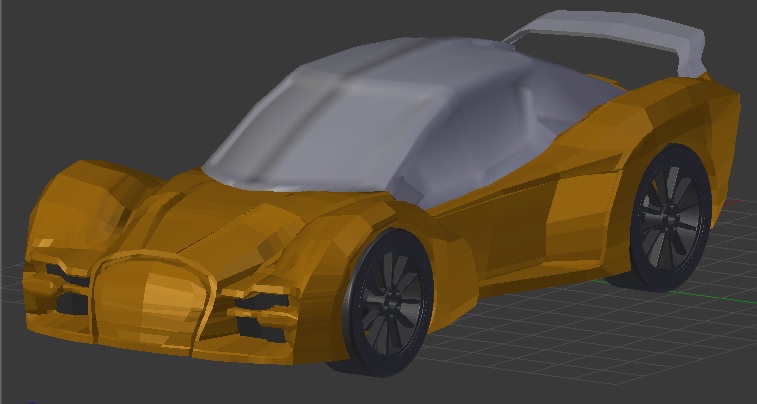
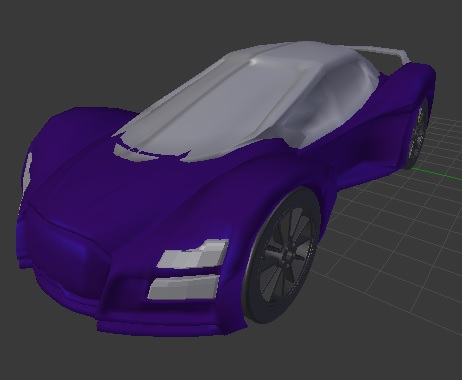
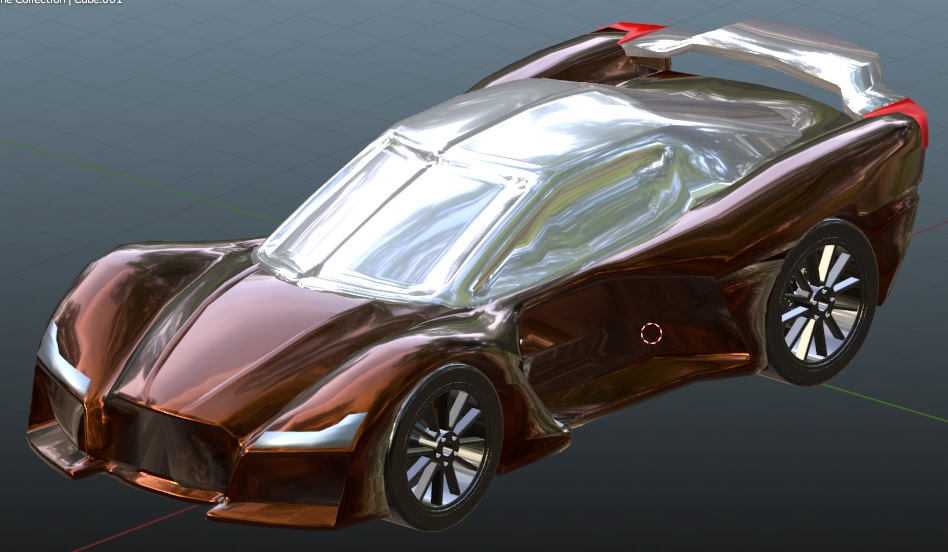
I’ve mainly been focused on trying to figure out the body work. I’ve been using Blender to design up a body around a CAD model of the frame, and it seems like with each iteration of the design, I’ve been finding ways to make the body look one step closer to being something you’d find from a better funded manufacturer…
I’m still not 100% sure how I’ll make the mold for the body. I was thinking of using the router to make a mold out of 2in thick pink foam, but a part of me is leaning towards making a wire frame and filling the empty spaces with foam. the wire frame way would make it easier to test fit the body over the frame before going all out on carving up a bunch of foam.
Though effort versus use? I’m seeing people out there having fun with the Exocit kit car (a miata stripped down to a space frame) and Goblin DF kit car (a chevy cobalt stripped down in the same way), I’m starting to think maybe the less is more route might be worth trying to design around.