With help from @David, @jameslancaster, @deanday, and @JeremiahB, I (mostly) successfully casted a wedding ring for my wife, @RozHer.
The workflow was as follows:
[Computer model] → [3D printed wax] → [Investment mold] → [Ring]
We first practiced with a ring that was printed on a FormLabs resin printer using their castable wax media. We don’t have a resin printer (yet), but FormLabs sent us some sample wax rings.
The practice ring took 2 full days. Burning out the wax takes 8-12 hours, and half of that time requires the temperature to rise gradually. Our mini-kiln in the jewelry lab isn’t programmable like that, so I set 15m timers on my phone to bump the temperature manually during the ramp up.
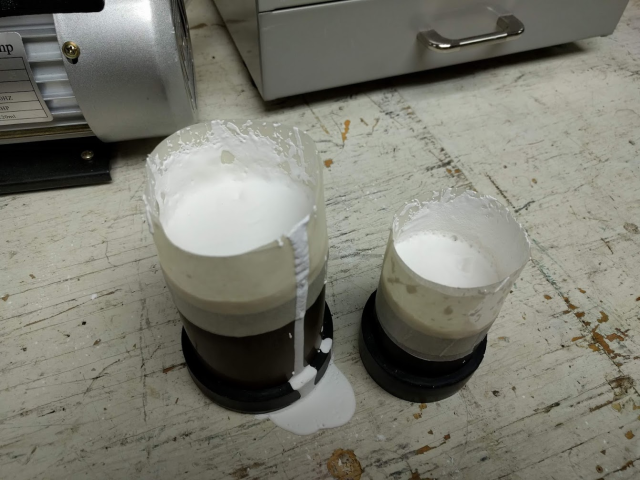
Unfortunately, the first mold failed after the burnout because I didn’t leave enough room at the top of the small flask we used, so we had to make a new mold and burn it out the next day. We were surprised and happy with the result though:
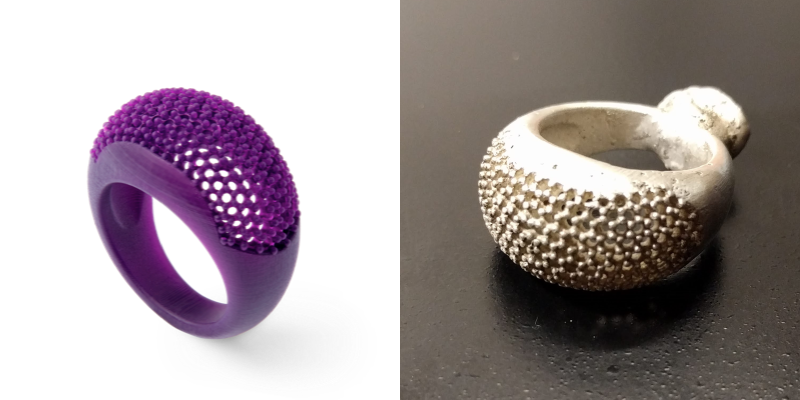
The image on the left is what the wax sample looked like, and the image on the right a sterling silver cast made from it and (poorly) polished. It wasn’t perfect, but way better than we expected.
With that experience under our collective belt, we prepared for the real ring. I designed the ring in Blender - here’s a render:
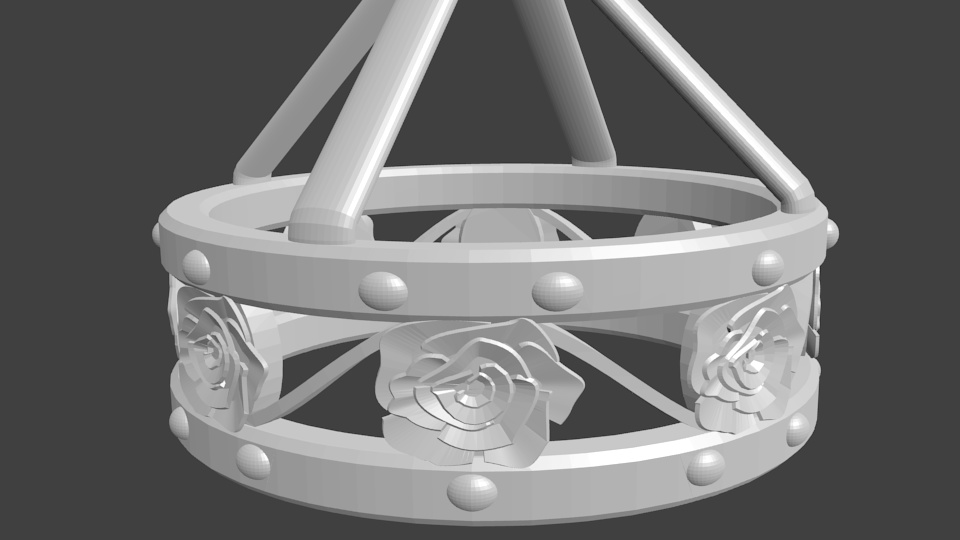
The 4 branches on the top are sprue channels, through which molten silver will flow during the casting process and later removed.
Since we don’t have a resin printer (yet), I had to find somewhere to print for me. There used to be a few online printing services that offered resin printing in castable wax, but it seems most of them have started offering casting as a service and have stopped offering castable wax prints. @David pointed me to http://3dhubs.com/, a directory service. There was just one provider that offered high-resolution 3D printing in castable wax, so I made my order.
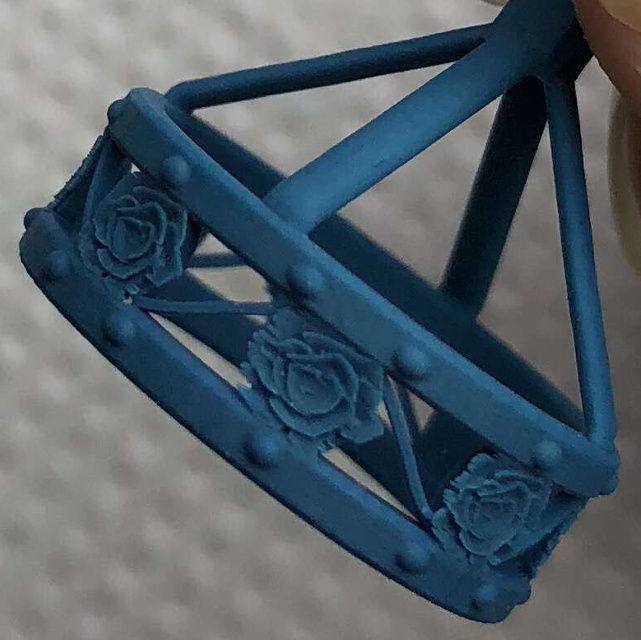
The level of detail I designed actually exceeded the on-paper specifications of the printer they used (Solidscape LabCAST dental printer), but they still came out pretty well:
I originally ordered five prints, but they suggested we switch materials for better detail. The new material was more expensive, so I changed my order to three. It cost $50 for the three prints and I paid $60 for expedited shipping from China. I think they must’ve already started the prints after I changed the quantity, because they still sent me five.
I was very glad to have all three, because they were pretty delicate. One broke before they shipped, and another broke almost as soon as I took it out of the box. The sprue channels I designed all broke off either before or while I was trying to attach the rings to a sprue base. They were just too thin. Eventually, I ended up with one mold with two rings and another mold with one.
You may notice the single ring by itself is broken as a result of me trying to stretch it. The prints came a little smaller than what I designed. I used a heat gun to warm up a tapered mandrel and just let gravity pull the ring down/stretch it as the wax warmed up. It was working at first, but eventually broke in the one place. I decided to mold and cast it anyway.
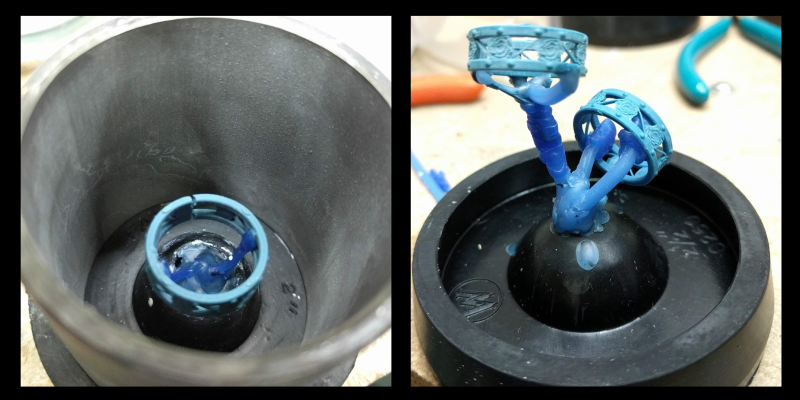
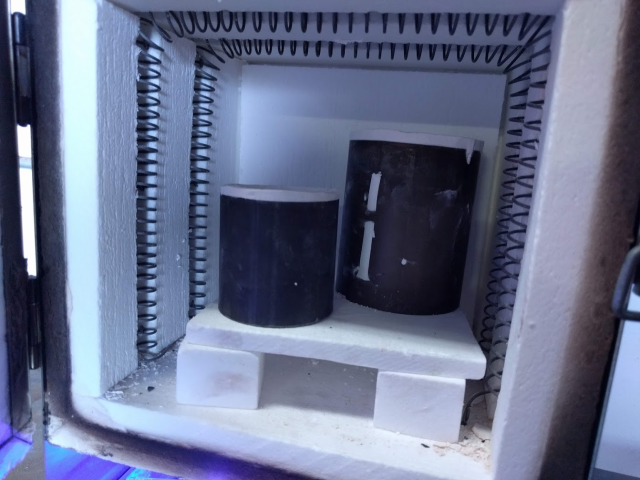
To make the mods, I mixed jeweler’s investment and put it in the vacuum chamber while vibrating the table with my fists and a sander to help remove air. Then I poured the investment slurry into the flasks with the wax and hit those with the vacuum chamber too.
I let those hangout overnight and dry while I slept, and came back the following day to burn out the wax. Both flasks fit in the kiln cozily.
After that was finished, we mounted a crucible in the spin caster with sterling silver in it. We melted the silver with an oxy-acetylene torch, mounted the flask, wound it up, melted some more, and let it rip. I don’t have a video, but there are plenty on YouTube.
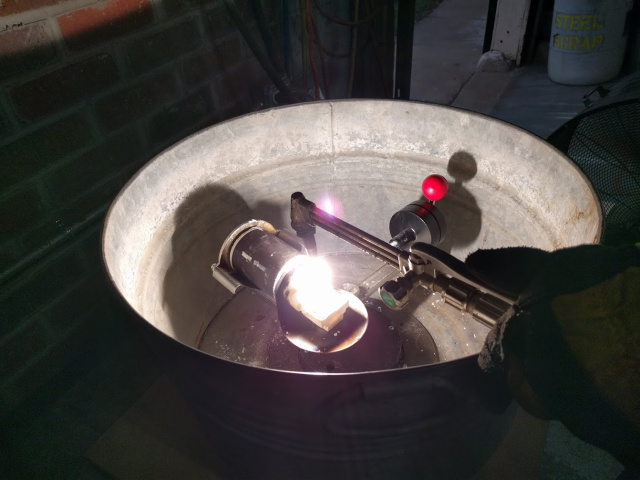
When the spin caster stopped, we let everything chill in place for a few minutes, then quenched the flask in a bucket of water. After that, it’s just cleaning up, polishing, and in my case, resizing. All three rings came out - including the broken one.
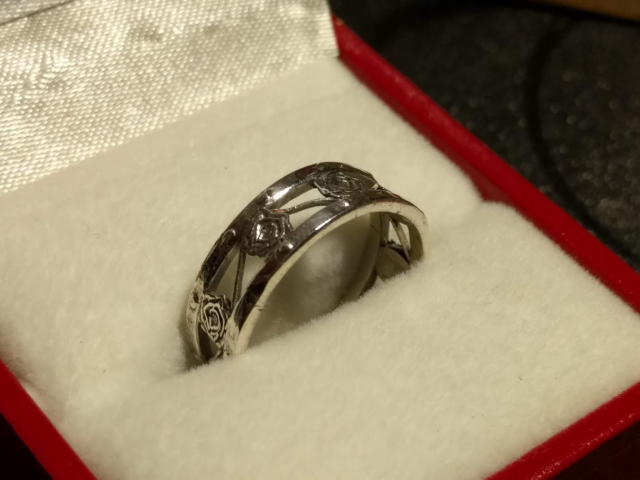
We have sizing equipment at MakeICT, but I took the ring to a professional at this point. I was pretty happy to not have completely screwed up so far, and I didn’t really want to risk it after all that. I went to 1-Hour Jewelry and chatted with the owner, David Le, who was experienced and knowledgeable in the exact process we used because he does the same thing in his shop. He resized and polished one of the rings, and I was very happy with his work.
Roz knew I was making a ring, but she wanted the design to be a surprise. I was a little anxious over that, because I couldn’t be sure if she’d like the design. She saw it for the first time when I placed it on her finger, and fortunately for me, she’s very happy with it 
Unfortunately though, the ring is pretty delicate. Silver, even sterling, is apparently pretty soft when it’s this thin and small (or maybe it was a procedural error?). So I’m making another and considering a harder medium (white gold?). I will probably also modify the design to thicken everything up. The first ring we made is solid, probably because it’s thicker, but maybe also (as David Le suggested) because we may have over-casted when making the actual wedding ring. That makes sense, from what I understand, because we used MAP torches the first time and the oxy-acetylene torch was much hotter - maybe too hot.
Anyway, I just wanted to share my experience here. It was fun to do, and I learned a lot from reading and researching. I learned the most from friends at the makerspace though. @David was especially helpful in learning and walking through the process with me, as well as acquiring and assemblying equipment - nearly all of it we already had thanks to him, I was just the lucky one to be the first to try it here.
There are more photos if anyone is interested in seeing them. I’m also looking for any tips, wisdom, advice, criticism, feedback, information, knowledge, and/or suggestions from anyone who might have anything to share with me - especially if it may be useful in making the new one. I’ve never done anything like this before, and there is obviously a lot more for me to learn!
Thanks for letting me share 