We’ve been working on the makeict plasma for the last few months trying to get it wrapped up. The software side if it has been a little more intense than expected and as such we have fallen behind schedule. I am reaching out for help tackling some, non software, related items while we nail down the last few issues.
Here is a list of things we need help with
fabricate/3dprint/etc a device to hold the float switch sensor next to the linear bearing (will post pics of what is needed). This one is critical and the plasma cant move forward until this is done
I’d like to help with item 1 on the top list; “a device to hold the float switch sensor next to the linear bearing”. Do you have the design requirements or some info to get me going?
Blockquote I’d like to help with item 1 on the top list; “a device to hold the float switch sensor next to the linear bearing”. Do you have the design requirements or some info to get me going?
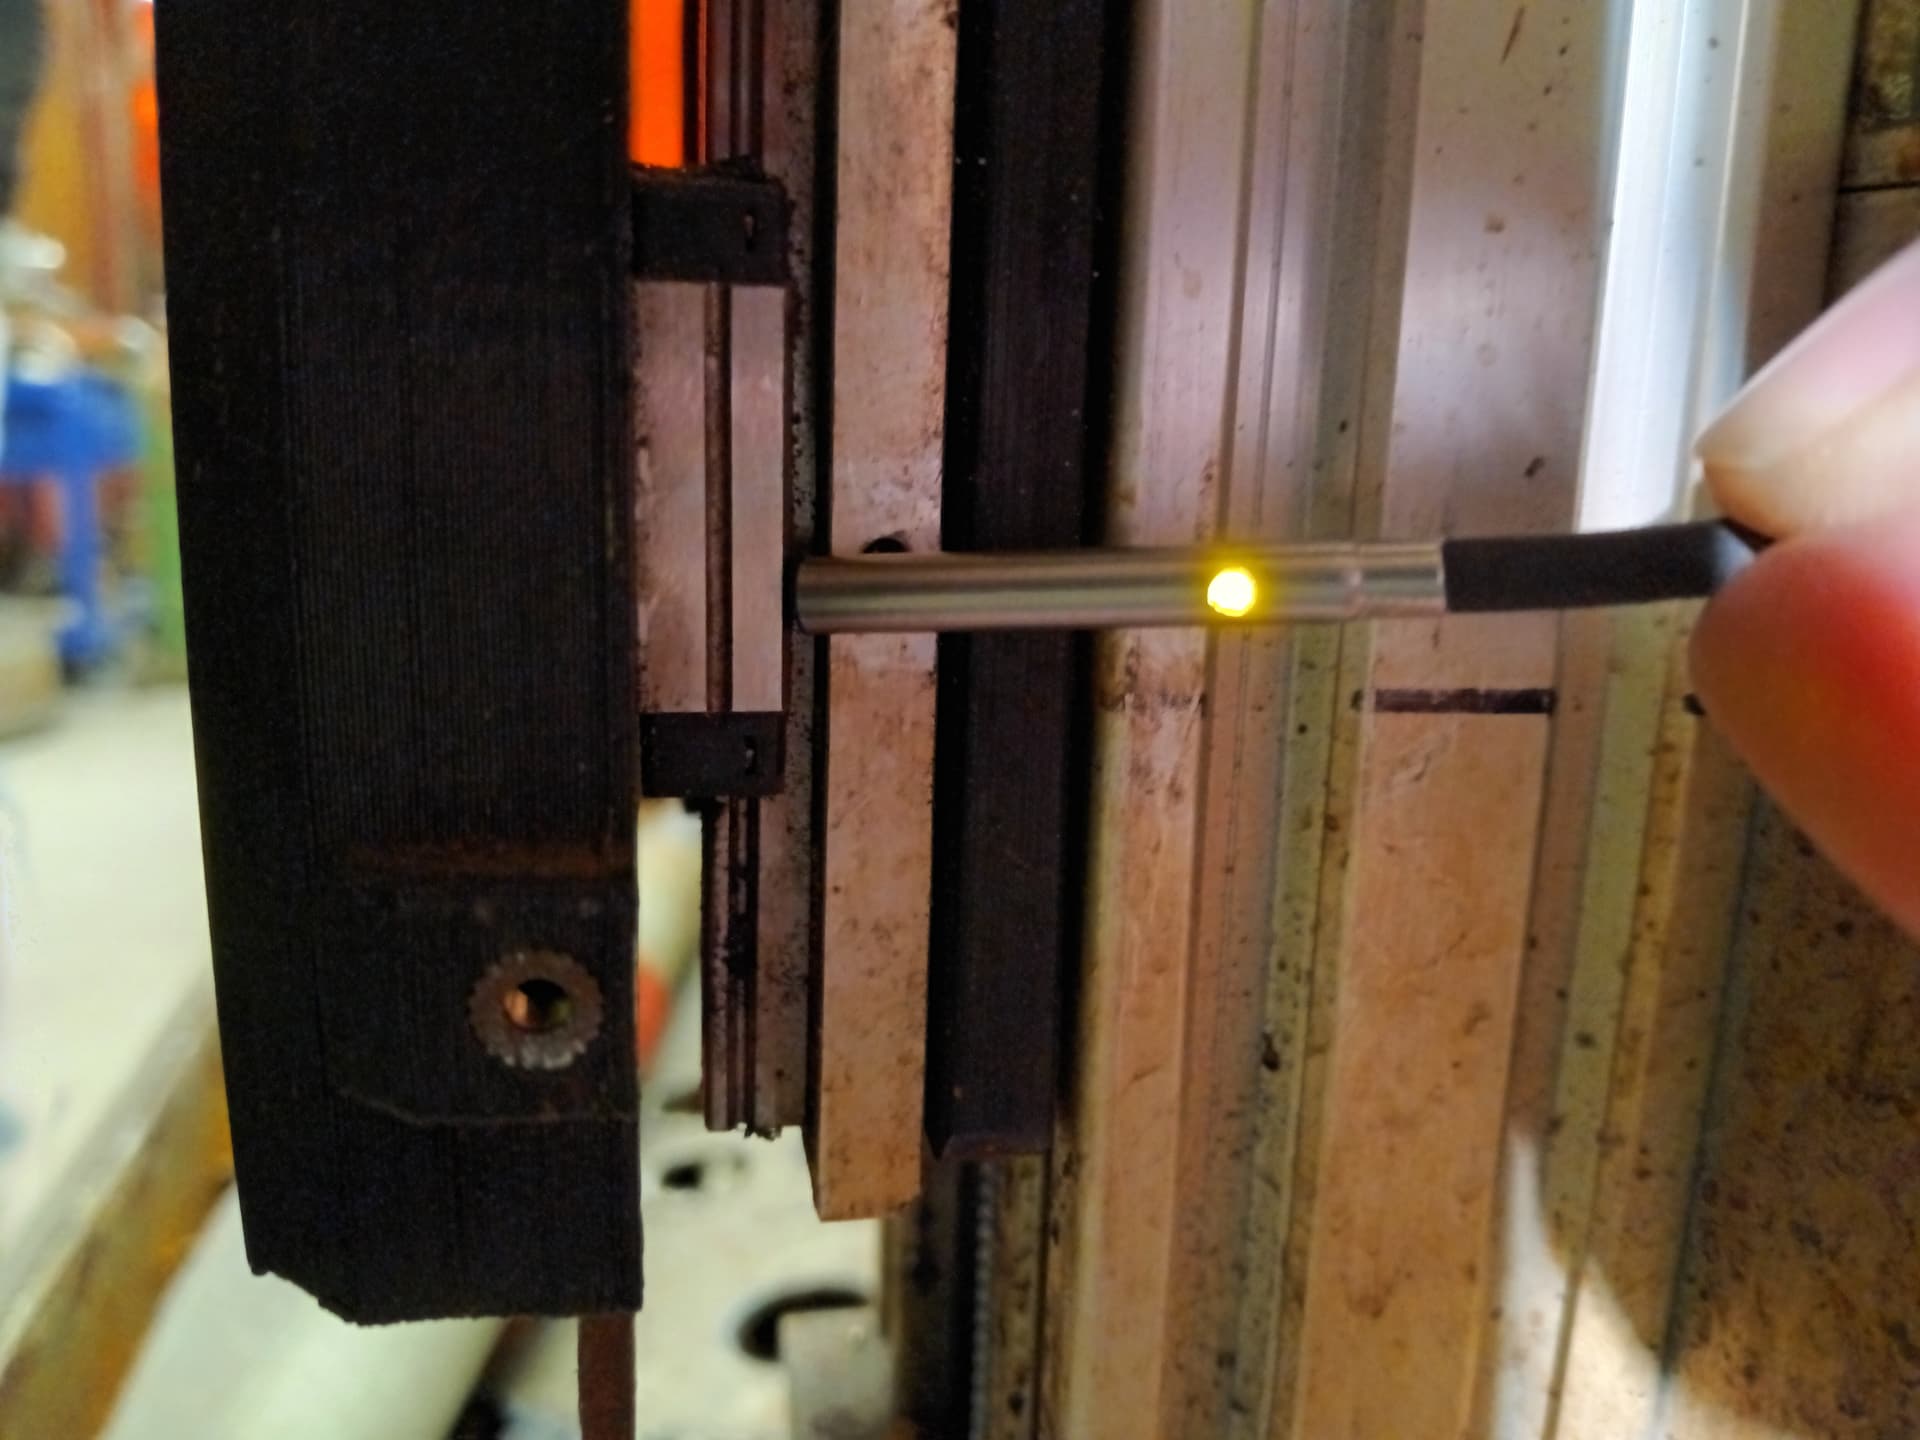
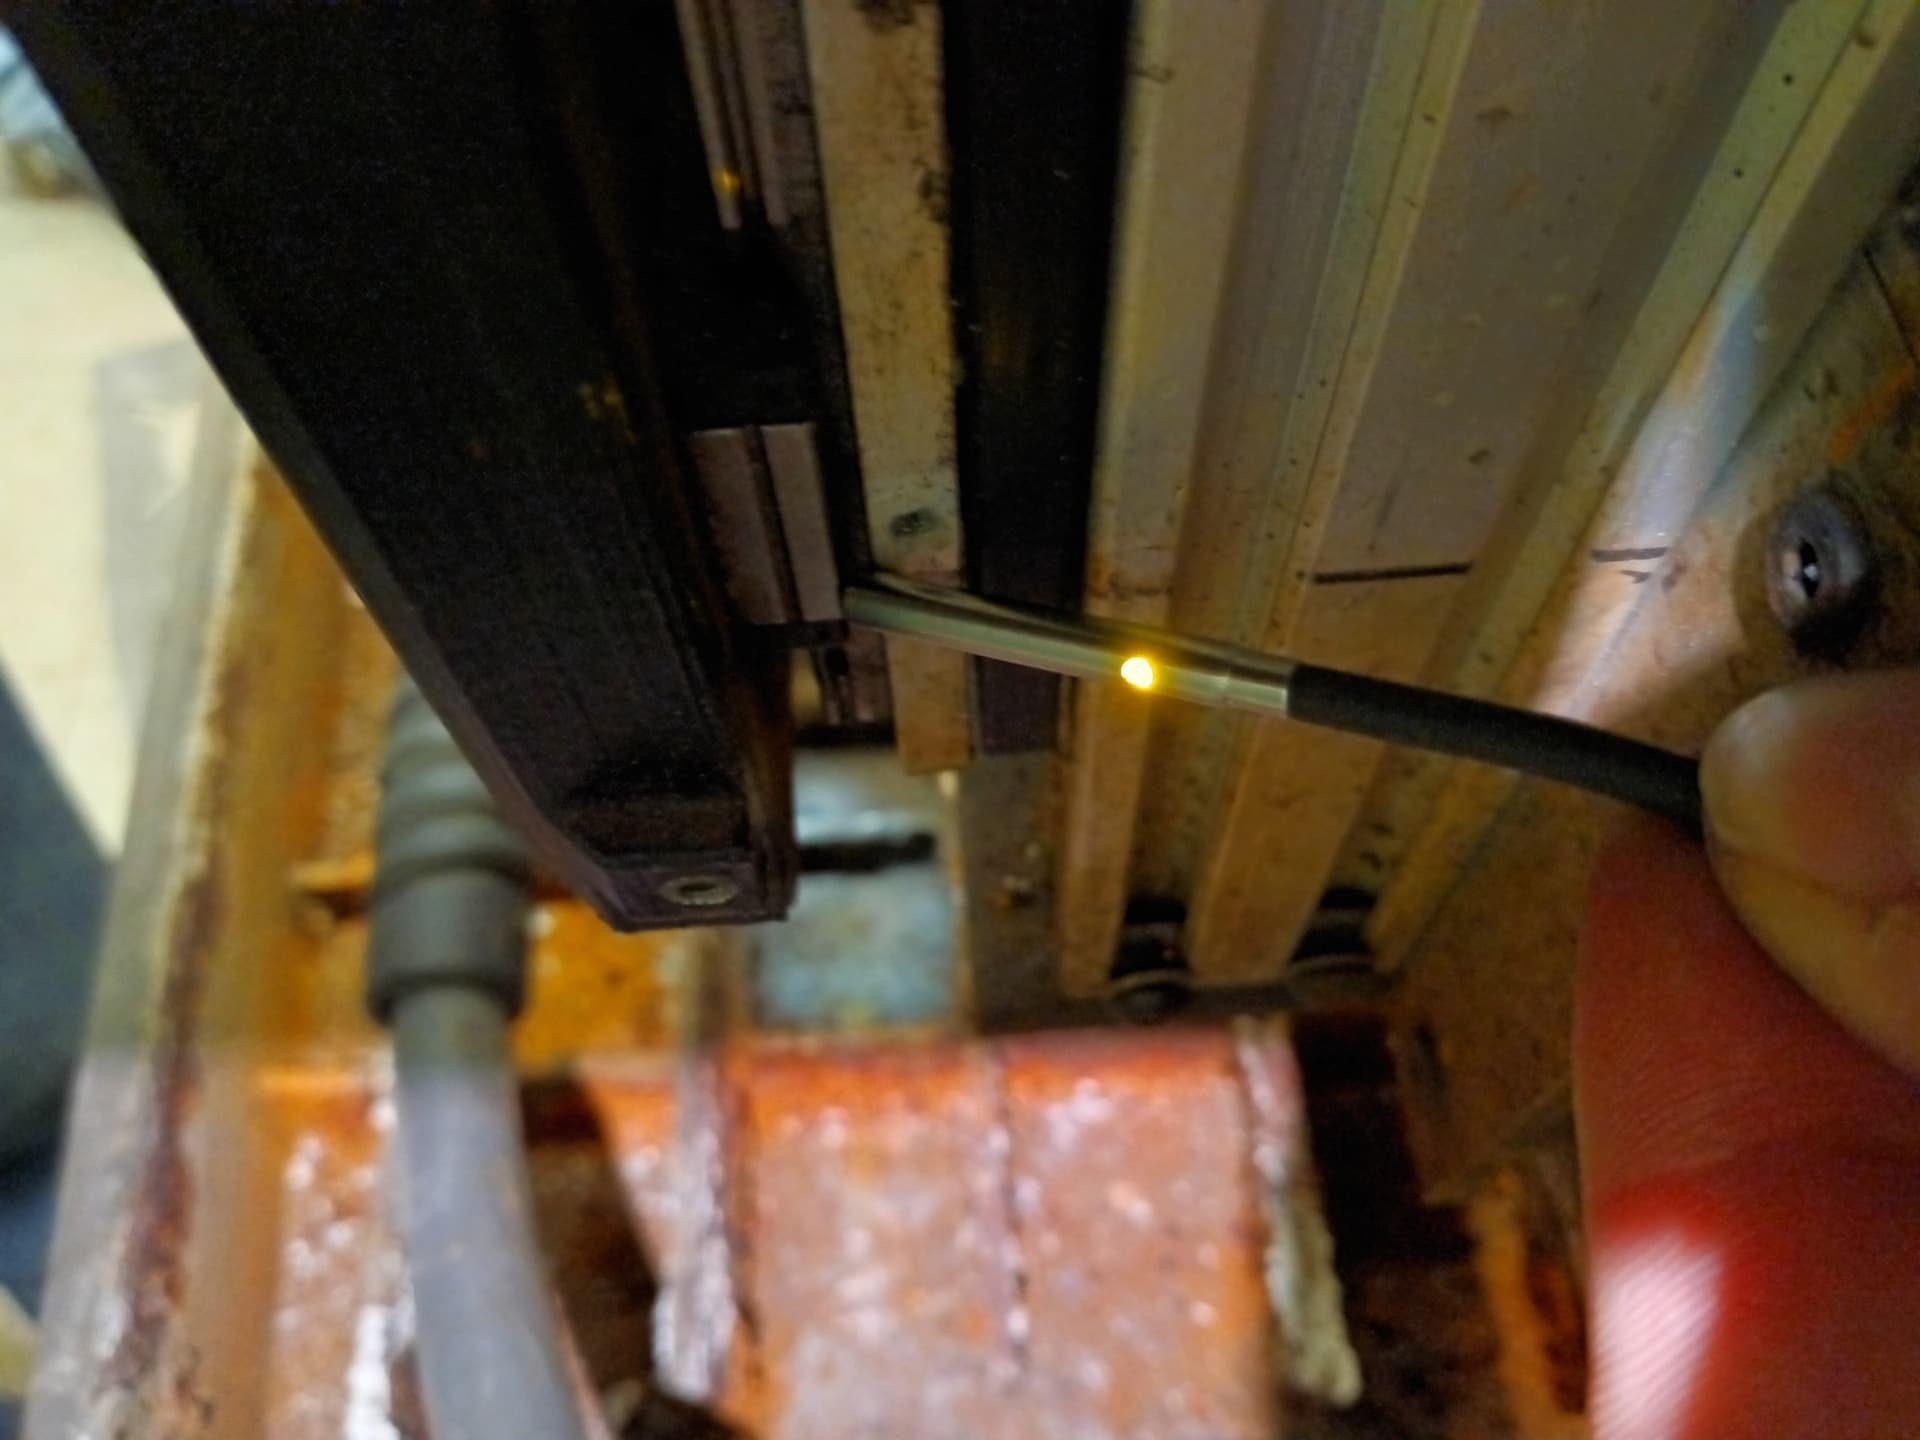
Here are a few pictures of where my head was at. We could make something that is held in place by the Tslot so it is adjustable that allows the sensor to be held near the linear rail bearing. The problem is the bearing doesnt stick out enough to active the sensor. Id prob glue/epoxy a piece of steel (sensor detects iron/steel) to make the design easier… or design something that held the sensor at an angle (see second pic)
For reference feel free to hit the green power button and play around with the float sensor, it will light up when activated, the range is very short, 1/8in or less. So whatever is built cant move and needs to withstand the operating conditions. 3d printed parts seem to hold up ok. Wood is a negative.
I’m not picky so long as it will hold up and it measures off that bearing. We have tried other methods of measuring off the torch and it “wiggles” to much to activate the sensor reliably.
Thanks for taking this, If you could get it done by next Thursday that would be great!
sorry for the radio silence. I was tied up with some family activity over the weekend and wasn’t online. I’ll go over at lunchtime today to look at it and see what I can come up with. If you already have something just let me know. Is this a proximity sensor that senses a ferrous target when it moves into the sensing cone? I have some experience with those at my job that might come in handy. Do we have a part number for the sensor itself?
OK, I was able to get over there at lunch and take a look at it. While this looks pretty straightforward, I have to admit it is not obvious to me what the total end objective is.
Does the prox sensor need to sense when the torch carriage (black V Block) descends to a certain height above the table?
Do we have any fasteners designed to work with the strut supports? Or any guidance on a standard fastener we could use?
Does anyone know the specs on the struts? I didn’t have time at lunch to take dimensions to build a model to use.
The Black V Block or Torch Carriage has some tapped bushings on the edge? Can I use those to attach a target bracket?
My thoughts so far are to design and print out a sensor base with a clamp to hold the sensor and it would be fastened to the strut. I would design it to be perpendicular to the torch carriage and target rather than trying to put it at an angle and capture the steel linear bearing base. The air gap required is pretty small and I think getting that aligned will end up being a hassle initially and especially for those working on this in the future.
I have a chance to get this designed and put together by Thursday but I’d like to get these questions answered to be most efficient with my time.
Thanks!
Jerry
We need to fix the mount to the double T slots rail(far right of the picture) since it doesn’t move. We can’t attach it to any part of the carriage as it moved too much (that how it was setup previously)
Hardware wise their are 2 t slots nuts we could tie into…might need longer bolts… But those should do the trick.
Hopefully that enough of an explanation. If not I’ll whip up a quick drawing
Got the float sensor bracket made and it is at the plasma table. Needs two 5 mm X .75" screws to fasten the bracket to the strut. Also will need to make a steel target and bond it to the back of the carriage. Sorry I didn’t have time to get that done.
This thread is about modifications to the existing plasma table at makeict. If you want to build one, I would suggest starting your own thread so it doesn’t get lost among the discussion about this one.