Prusa 4 has a meltdown last night while printing. Not sure what to do or how to fix so I put out of order on it.
2 Likes
I will take a look this weekend when I’m down there. I’m limited on transportation right now.
1 Like
I found 3 printers which had globs on them: Prusa 1, 2 and 4. So I worked on them some. Which was taking apart most all of the carriage.
I have not recalibrated the non-standard beds.
Z on Prusa 2 was at something like -2.4 or something mm. After I think it’s maybe -1.2mm.
Additionally, it had glue stick smeared over it and whomever was printing hadn’t waited for the first layer to complete (or I’d assume they’d have seen the issues). Please don’t use glue sticks, and if you do, clean it up.
PLEASE WATCH THE FIRST LAYER AT LEAST!
So:
-
The bed Z offset should not be large, right now, it’s very small on Prusa 1. I think it’s 0.4 on 1 and 1.2mm on 2.
-
Prusa 1, should work. (If using the other bed recalibrate the offset, if you don’t make sure that there aren’t issues.)
-
Prusa 2, should work. (If using the other bed recalibrate the offset, if you don’t make sure that there aren’t issues.)
-
- Filament sensor was being a little picky, I think it’s good but loading may be a little off (not detecting all the time, if so just push it in and try to load it. It may not prompt.)
-
Prusa 3 is presumed working.
-
Prusa 4 needs some parts, it’s currently disassembled.
-
- Additionally there’s a semi-embedded nut that is not embedded on the carriage. Needs fixing. (Major pain getting stuff apart)
-
- The hotend is not good, I’m thinking it needs just a new heat block, heater and temp sensor, but someone else can try to dig it out. (I couldn’t find it.) They may be fixable, but it looked like the temp sensor at least was bent.
I apologies if I forgot something in this list, but worked on it to the limit of my back tolerating it.
4 Likes
Hi James. Please see some responses below for clarity.
Z on Prusa 2 was at something like -2.4 or something mm. After I think it’s maybe -1.2mm.
How would you recommend fixing this going forward?
Additionally, it had glue stick smeared over it and whomever was printing hadn’t waited for the first layer to complete (or I’d assume they’d have seen the issues). Please don’t use glue sticks, and if you do, clean it up.
Please do not assume I used a glue stick because if a glue stick was used, wasn’t by me. Do you have photos of what it looked like to indicate “glue stick usage” for people to see that it wasn’t functioning correctly.
PLEASE WATCH THE FIRST LAYER AT LEAST!
Again, please do not assume that I didn’t watch the first layer. It looked like it was functioning fine for me and I am not as experience on a 3D printer as you. Do you have pictures of what it looked like in the moment to illustrate what to have looked for?
So:
-
The bed Z offset should not be large, right now, it’s very small on Prusa 1. I think it’s 0.4 on 1 and 1.2mm on 2.
-
Prusa 1, should work. (If using the other bed recalibrate the offset, if you don’t make sure that there aren’t issues.) Can you please provide more detail to what “the other bed” means? This isn’t clear when there are multiple types of beds. What is “standard”
-
Prusa 2, should work. (If using the other bed recalibrate the offset, if you don’t make sure that there aren’t issues.)
-
- Filament sensor was being a little picky, I think it’s good but loading may be a little off (not detecting all the time, if so just push it in and try to load it. It may not prompt.)
-
Prusa 3 is presumed working.
-
Prusa 4 needs some parts, it’s currently disassembled.
-
- Additionally there’s a semi-embedded nut that is not embedded on the carriage. Needs fixing. (Major pain getting stuff apart)
-
- The hotend is not good, I’m thinking it needs just a new heat block, heater and temp sensor, but someone else can try to dig it out. (I couldn’t find it.) They may be fixable, but it looked like the temp sensor at least was bent.
1 Like
I do have some pictures which can/should be educational to everyone.
(And no one has been named who did or didn’t do some of this. It’s almost unheard of for people to intentionally mess up stuff. Unfortunately, It is a fact of a shared space that people will, and sadly sometimes fixing it takes a long time (~4 hours) and causes pain (quite literally, what prevented me from finishing up some of the tasks that I tried to document in my post. Usually I try to post when repairs are complete, but in this case I couldn’t, so apologies if I was slightly grumpy and/or confusing.))
Prusa 1, should work. (If using the other bed recalibrate the offset, if you don’t make sure that there aren’t issues.) Can you please provide more detail to what “the other bed” means? This isn’t clear when there are multiple types of beds. What is “standard”
The standard will be the PLA_pei/Smooth sheets.
So to be more specific: If you are using the Satin covered/Textured sheets on Prusa 1/2 then you will need to run the first layer calibration in the menus.
For the first layer calibration, please refer to the guide below.
Do you have pictures of what it looked like in the moment to illustrate what to have looked for?

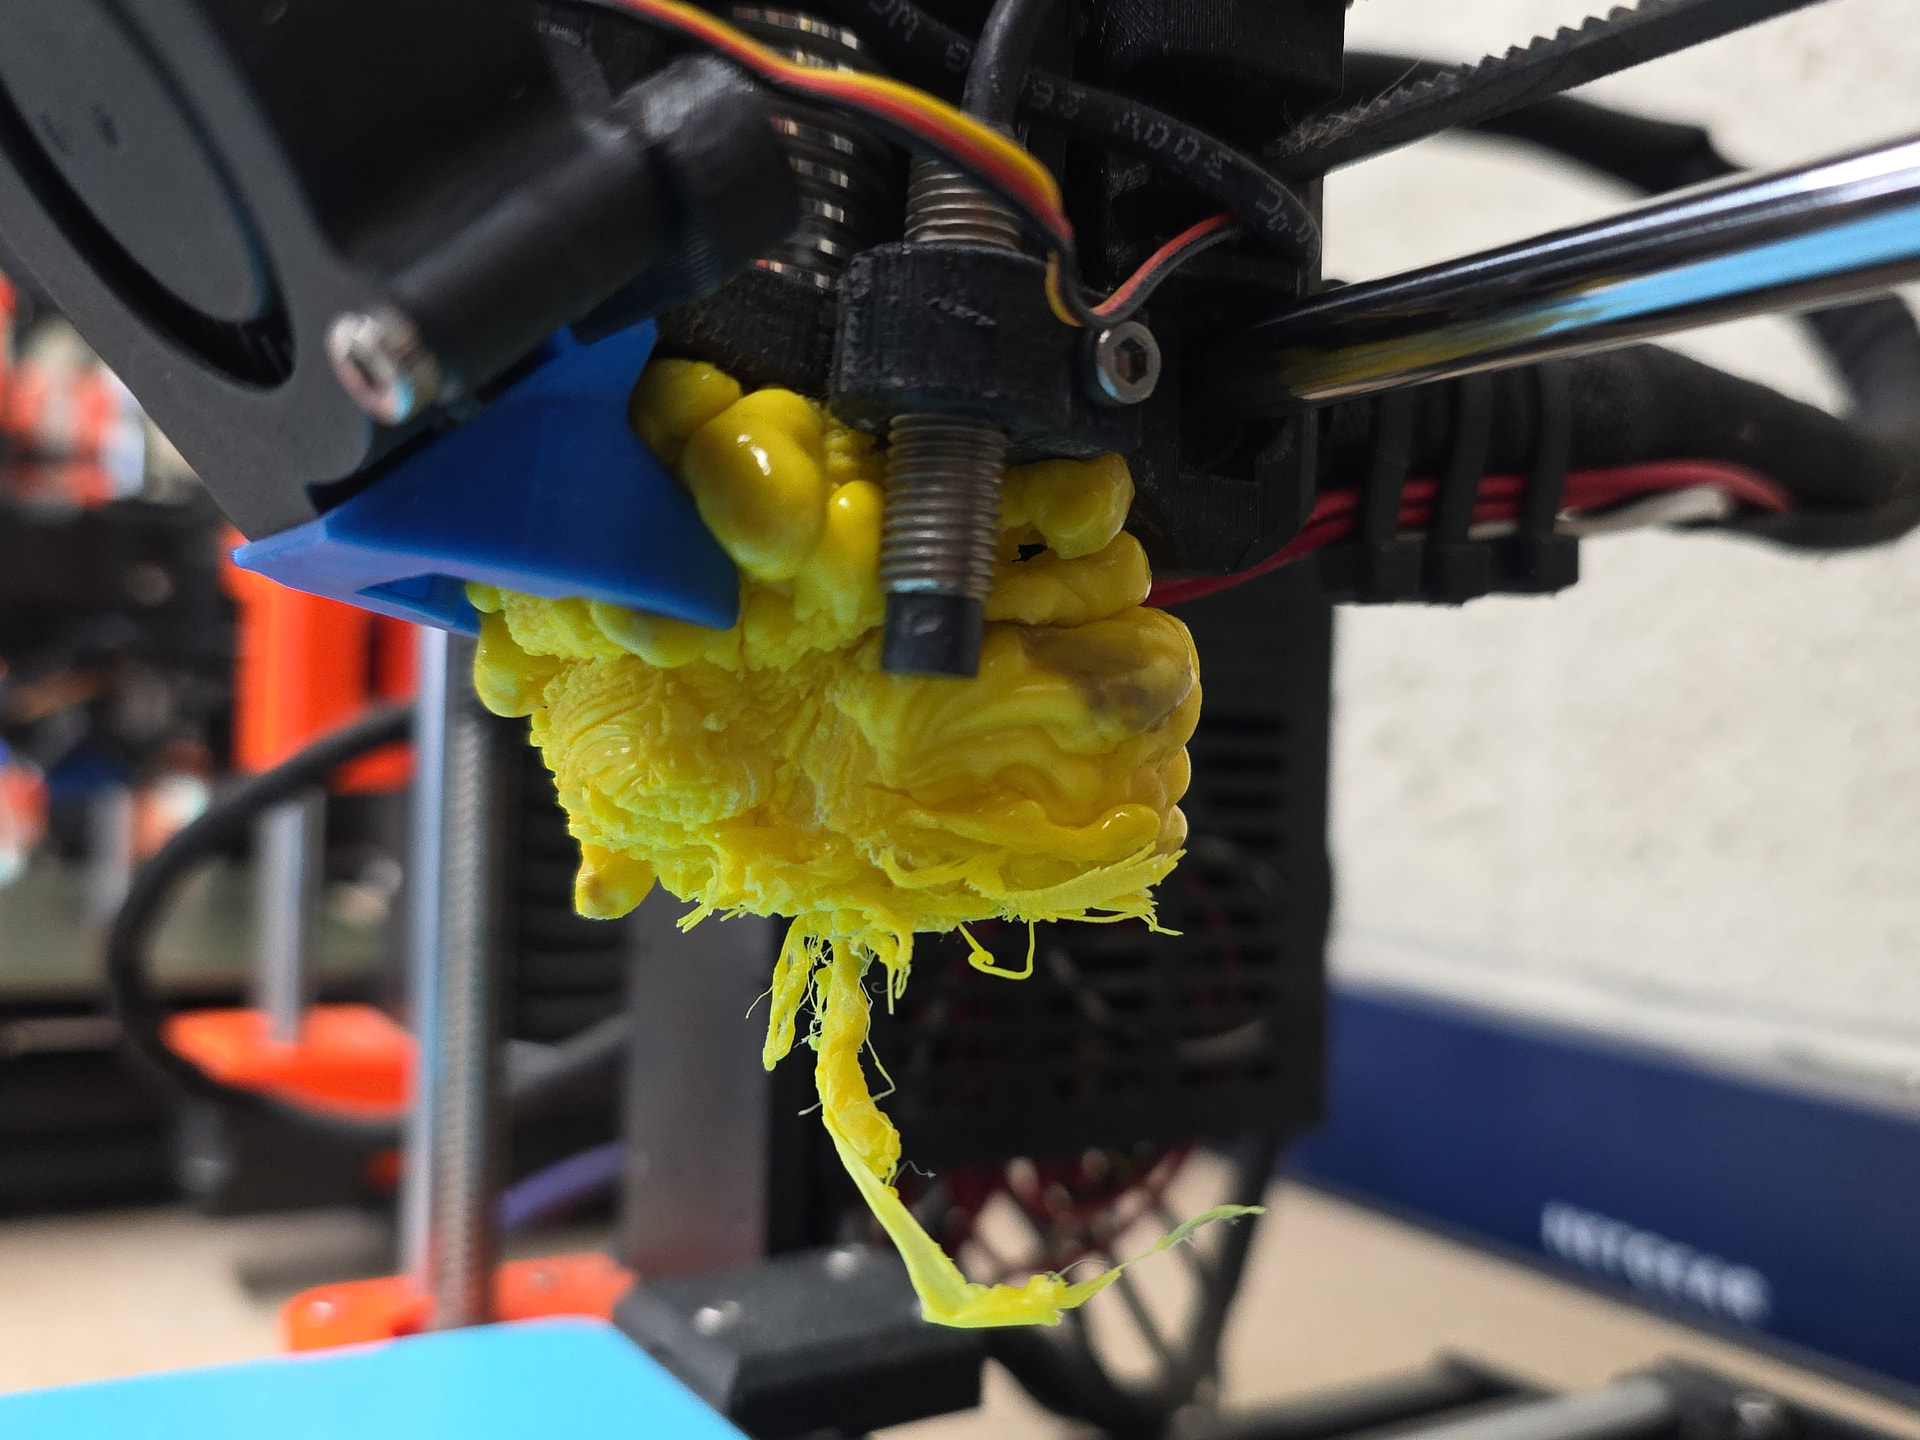
This here is one of them, and specifically look at the the upper left part of it, where you can see a first layer existed, but it is not at all uniform. Any non-uniformity of the first layer should be regarded as bad. Any first layer should have a smoosh and bond with the extrusions next to it to it to be a good layer, without ridges. (Ridges indicate too low, but usually if tiny are alright, though should be watched.) It should be pretty uniform. You shouldn’t be able to see through a 1st layer. (I don’t have a picture right now to illustrate. Correction, see 1st link, the Too High/Perfect/Too Low. illustration, and some of the others.)
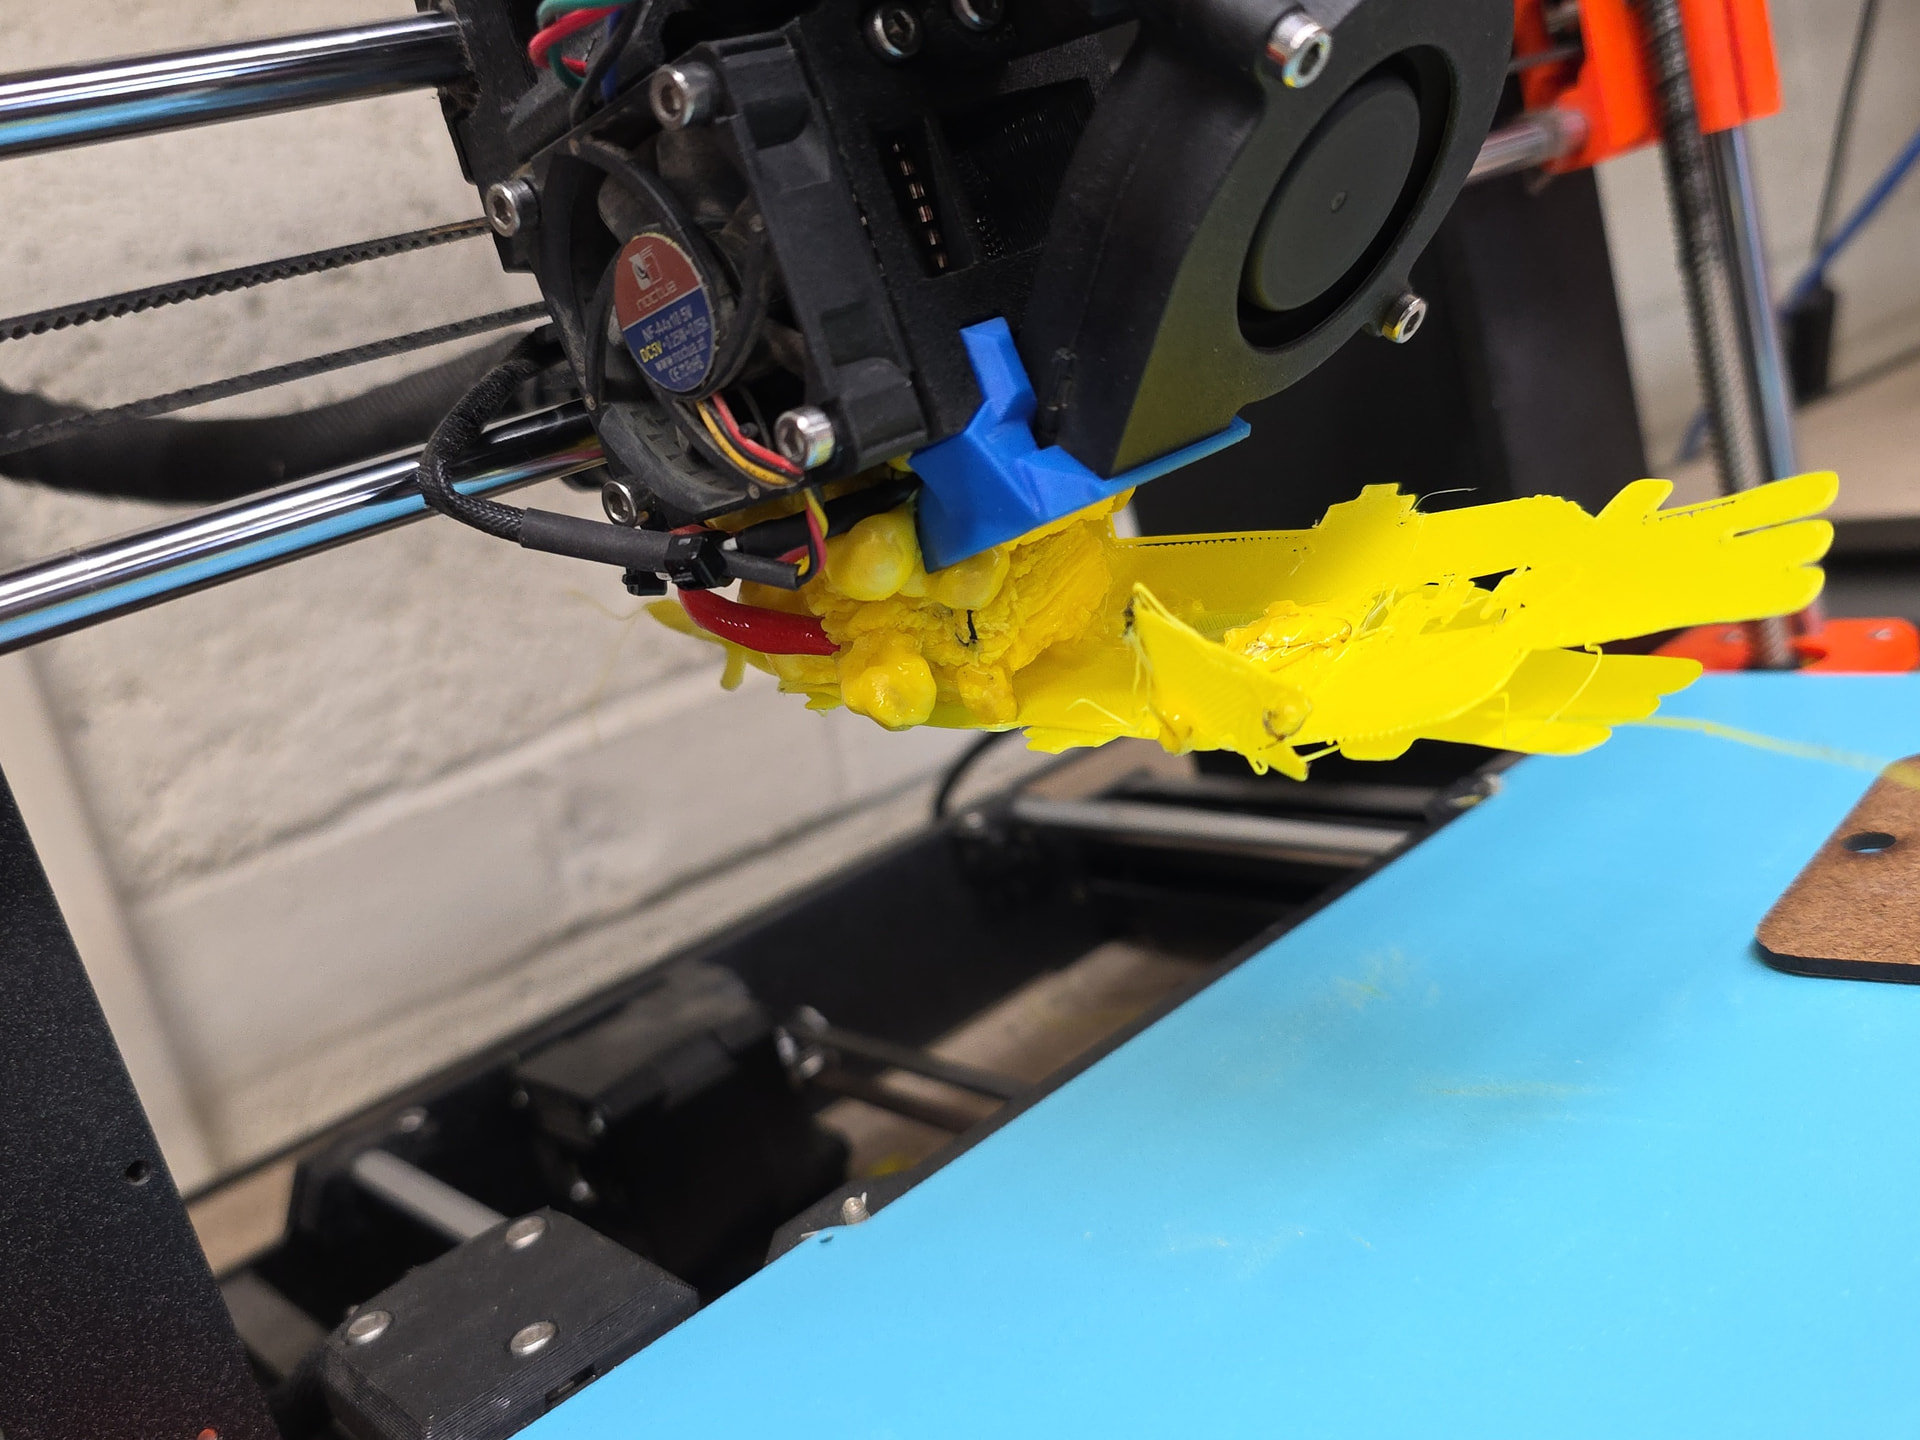
Here’s the second one where again, you can see it string along and not bond to the ajoining layers. You can see how the layers did not smoosh together and bond to form a single layer.
Again, Please see the 1st link and the Too high/Perfect/Too low. Your first layer should look like the Perfect section. If it doesn’t there’s an issue, and your print will be unlikely to complete.
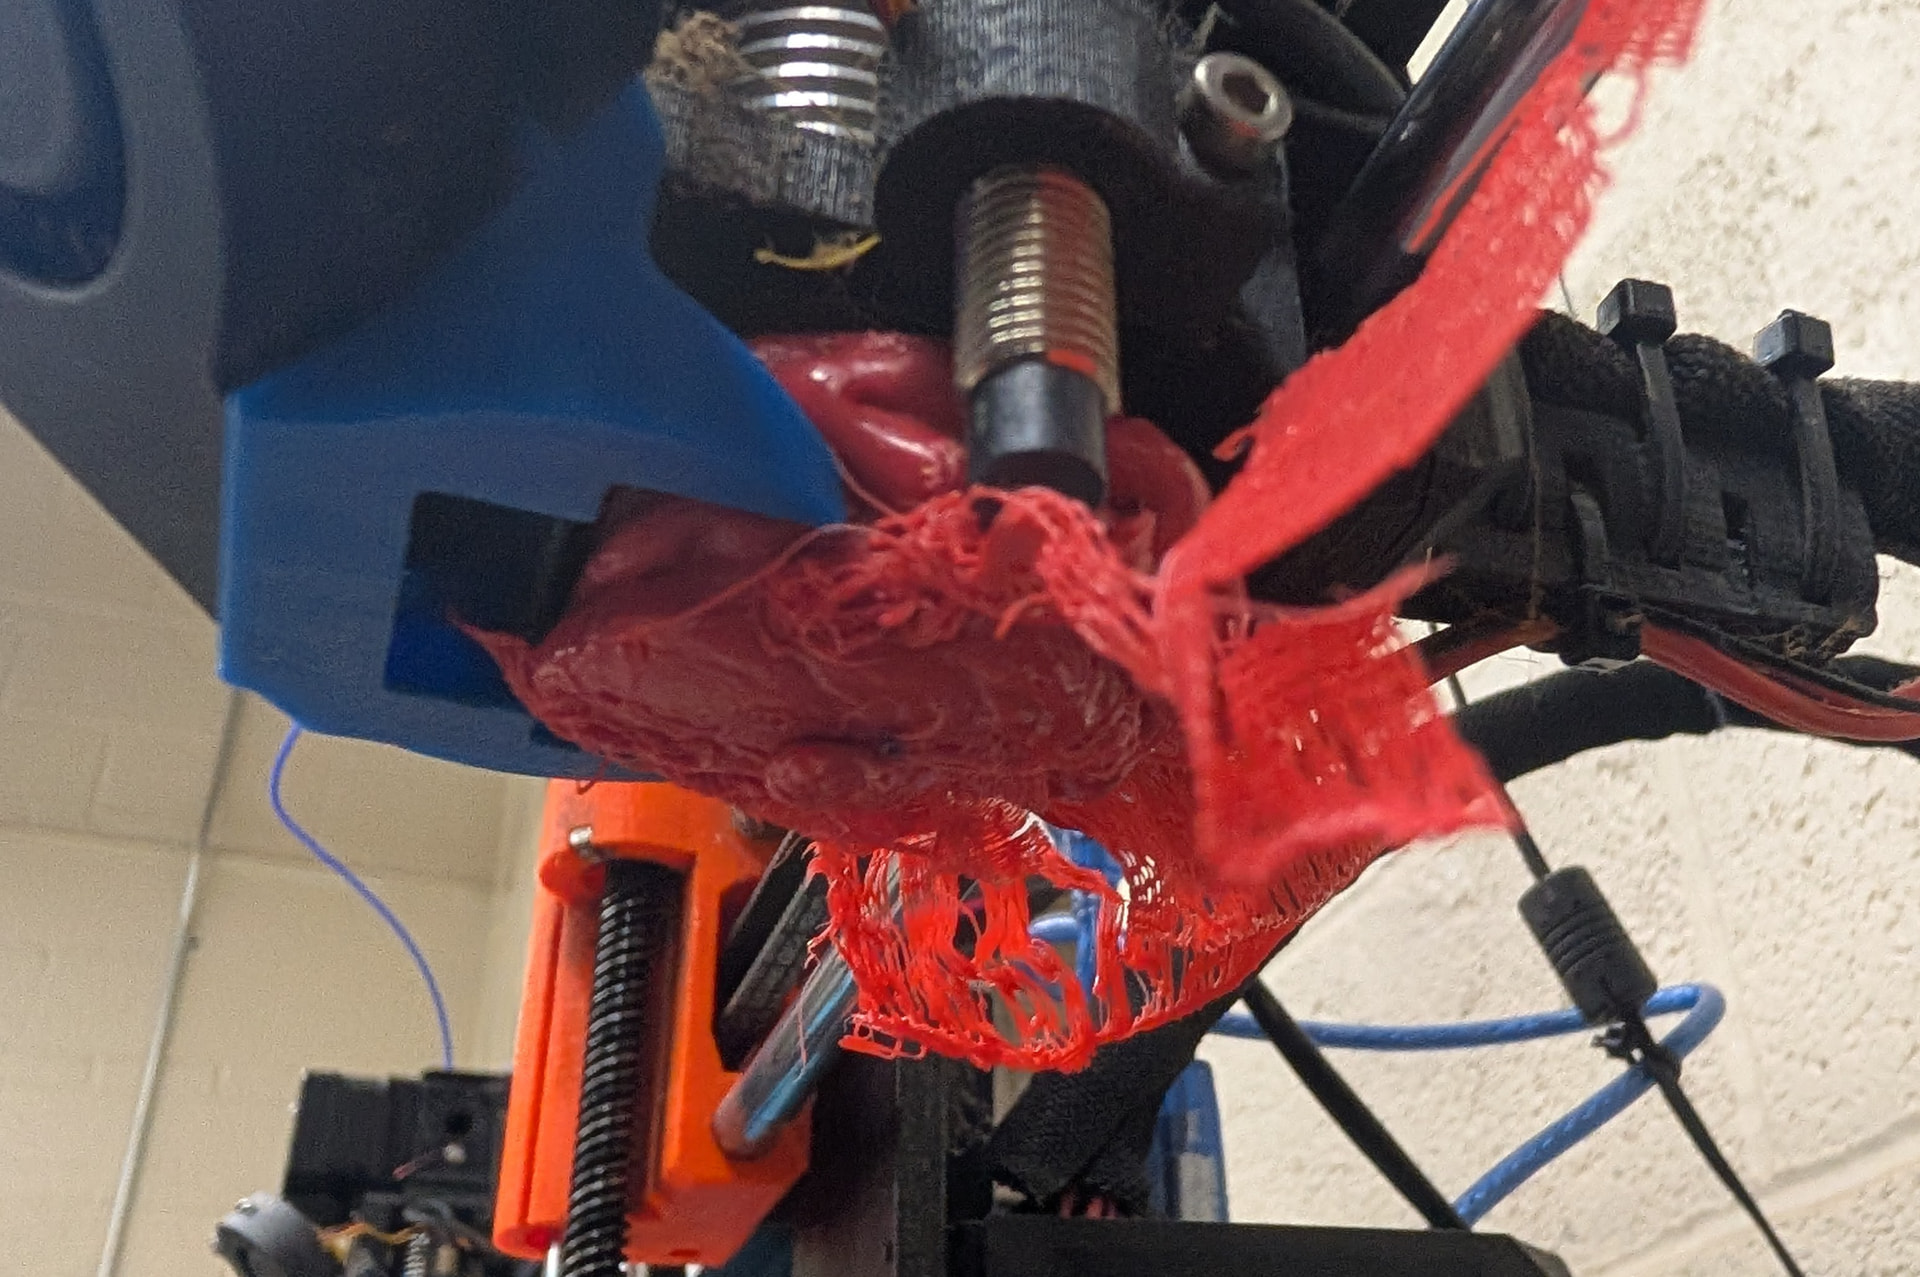
Very generally (though the second can happen to either, and there can be other causes): When just a little too low you’ll get ridges in the 1st layer as the nozzle moves through while still being able to extrude and displaces material to the side (this actually generally gives the best bed adhesion, but can actually knock the nozzle out of alignment, or break it if the ridges are too hard), or little, no extrusion. It will generally get stringy when it’s too high (or some cases too low, there are some pictures on the guide below.) and not bond with the neighbors.
Z on Prusa 2 was at something like -2.4 or something mm. After I think it’s maybe -1.2mm.
How would you recommend fixing this going forward?
Ideally, we’d have a person set it who knows what they are doing, and no one would touch the offsets.
The fact is that we have people who often mess with those settings. I’d prefer they don’t but it happens so people need to be aware of it and if they adjust it, they need to read this: (Which has some pictures, and is generally complete)
Do you have photos of what it looked like to indicate “glue stick usage” for people to see that it wasn’t functioning correctly.
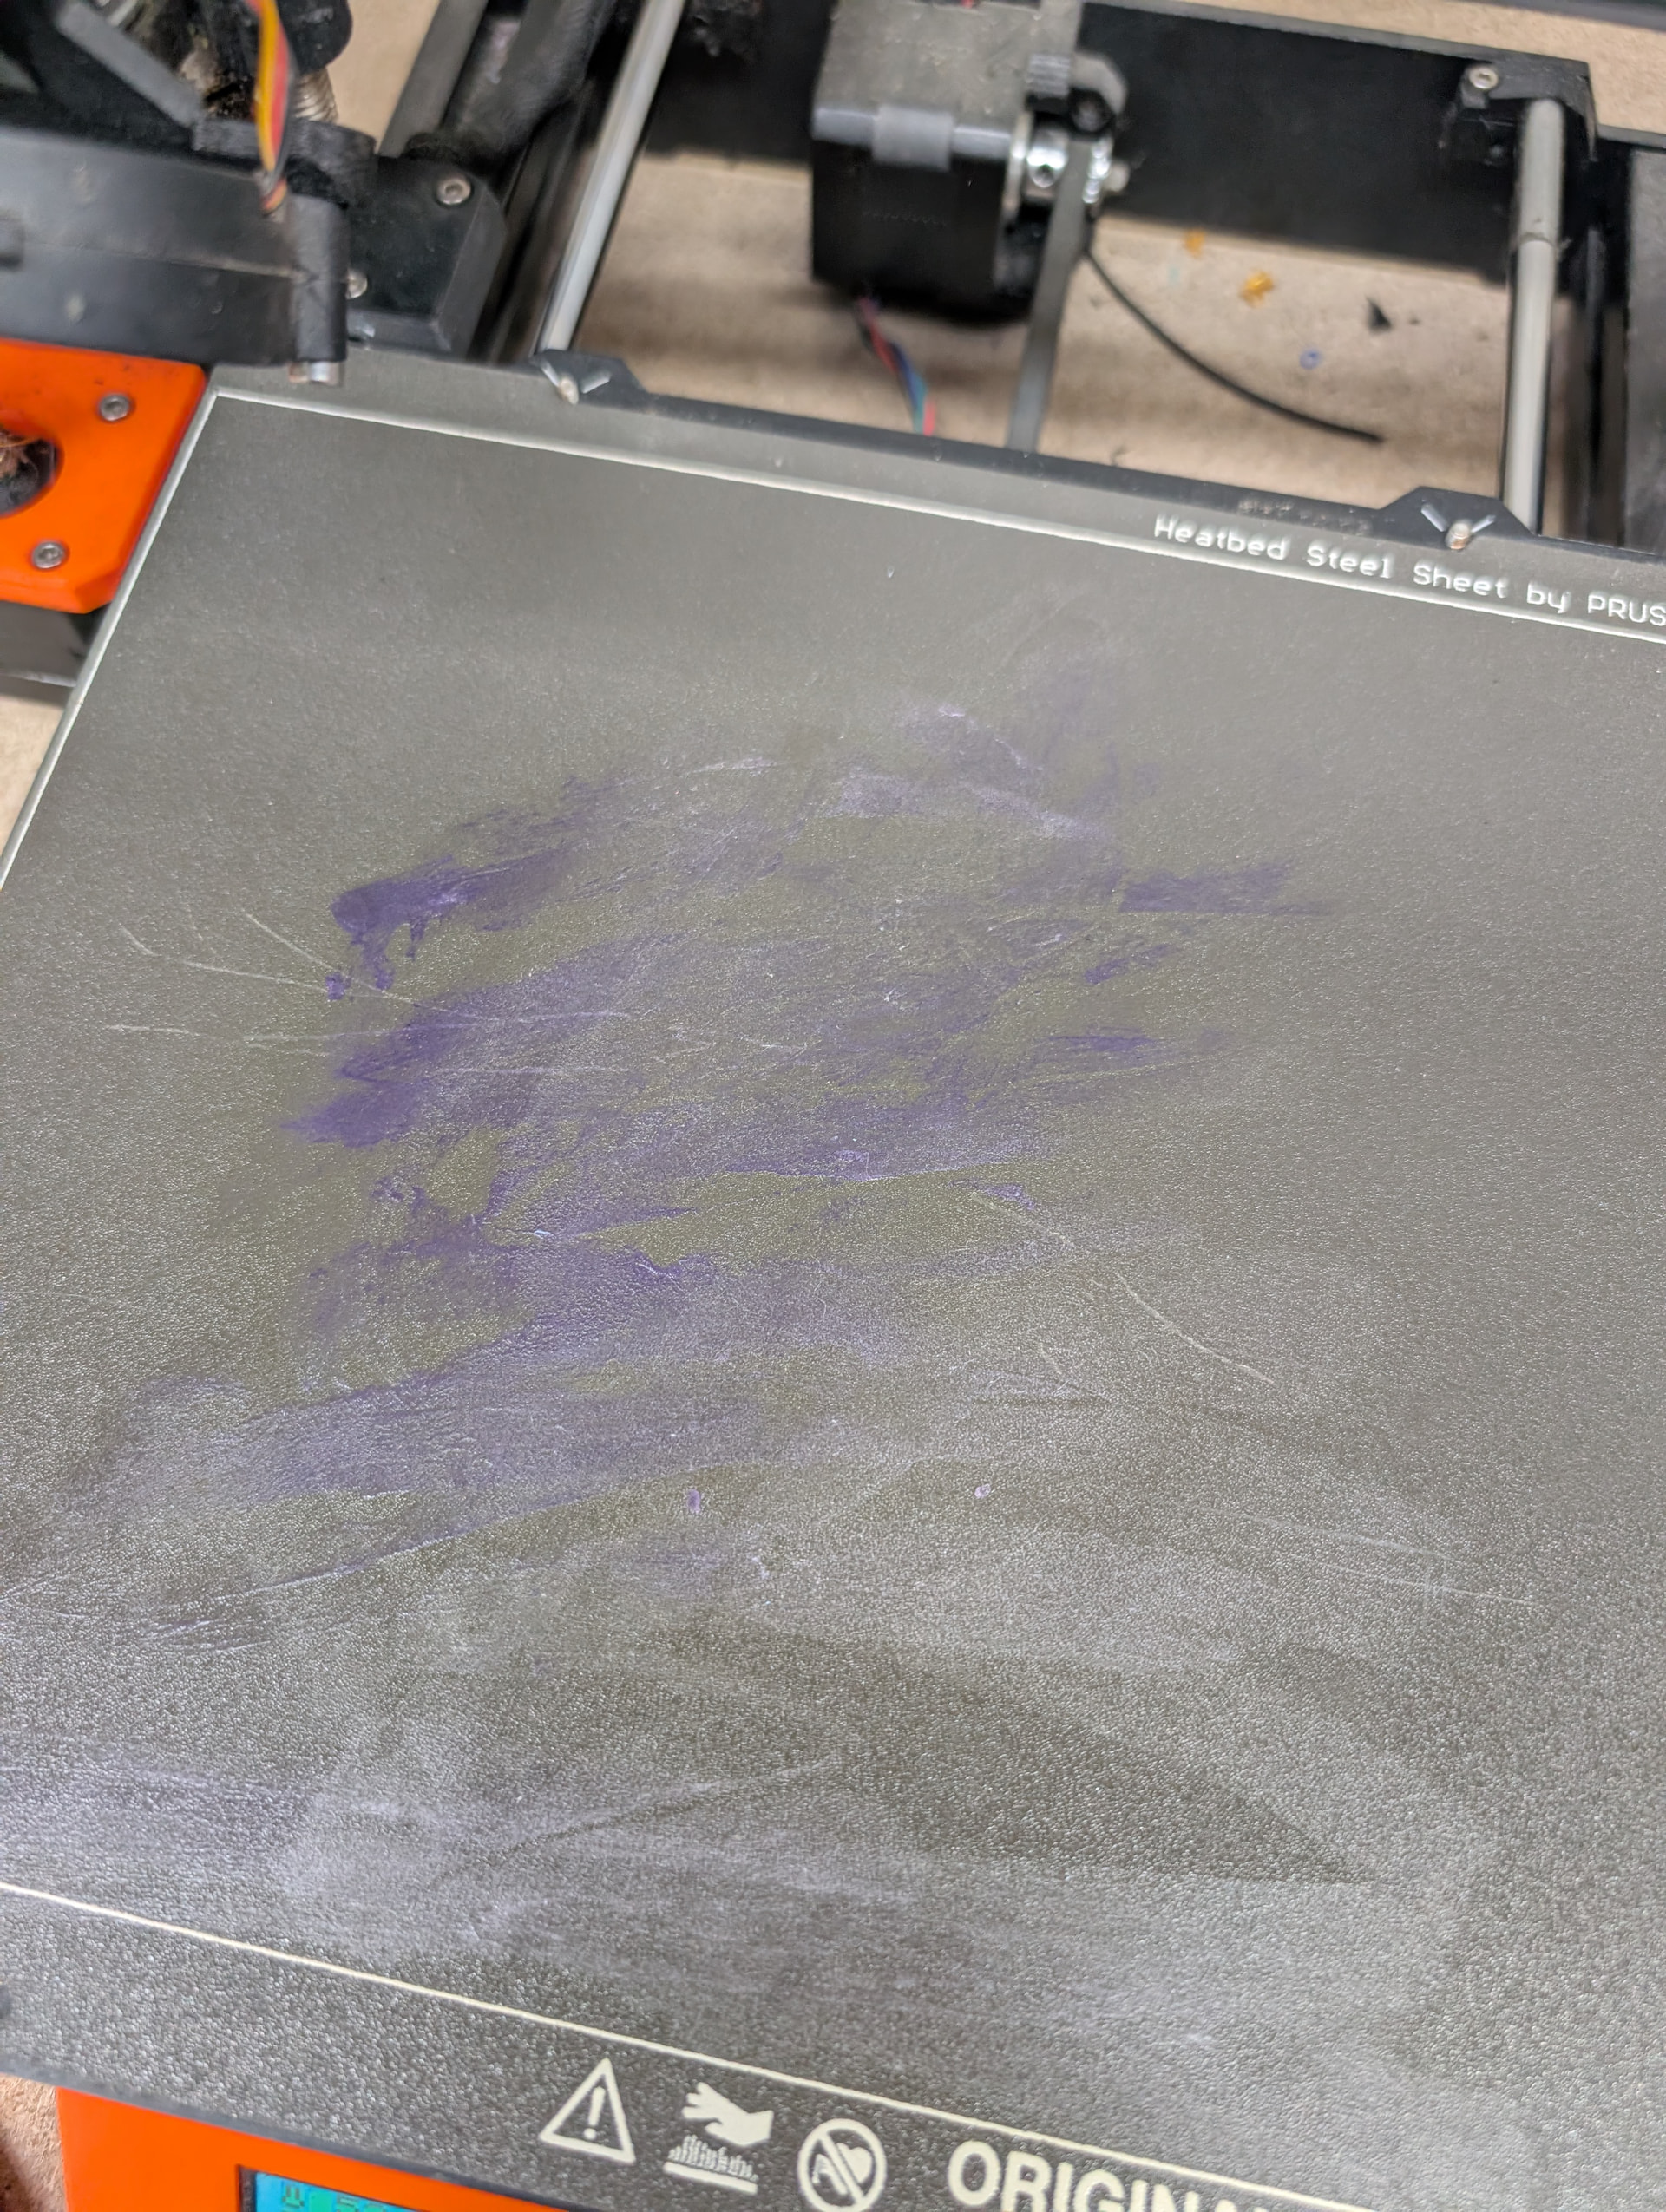
As for the glue stick, here’s an image of it before wetting and after. You can see the whitish stuff on the bed, I wasn’t sure exactly what it was until I tried to clean it, and it turned purple.

Note that some of the prusa pages may mention using a glue stick for ABS, etc on the smooth PEI sheet, which are not applicable to MakeICT: Just use the right bed (which we have on the wiki)
3 Likes
Are you still interested in fixing? I have built and rebuild a few similar 3d printer situations and have spare parts i would be willing to donate.
1 Like