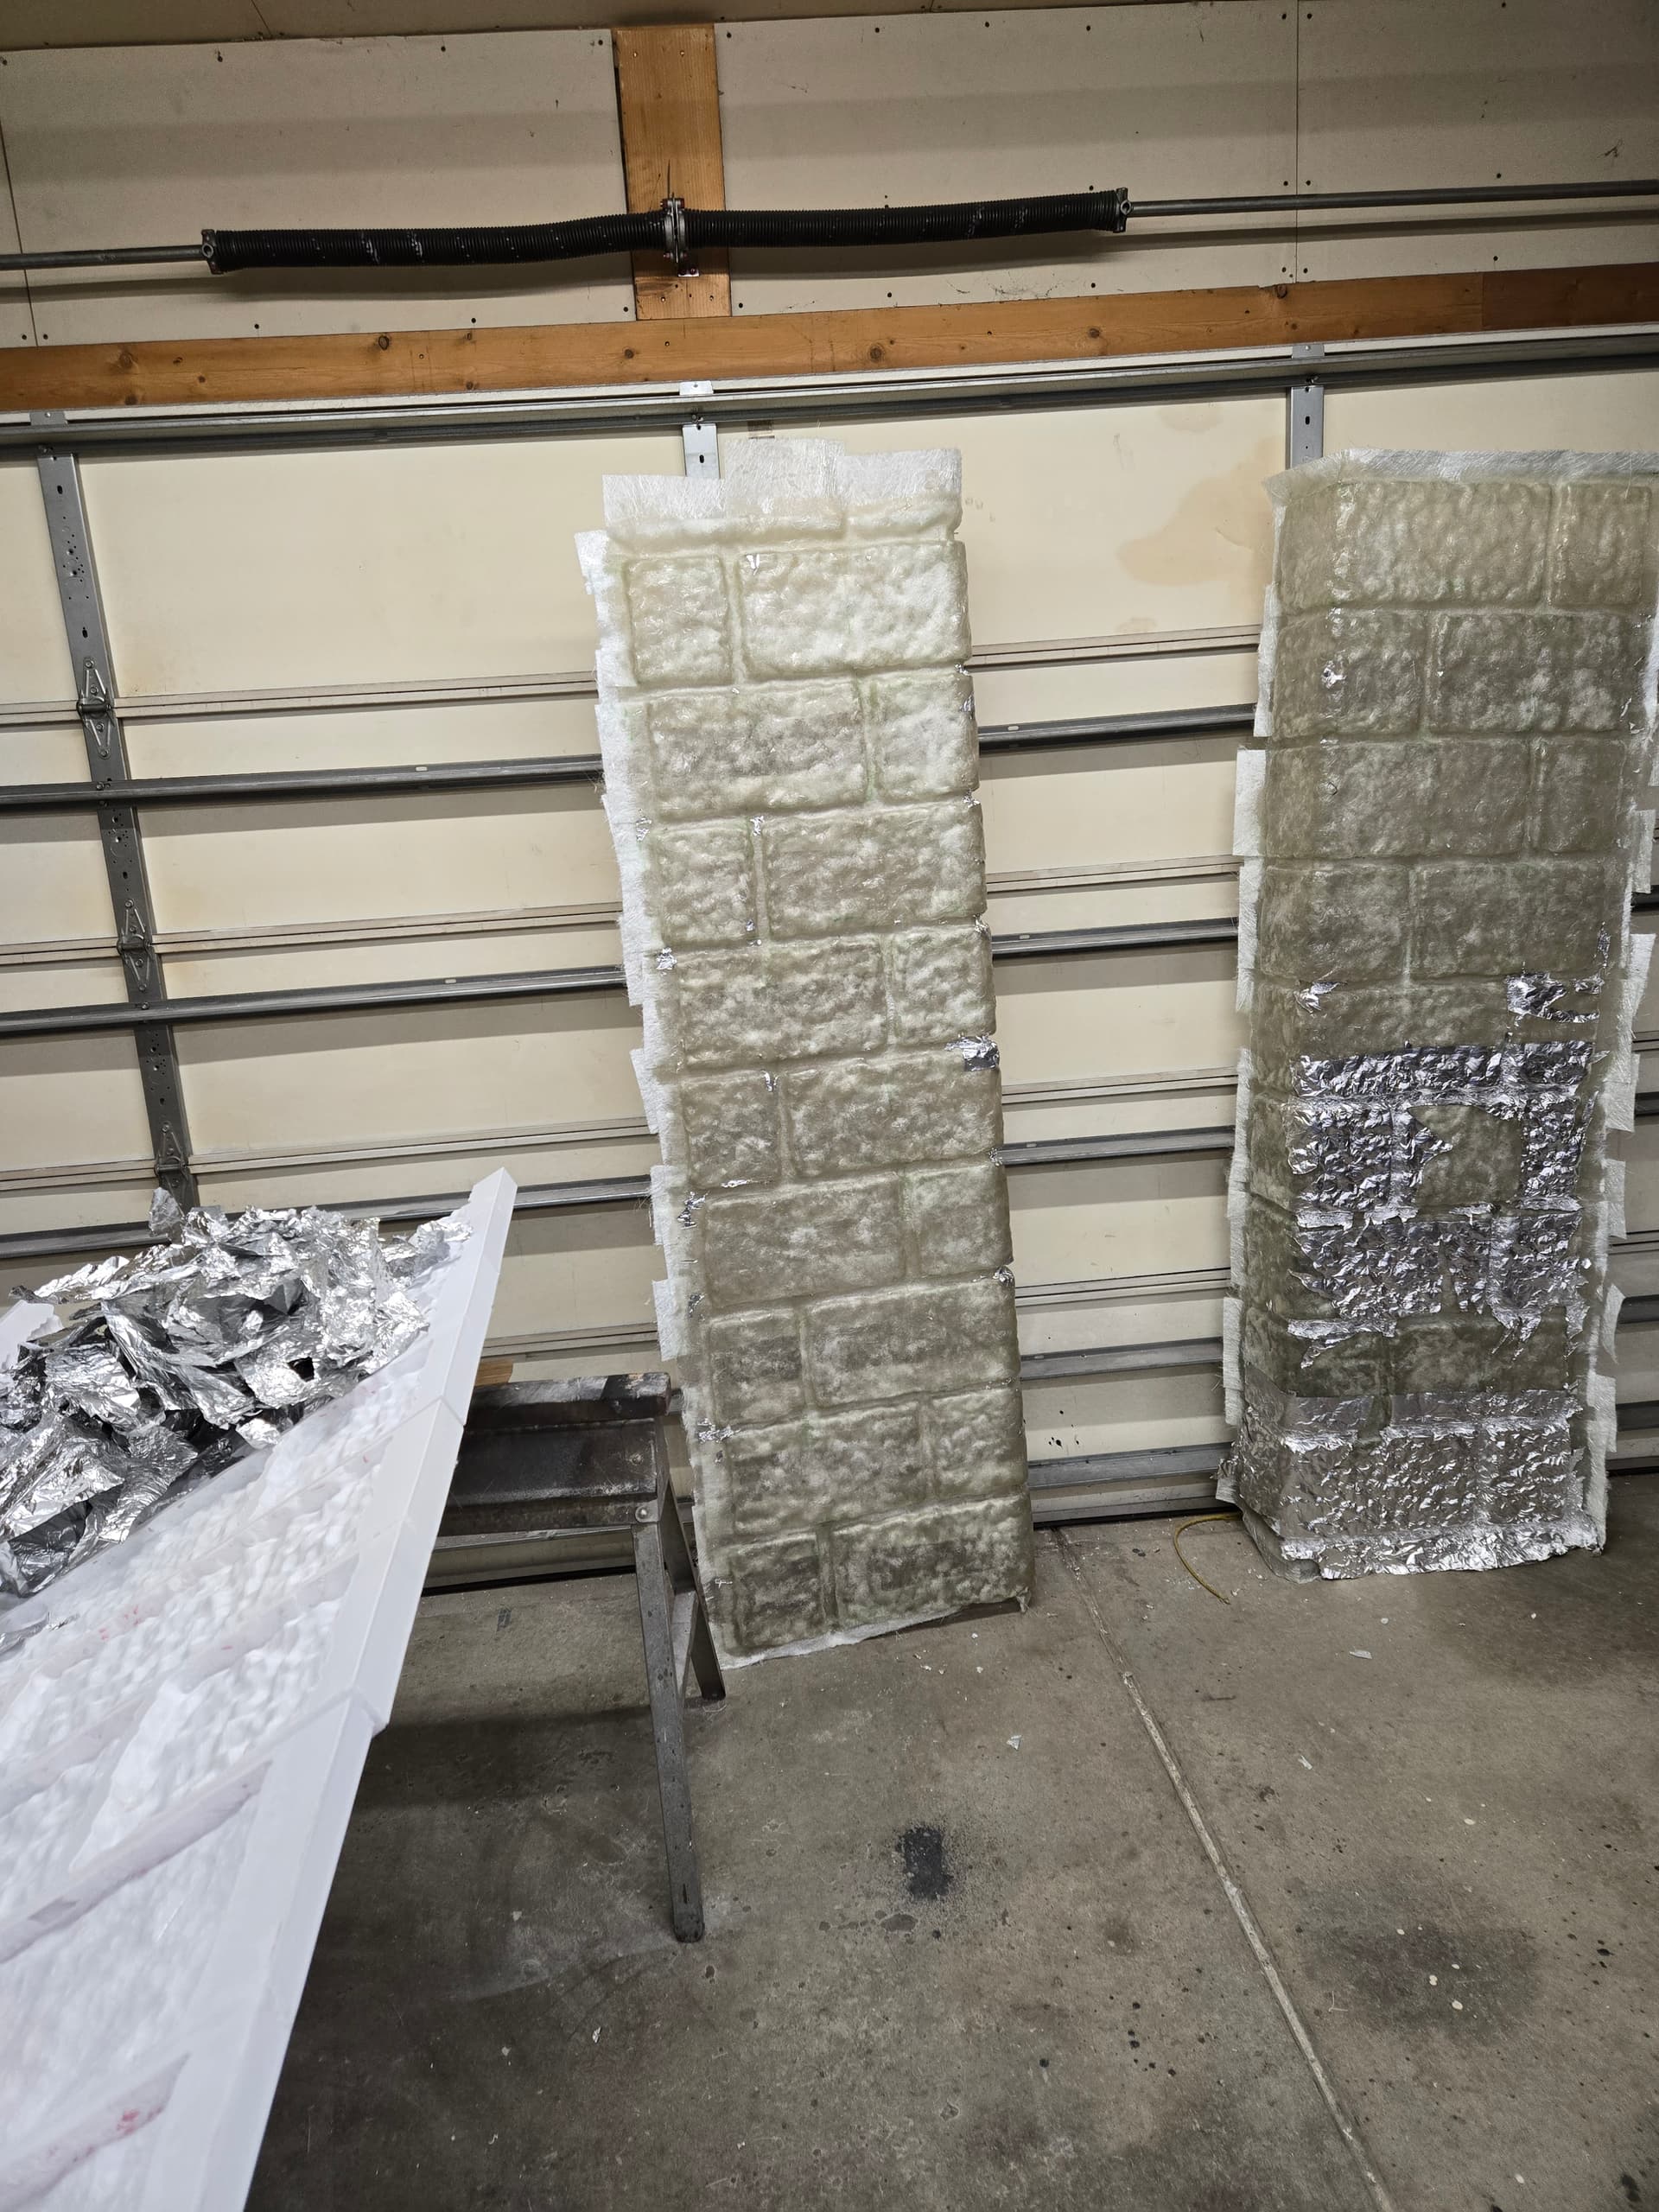
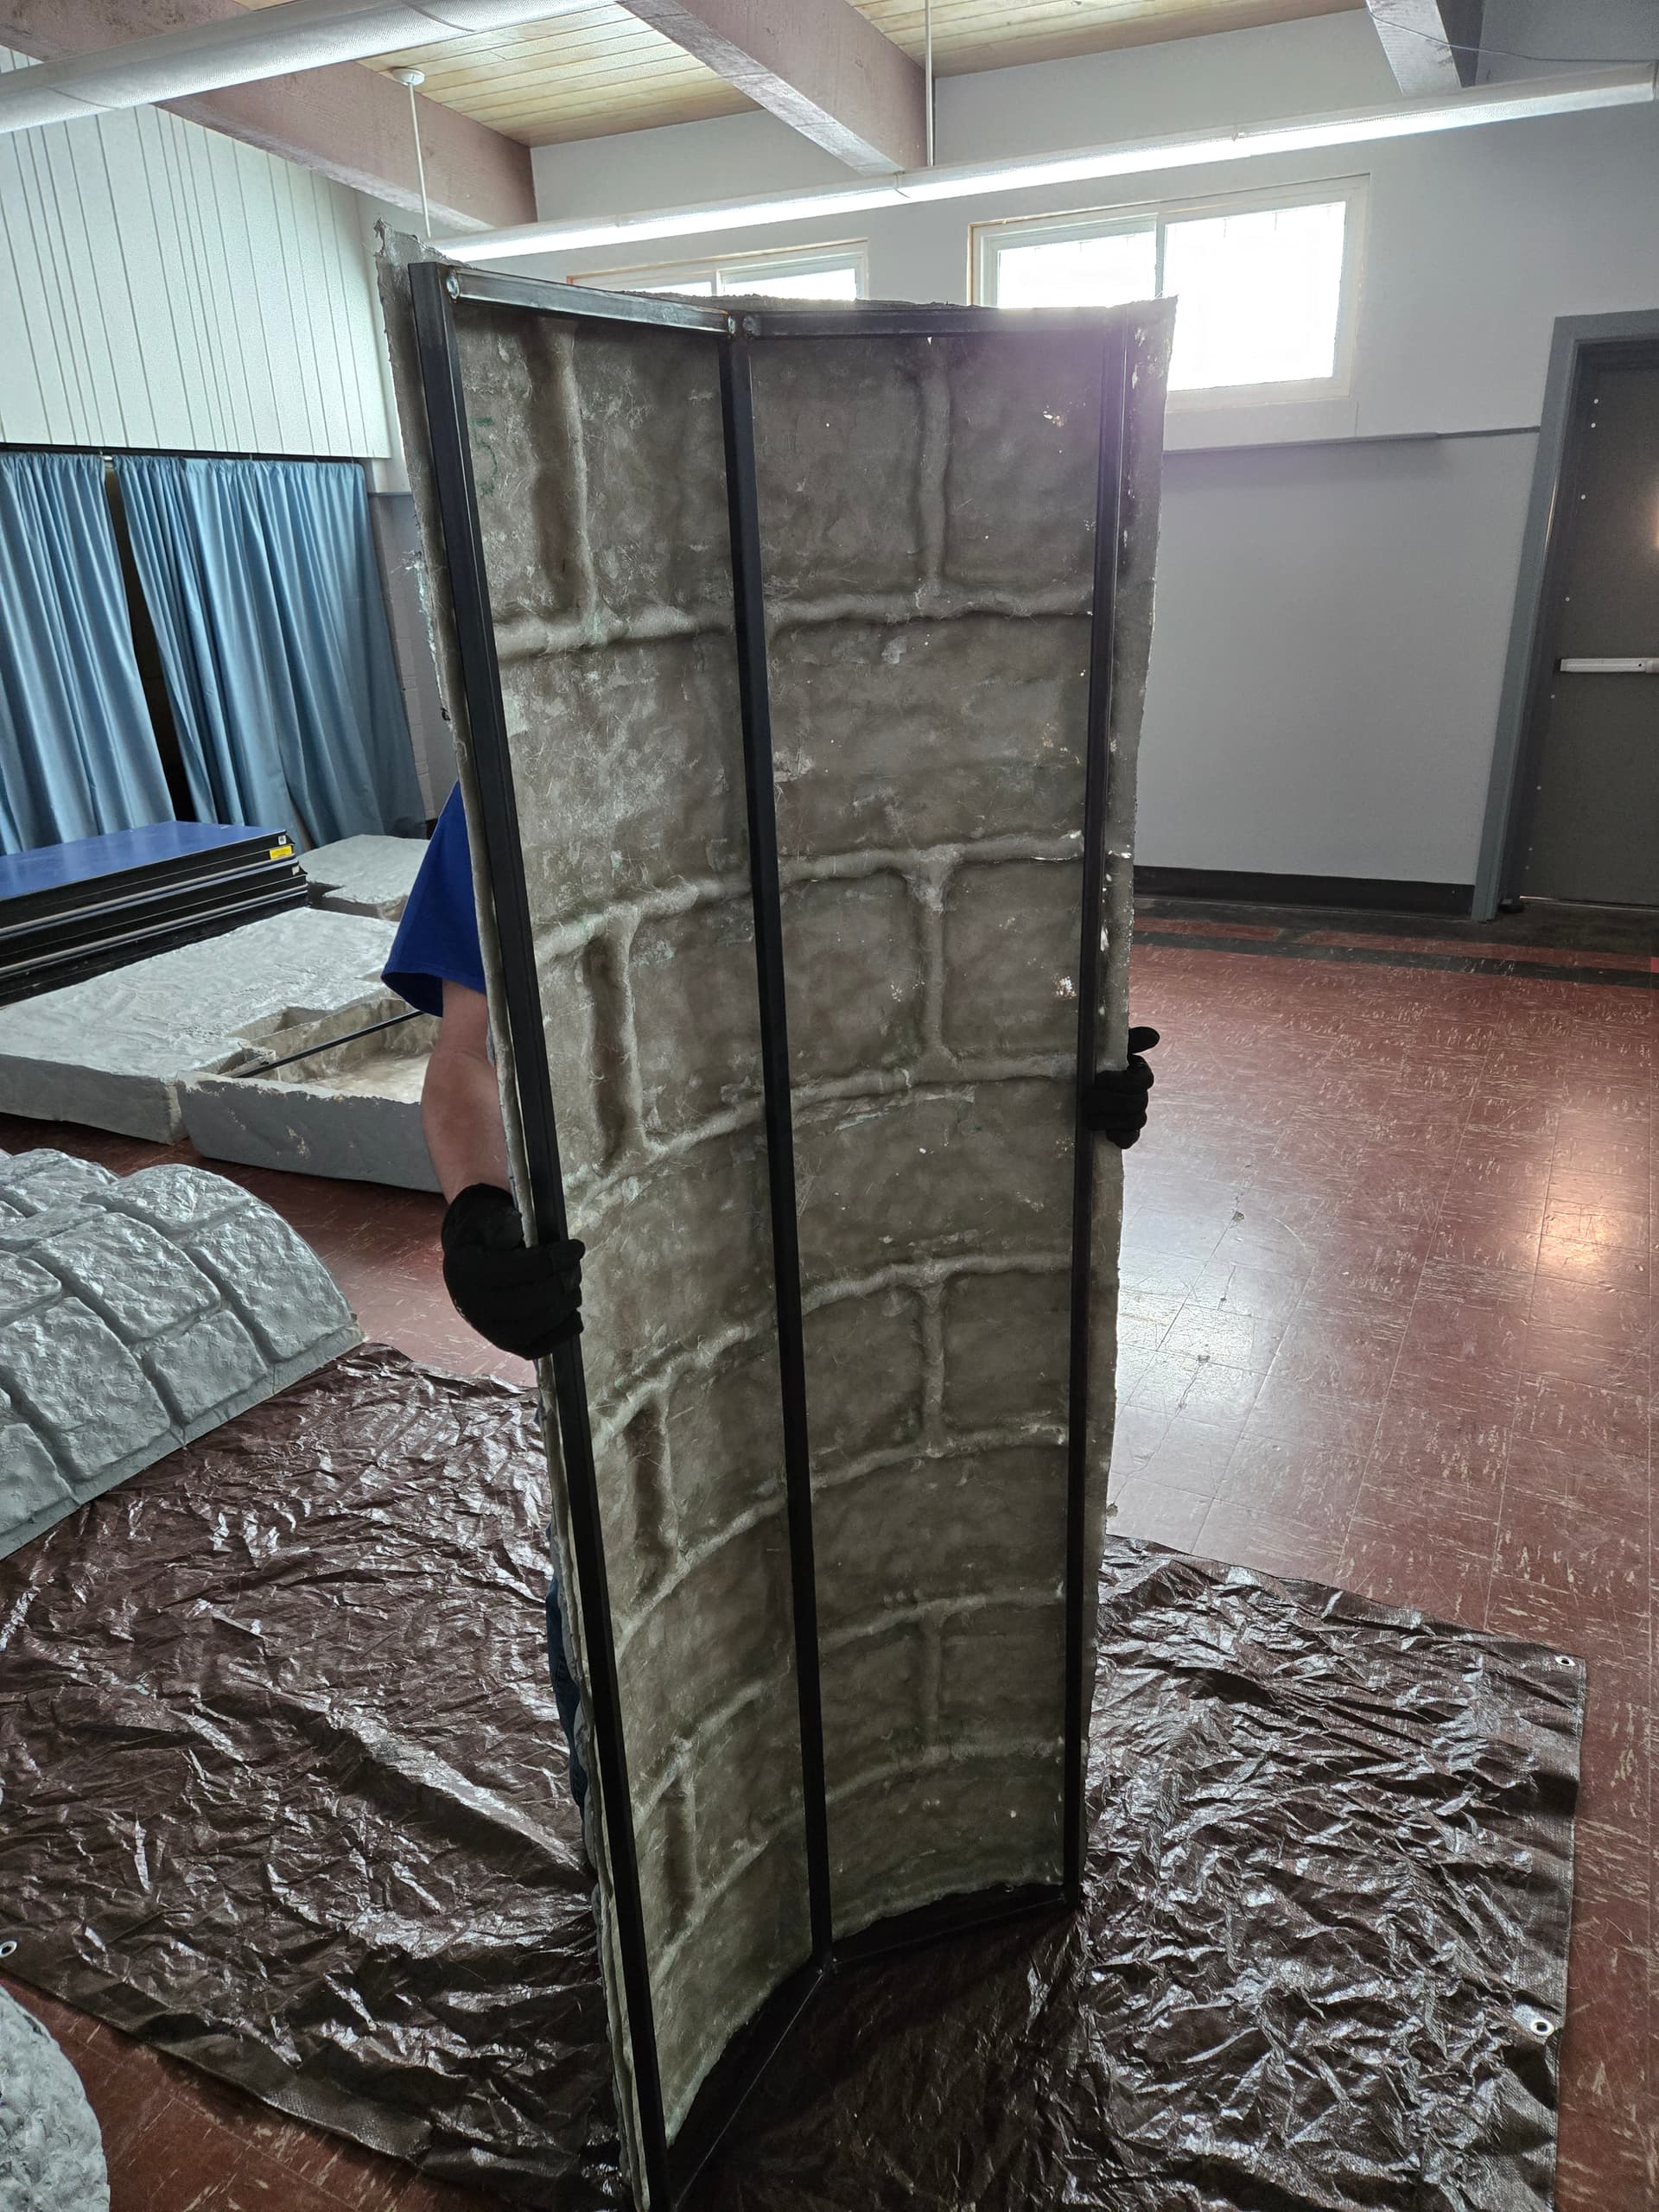
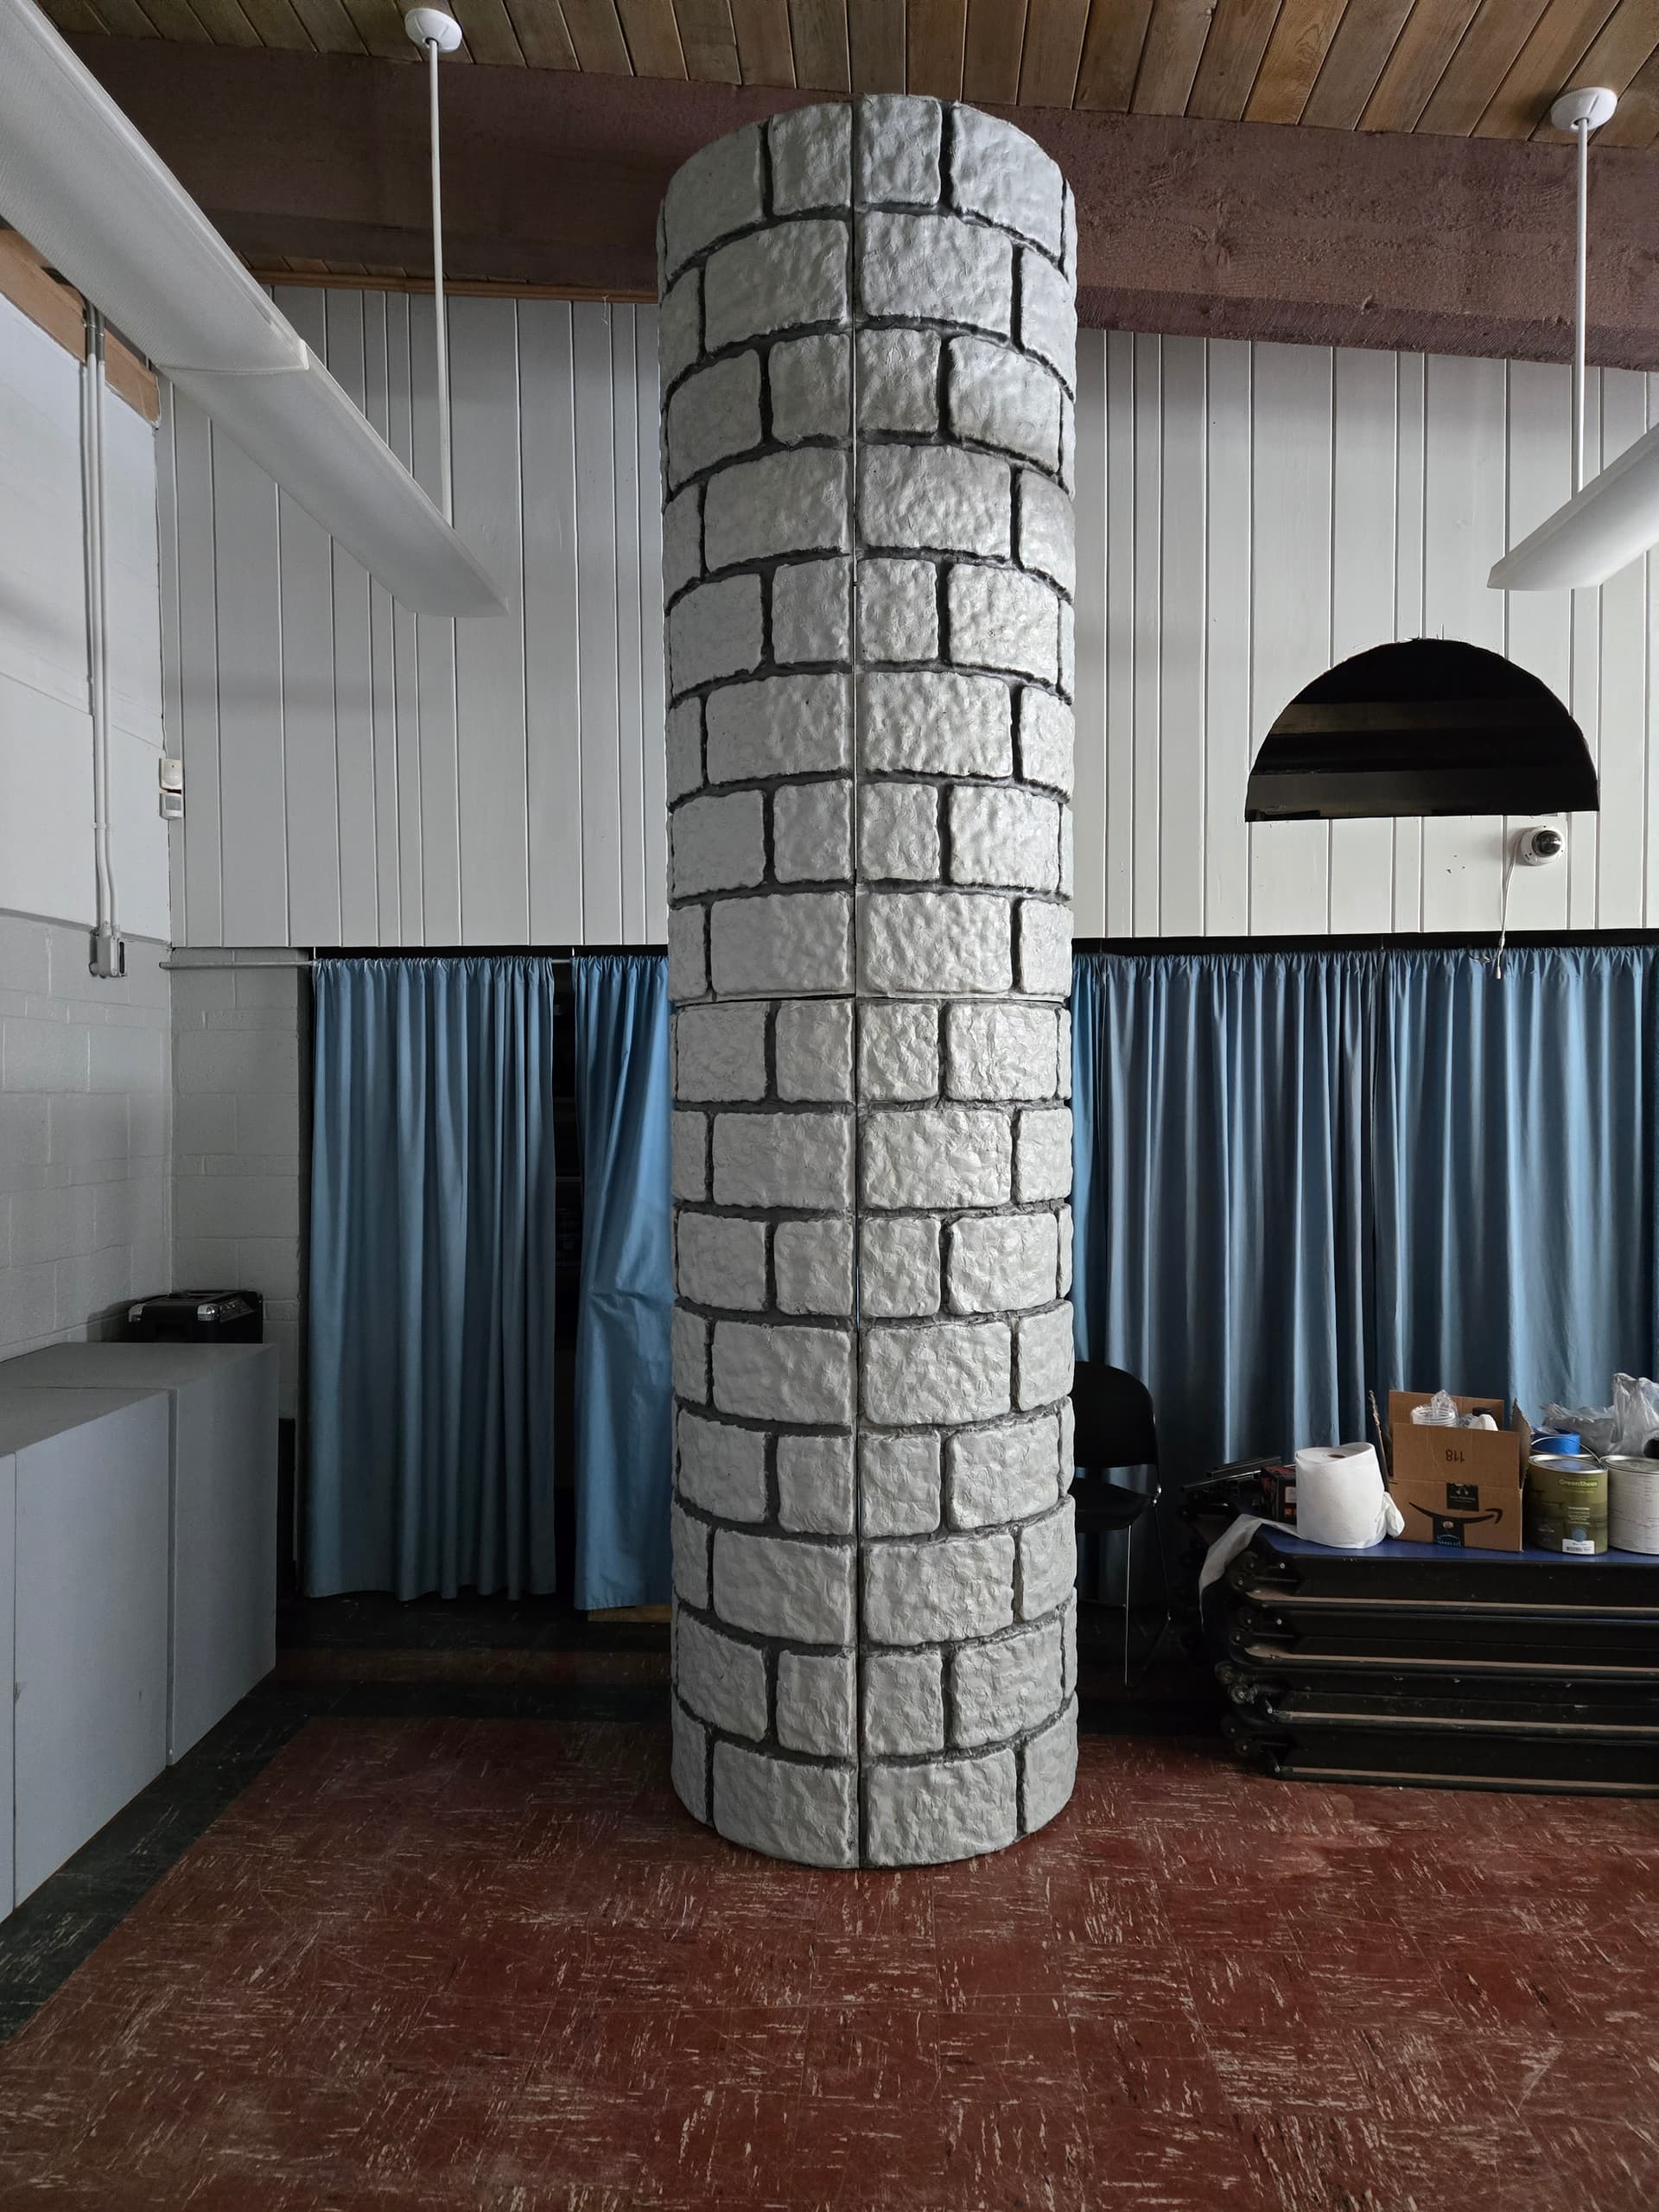
Yes, that vertical panel is about 8ft tall and a reversible mold. I still need to clean the sharp edges off those panels, but i’m hoping the layup process will be similar to the curved panels, just slightly taller.
I’ve posted an event on the calendar for Friday at 6pm but don’t let the time of the event keep you from peeling the tinfoil. (I was thinking about getting some CheeZies pizza as a thank you for anyone that helps, though i can’t say i’ve tried them before)
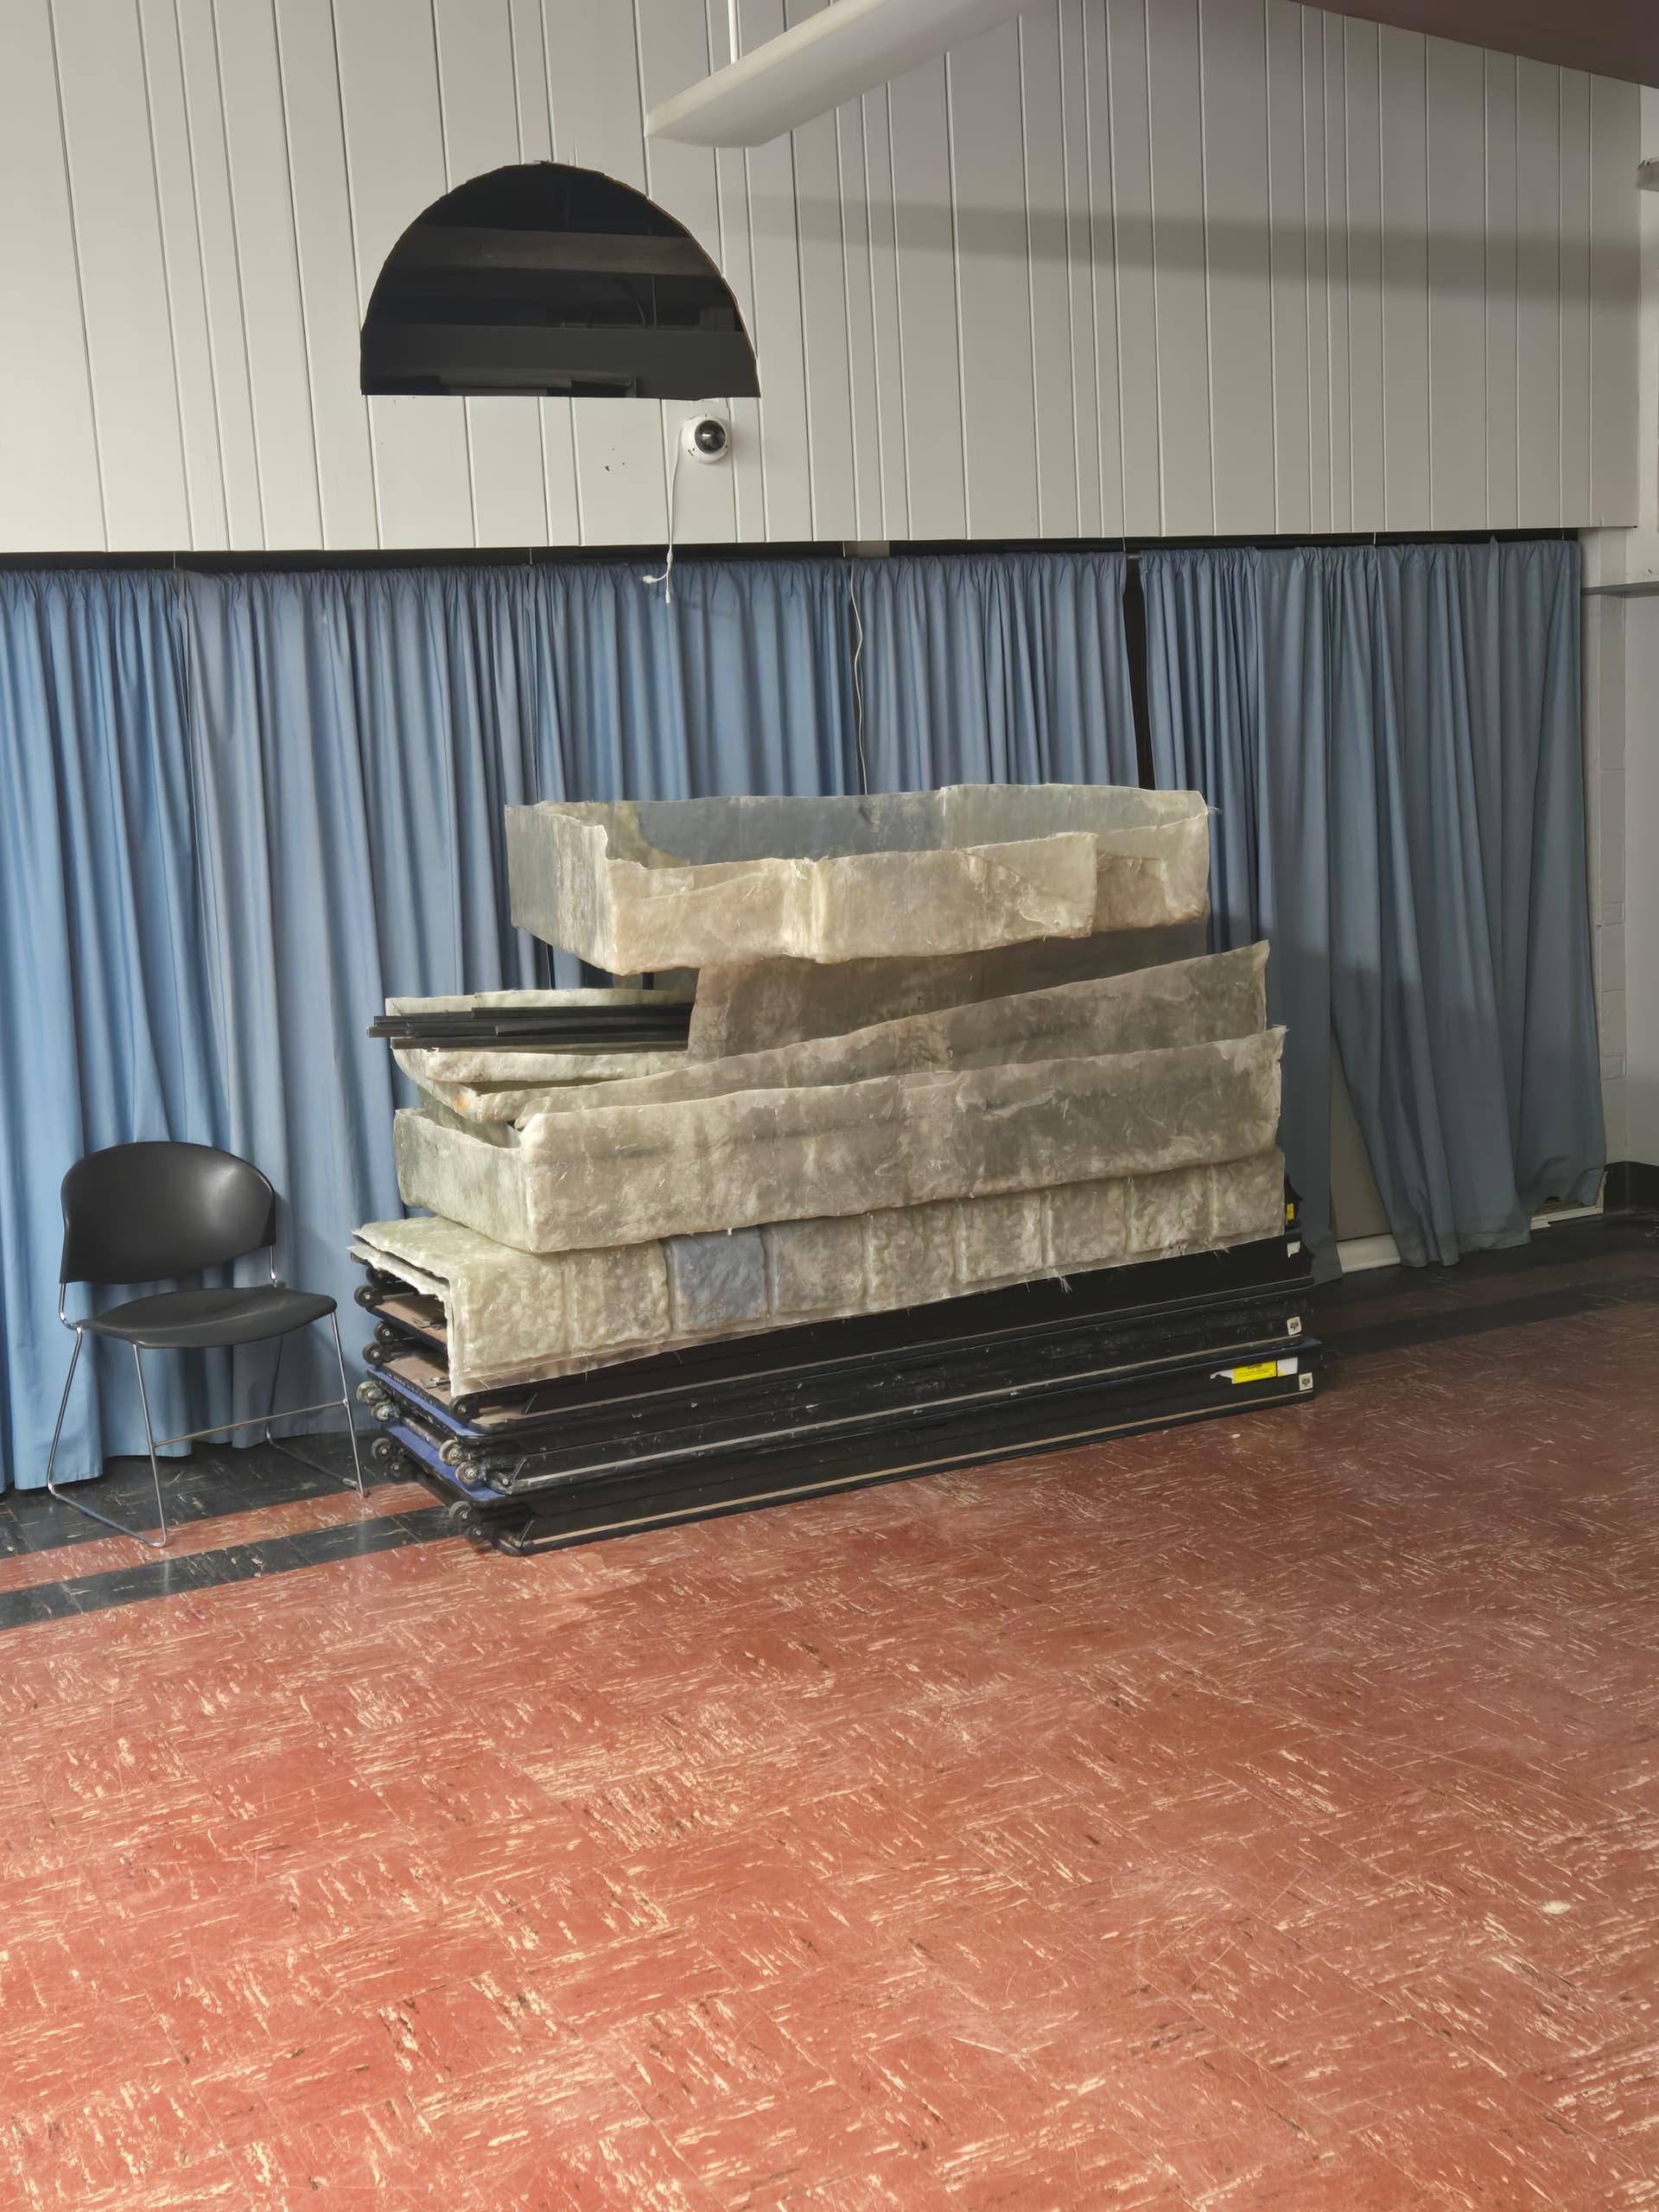
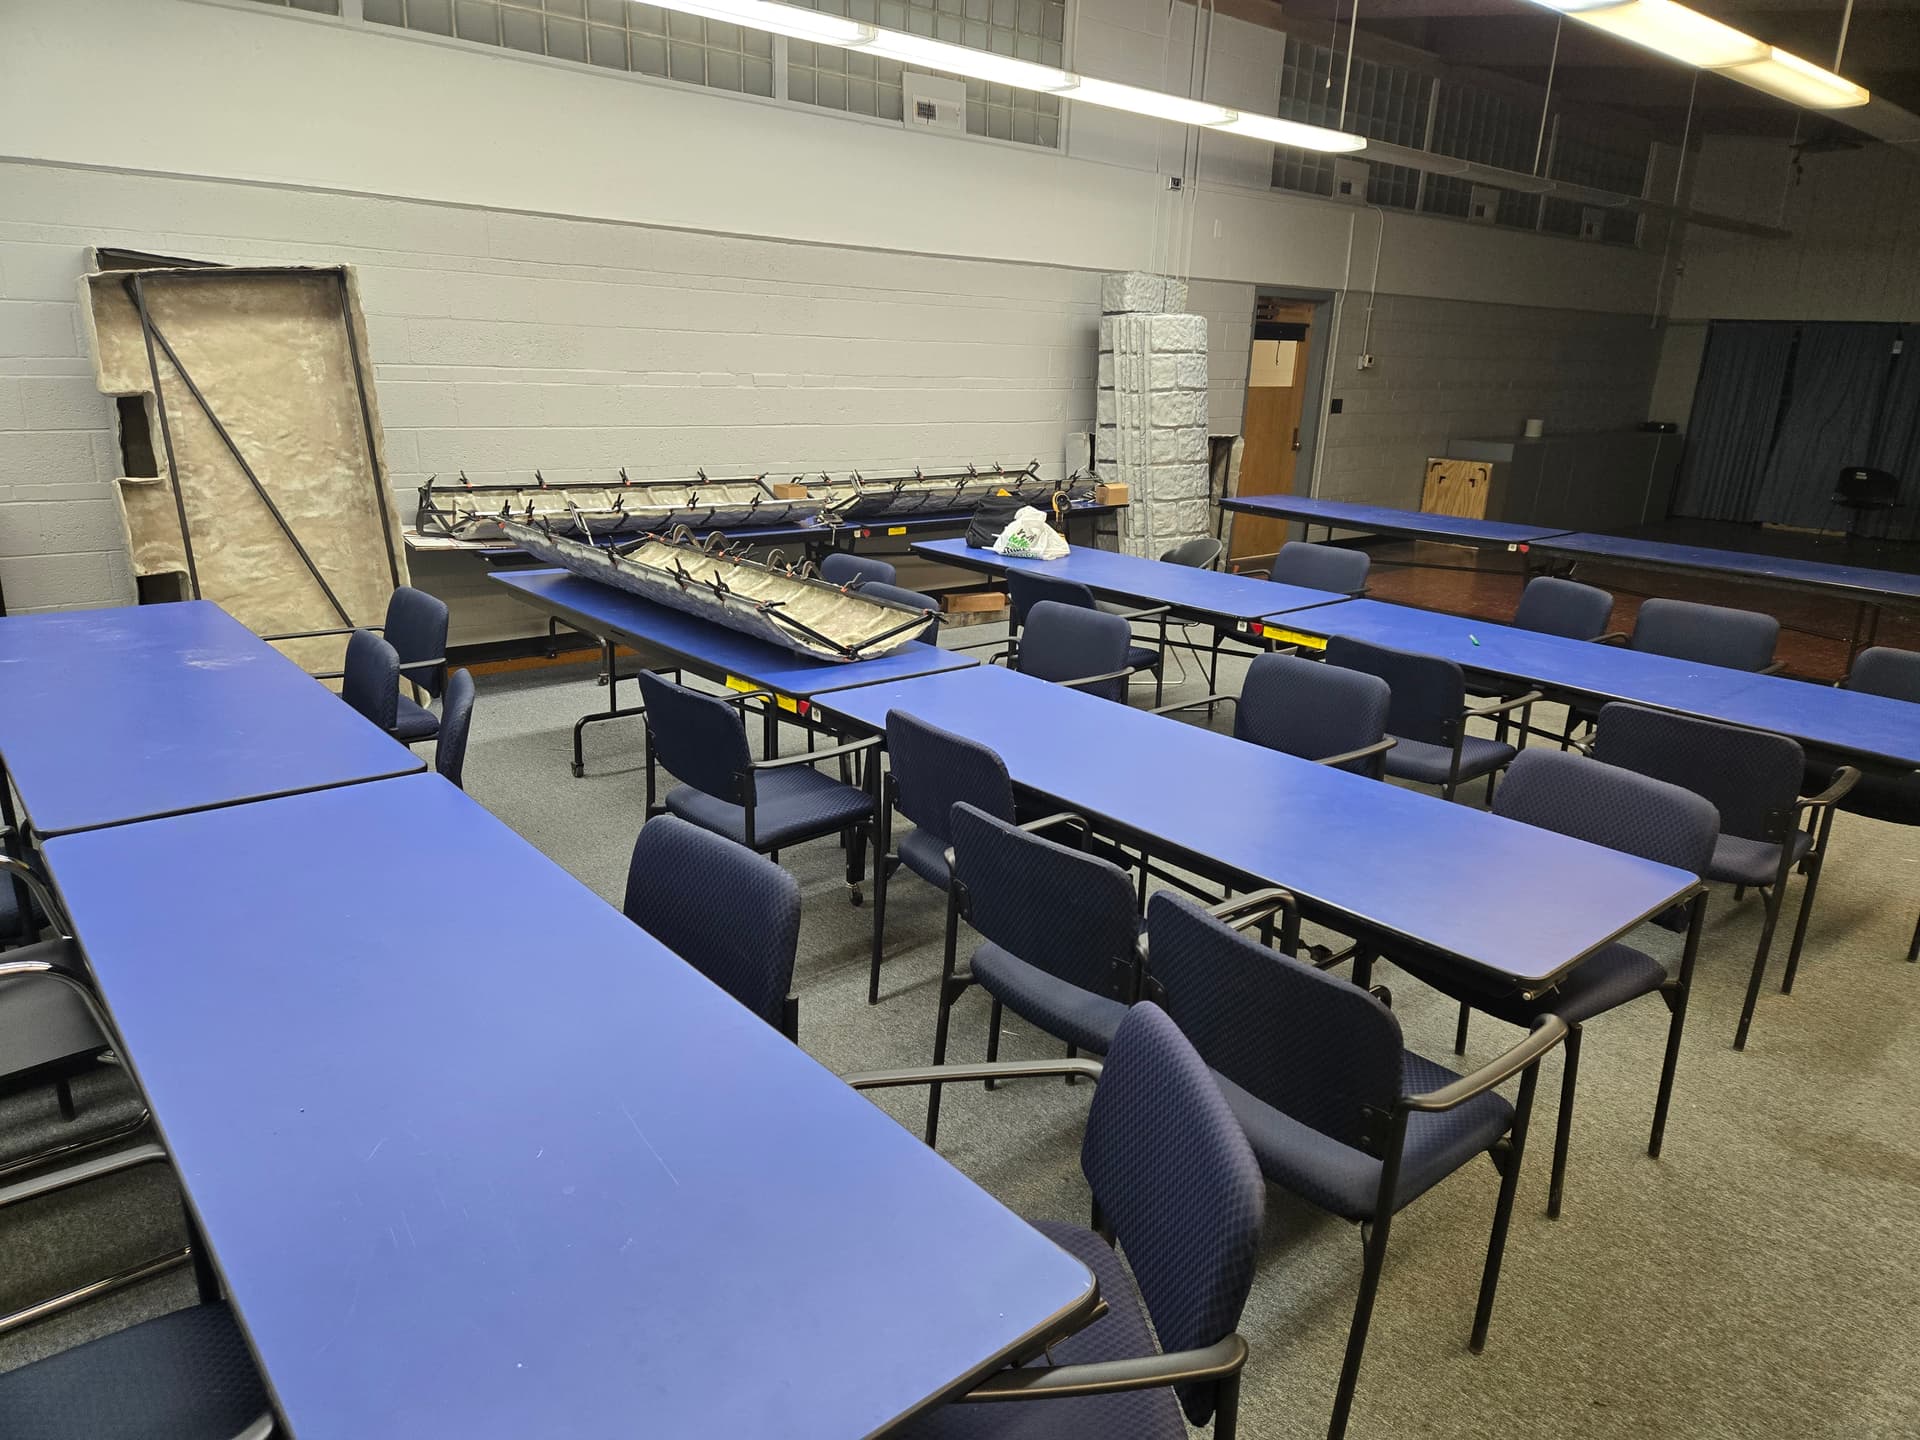
I’ve scheduled it for room 4, and i don’t mind being on cleanup duty for this one.
I should be there!
I should be there as well, although I will be a bit late, I am planning to cast a piece in the jewelry lab around 6 but I will head over after the casting is done.
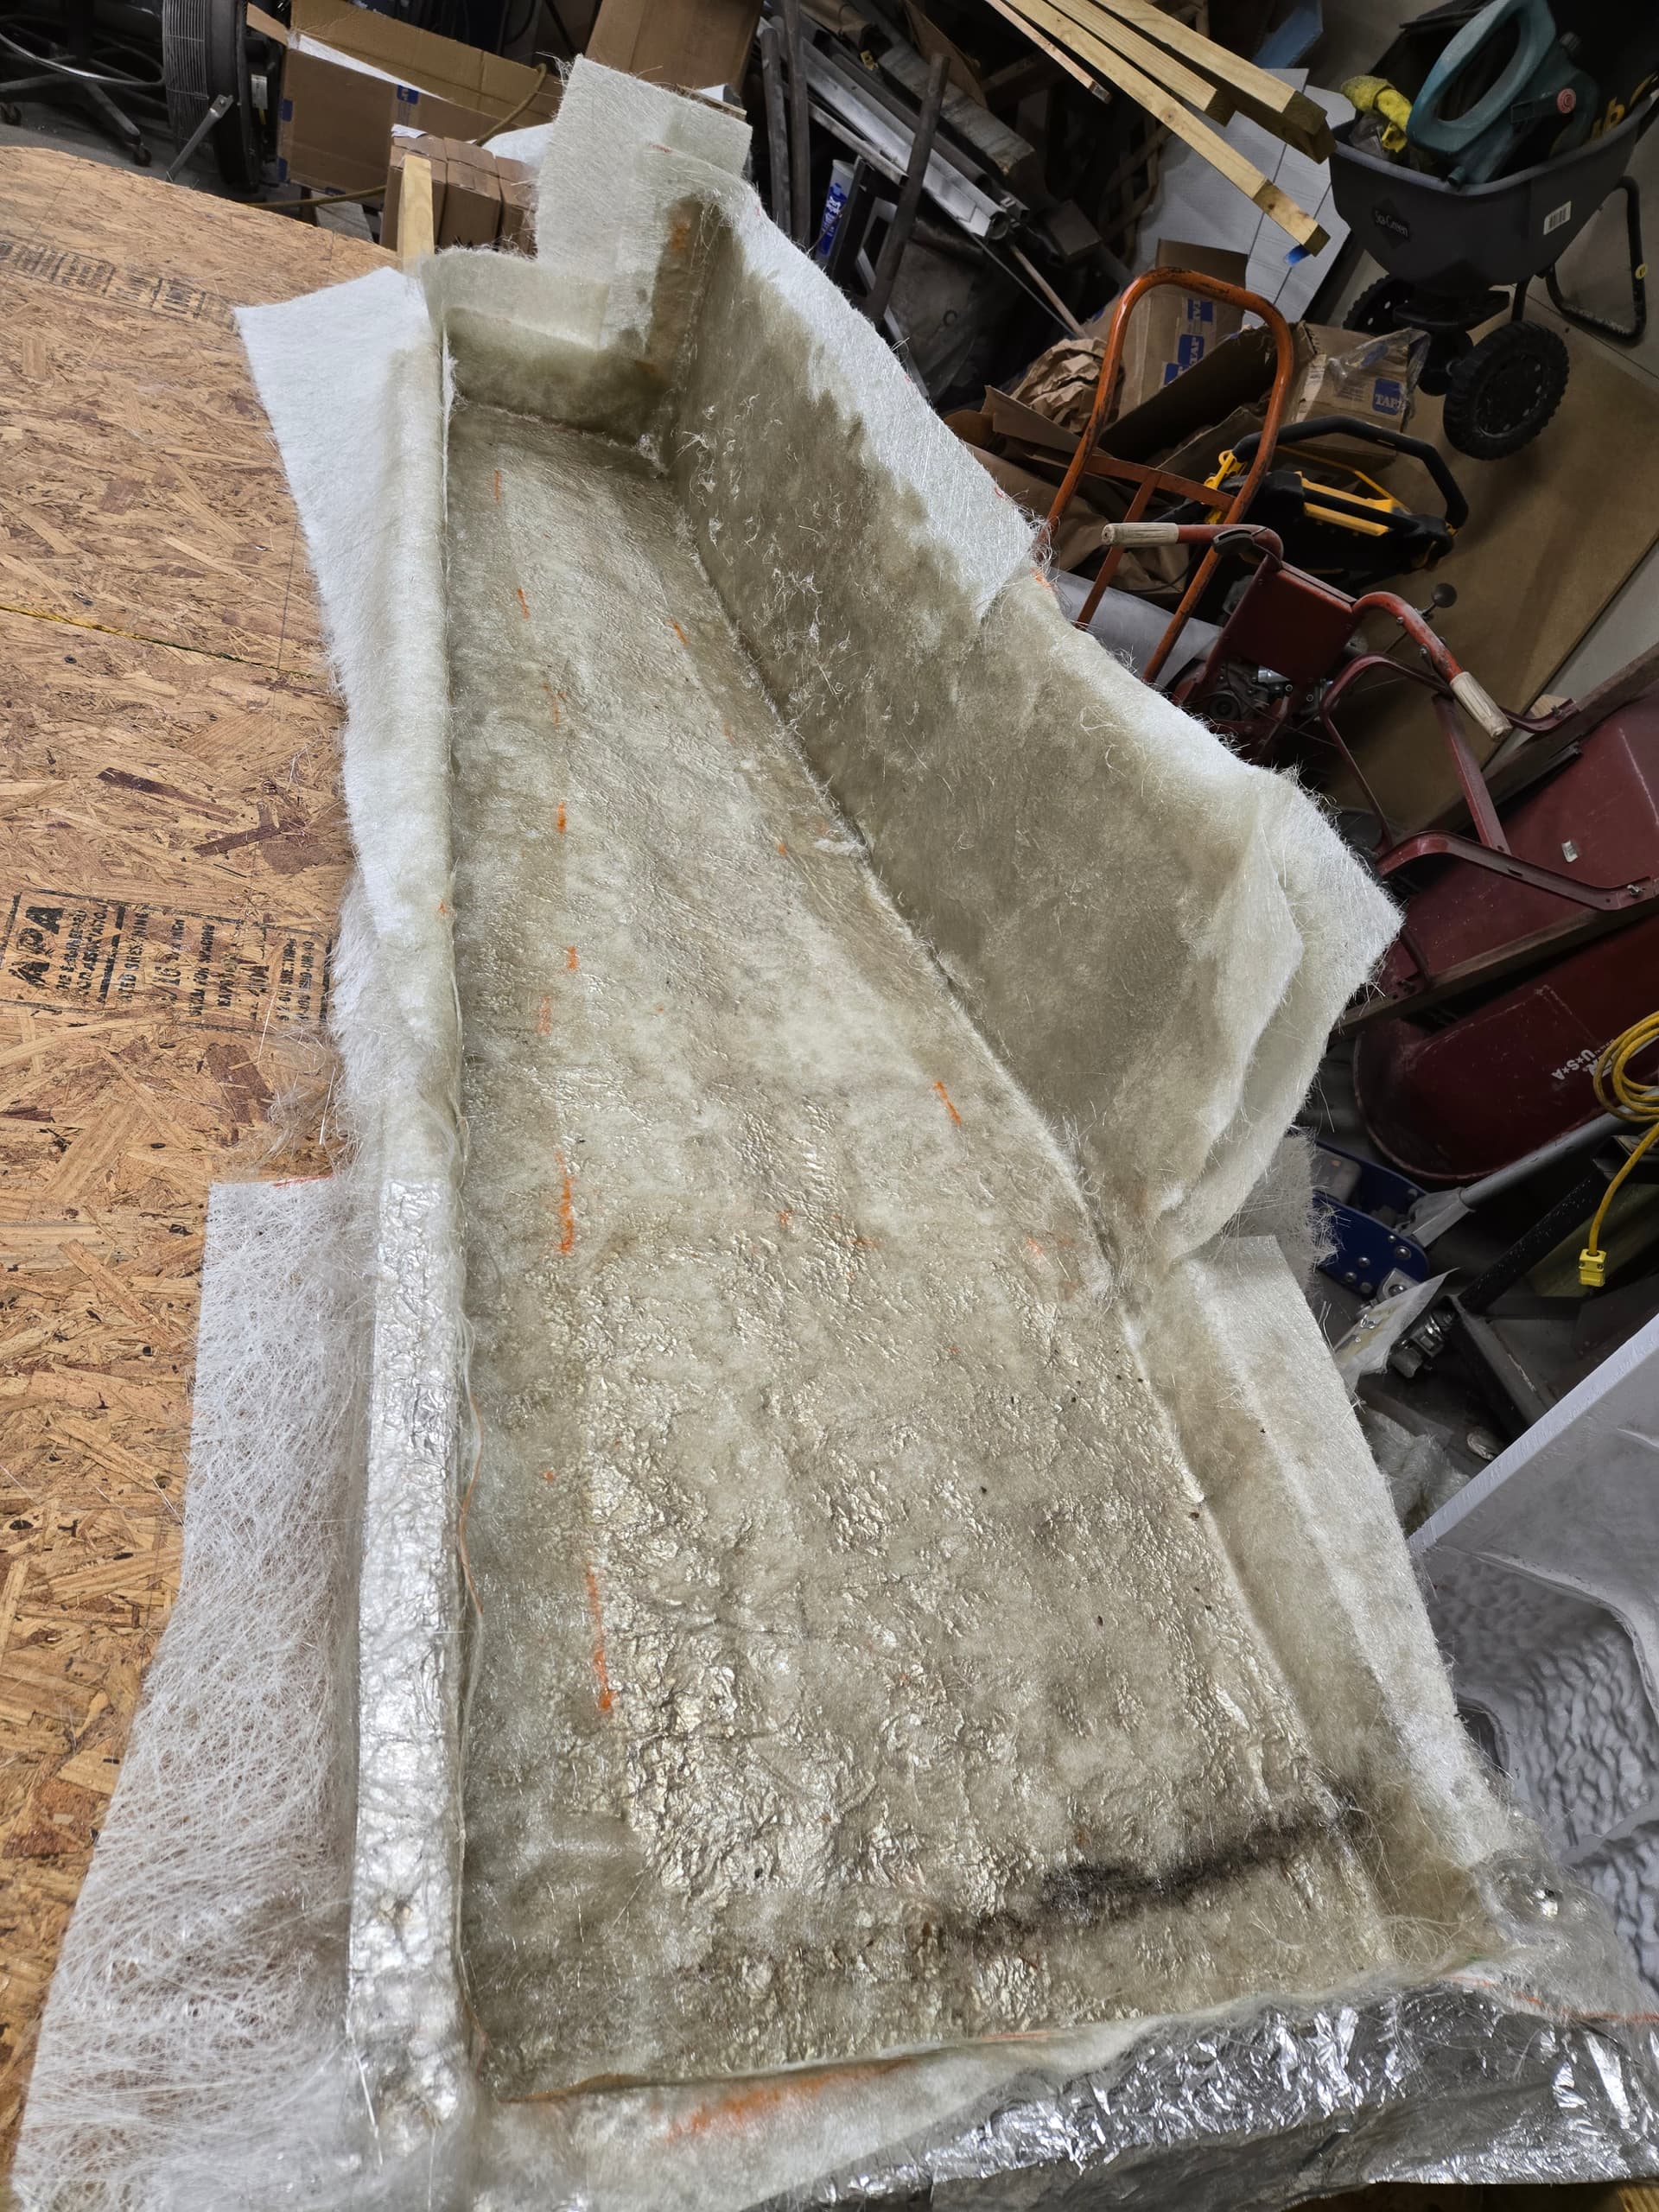
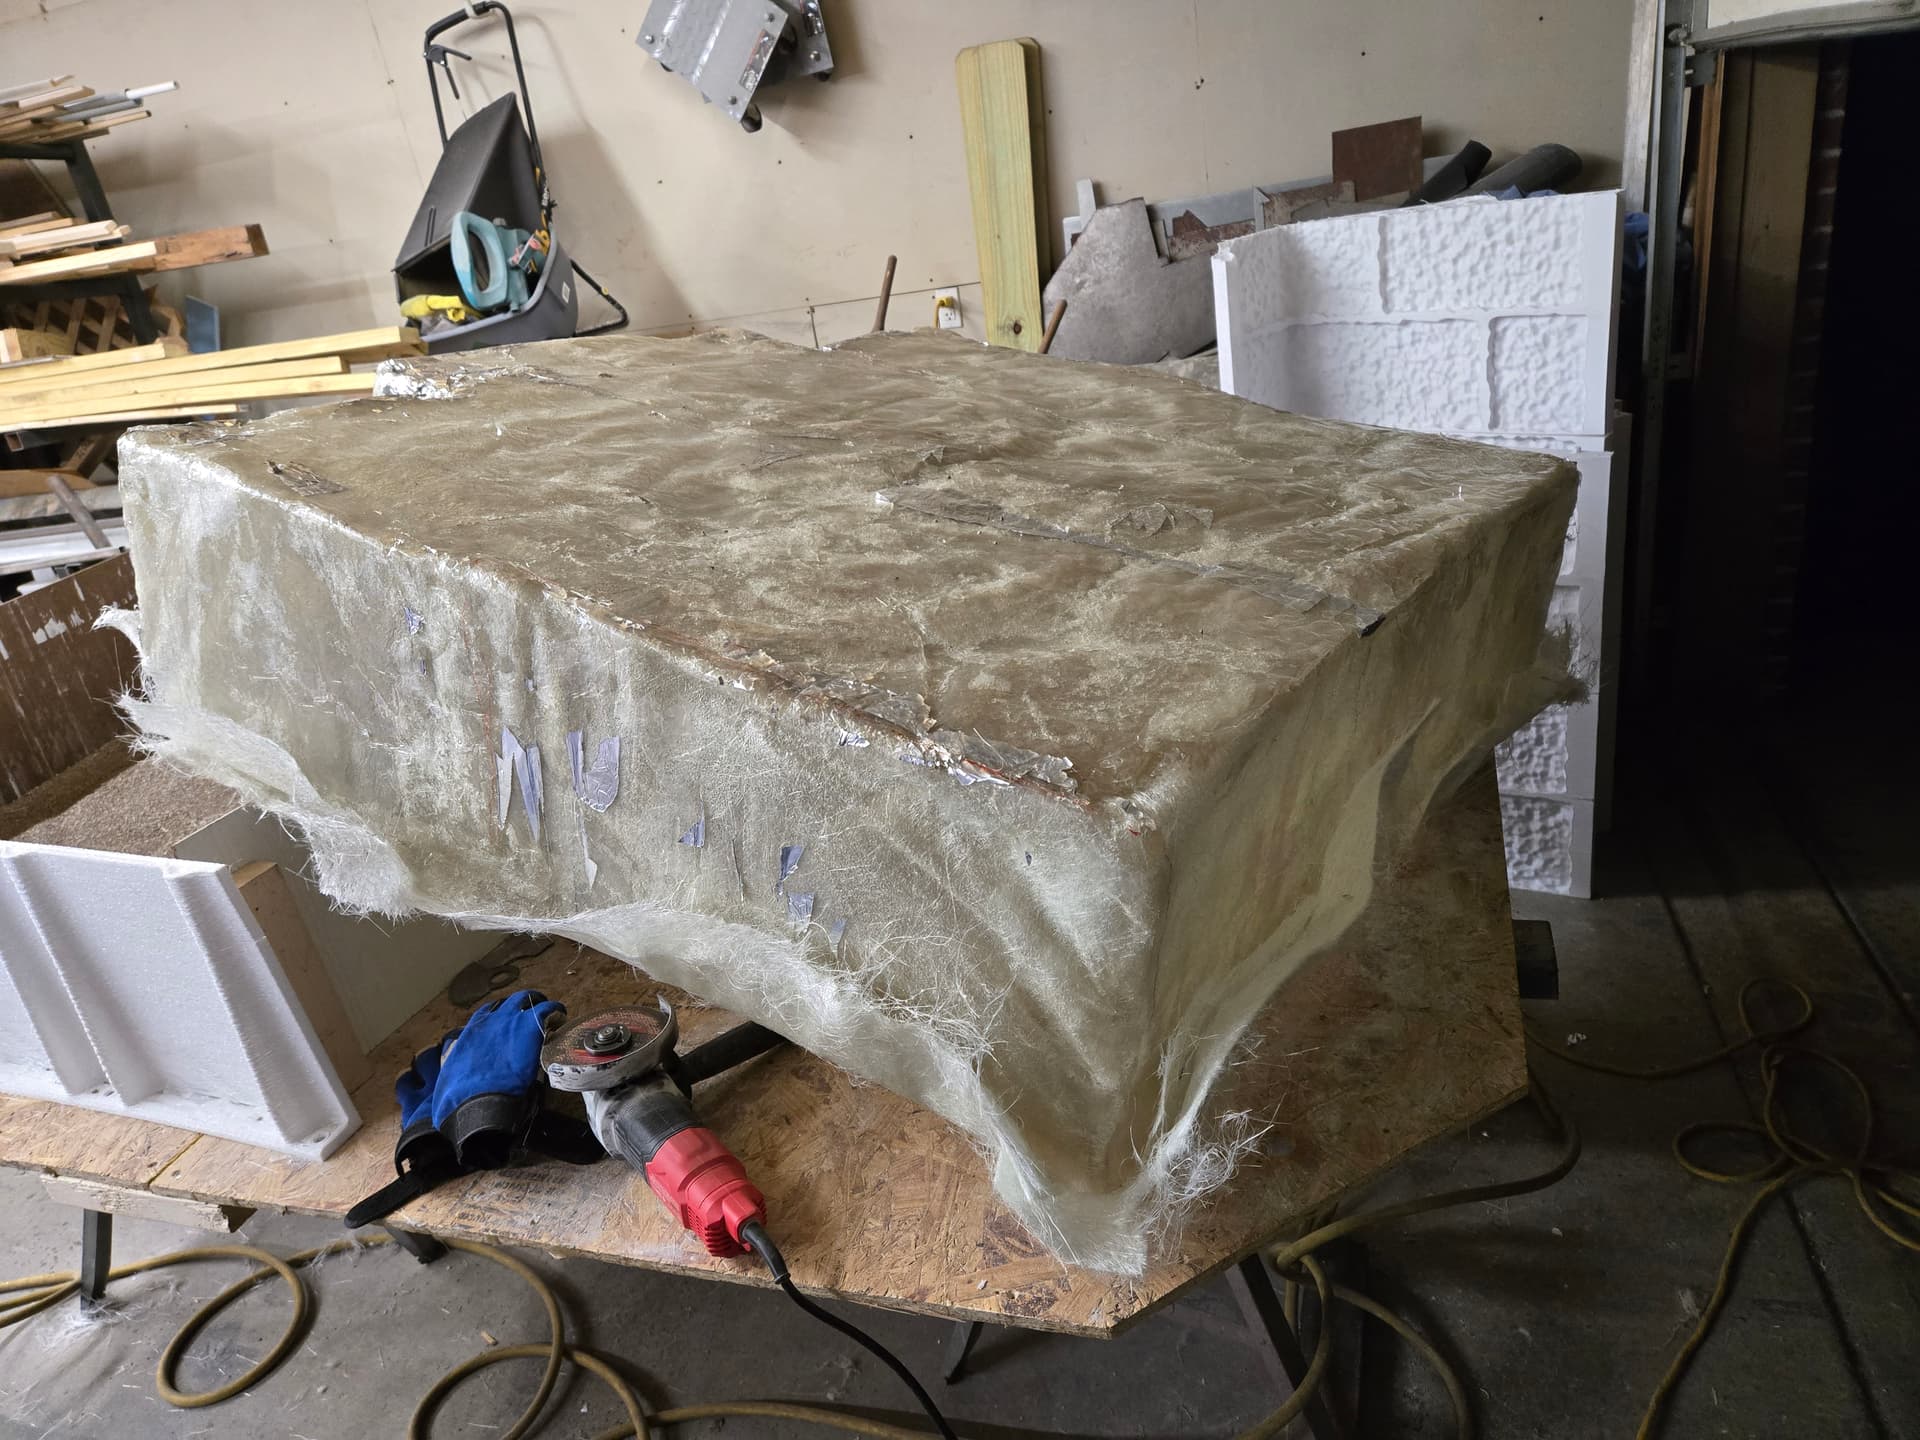
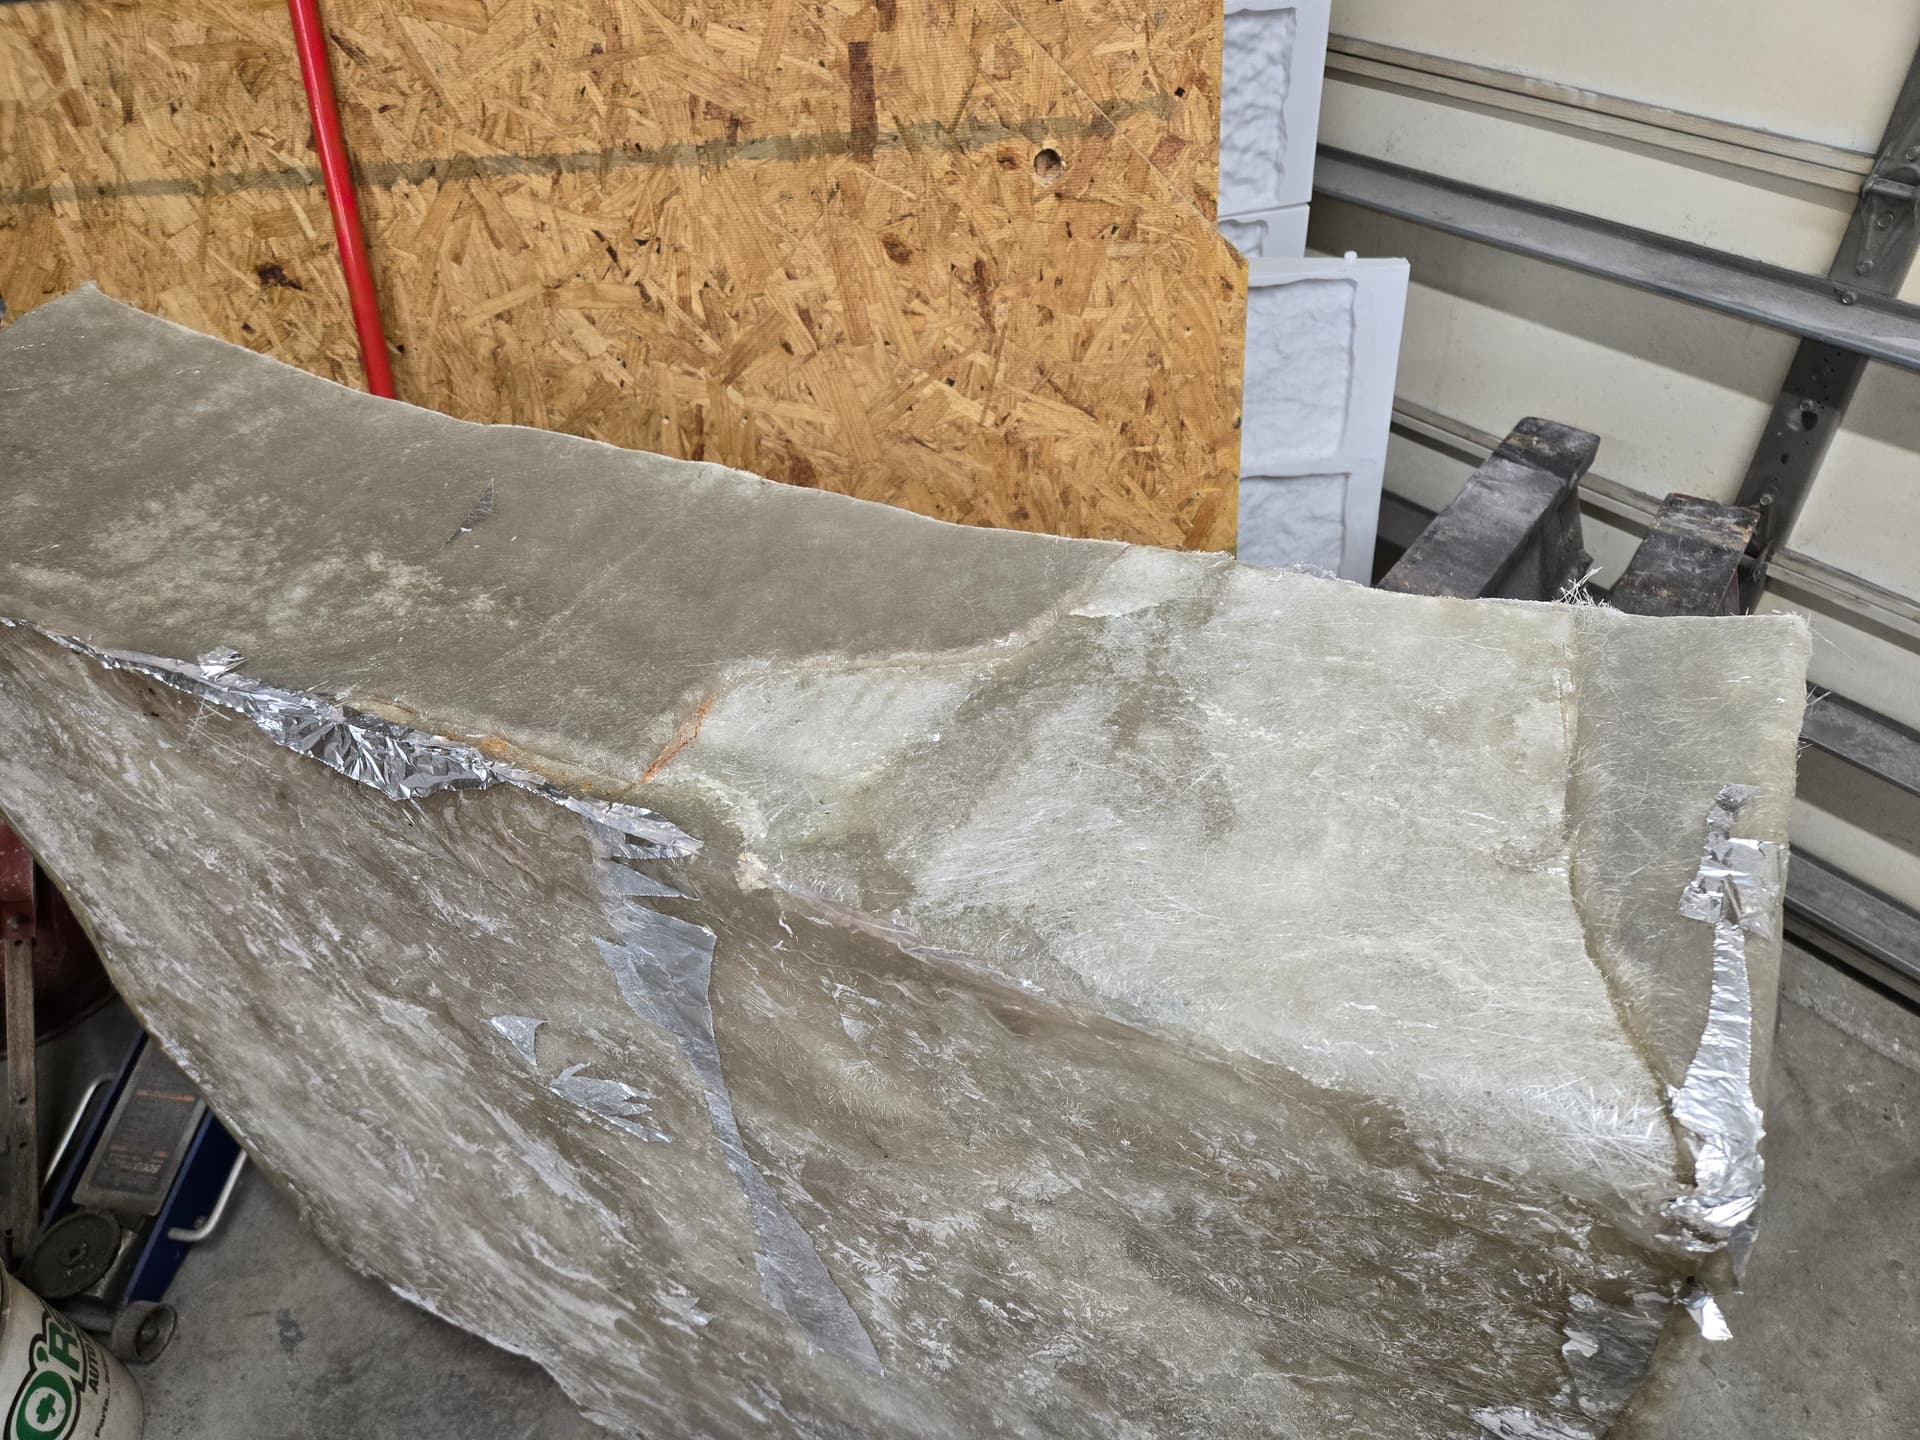
Thabk you Cooper, and everyone else that helped out. I wasn’t expecting to get as far as we did tonight, nor was i expecting so many people to ‘chip in’ at the work. I also greatly appreciated hearing the different ideas to remove some of the more stubborn tinfoil and seeing them attempted (even chatgpt struggled at a solution for this one, heating up the tinfoil helped but you had to pick at each piece you heated)
I was a bit surprised and excited to see some faces i hadn’t seen around the space for a while as well as some new faces that were curious about the process and why we did things a certain way on such a large project.
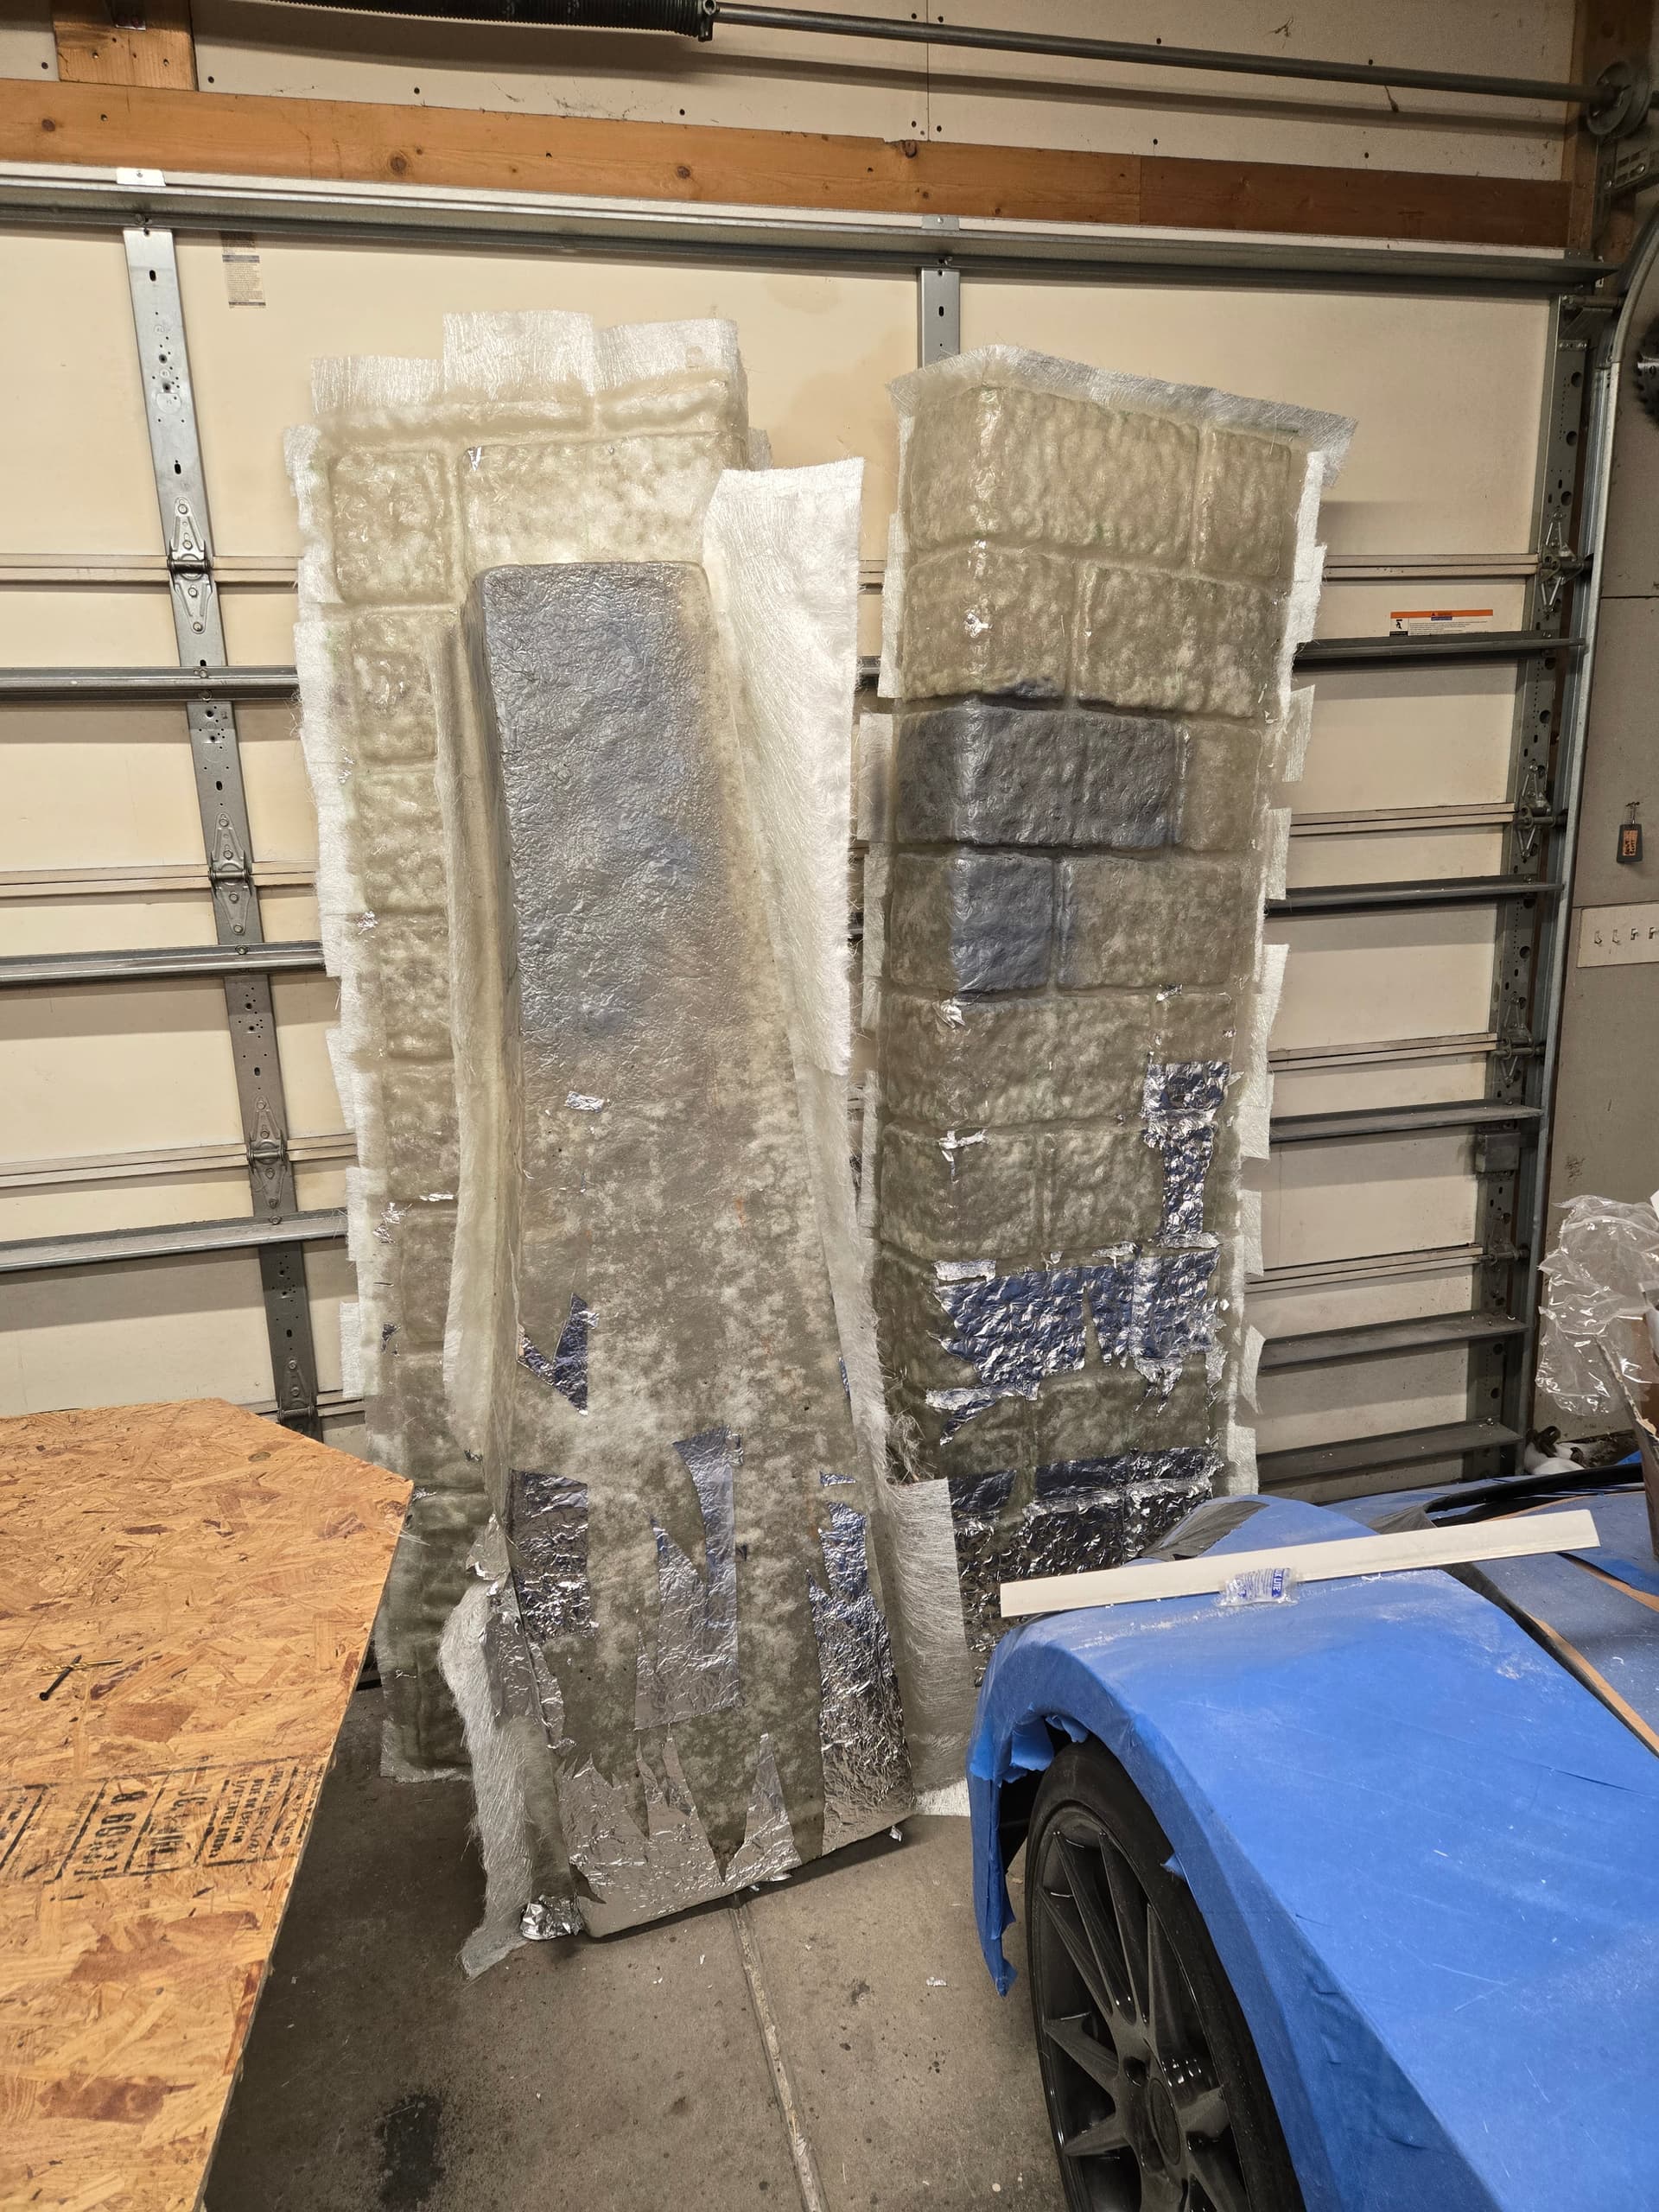
There’s still a little bit of cleanup left on a couple panels, but this is definitely helping more confident and energized to tackle.
Again, thank you to everyone that helped tonight!

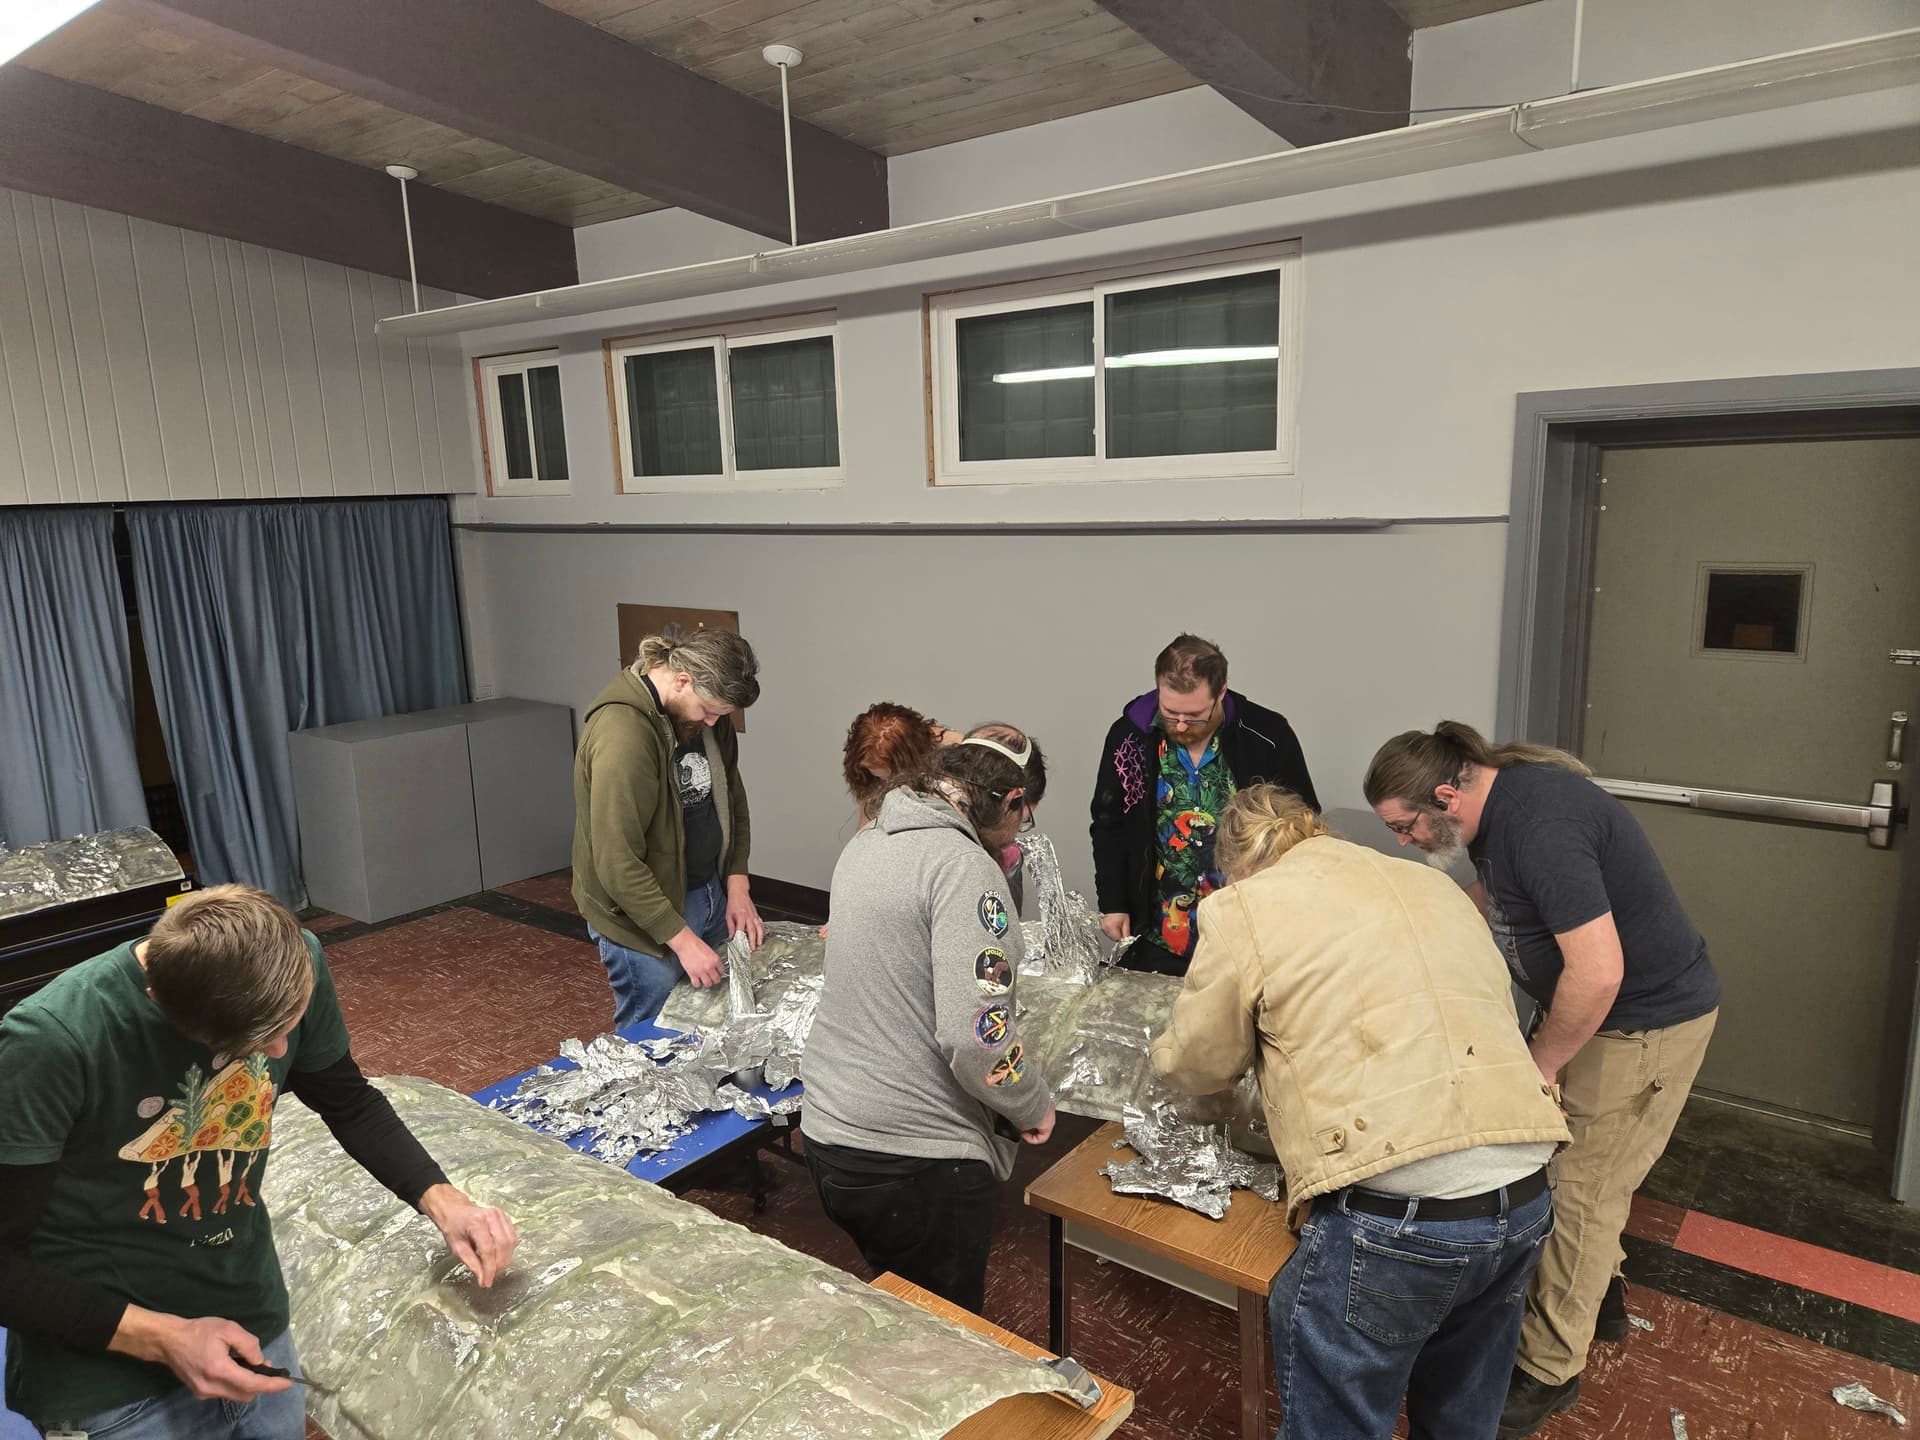
We did end up filling a trash bag with all the tin foil that was picked off. We missed an opportunity to make a giant tinfoil ball, but there may have been a snowball fight or two.
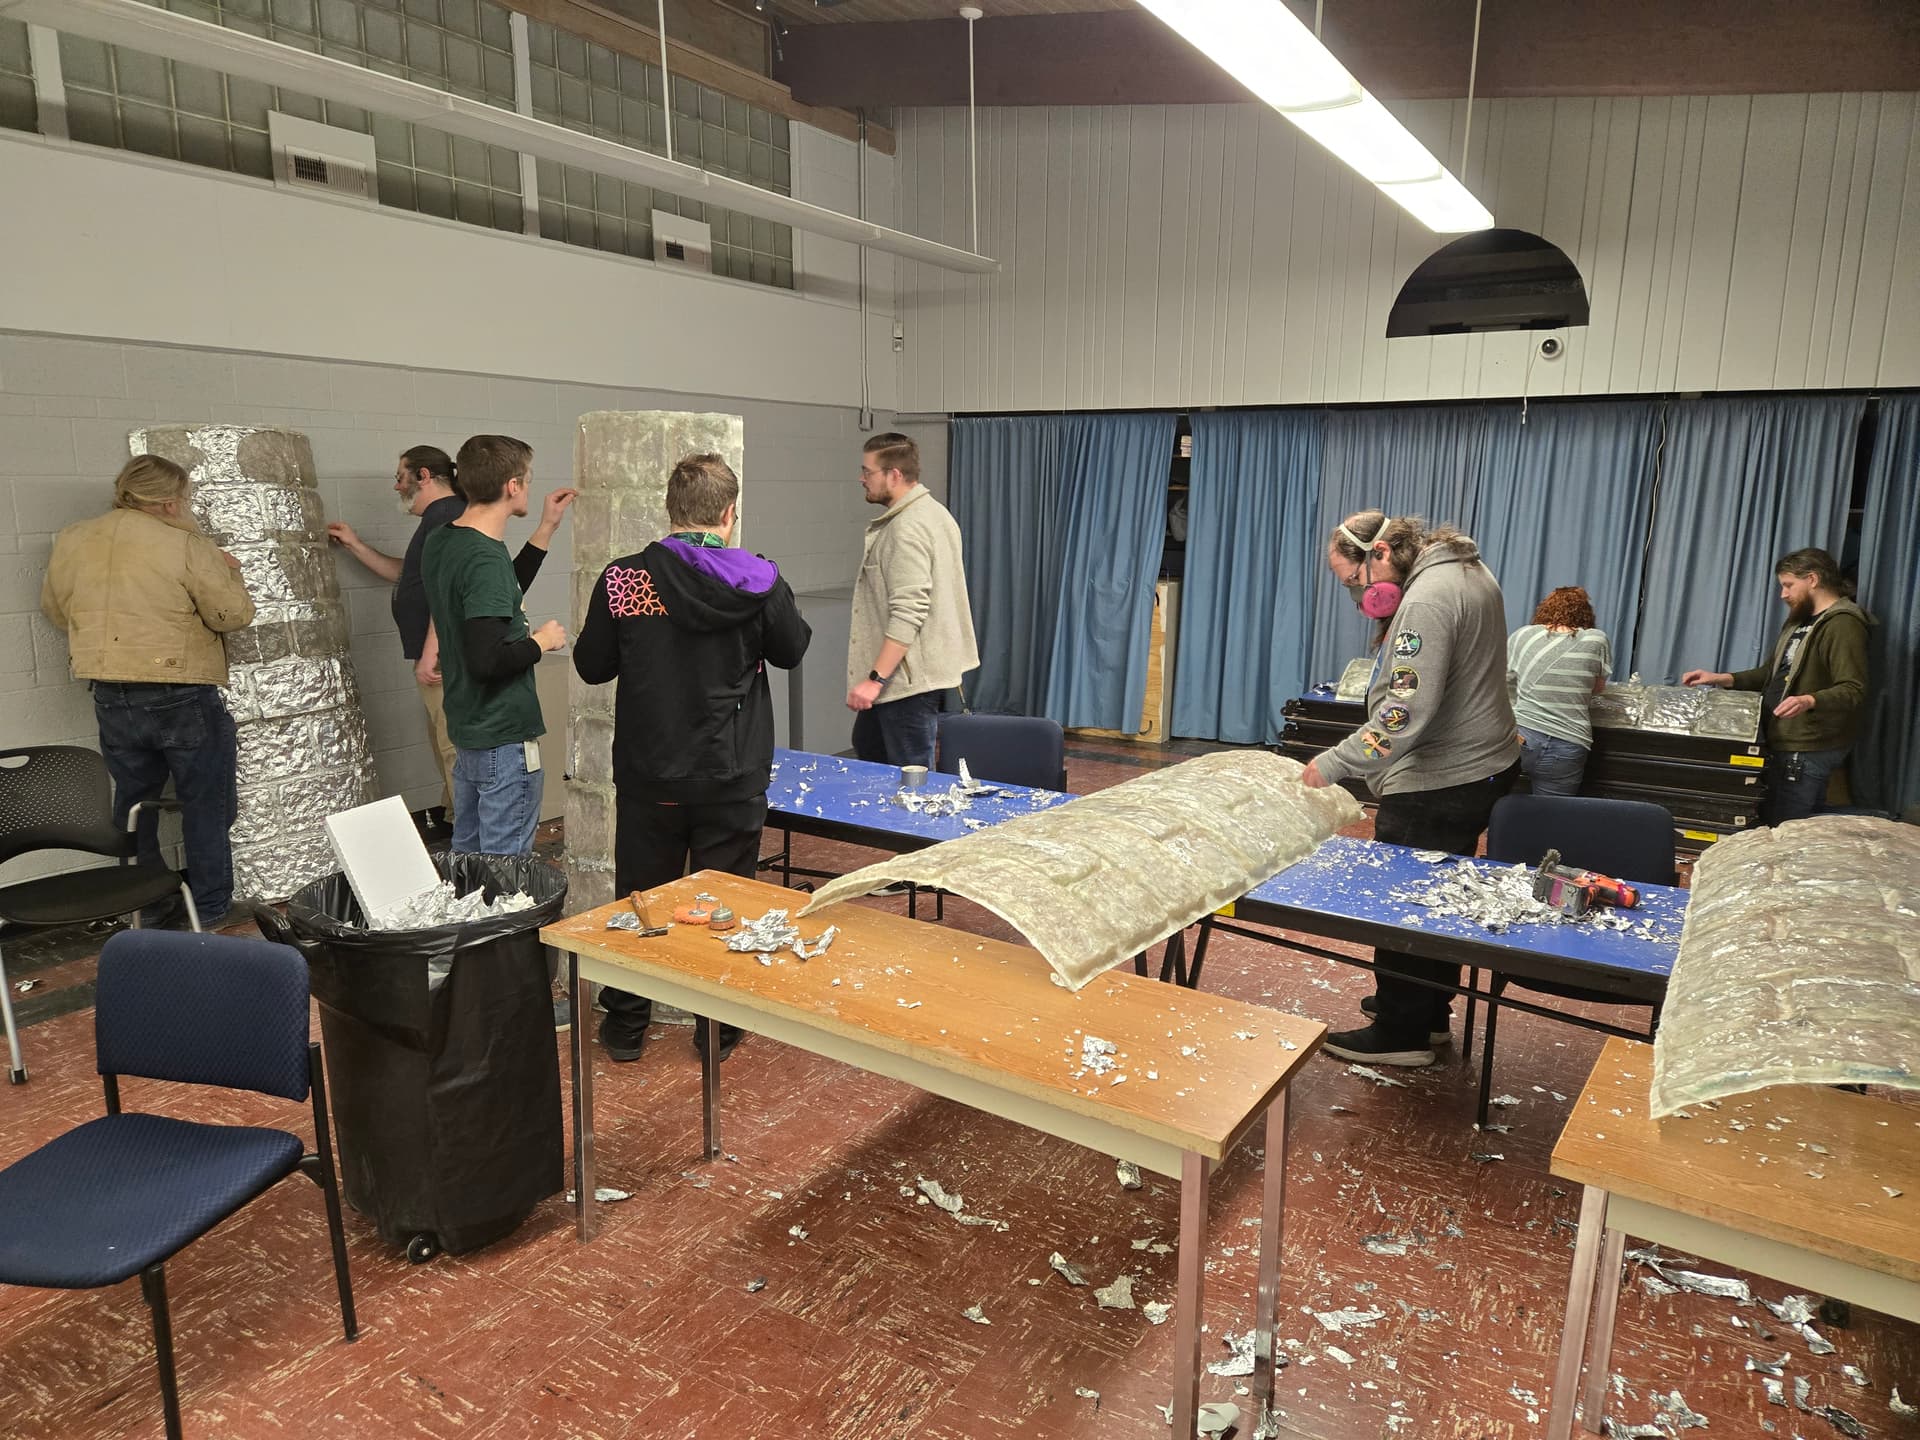
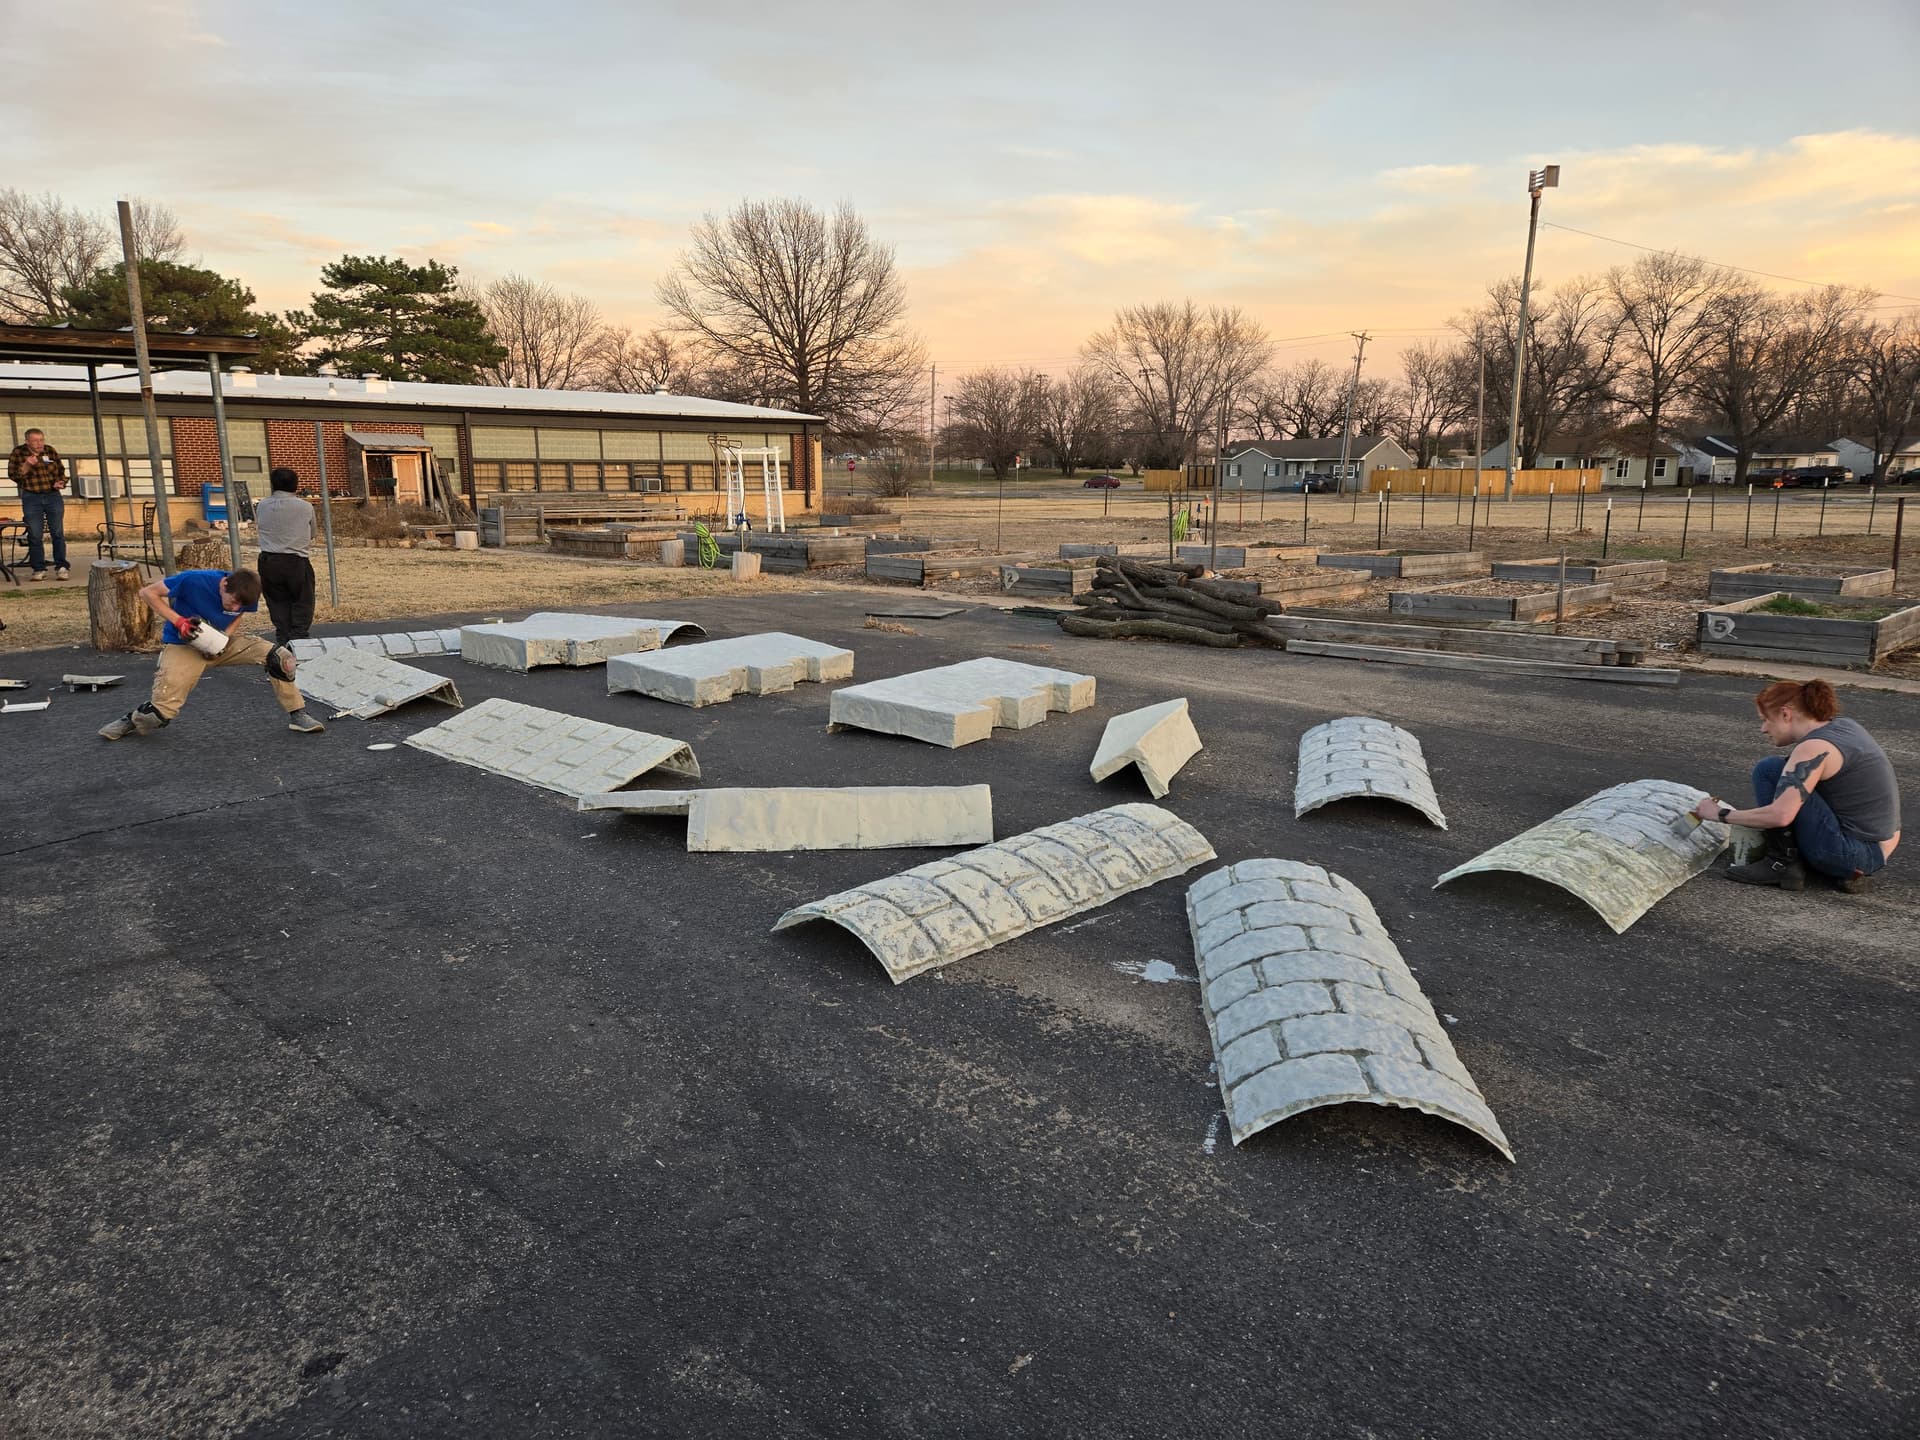
We’re stilling making progress on the castle, slowely but surely. 3 of the 7 center pieces are laid up and the tinfoil has been coming off a lot more easily with the use of the dump gun.
I’ve got the mold prepped to do another arched piece hopefully on Friday, and then hopefully i can get 2 of the top pieces done over the weekend (slightly hopeful to get all 3, but i have a lot going on in the next 6 days…
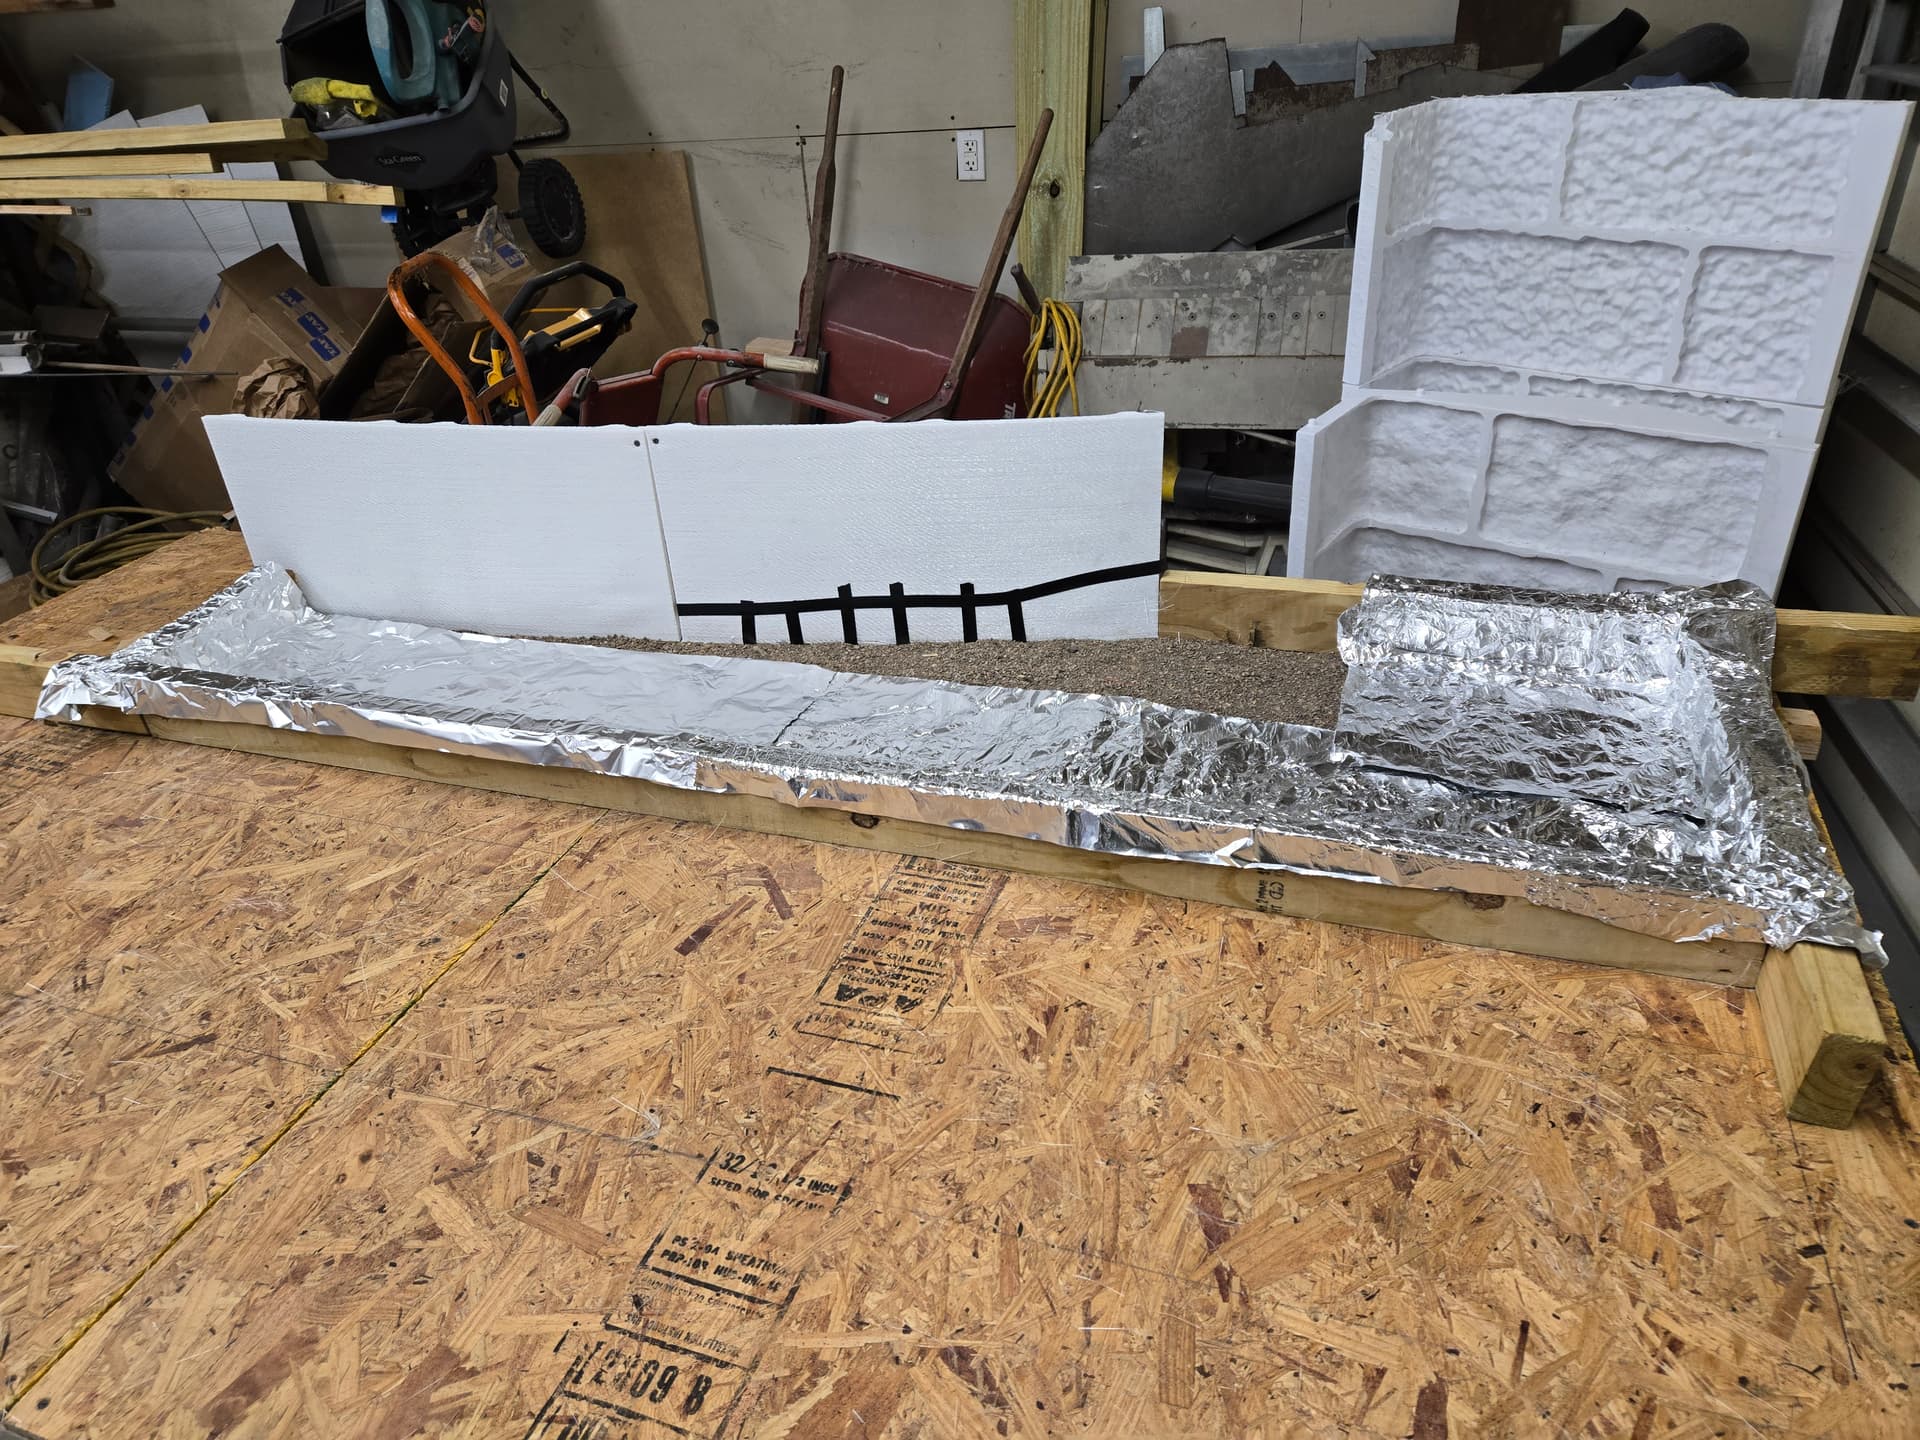
The rest of the molds probably won’t be fully 3d printed, so i tested out using some ‘sand’ to get a more stone like appearance without printing off massive pieces for them. I was concerned about the big piece looking like leather so i went ahead and gave it a quick shot of krylon paint… and i think its gonna work, though i am tempted to experiment with the dump gun now and see what happens to the resin if we mix some acrylic paint in as a tint instead of buying a bunch of gelcoat.
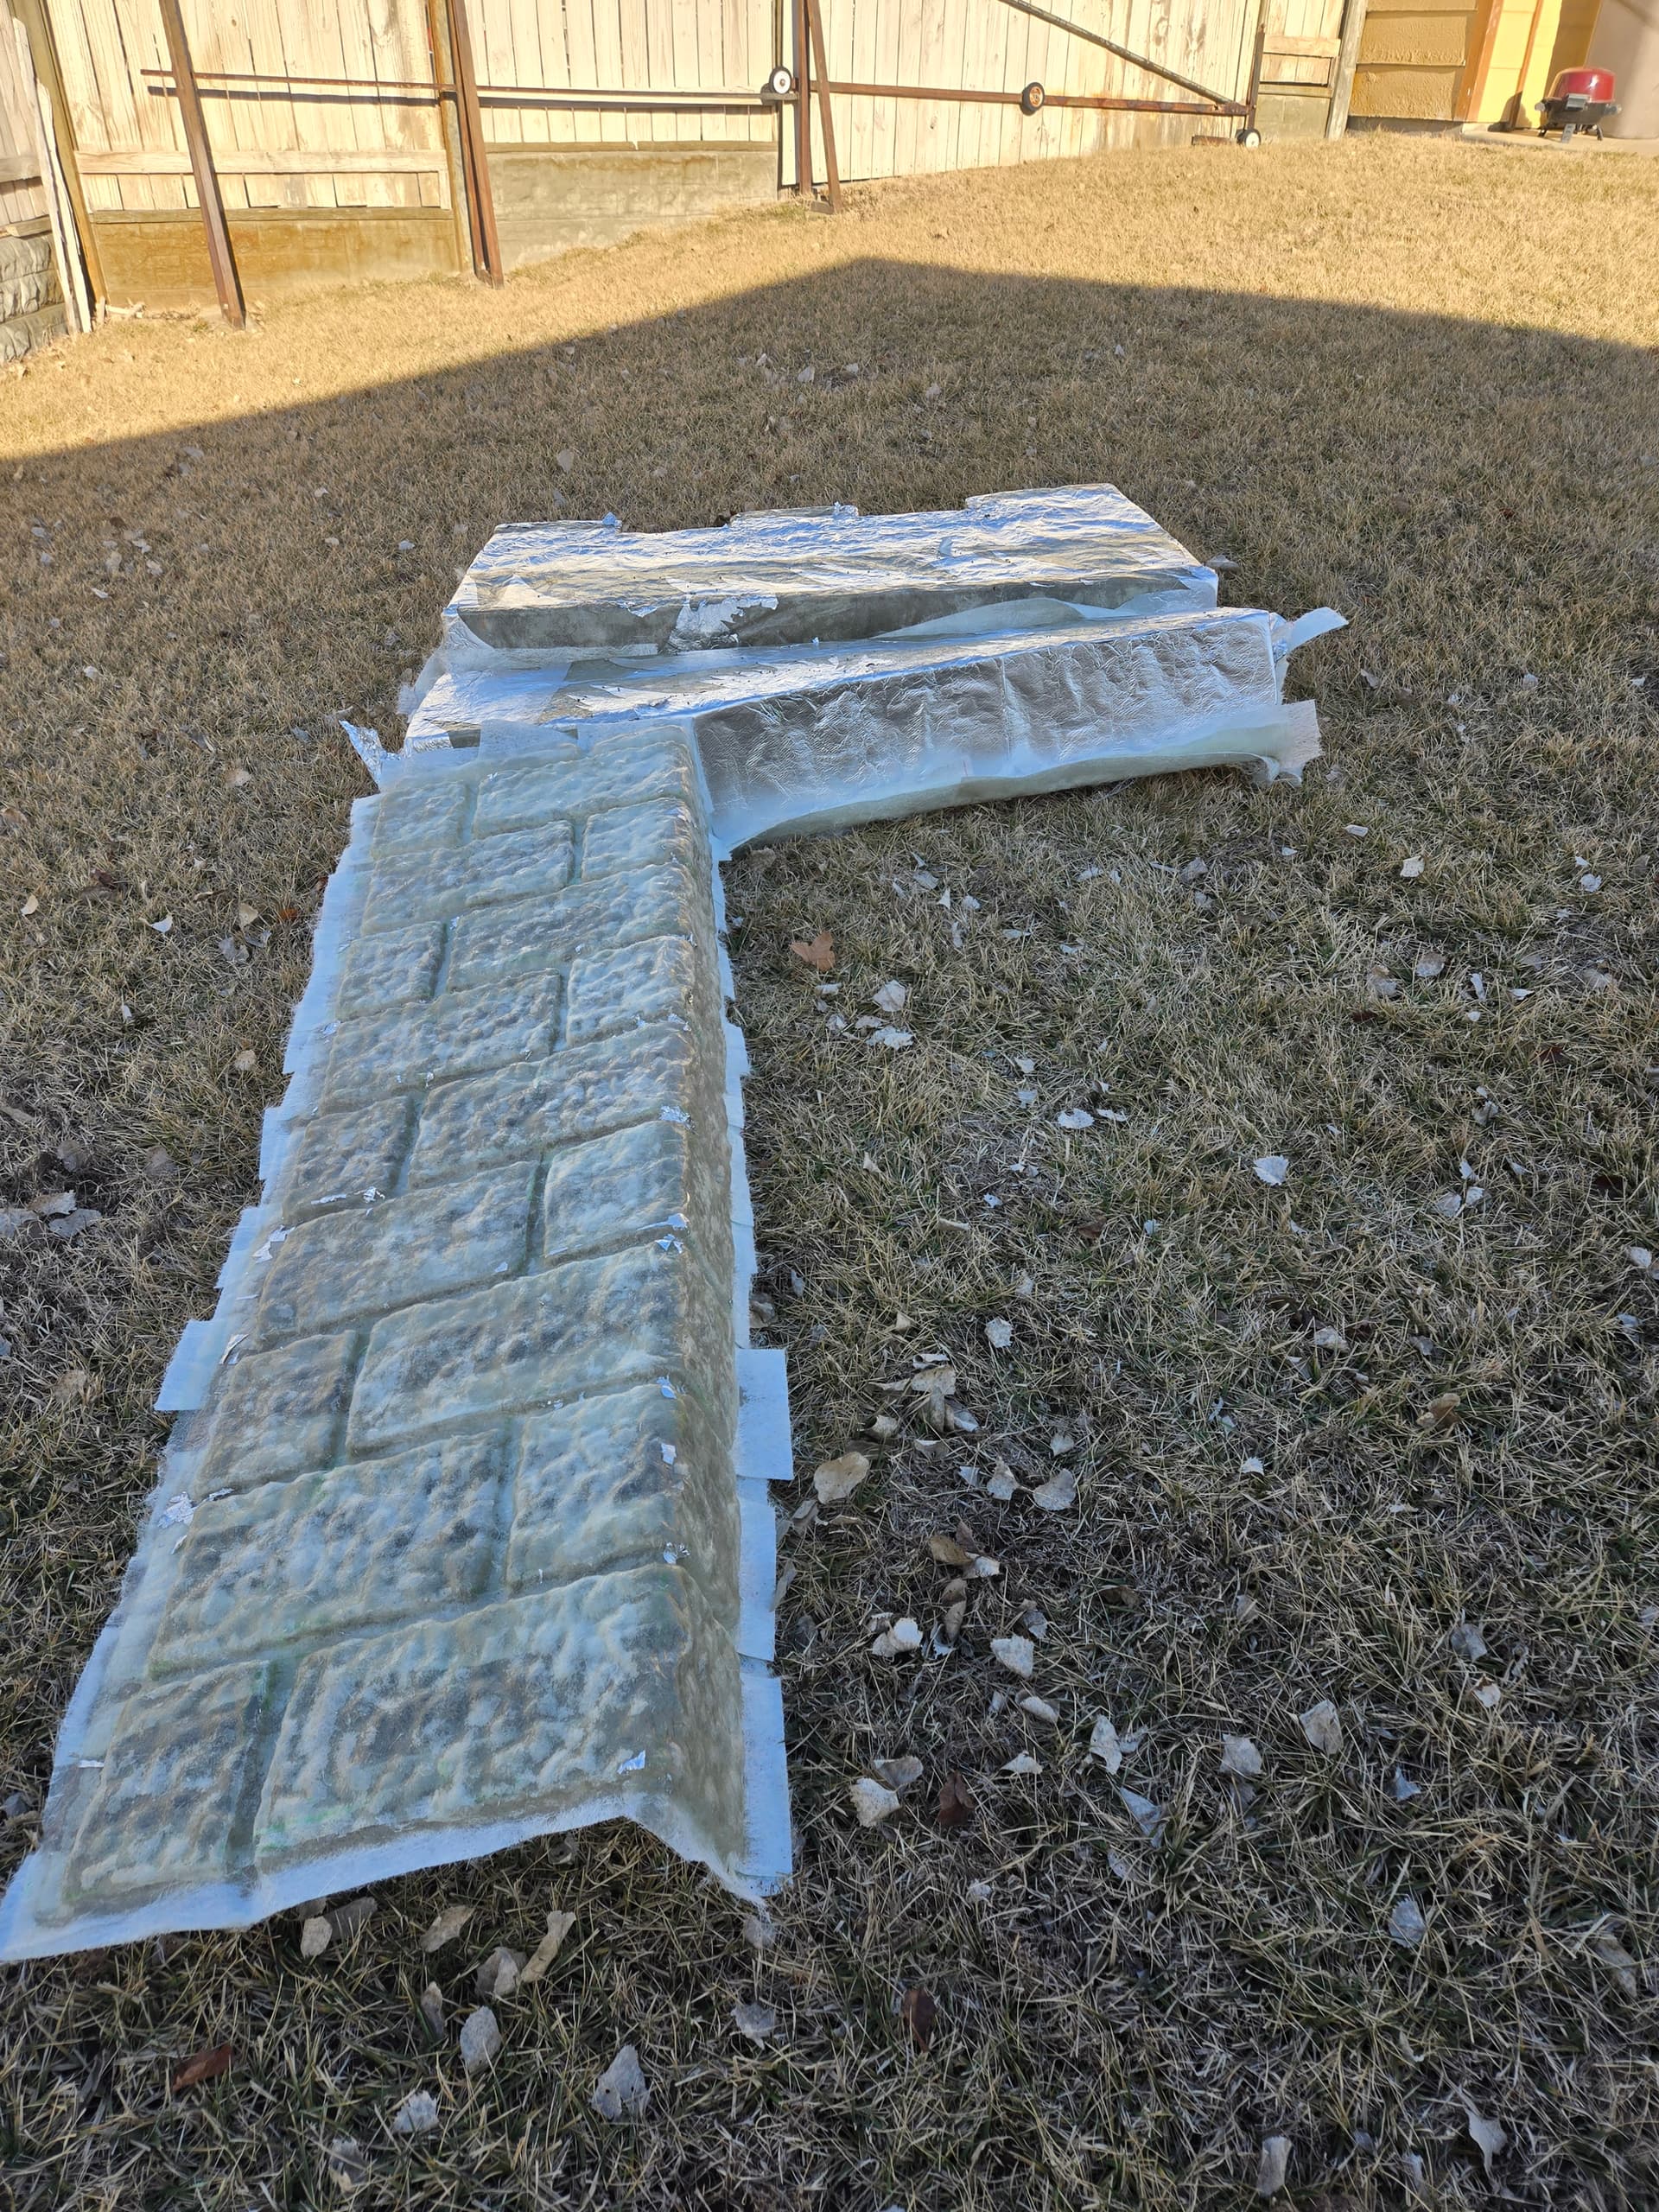
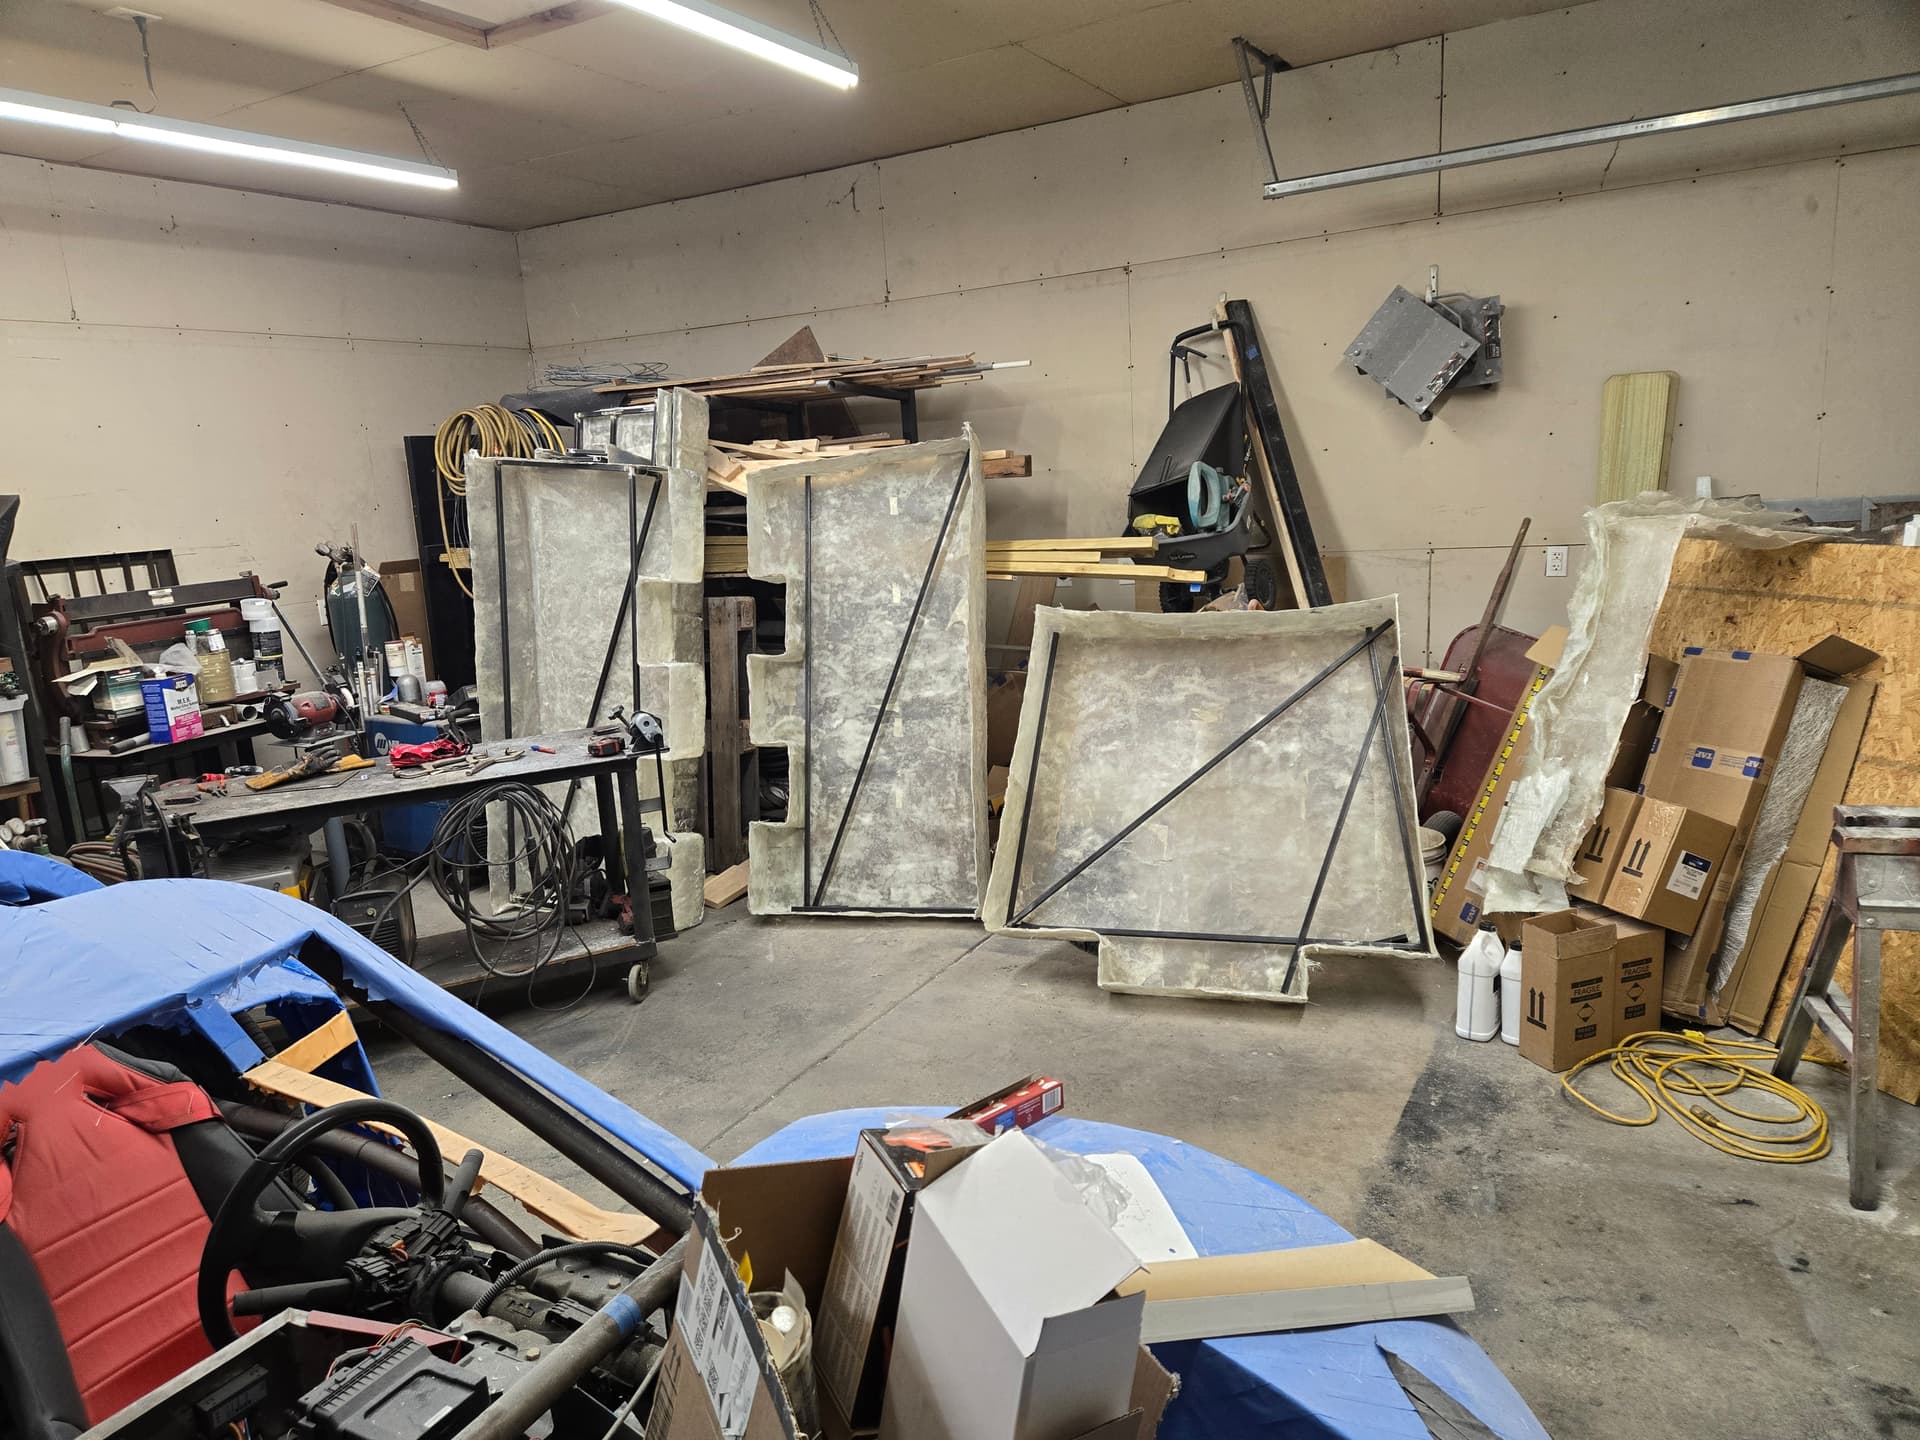
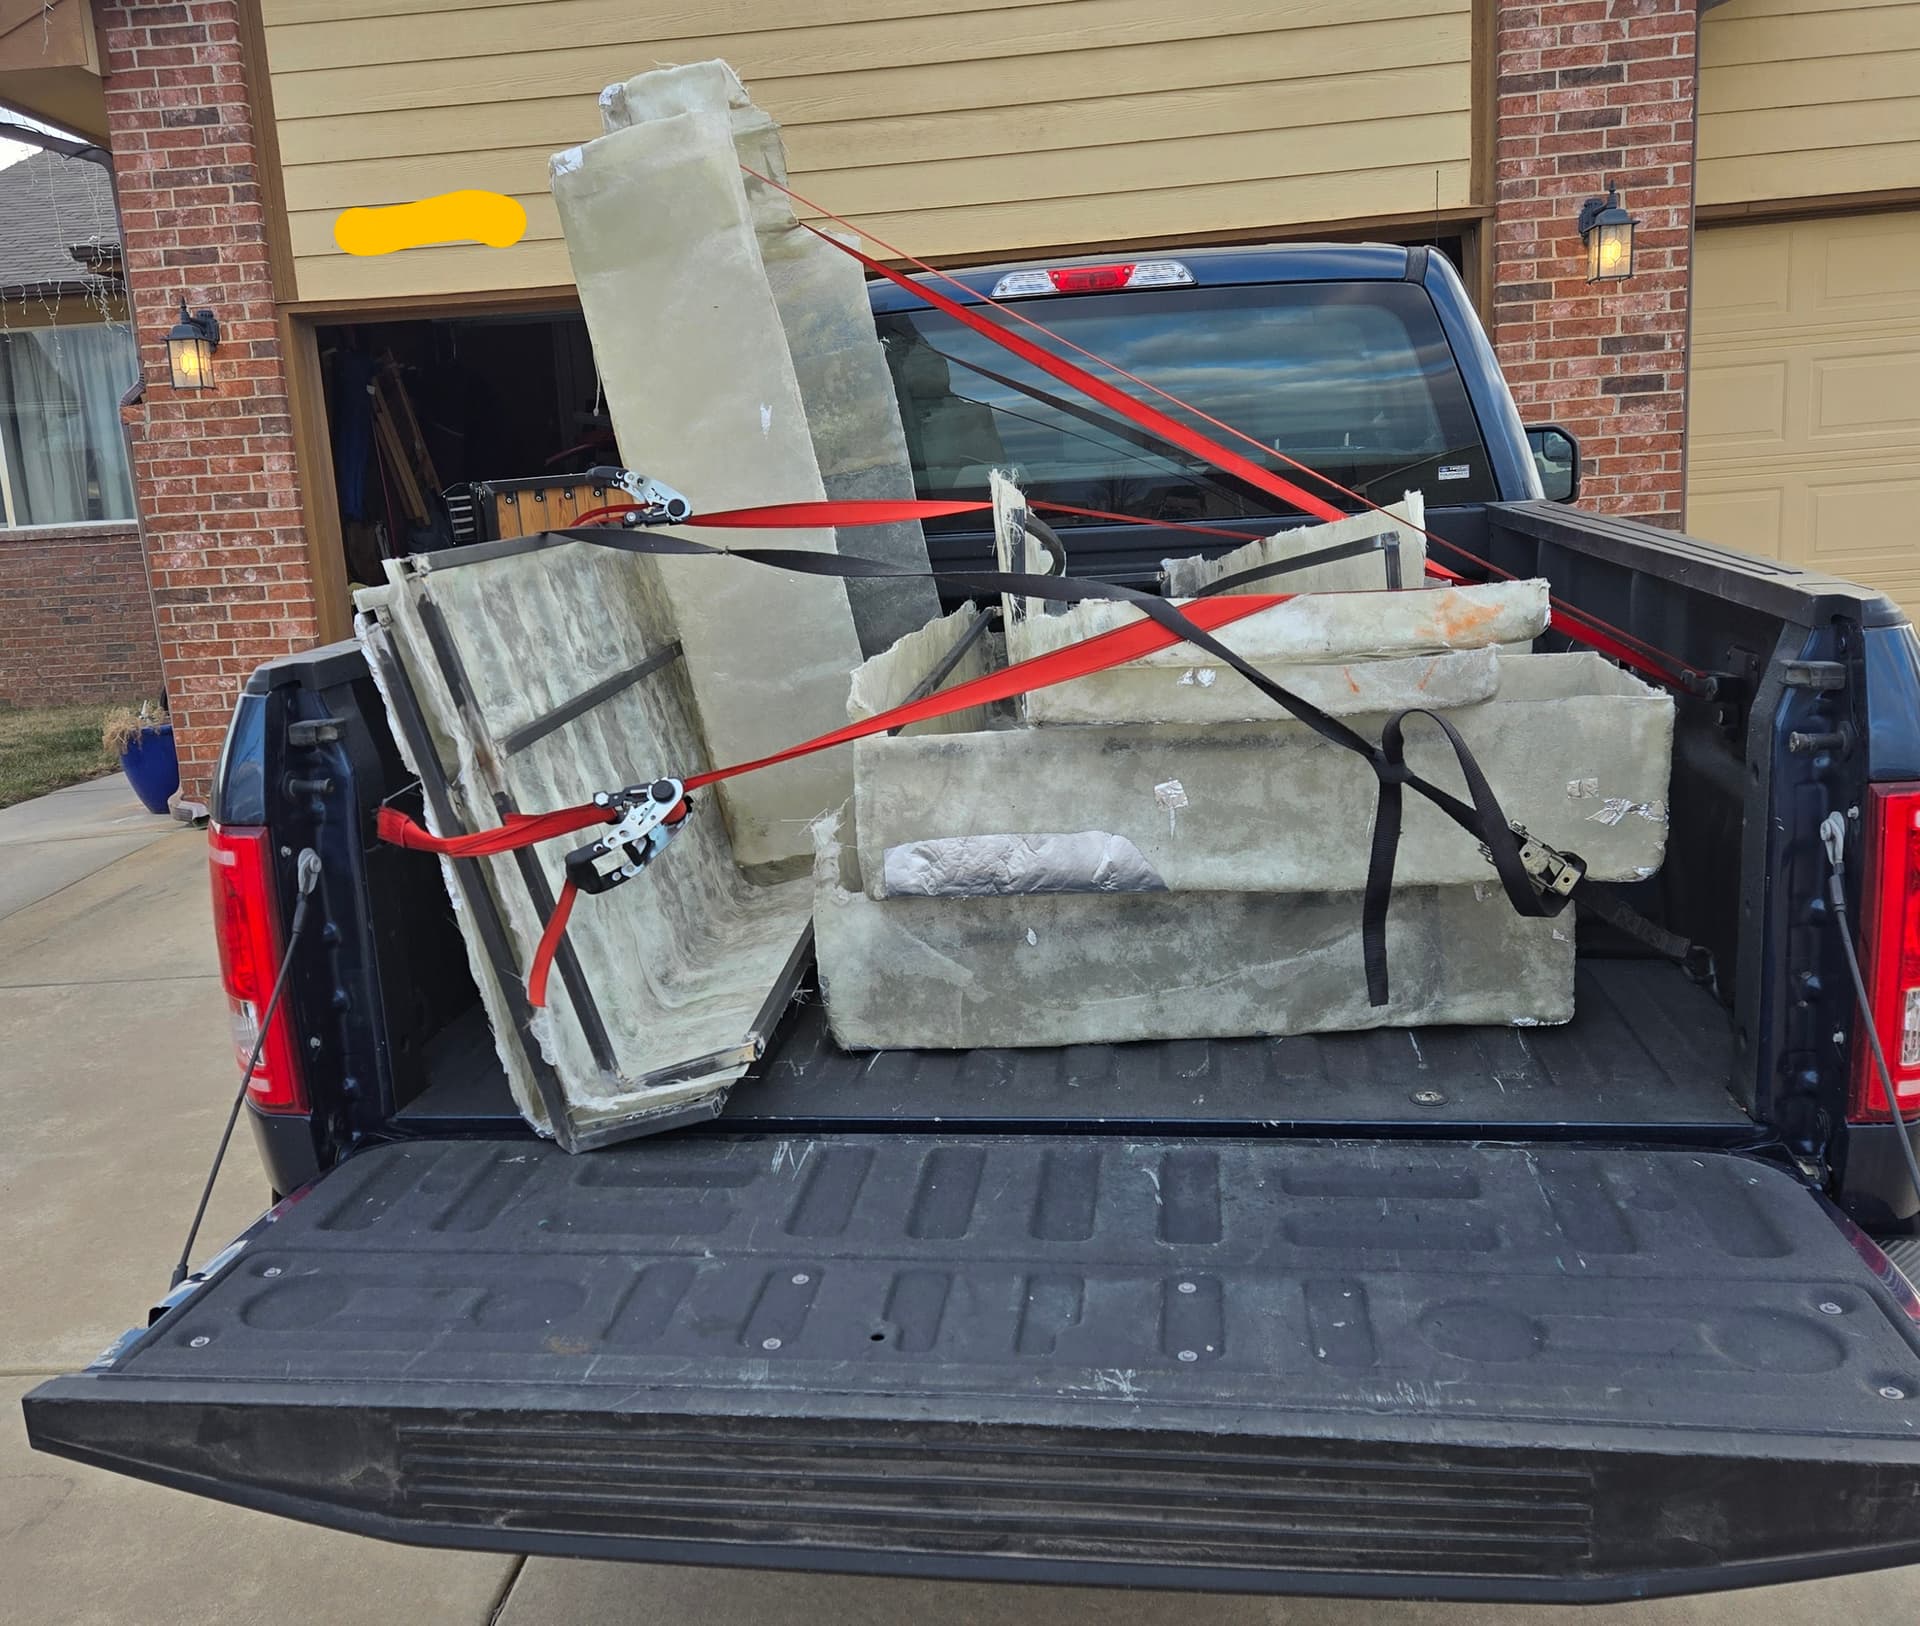
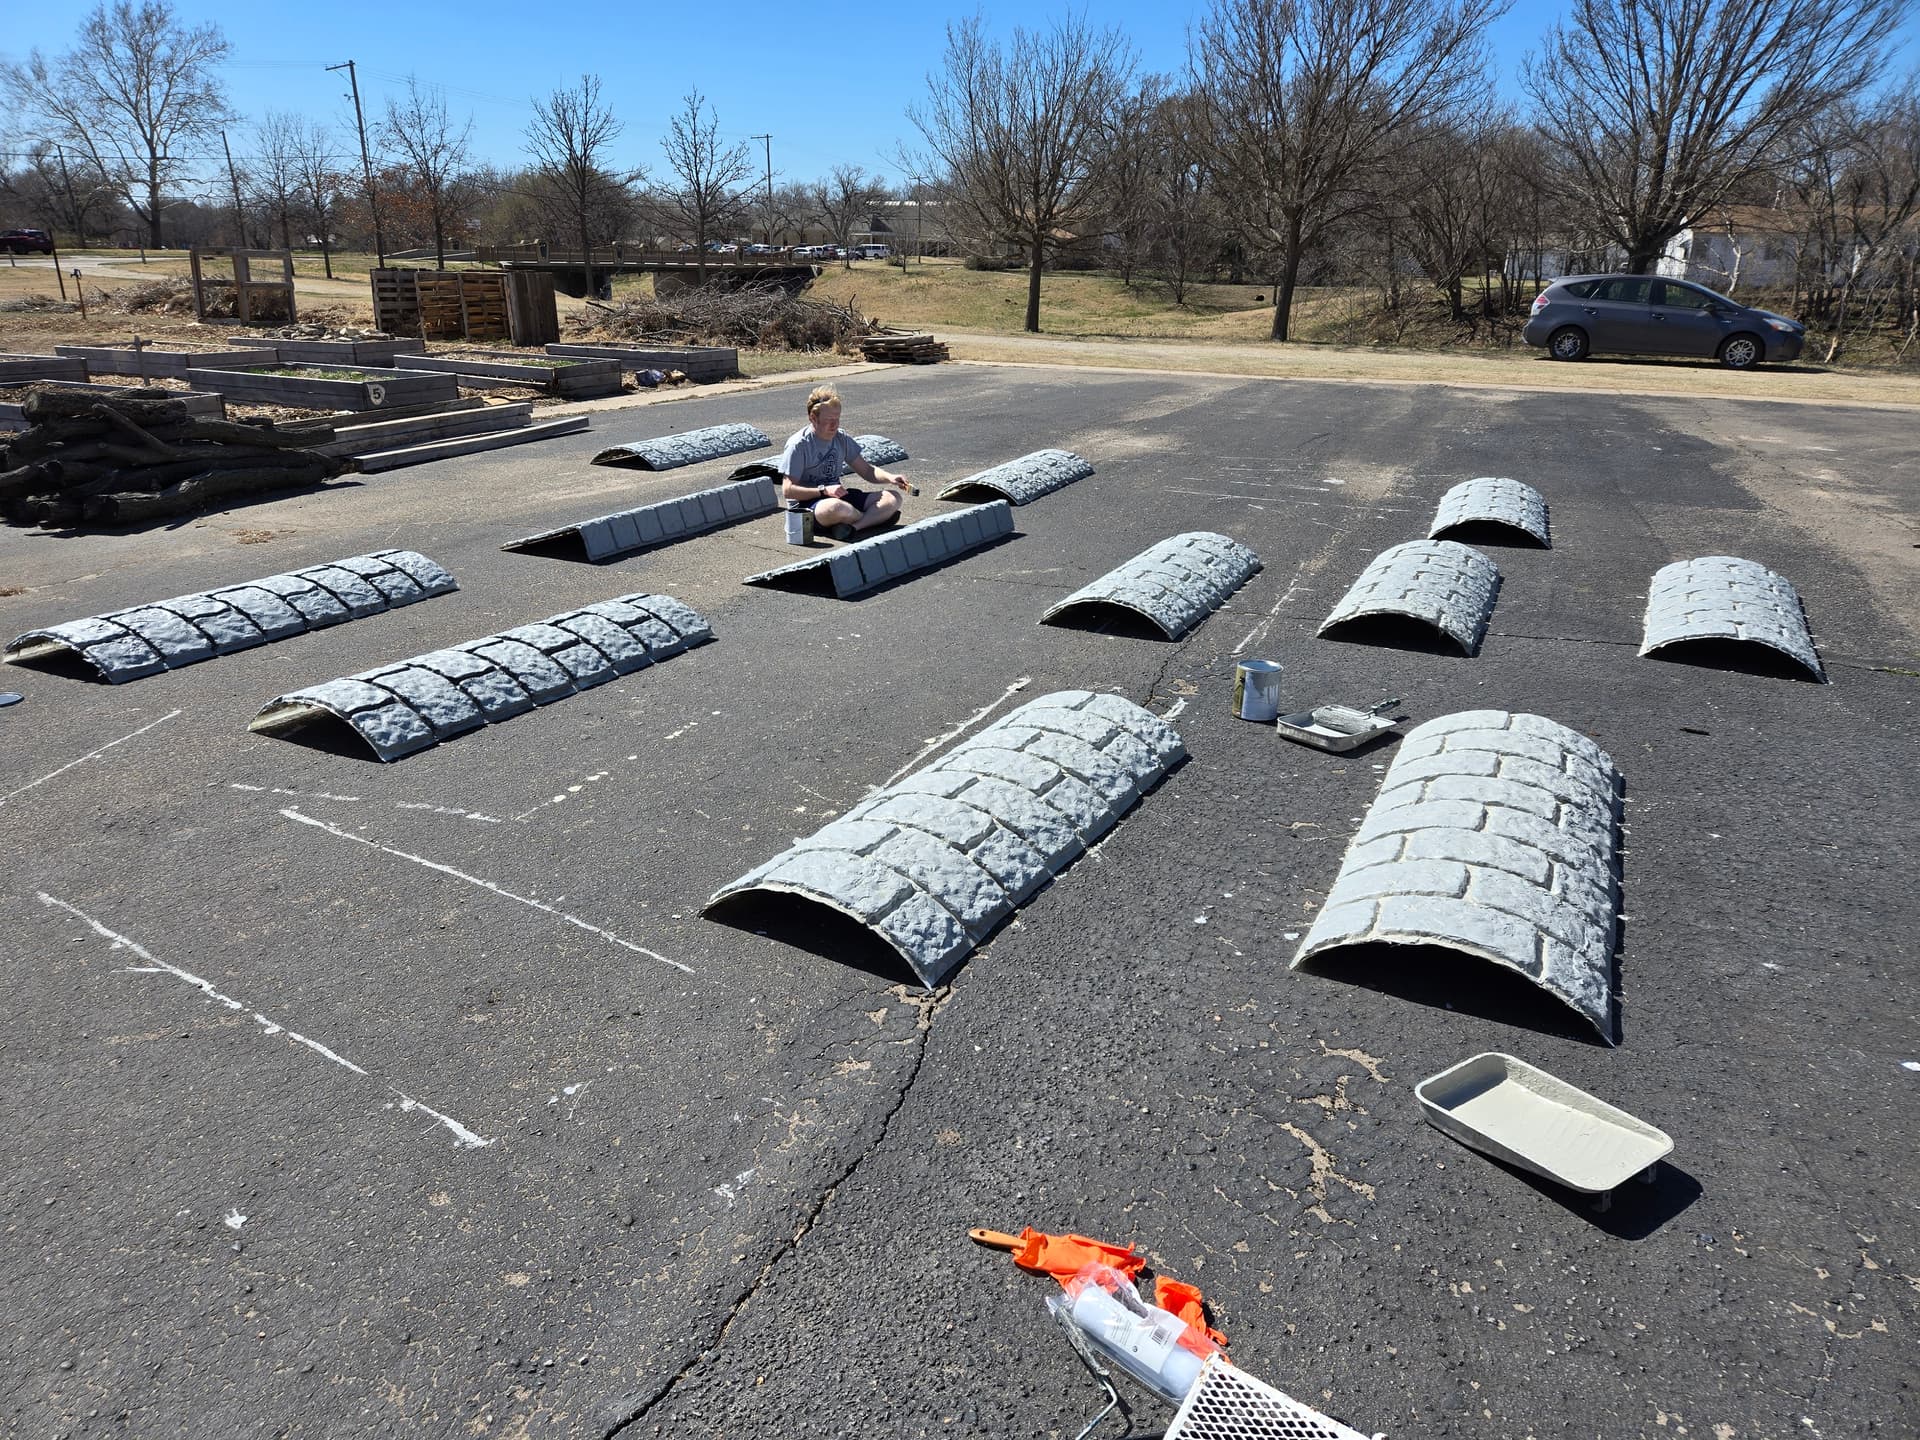
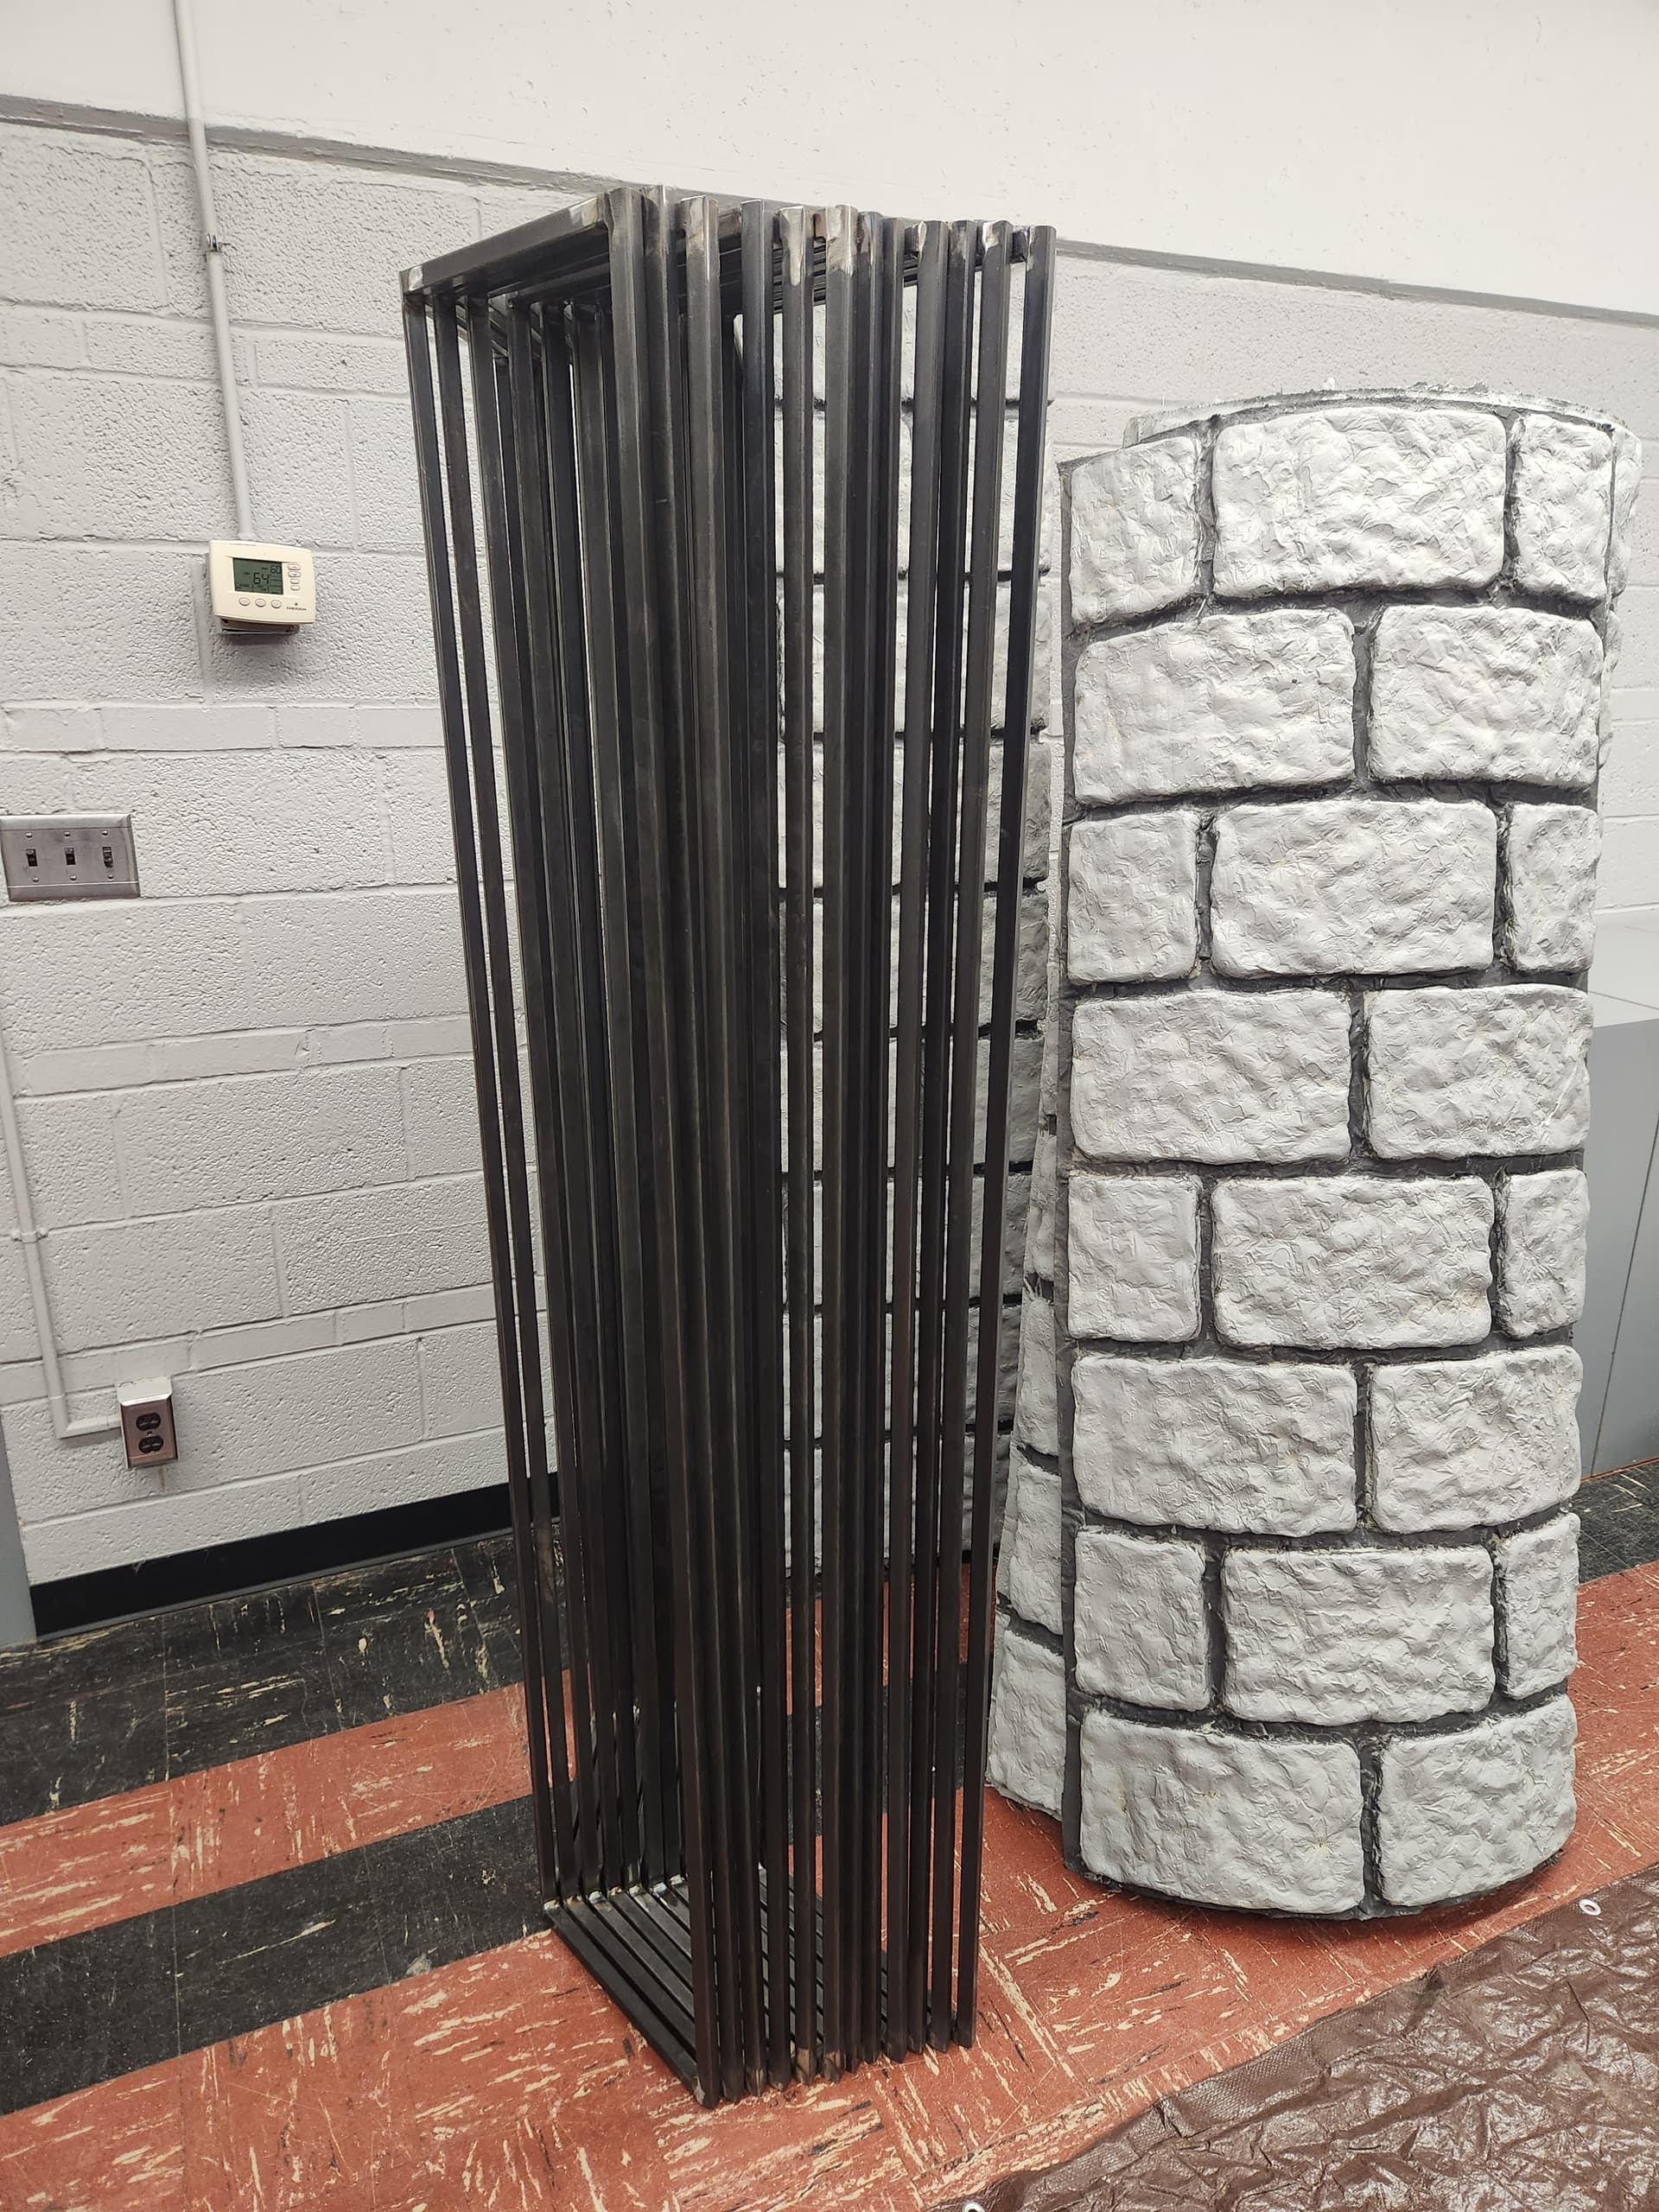
All of the panels are now laid up and trimmed. I was concerned about how much space the panels took in my shop, but once they were trimmed up, the panels nested nicely in each other. I think we’re looking good on hitting that goal of being able to move the tent and castle in the back of ONE half ton pickup truck.
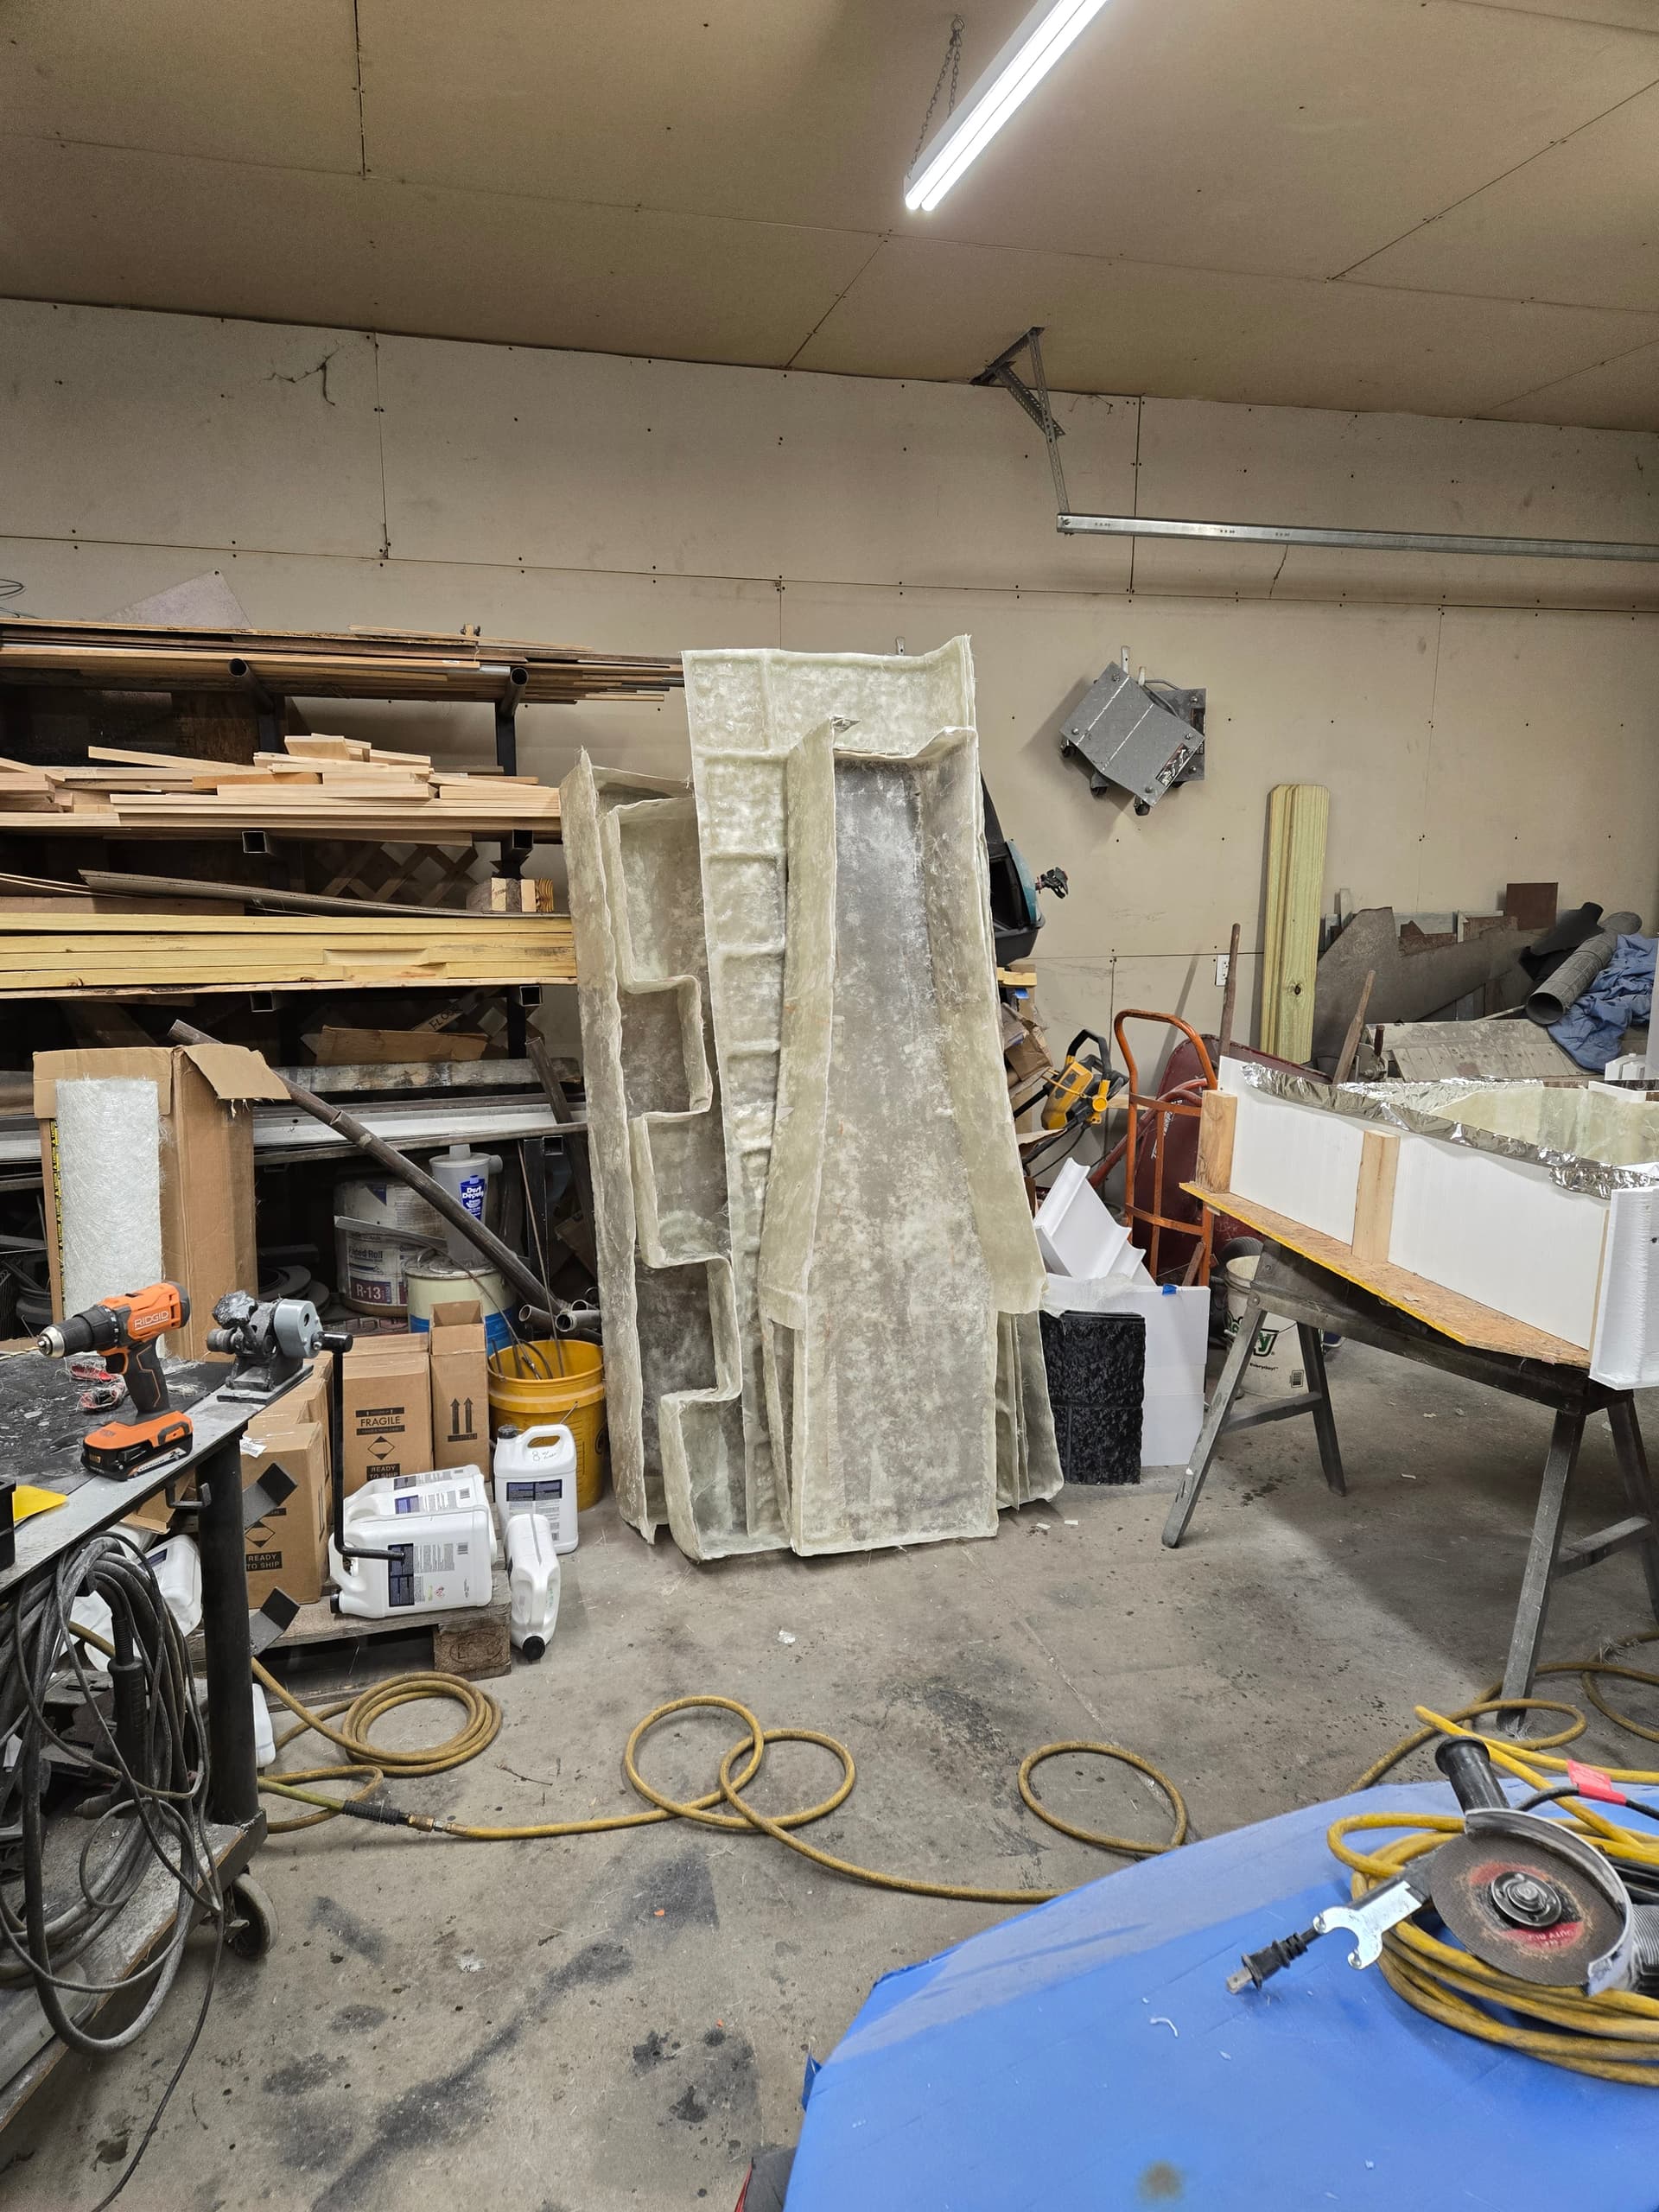
I haven’t laid out the trimmed panels yet, but the untrimmed panels certainly felt massive when laid out.

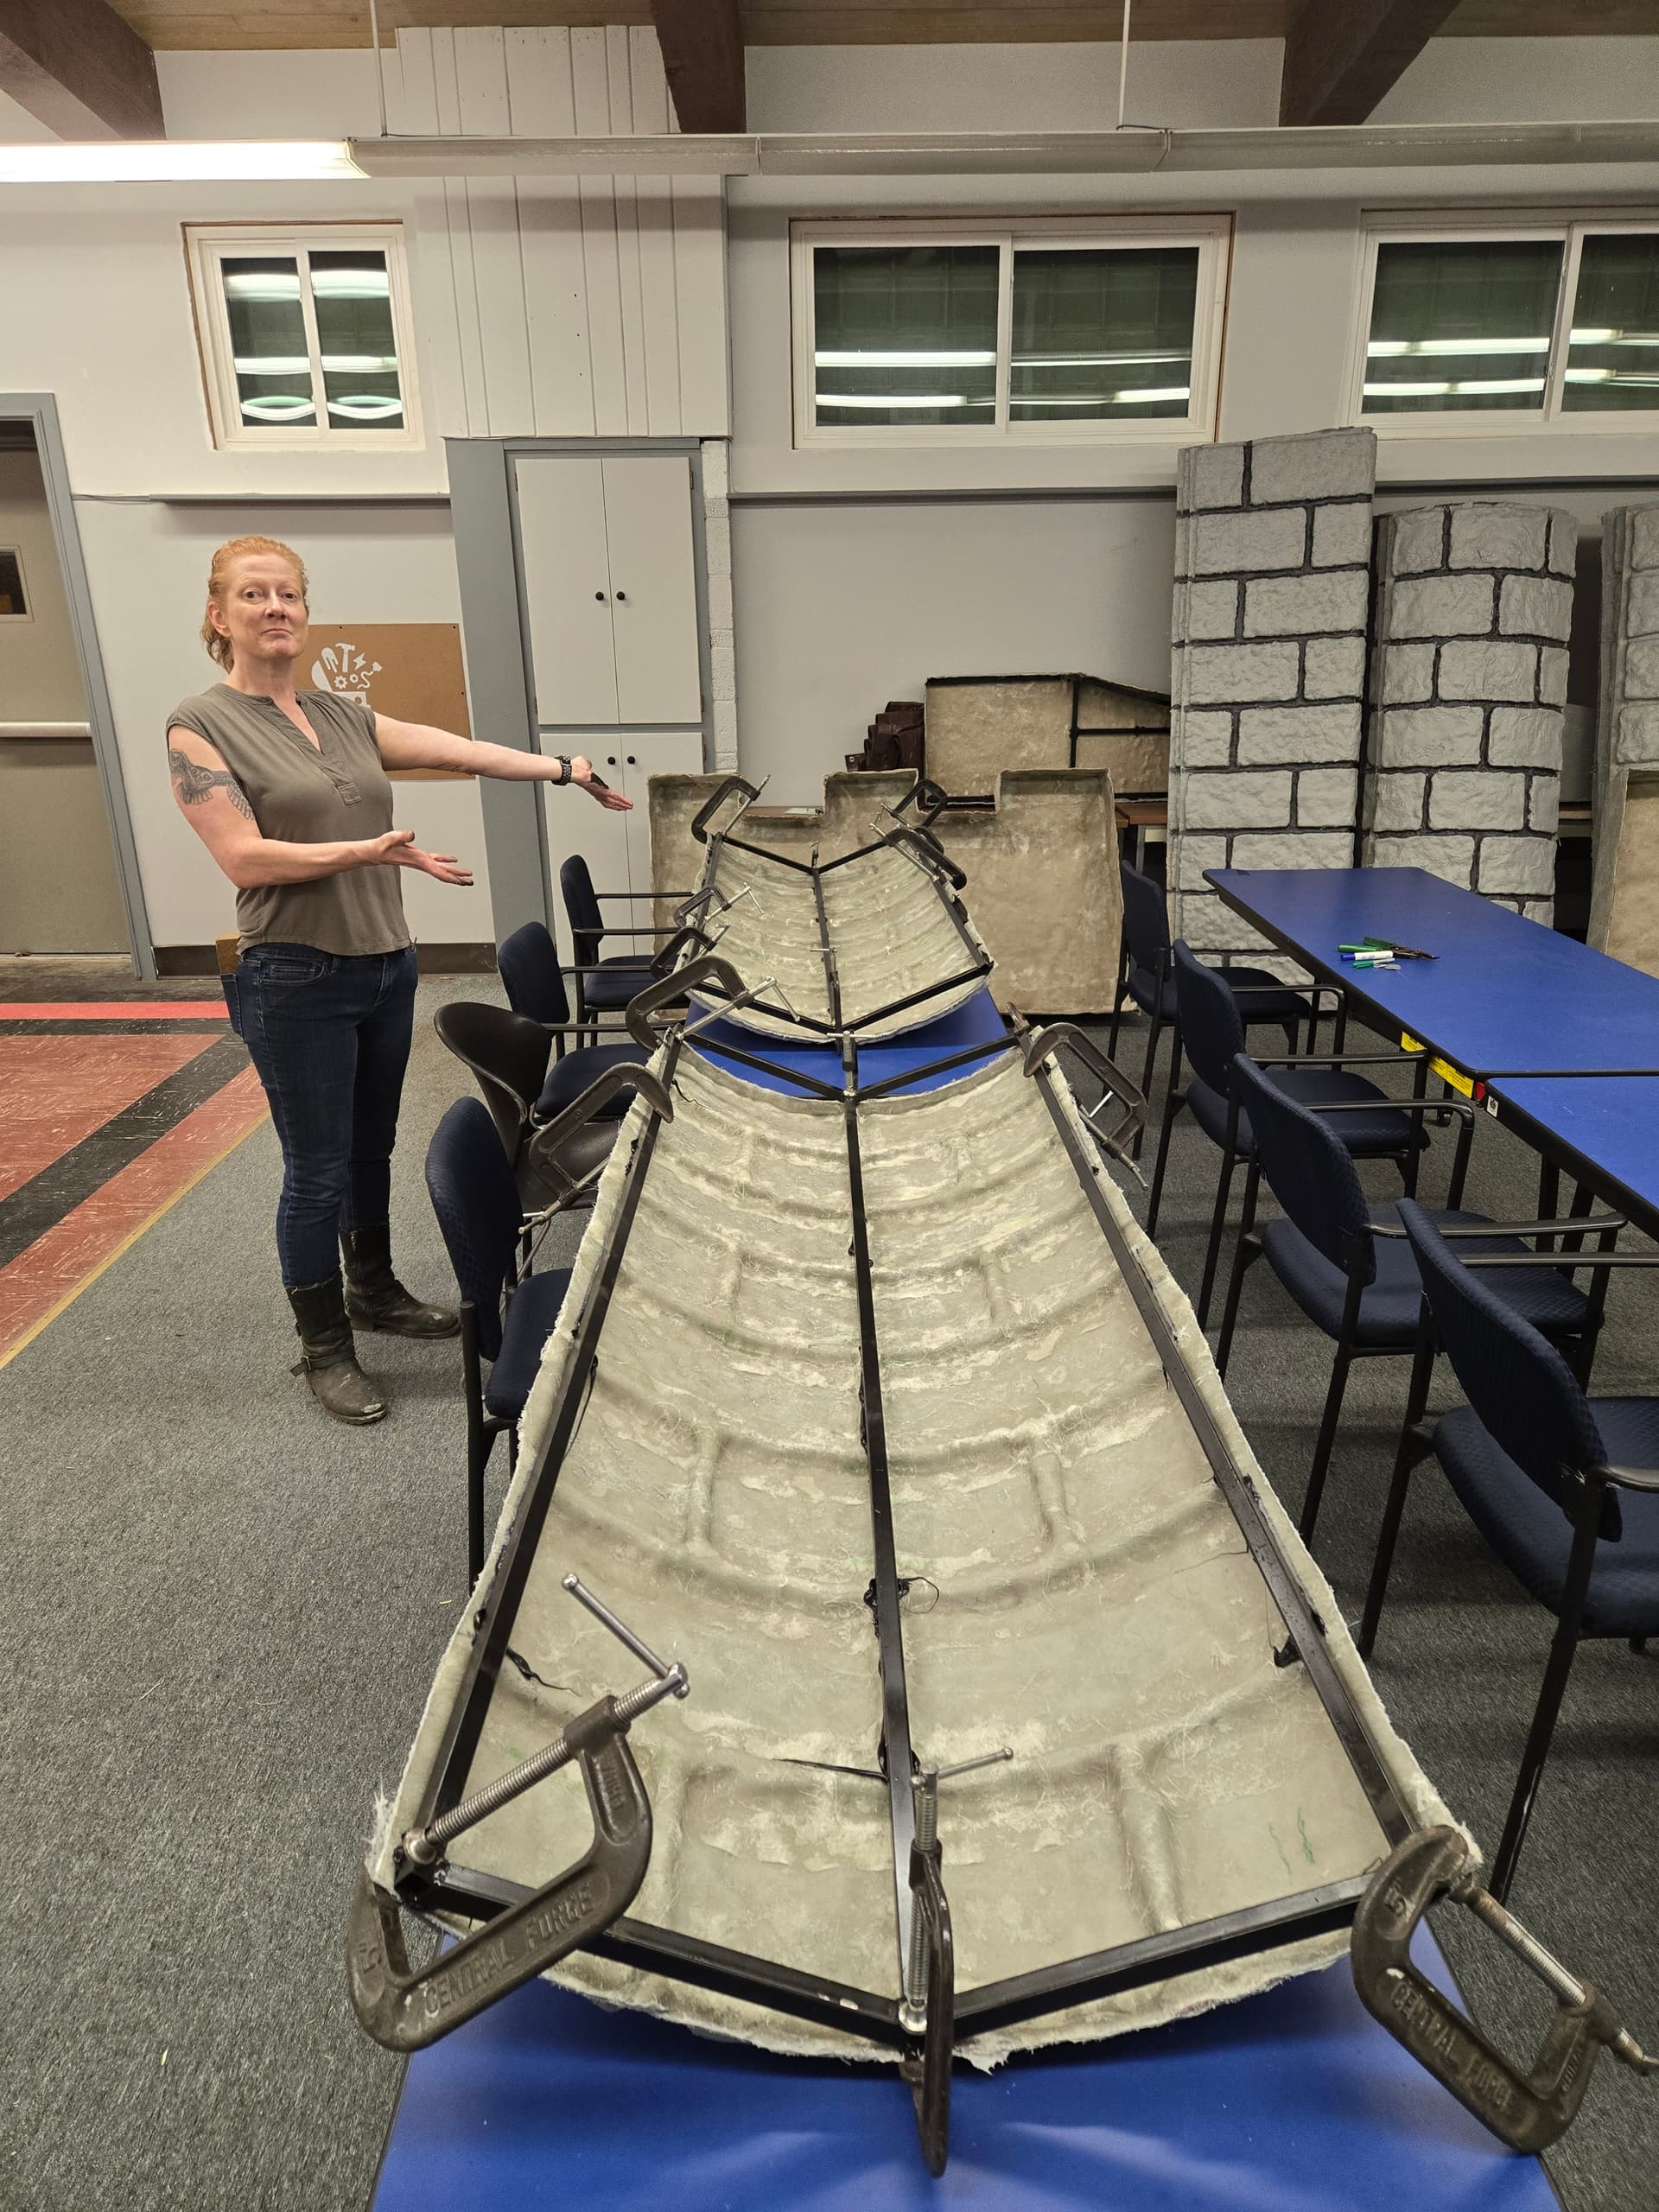
Of course my air compressor would give out on the last panel (reid valves were going bad, and the regulator was having fits on a 30gal air compressor i’ve been babying since my dad bought it in 1990). I have a new air compressor on order, and i’m borrowing another air compressor in the meantime… but that did mean that center keystone piece did not layup the way i wanted. Since my air compressor was singing it’s swan song, it hasn’t atomizing the resin as quickly.A lot of resin hardened befor i could get the fiberglass squished as flat as i wanted, which caused some pretty bad delamination between layers. I decided to test out repairing the panel by cutting out the bad spots and putting in new cloth… it worked, kinda, just one of those parts that might take an extra stiff coat of paint to make look good…

Next up: knocking out the metalframes, and hopefully start painting these things!
So far i’ve cut parts for one frame, but i’m crossing my fingers to have all the parts cut for the center 7 pieces by friday this week.
As far as attaching the metalwork to the panels, after calling around to a lot of places, someone pointed out that windshield adhesive is as effective as some of these high dollar specialized adhesives for attaching weird materials to metal. So there may be some more experimenting this week to see how effective that bond really is with fairly cheap windshield adhesive.
I will definitely be asking for help with the paint, and maybe the welding fairly soon. We still have a month before fair, but i’d rather be focused on ‘make and take’ projects that last week before fair.
Managed to get 6 of the 7 frames built for the castle this week with Dave Hanson’s help (thanks for the metal delivery)

We managed to get the rest of the tinfoil off the 7 center panels tonight. There are a few areas we’re gonna have to add some resin too, but overall they aren’t looking too bad.
I’m hoping to do that Saturday afternoon (probably start before 3pm) as well as weld up the last of the frames. If that all goes well, i’m crossing my fingers that we can then drill and bolt everything together sunday and attempt to errect the center of the castle. ![]()
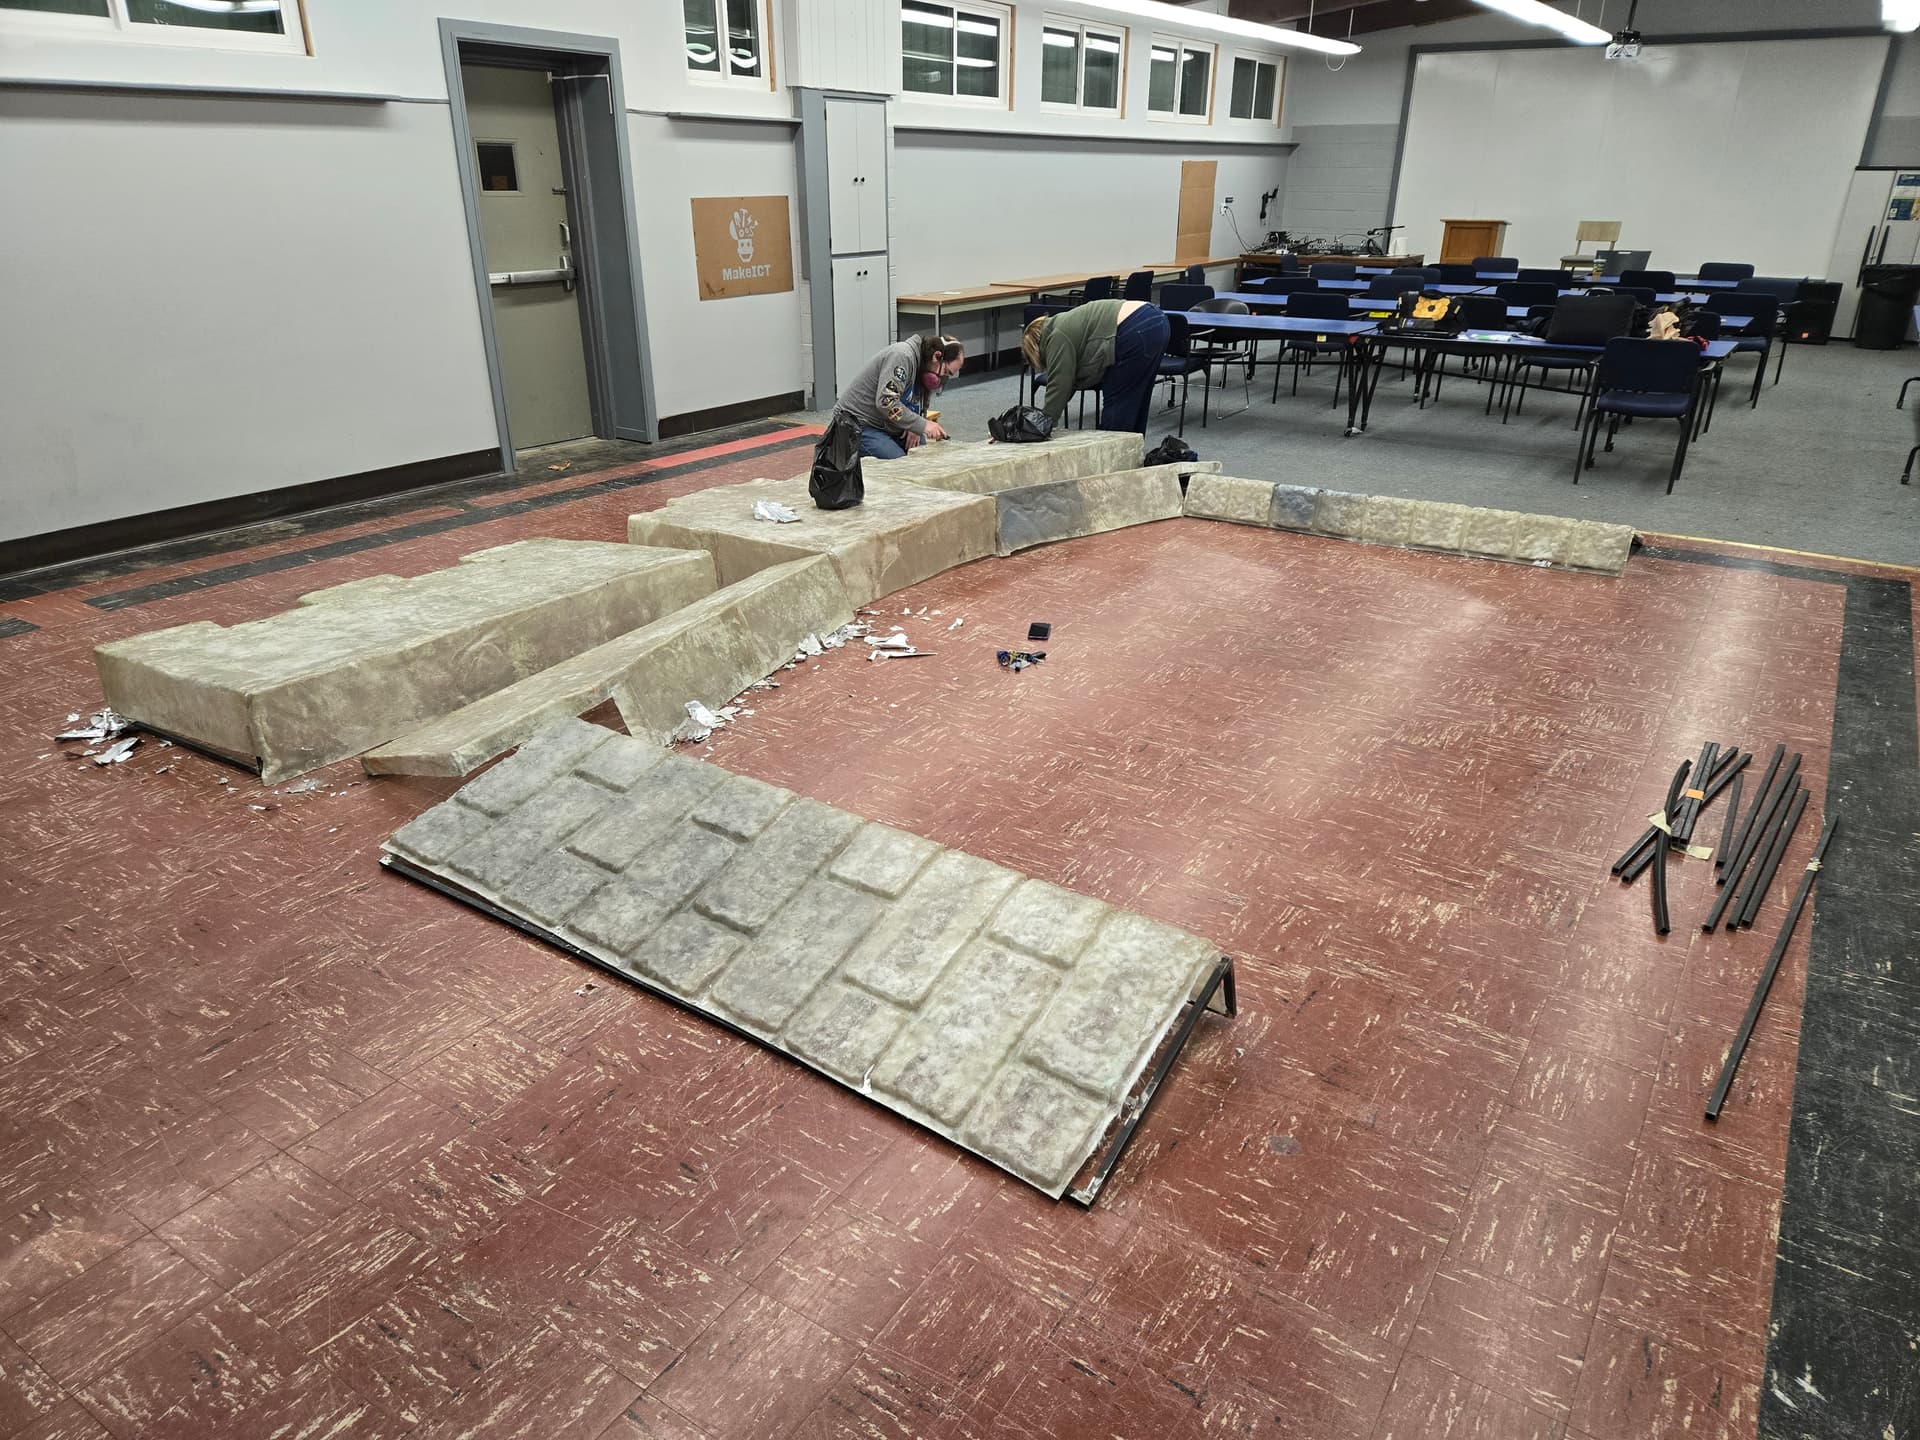
Unfortunatelty, it looks like it may take 2 trucks to move all of the castle. However, with the frames fitted to the fiberglass, Ladeana was able to unload most of the panels from my truck by herself (the bigger panels are a bit awkward to move by 1 person), so i’m counting that as a win.
The weather was too chilly today to paint or apply resin, so i welded up the last frame instead.
I’ll probably be up at the space at noon tomorrow to finish welding the other frames (hopefully there is enough gas left to make that happen). Hopefully by 1pm it’ll be warm enough to apply the resin and paint the frames.
I’m hoping that means we’ll be ready to drill, bolt and errect the center section by the end of the week. After that, we should be good to paint the fiberglass and attach decorations.
Dave is working on the curved frame parts, but will probably need help welding them up this week.
Managed to get a finishing coat of resin on the center pieces today and a coat of paint on the frames.
Hopefully Thursday i’ll put a meeting notice on the calendar and be able to paint some panels. Then we should be able to drill and bolt together the panels on sunday. We’ll just need to pick up 5 gallons of grey paint from the sedgwick county swap and shop before thursday.

I put the Neighborhood meeting in room 4 for 6:30-8:30 on Thursday… do I need to move that?
I’d rather not have to move the neighborhood association. I moved the panels to the boiler room, so we might be able to make one of the other rooms work or we might be able to do the painting outside (though not sure how long the paint will take to dry). If we have 2 or 3 people going at it with paint rollers i don’t see it taking more than an hour, but not sure if we’d want to leave them outside if it’s a 24hr cure.
what kind of paint are you using? if it’s latex they could dry in the boiler room with a fan on them.
It will probably be a mystery mix for paint, but most likely latex based from the Swap and Shop.
Thank you to everyone that helped paint yesterday!
We have 6 panels left to get some paint on, and then it should be all about getting artistic and having more fun with decorations!
If the weather cooperates (and doesn’t continue to look like the dust bowl), i’m hoping to do another castle event on sunday around noon. I’ve picked up more paint and brushes and will probably leave then at the space this evening in case anyone else wanted to sneak in some painting. ![]()
Had some more help today from some different faces - Paul S. And Piper T. All the panels now have primer and base coat on them. 9 of the 14 panels have grout lines painted on and may be the next focus while orientation is going on Tuesday. I would not be offended if someone else took some time this week to paint the lines on the remaining panels. ![]()
Next up: we could really use some help from some artists to make these panels look more aged… i’ll see if i can find some green and brown paint to give these panels more depth.
Some of the frames are now glued to the panels and that windshield glue is proving to have a lot of hold without noxious fumes, but the stuff is super thick and hard to extrude from a caulking gun.
Dave has also been busting his butt cranking out the frames for the towers today with Matthew C.'s help. Next is going to be some paint and drilling…
We’re making some good and steady progress, but everyone pitching in has really helped keep us on track and keep this massive project from becoming overwhelming.
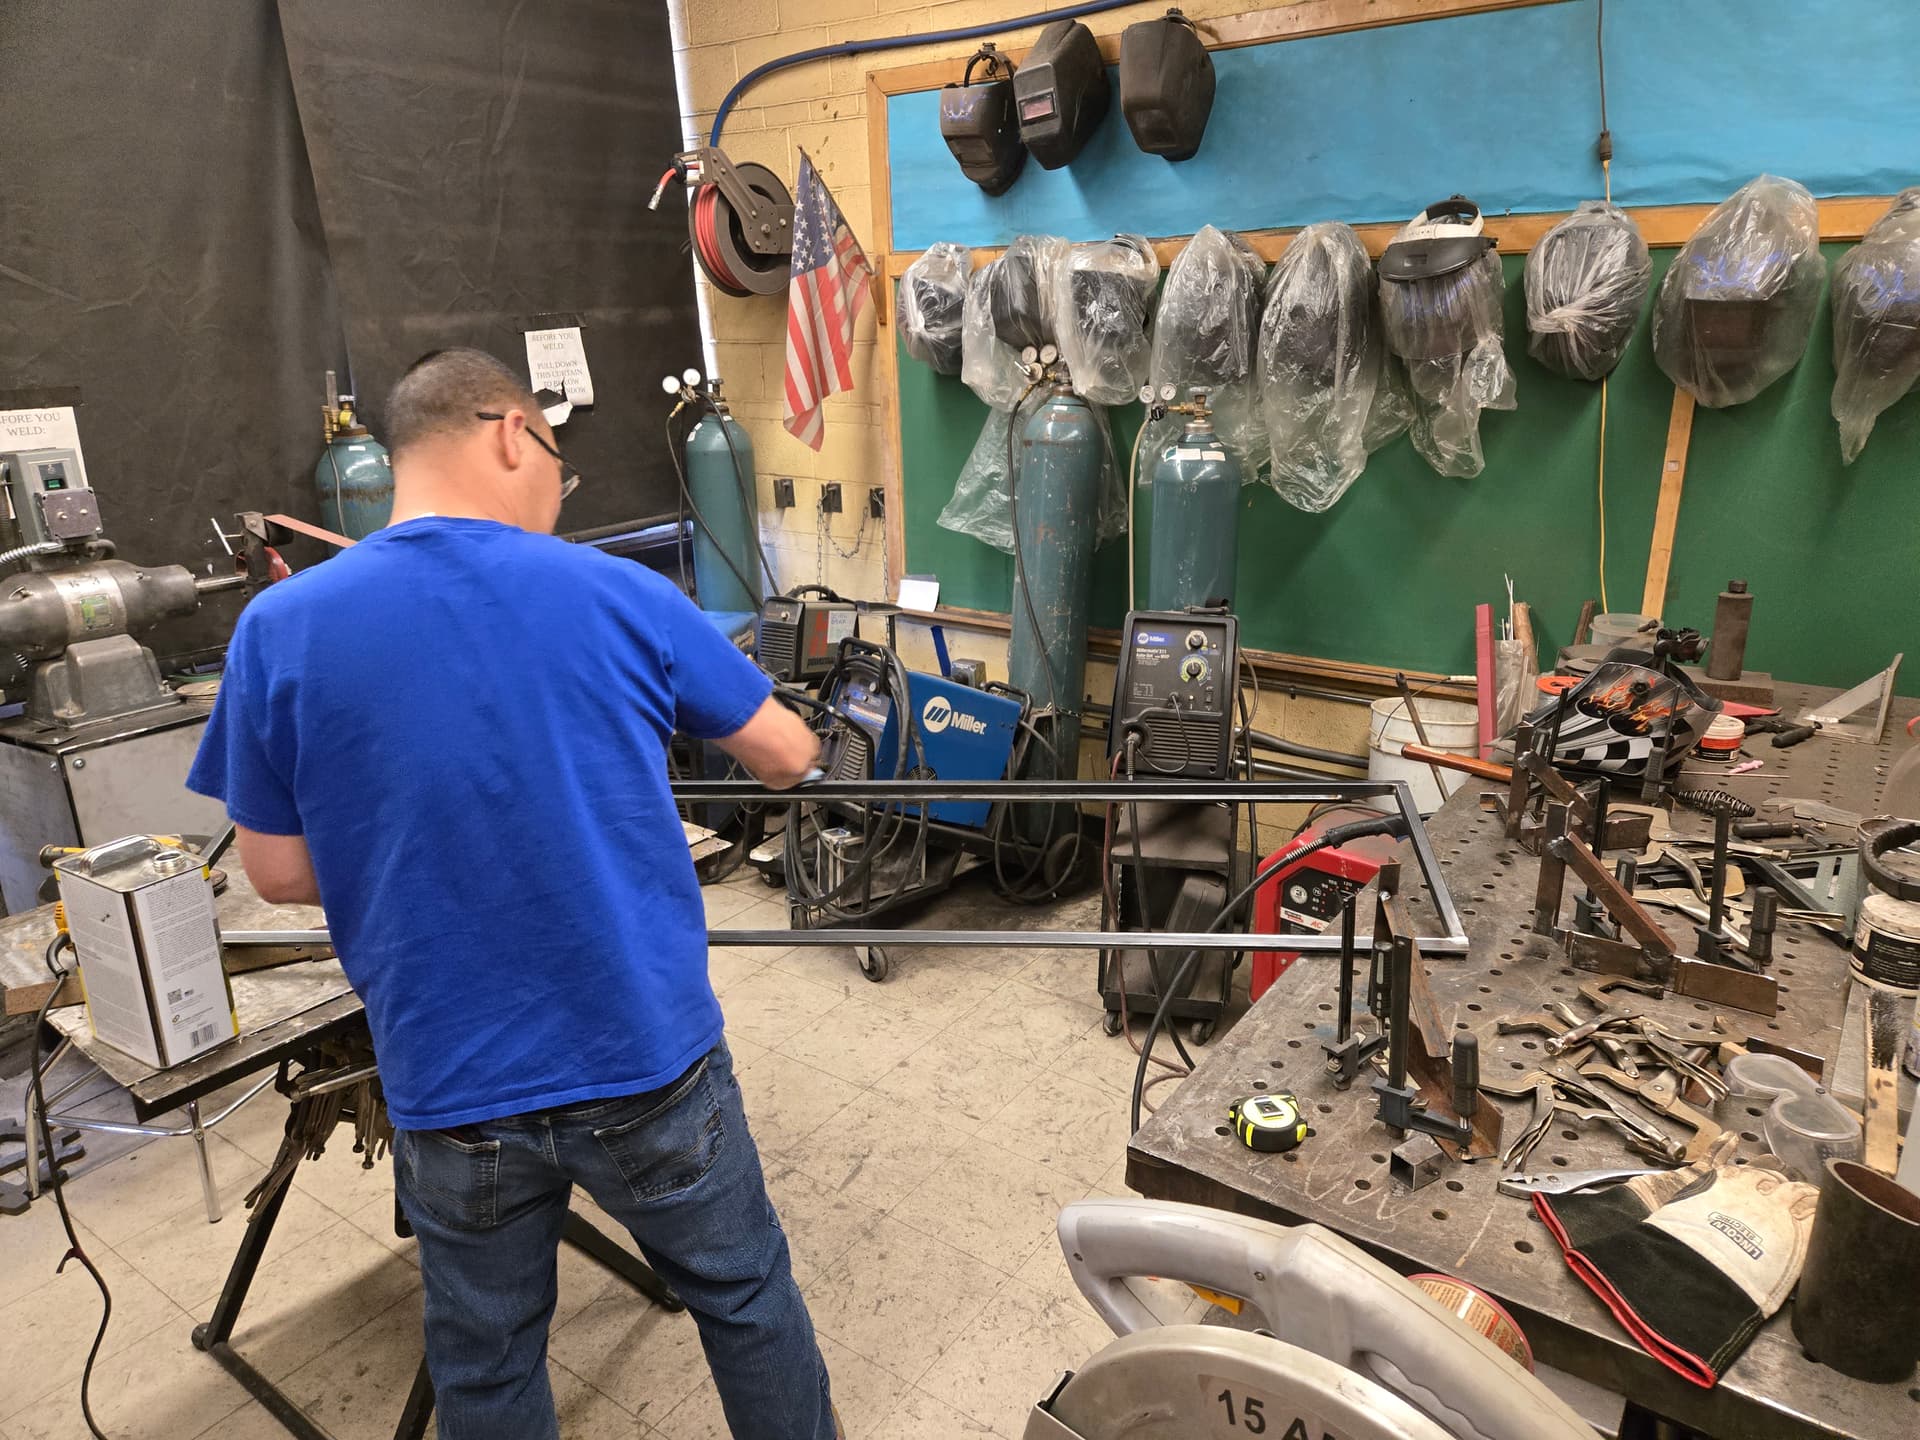
It was fun to test out my welding skills yesterday, since I haven’t welded since I was in high school 10 years ago. ![]() Hope my welds can hold up!
Hope my welds can hold up!
We made some pretty good progress last night. All 12 frames are spray painted black, and 2 of them are glued and clamped together. The panels were pretty close to the shape of the frames (worste spot was a half inch off but took less force than pinching a baby cheek to close), but the clamps make sure we get full contact with the adhesive for a little more strength.
We should be good to pull the clamps off this evening, but we might wait until tuesday to make sure its fully cured before picking up more windshield adhesive and gluing up the rest of the panels.
The cure time and number of c-clamps we have is a bit of a limiting factor for how quickly we can get everything glued up, but at least the actual application of glue and clamp up takes less than a half hour for 2 panels. I’d rather not use vise grips on these since it’s possible to set them too tight and possibly crack a panel.
We’ve kinda gotten into production with gluing, trimming and drilling panels…
We’ve run out of glue, but at least we’ve been able to test out assembling the concept. It looks pretty cool, but it definitely needs an artist’s touch.
Next, we’ll focus on the center section and getting that bolted together. We did run out of glue, but hopefully we’ll get more in this week so we can finish the manufacturing side of this project and start having some more fun decorating it. ![]()