I’d like to re-use the mirrors if possible, but I think we’re gonna need to beef up the mounts on them.
Also, something to note: the fire truck is being stored in an un-insulated garage.
- we need to be mindful of the temperature extremes the truck will go thru (just thinking we might put a test piece of spackle in the freezer and then bring it back to room temp to make sure no cracking occurs)
- we SHOULD also look at some kind of cover for the parts to help protect them and keep them clean when not in use (do we have material sitting around that we could see some bags out of?)
Paging @Malissa!
I actually got double shipped my last order of muslin and I’ve sent them emails with no response. So I have plenty of extra.
Would it be worth grabbing some zippers from the yard store to help seal the parts?
I probably already have some that would work.
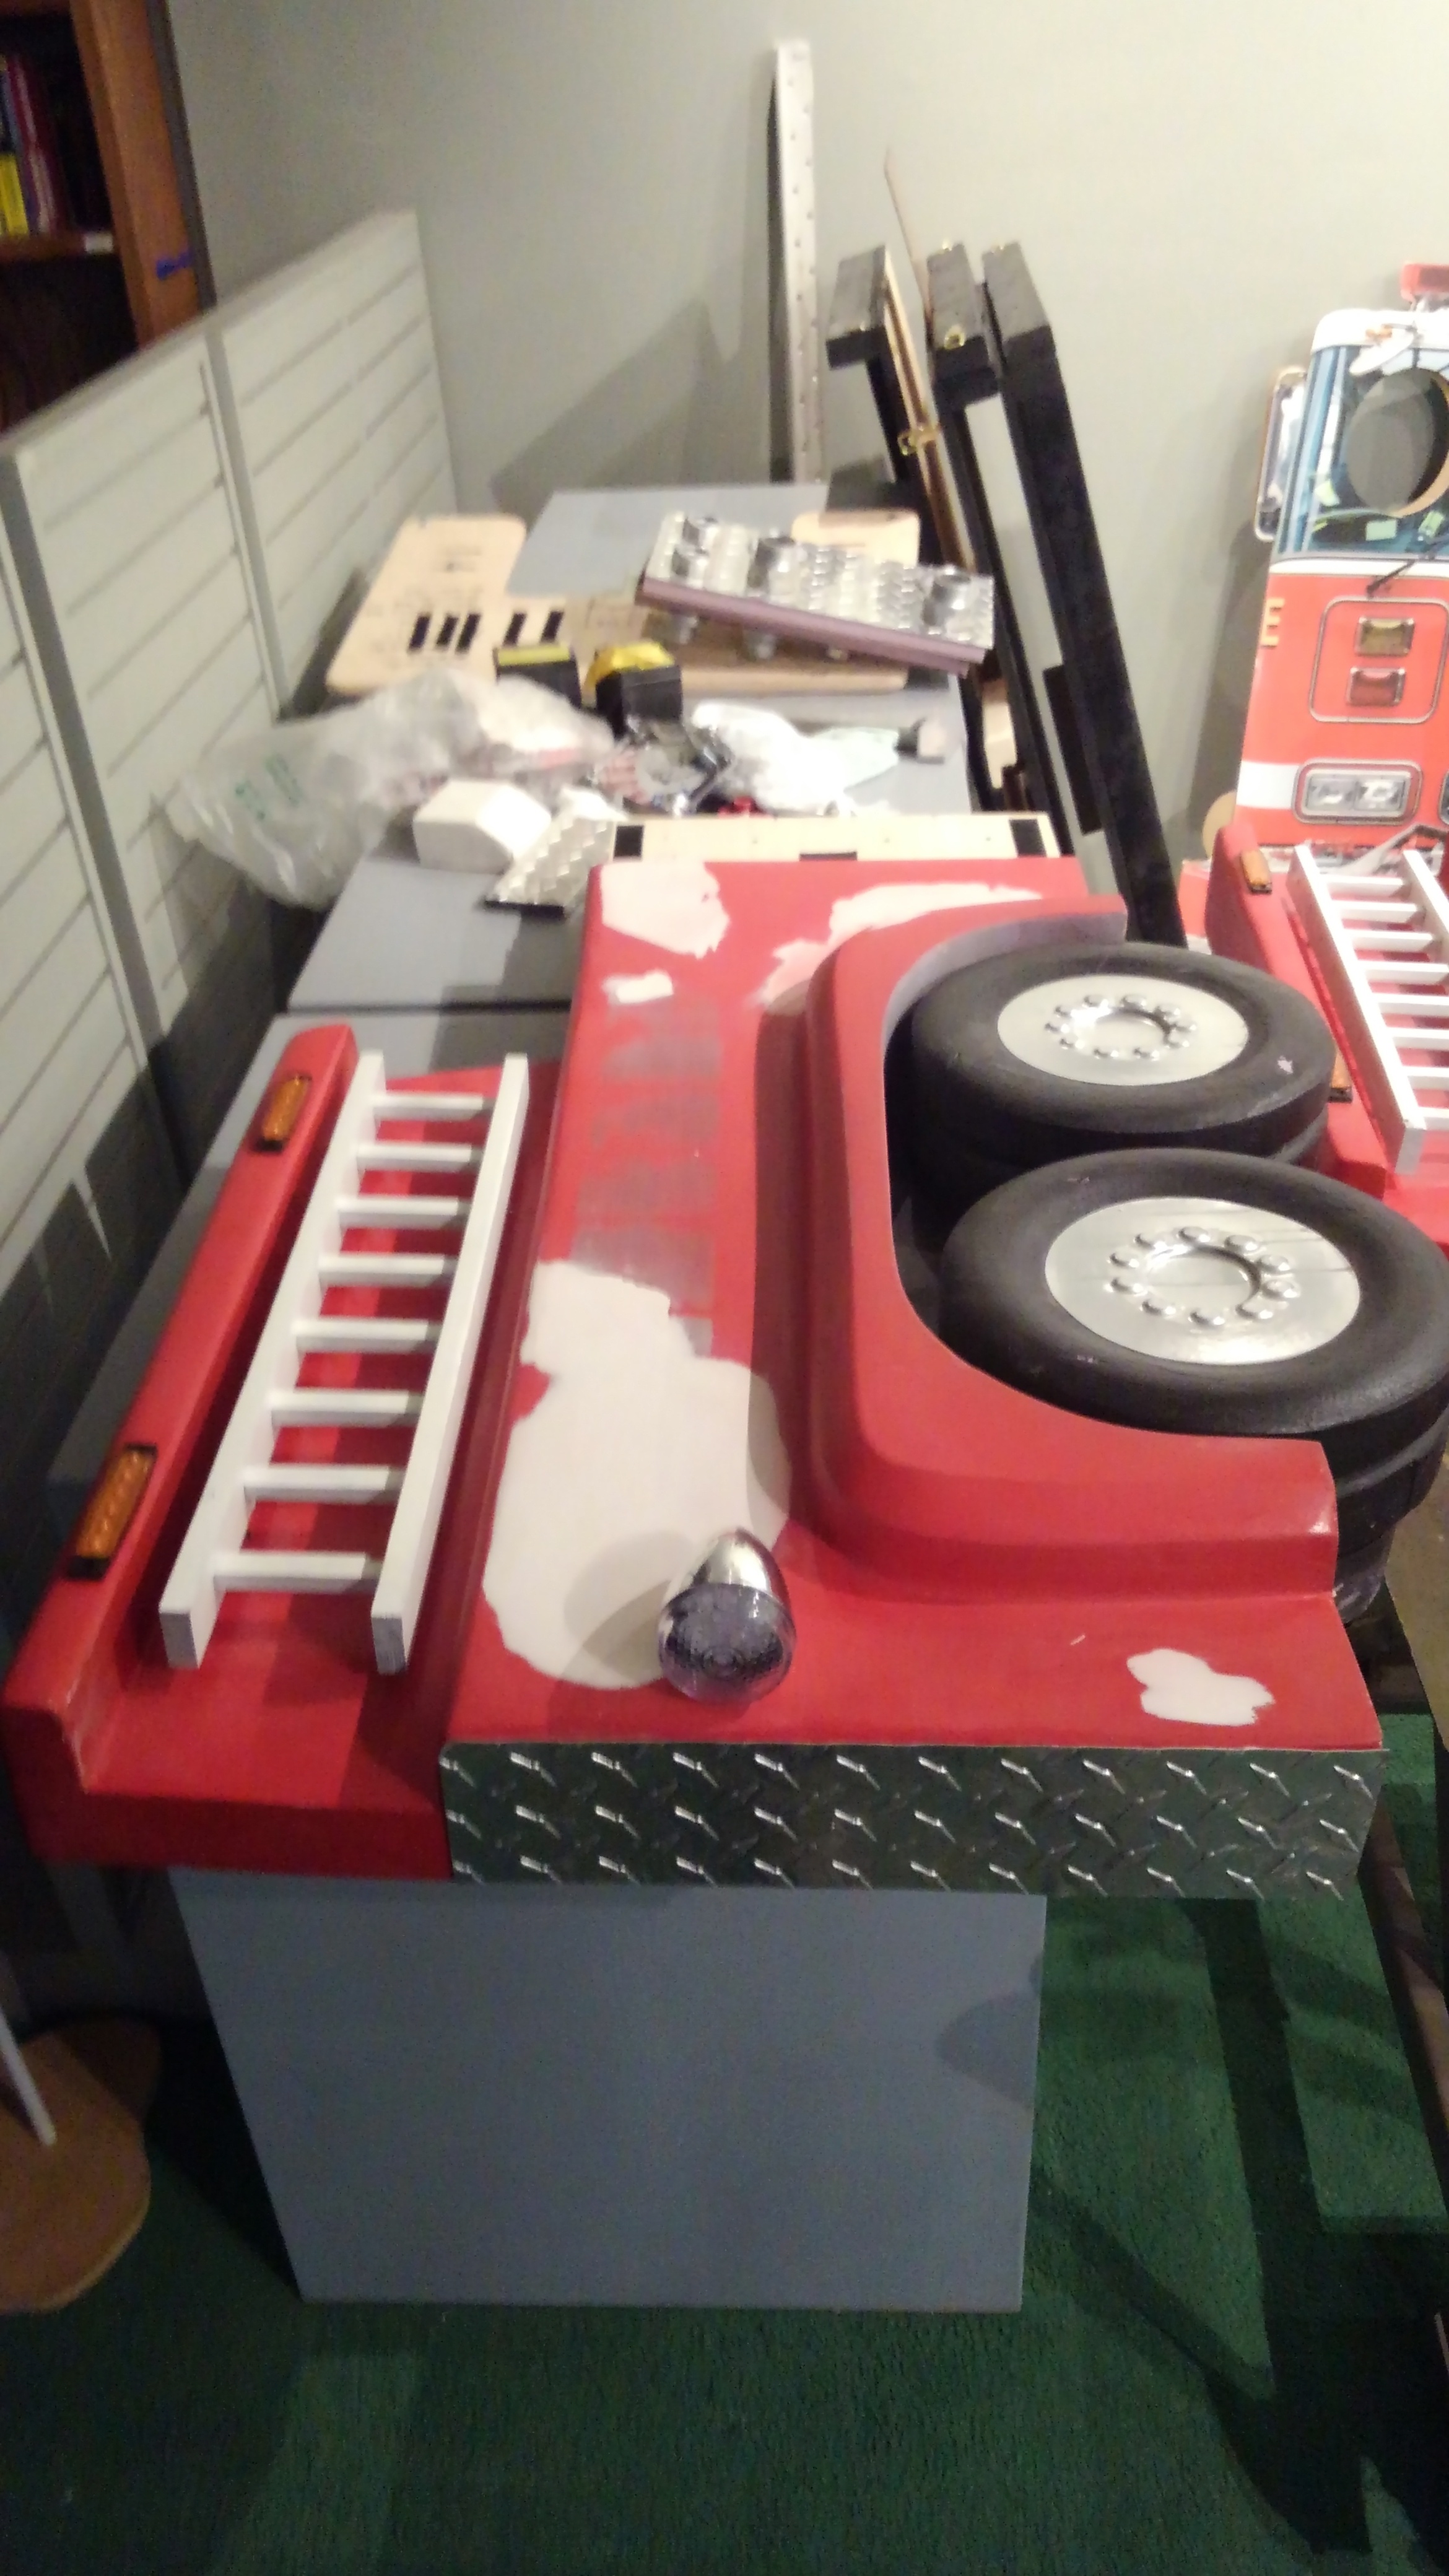
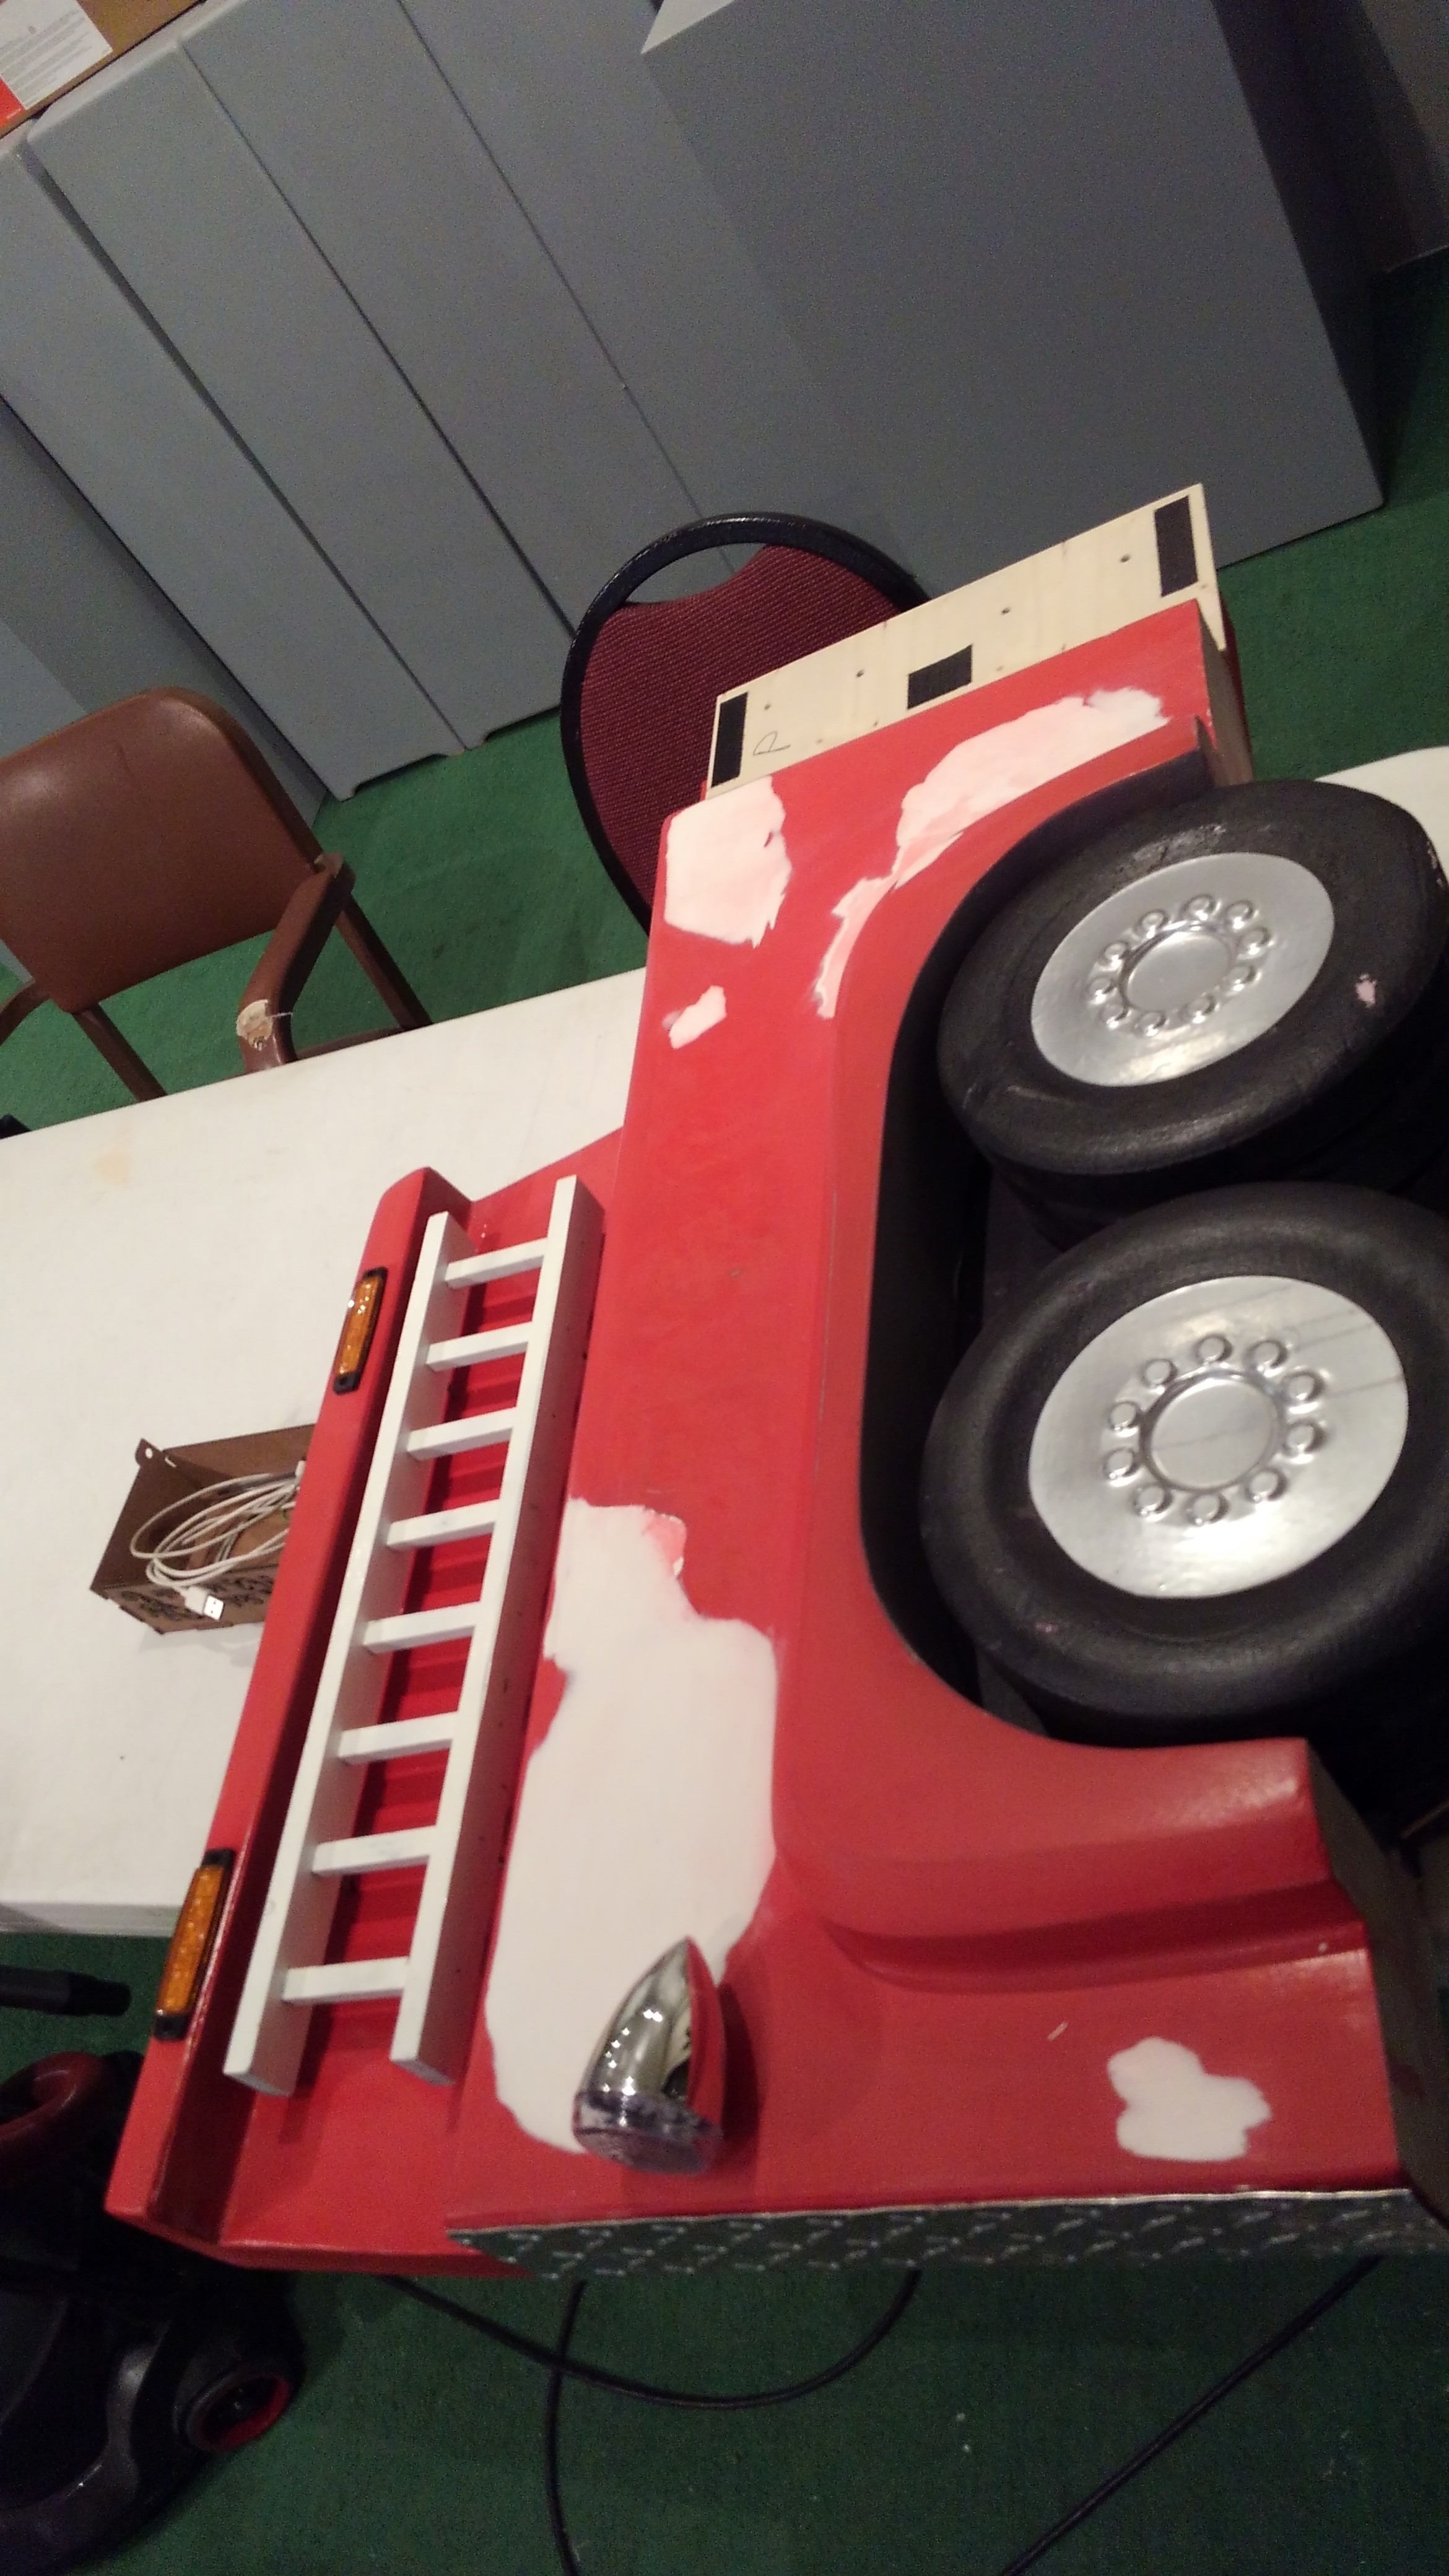
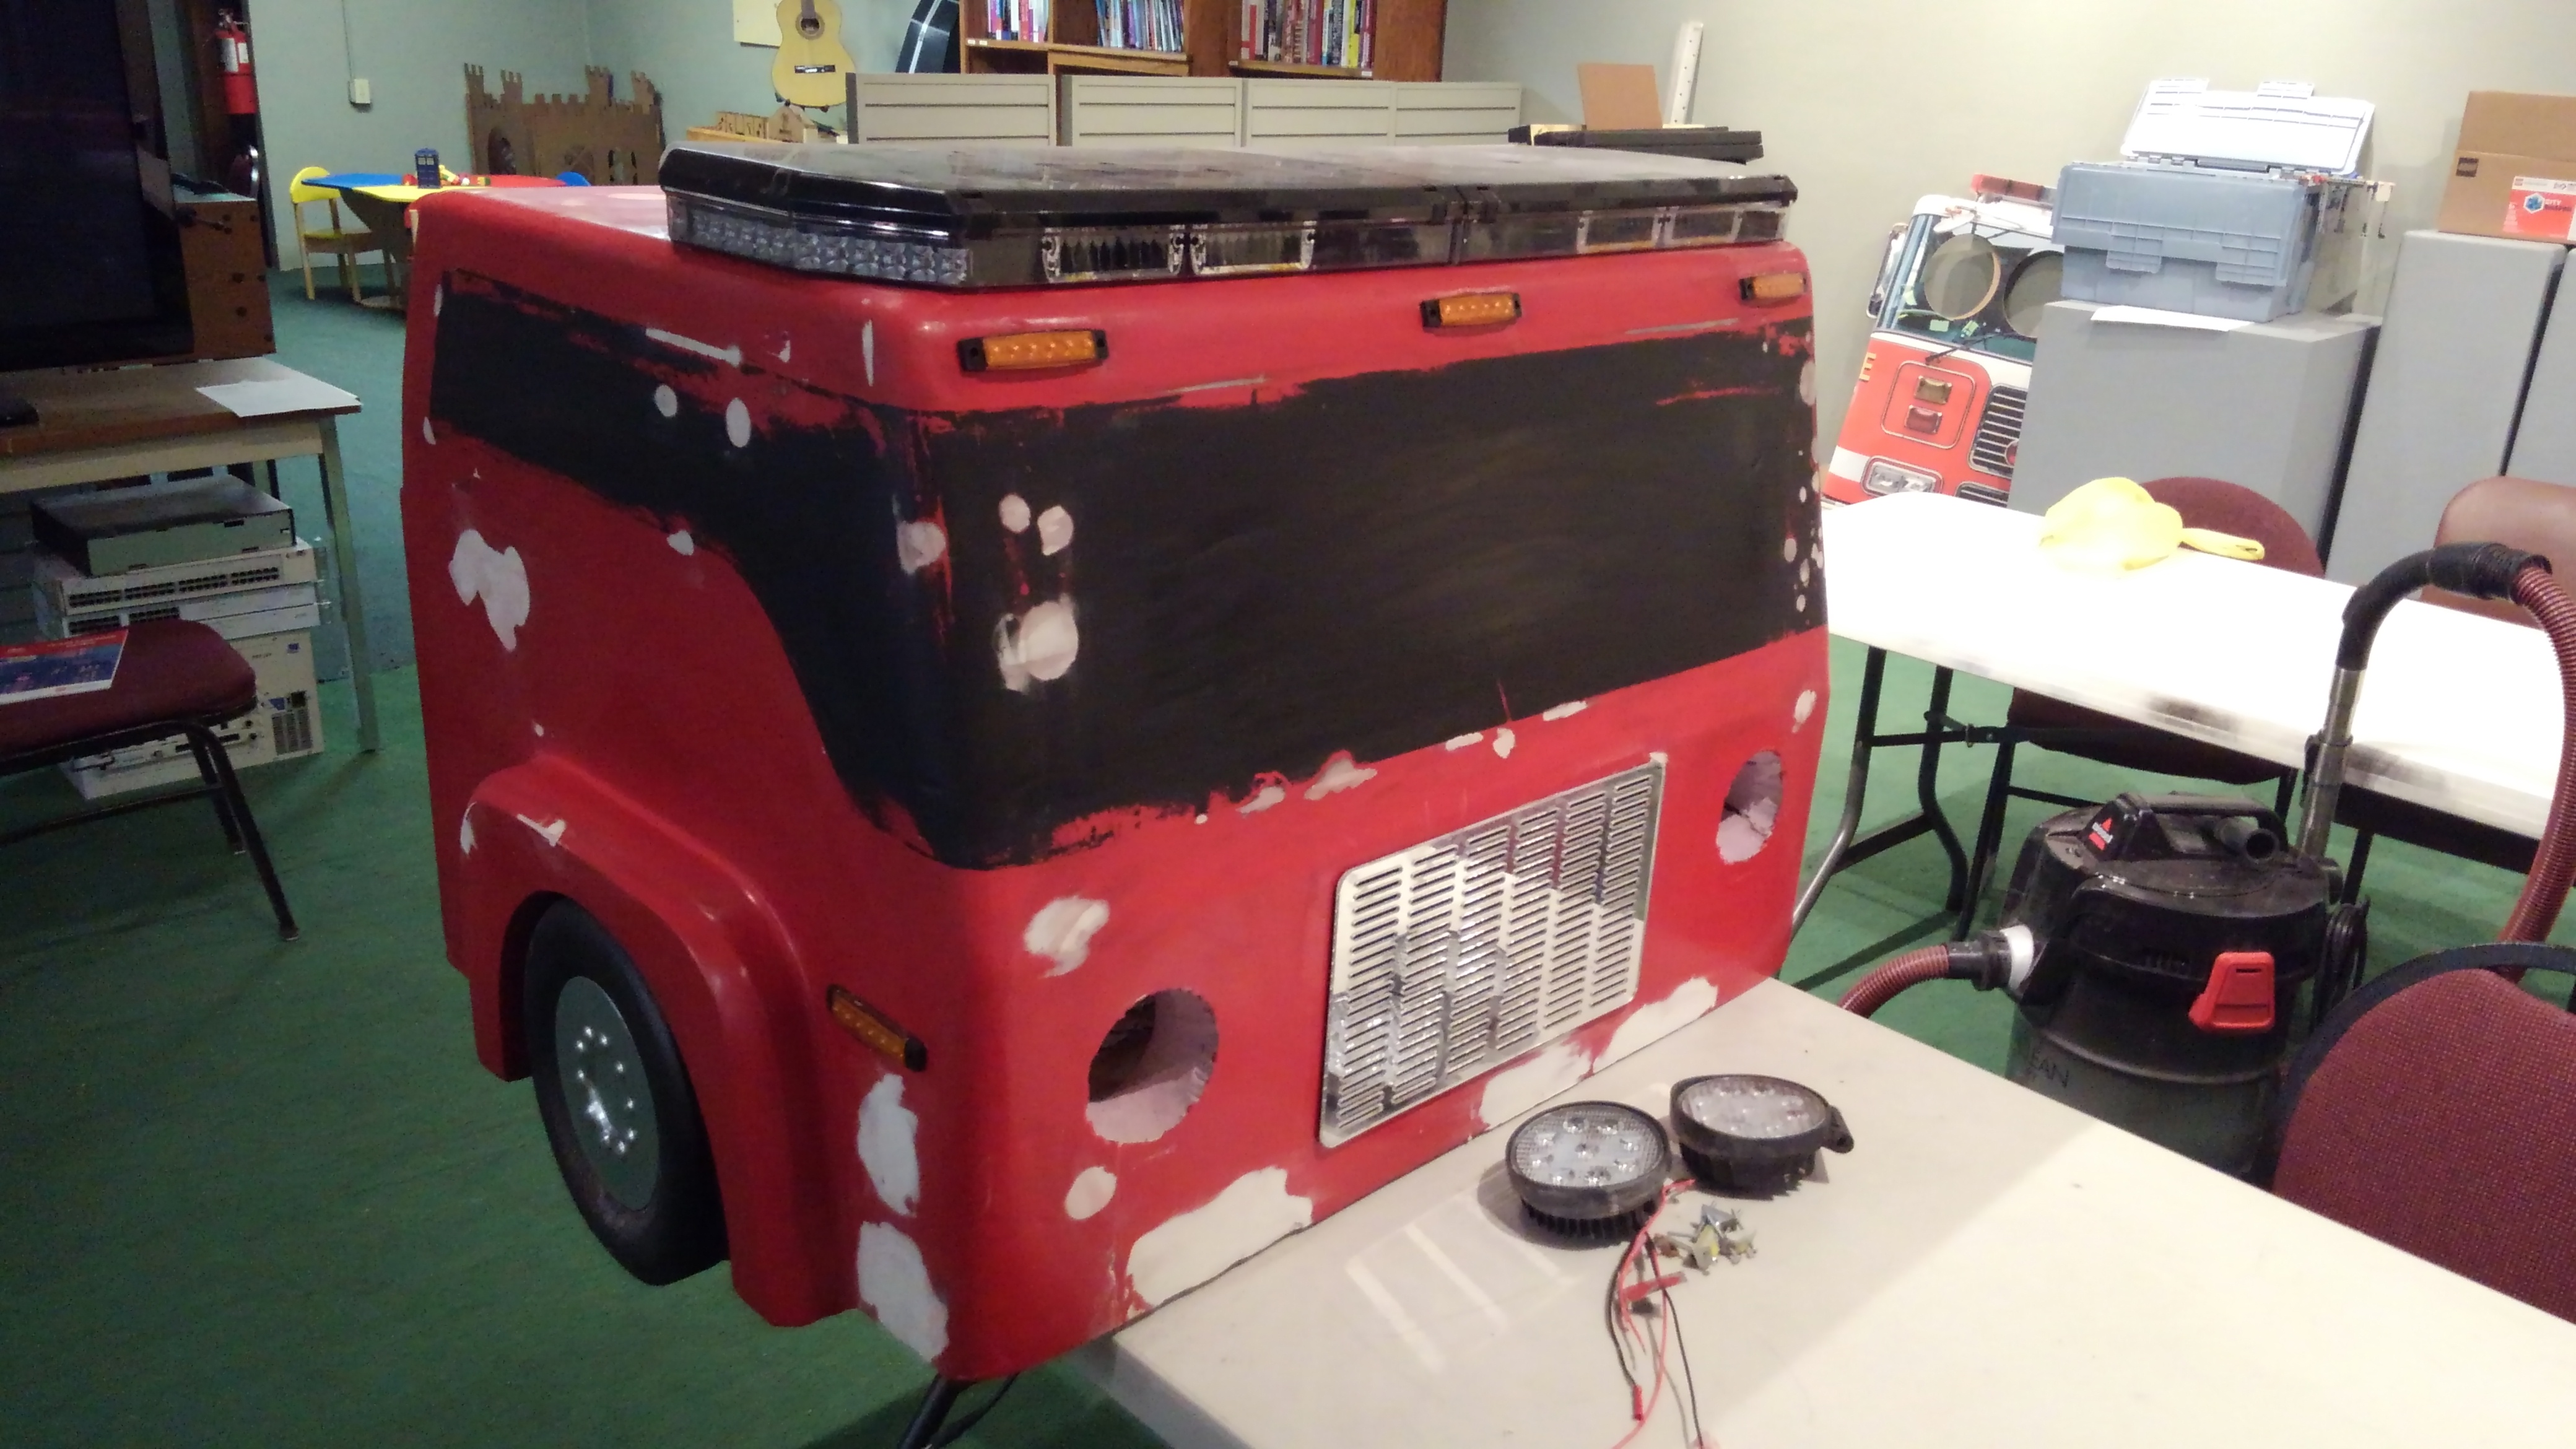
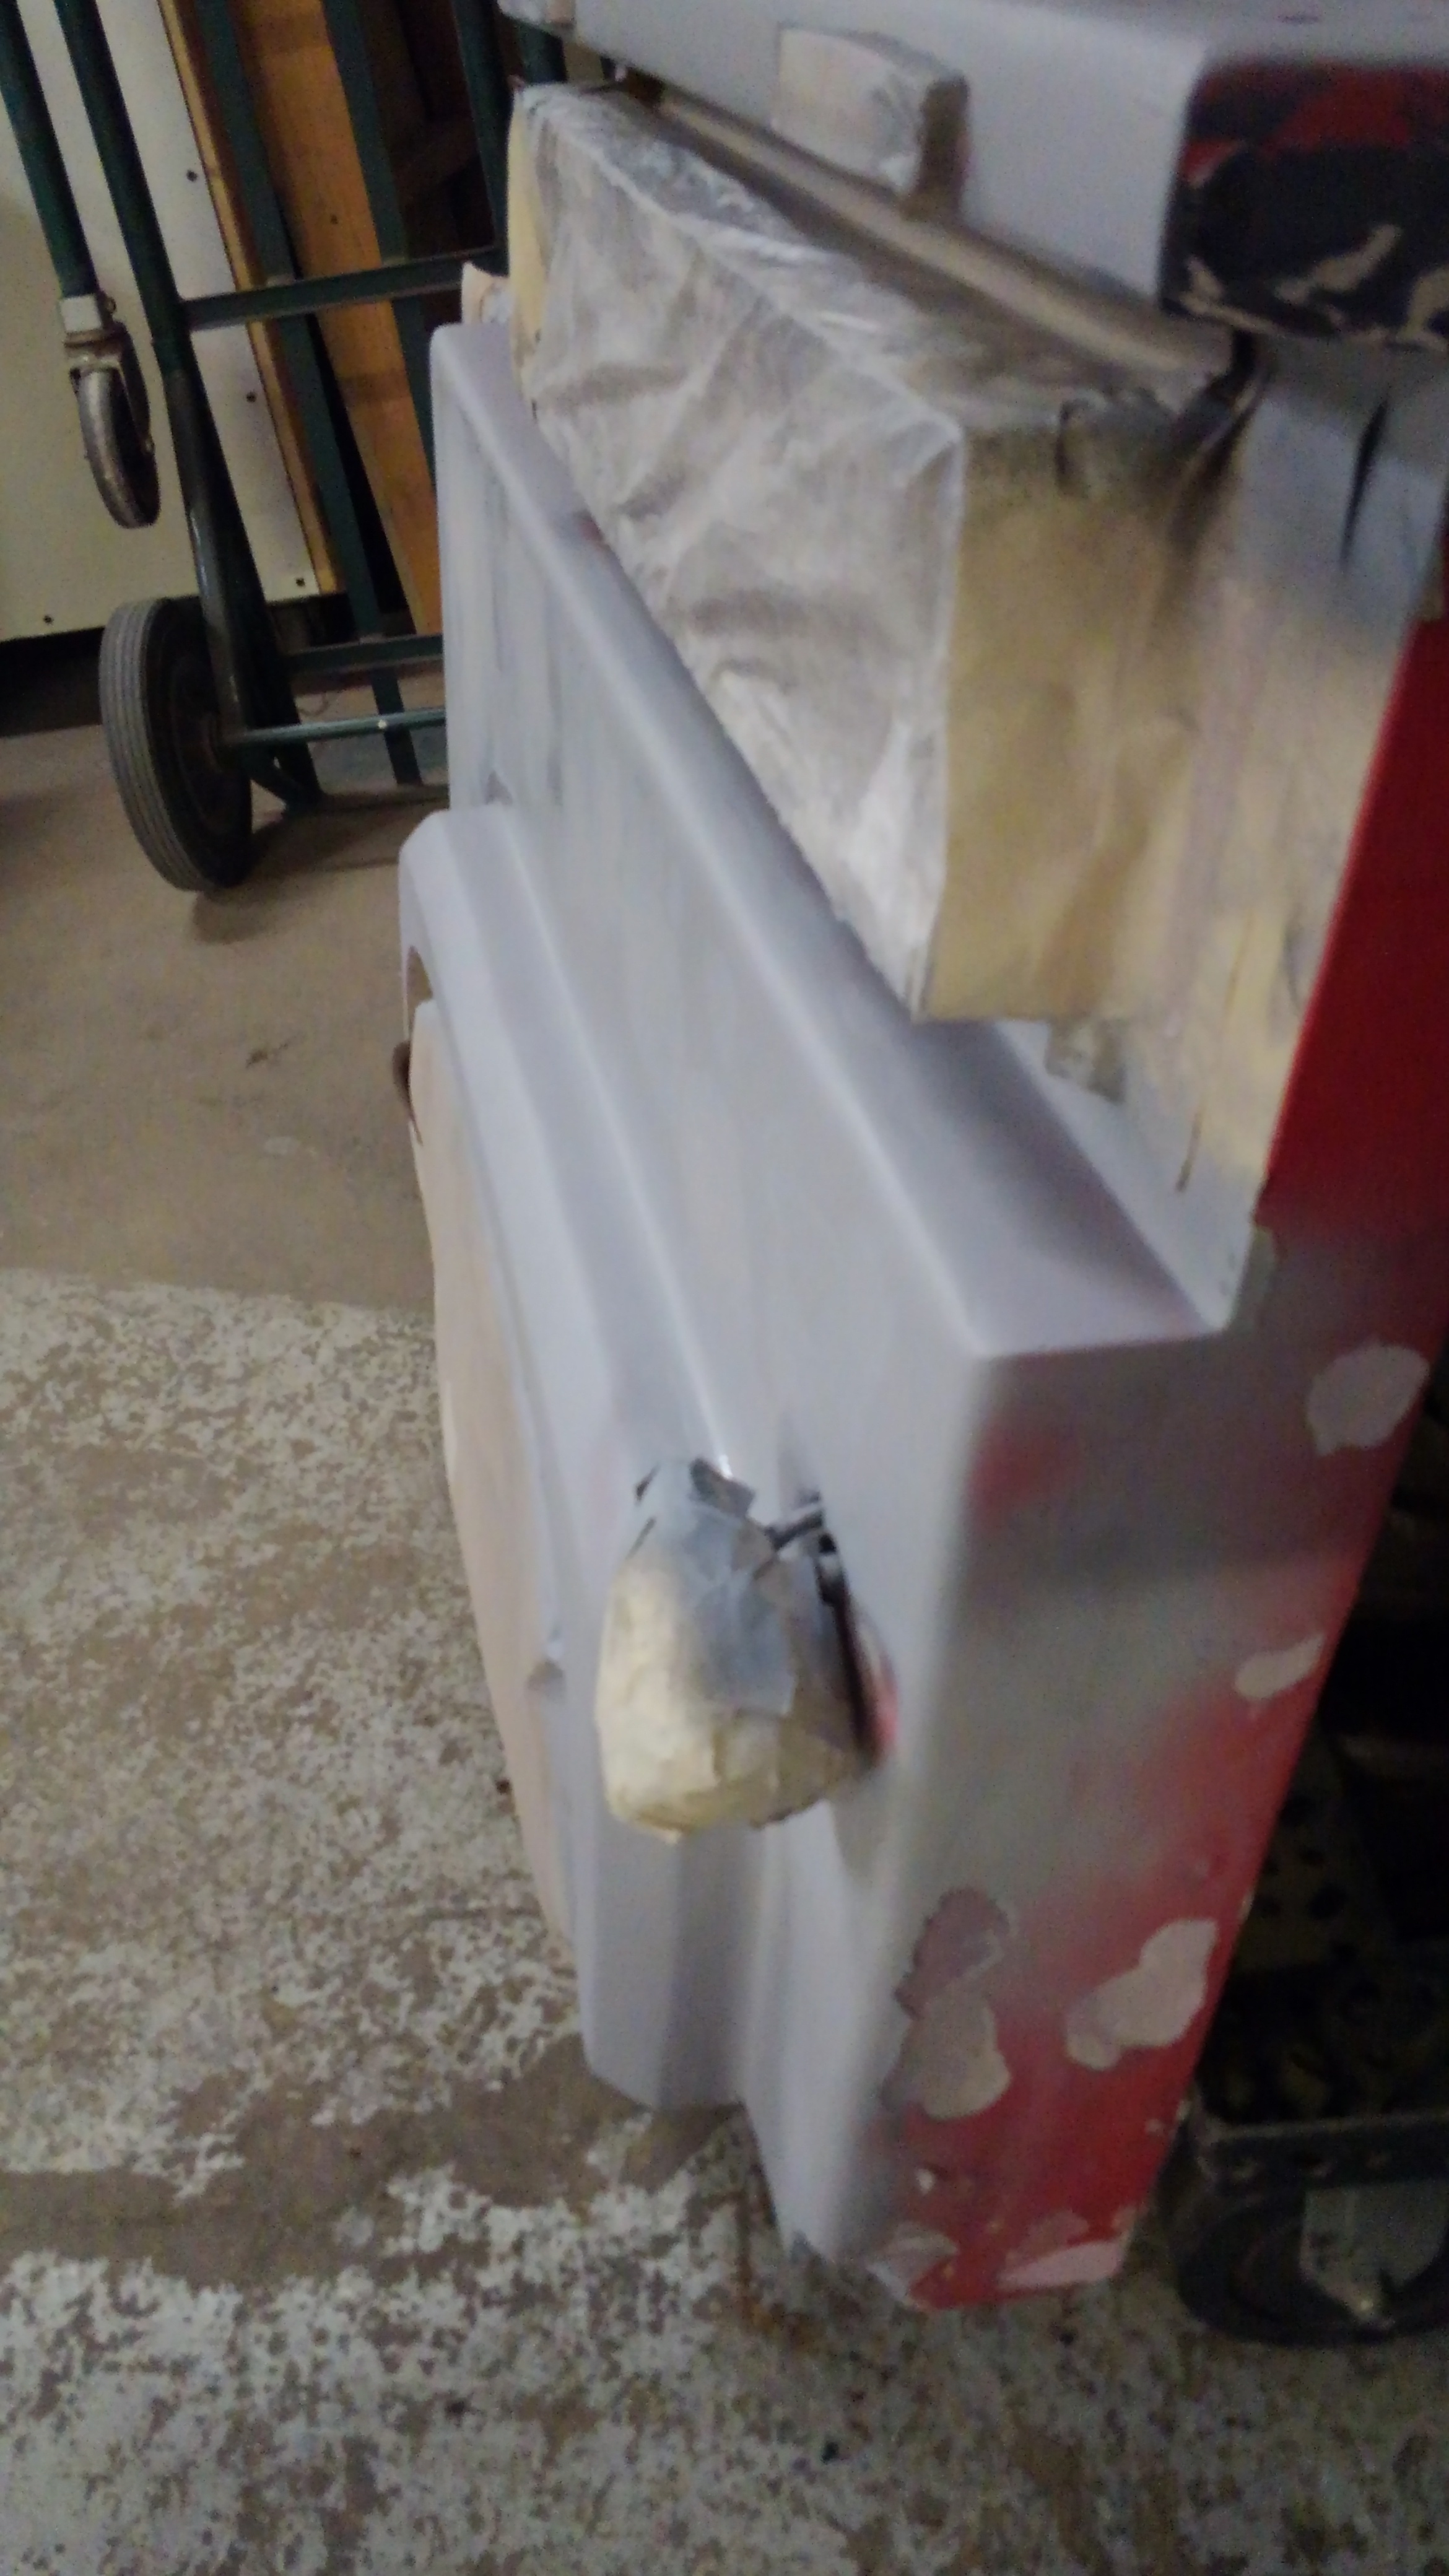
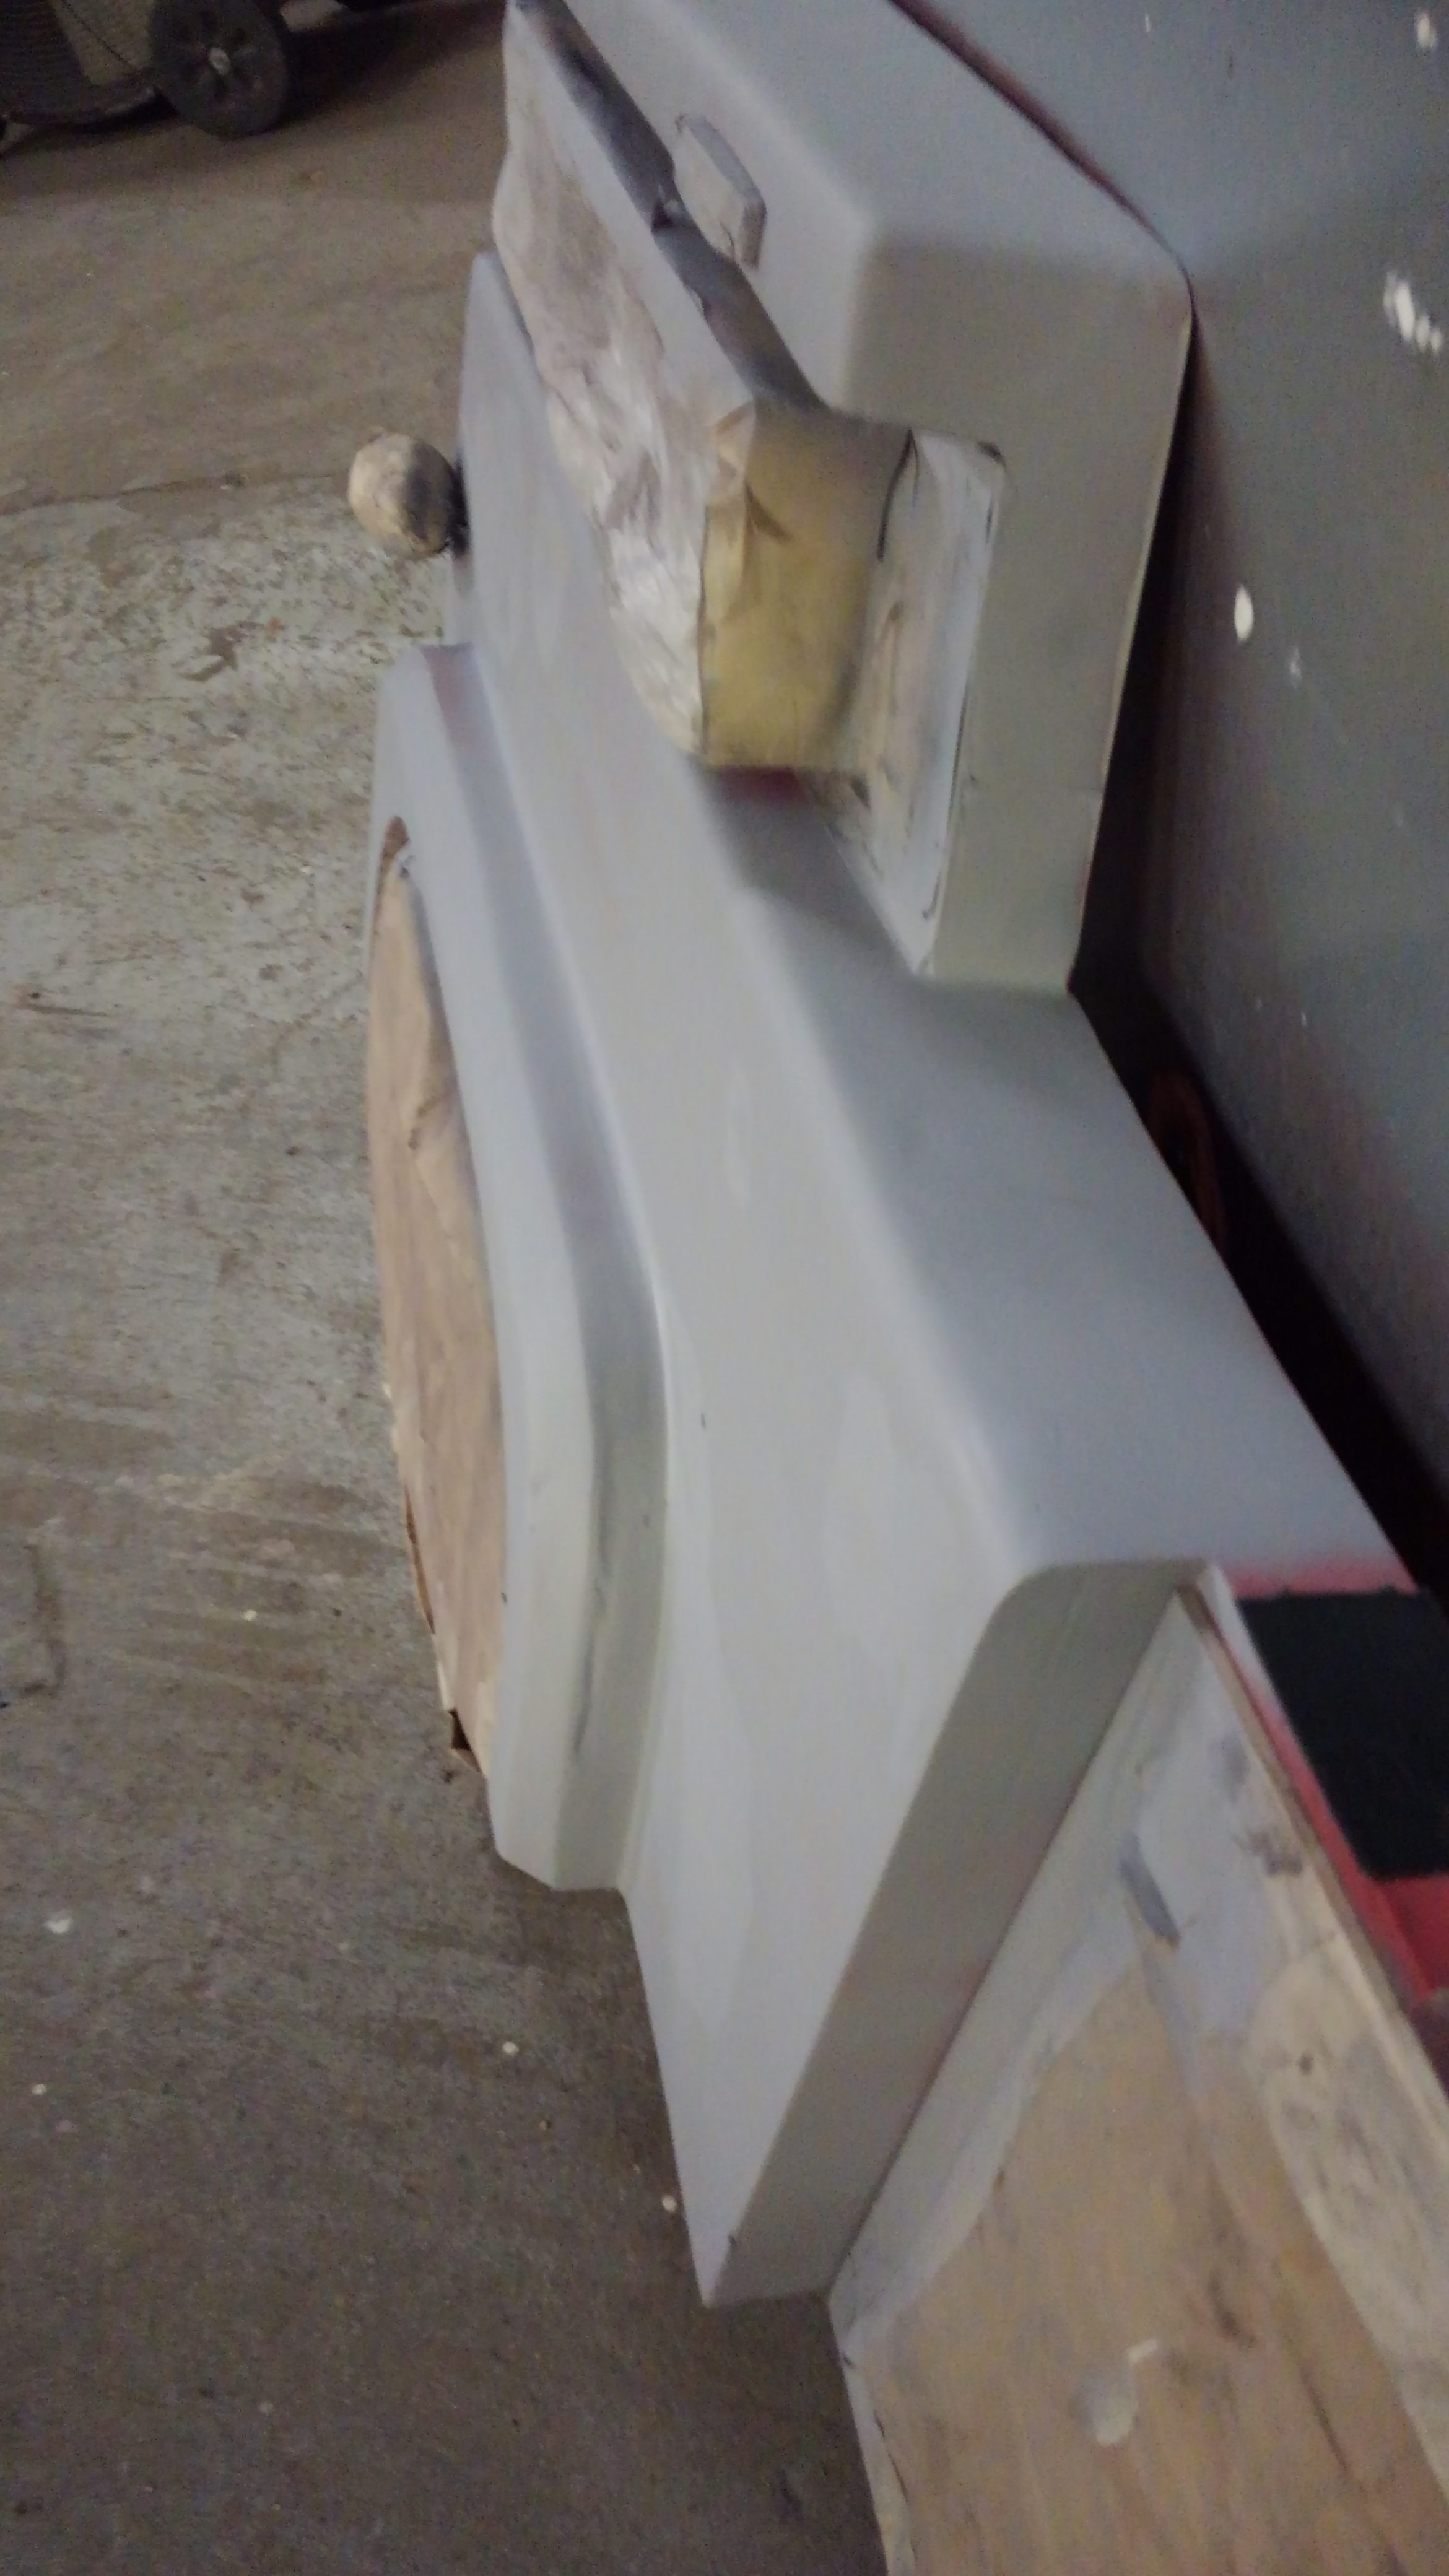
Thank you to everyone that helped today! A lot of progress was made today, but we need to be cautious. The pimples have been popped and filled for the most part, but we still have a bit to do before paint.
We will still need to:
-repair the front bumper (probably take some 3/8im diameter dowel and use some foam safe epoxy to glue the parts together)
-remove anything That can easily be unbolted/unscrewed
-lightly sand and clean off any surface to be painted
-mask off the wheel wells and anything that wasn’t unbolted
Before we look into a color coat, we’ll need to lay down a coat of high build primer. We’ll then do a light sanding on the primer with block Sanders and make sure we haven’t warped the surface too much. We may have to repeat that step a few times.
Supposedly we can take a piece of the fire truck to Lowe’s to get the paint matched, but if anyone knows what paint was used last time, that would take care of a few headaches.
Nice!
We could easily put some metal plates on the backside of the foam to help keep from tearing out the foam.
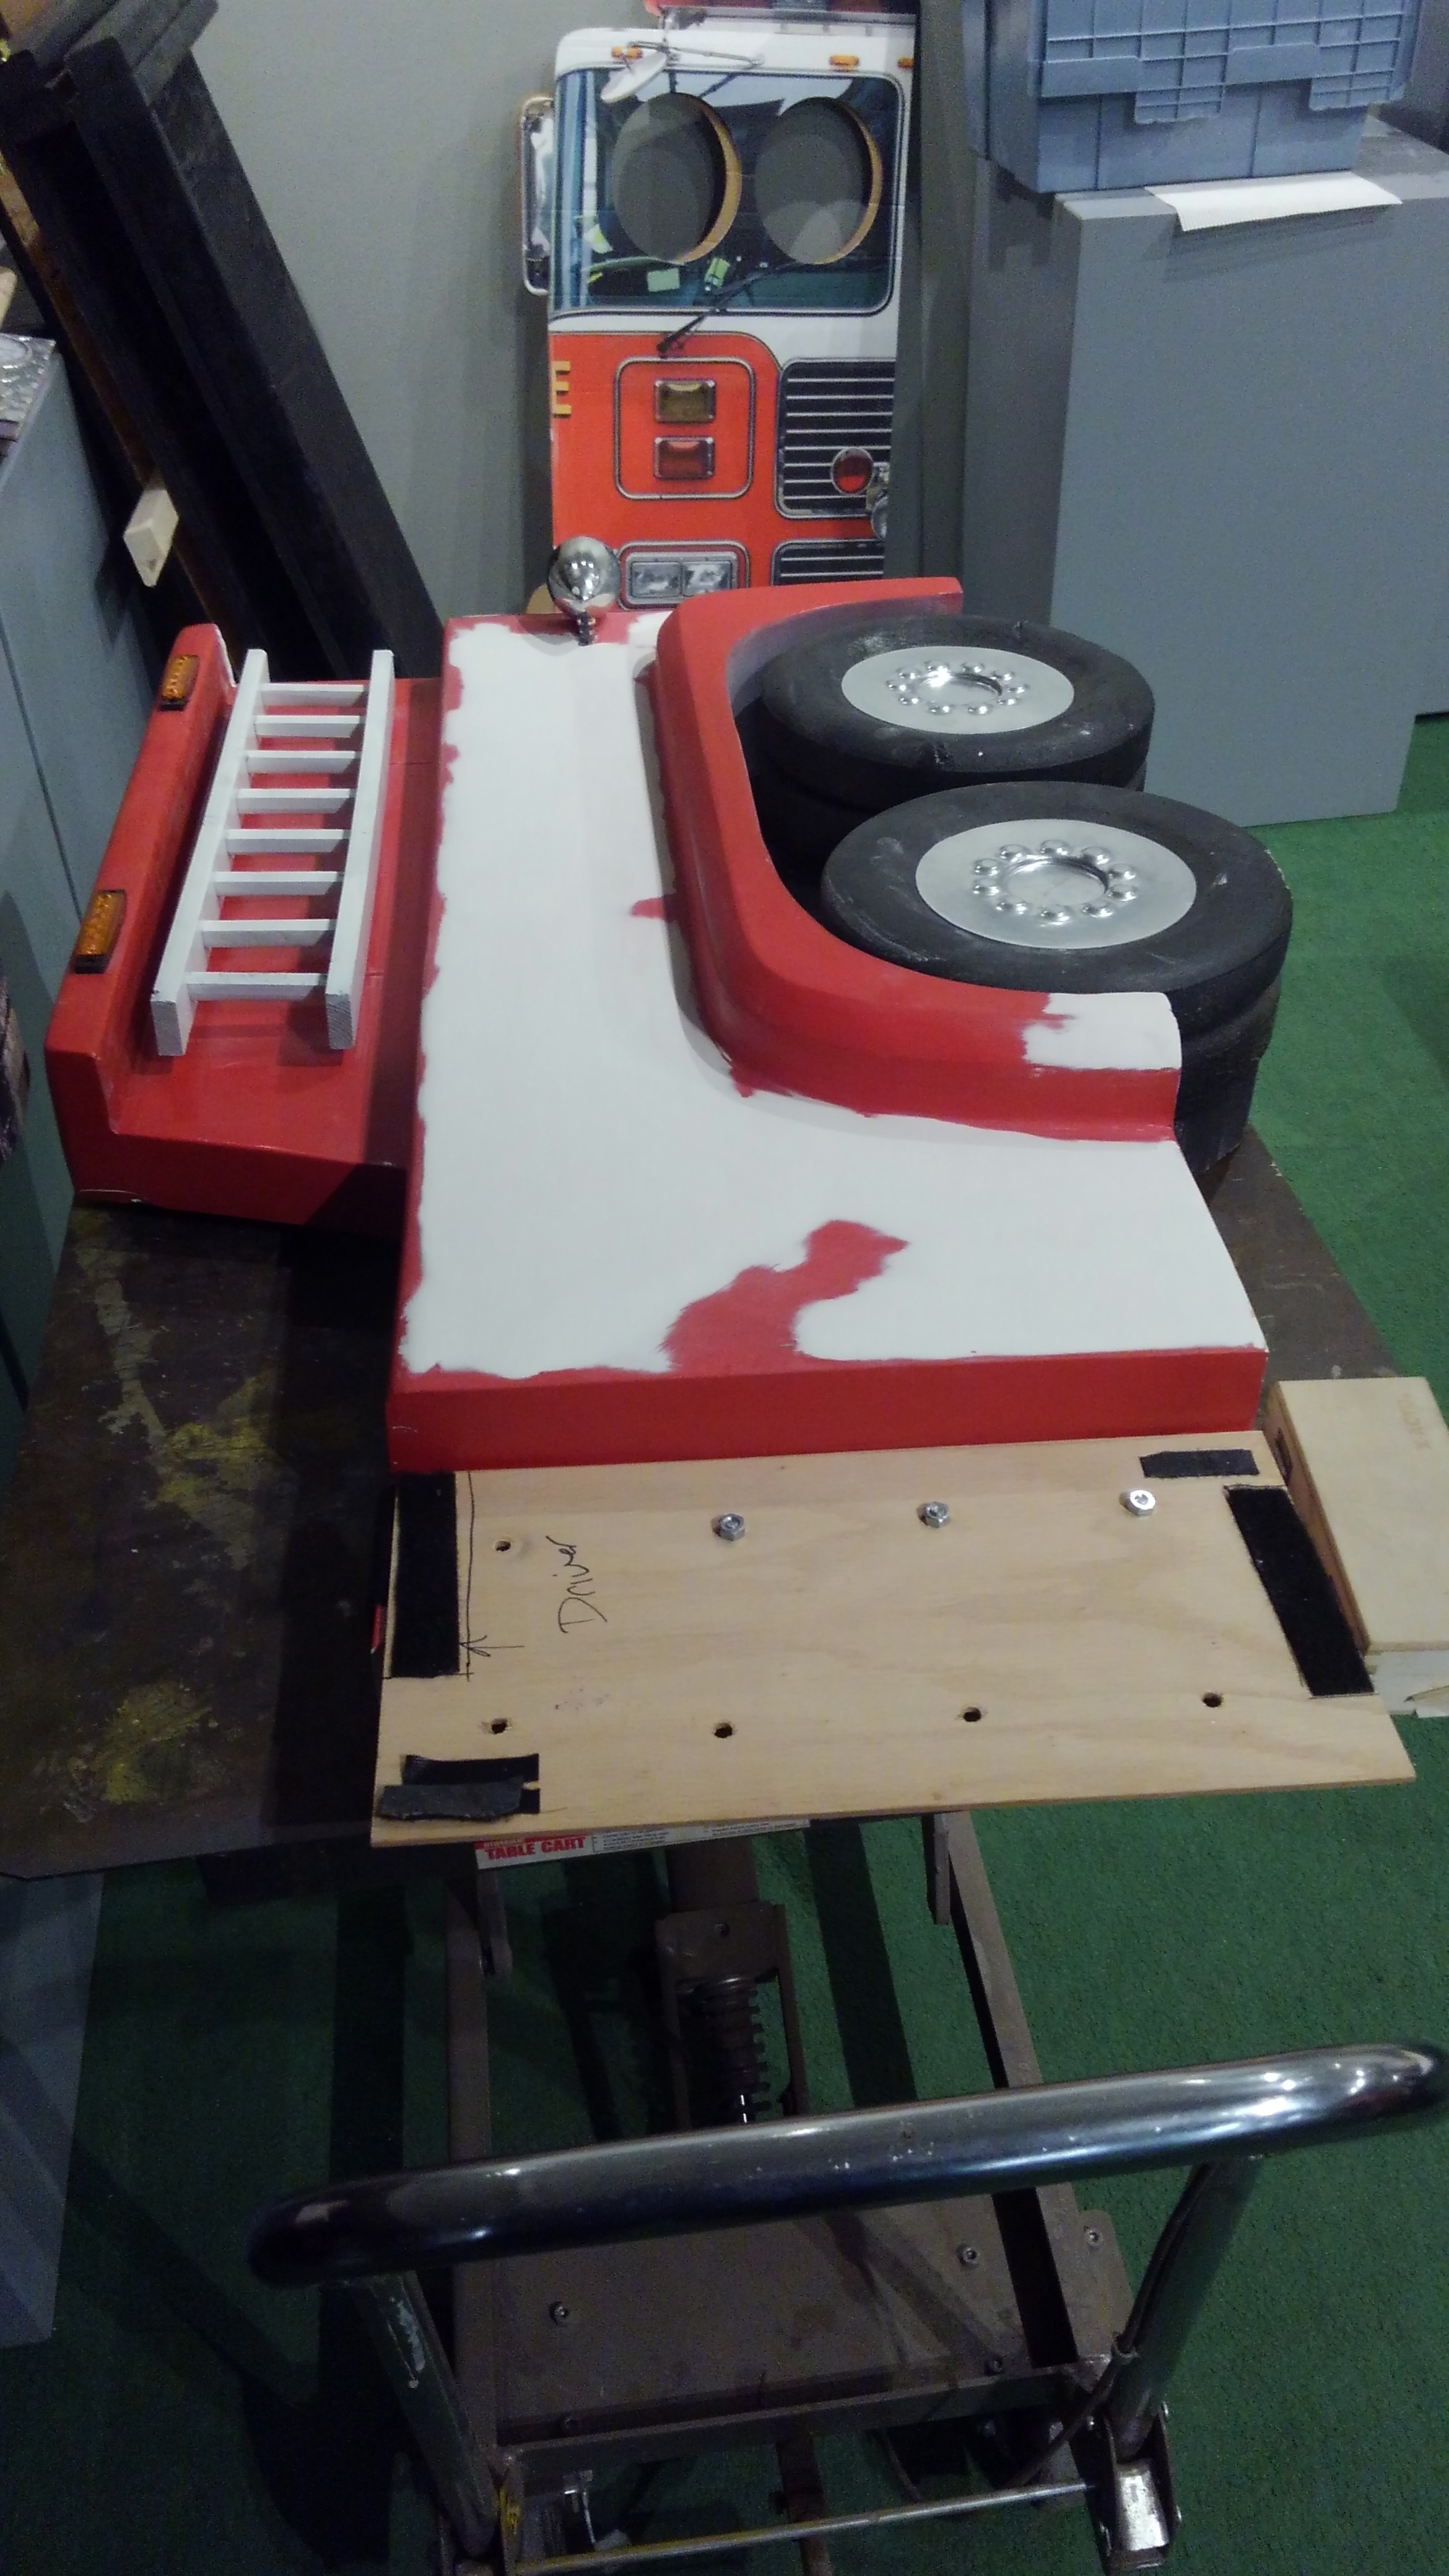
Made a bit more progress this evening.
I think we’re pretty much done with sanding on the body. I’ve taken some naptha and rubbed down the body to get rid of all the sticker sticky stickerson stuff off the body and removed what could easily be unbolted
The bubble turret is now in Christian’s care after we took a hot knife and an air dryer to soften up the hot glue holding it on.
We should be ready to do a wipe down of the panels and be ready to mask off the lights, ladders, and wheel wells. Once that is done, we should be ready to lay down some red high build primer (do some more sanding) and then hopefully be ready for a color coat and clear.
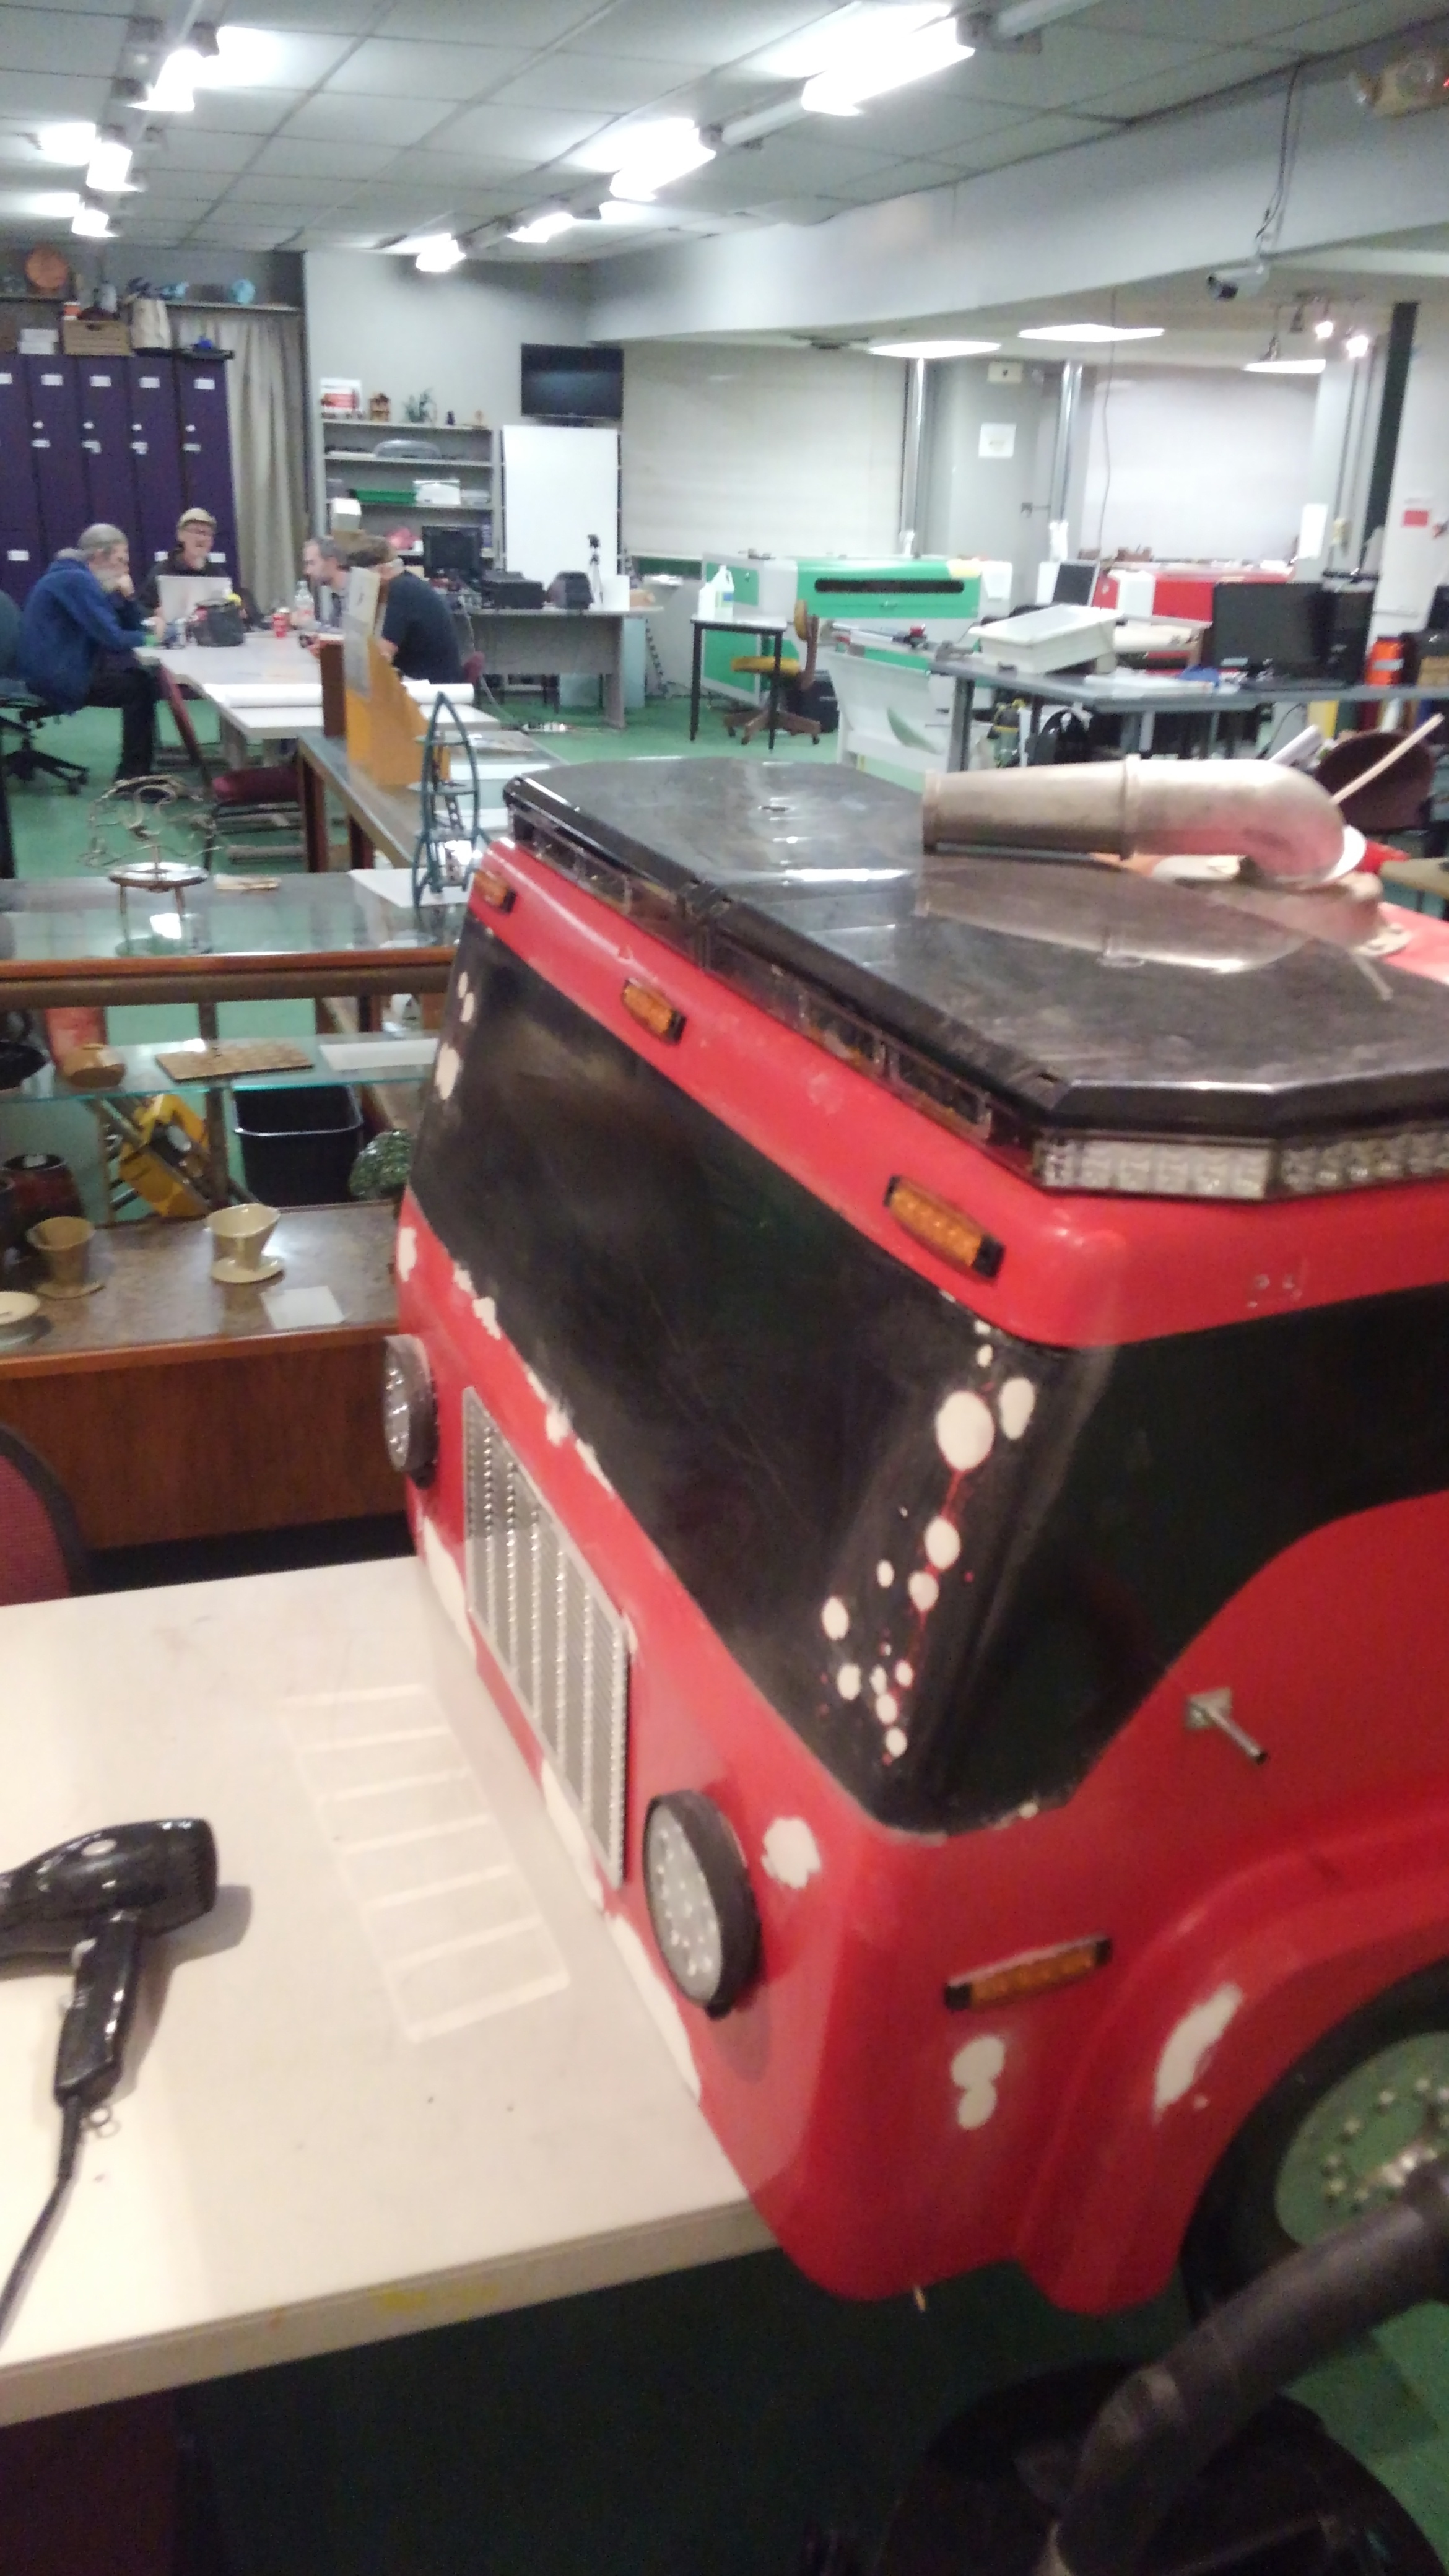
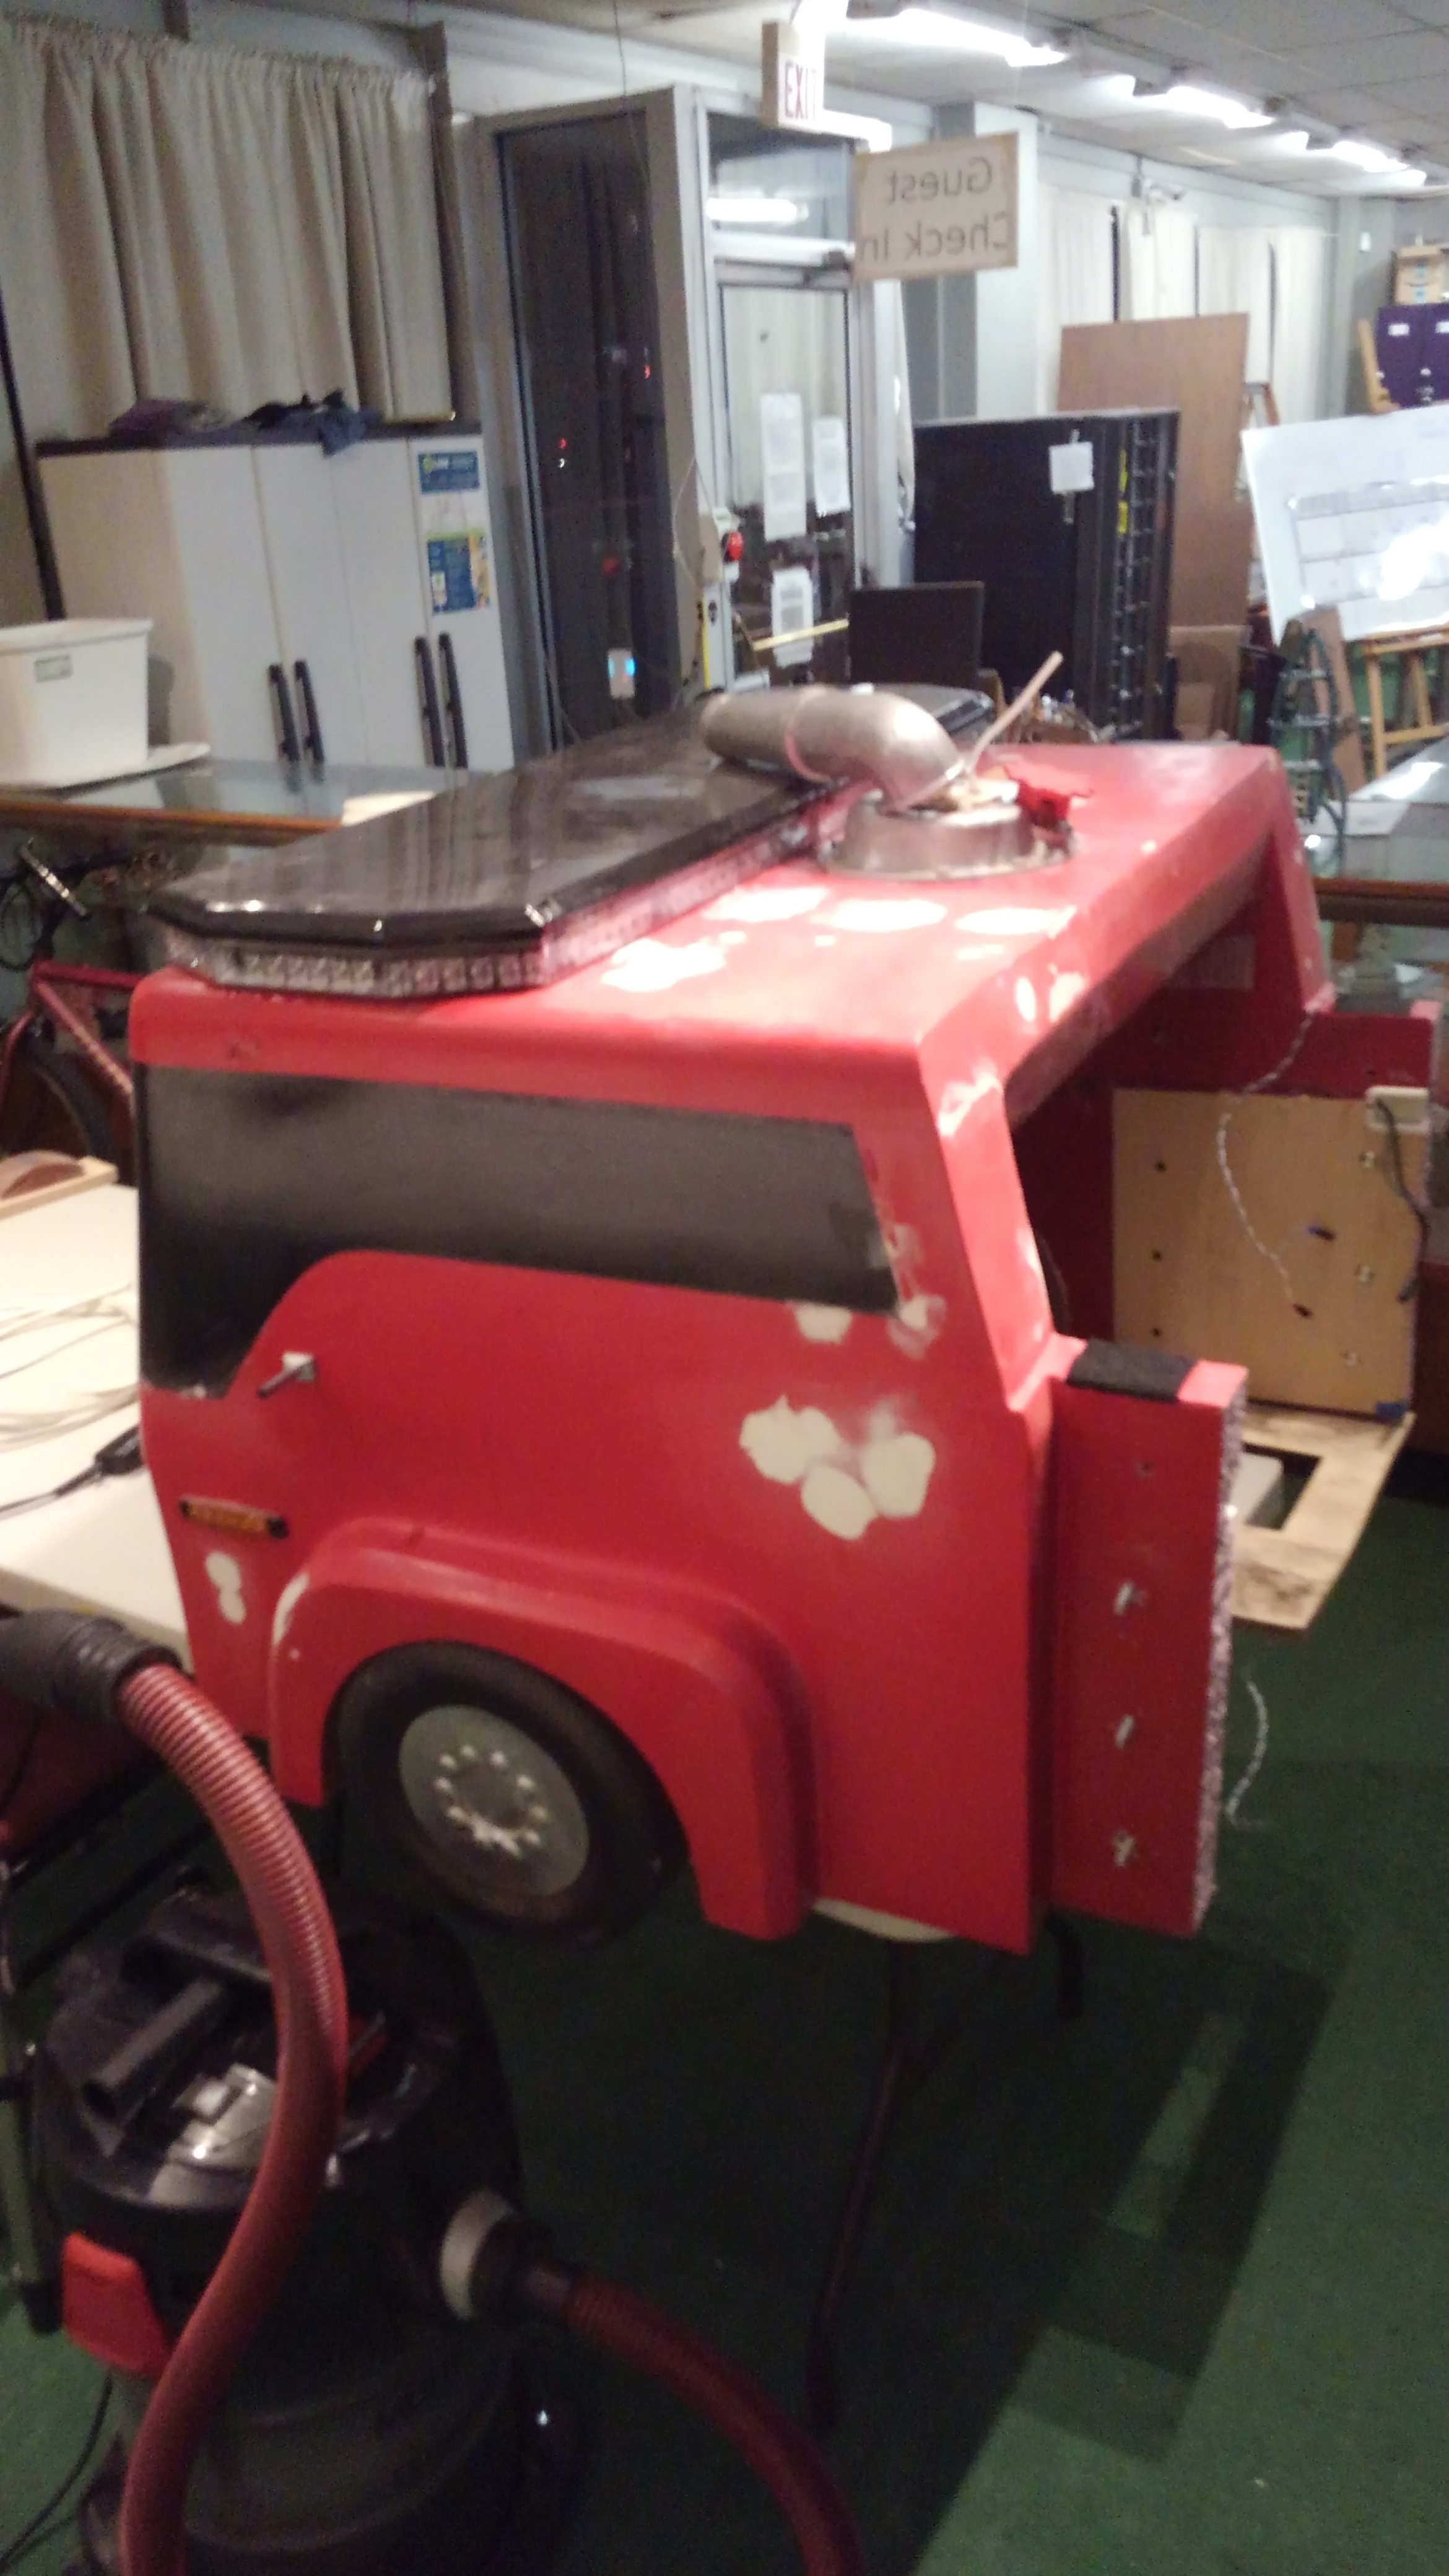
So we got some high build primer on the body last night. The intent is not to have a solid coat with high build but to find the low spots. By doing a light sanding, the high build primer comes off the high spots and shots spots where we might need to do more body work. One of the panels didn’t look that bad with the high build primer, but the front is going to need more attention.
… unfortunately, I don’t know if I’ll be able to make it down tonight, but with any luck, I should be down Friday for more sanding and prep work. It may take a few more days to get the body into a more respectable condition.
Big thanks to Angel for helping to mask everything off last night!
Both of the side panels are now sanded down. If someone wants to wipe them down with Naptha (from the wood shop), that would be greatly appreciated. After that, those panels should be ready for a color primer, and then the color coat and clear coat.
I have not sanded down the front yet, but it’s pretty much the same process on the front as the sides… with just a bit more area to cover. The sand paper is sitting on top of the fire truck for who ever feels up for tackling it.
Guys, I need more help with the fire truck…
The front is looking better, but the sides are not as good as I originally thought. We won’t need to sand the primer all the way down this time, but they definitel need the paint sanded off where the low spots are.
I am going to be tied up on Friday and Saturday, but plan on spending almost all of Sunday at 1500 Douglas to sand on them and would appreciate some company. Feel free to come down and sand on the side panels ahead of time.
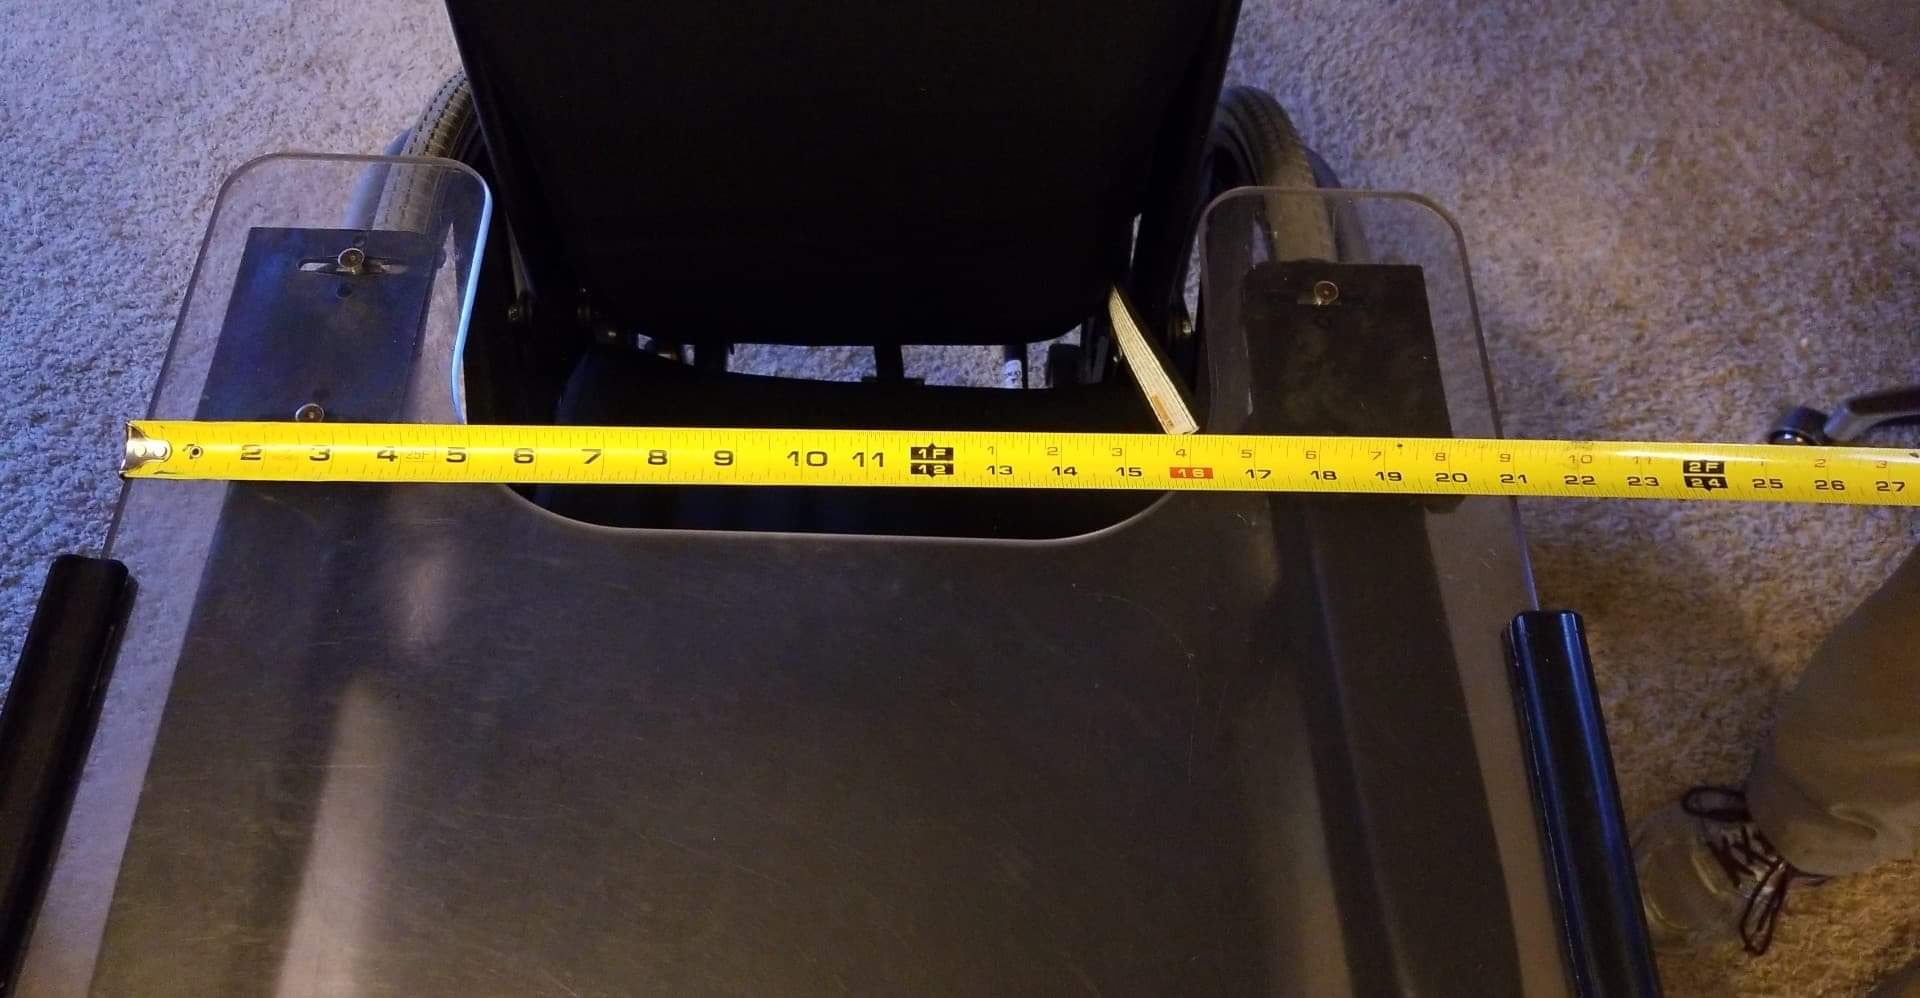
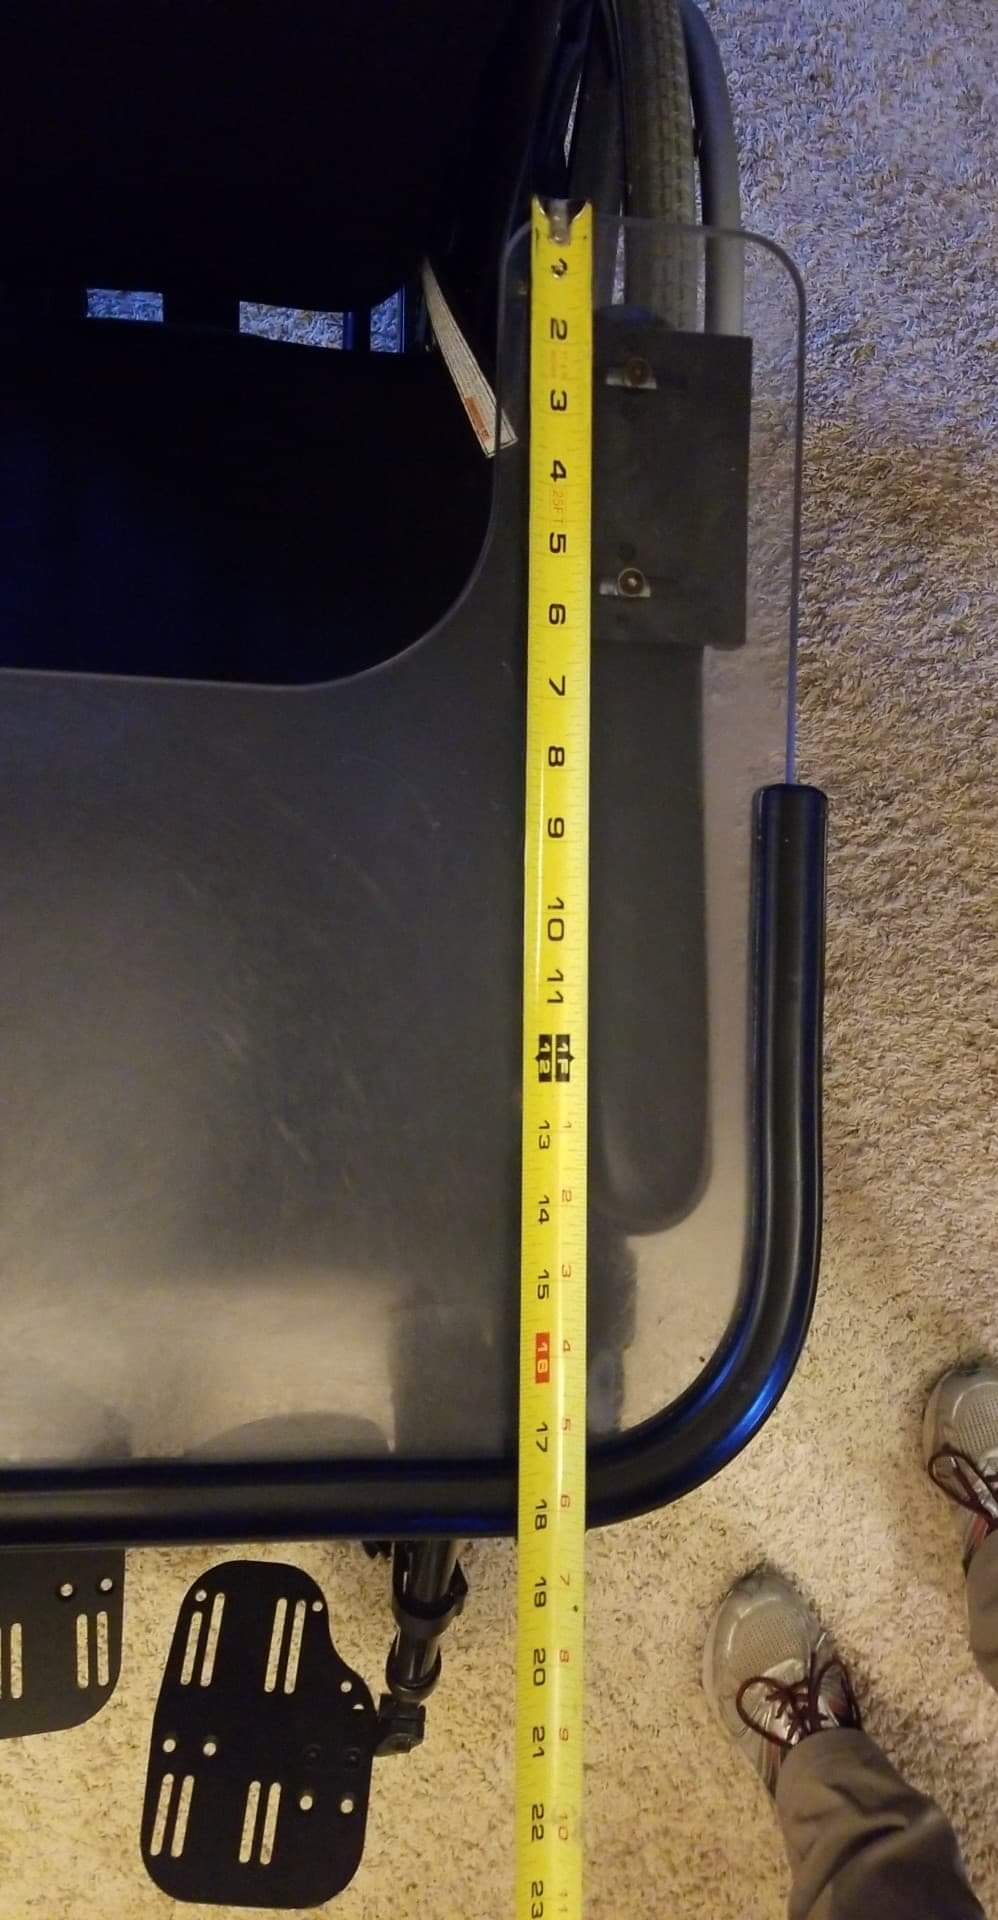
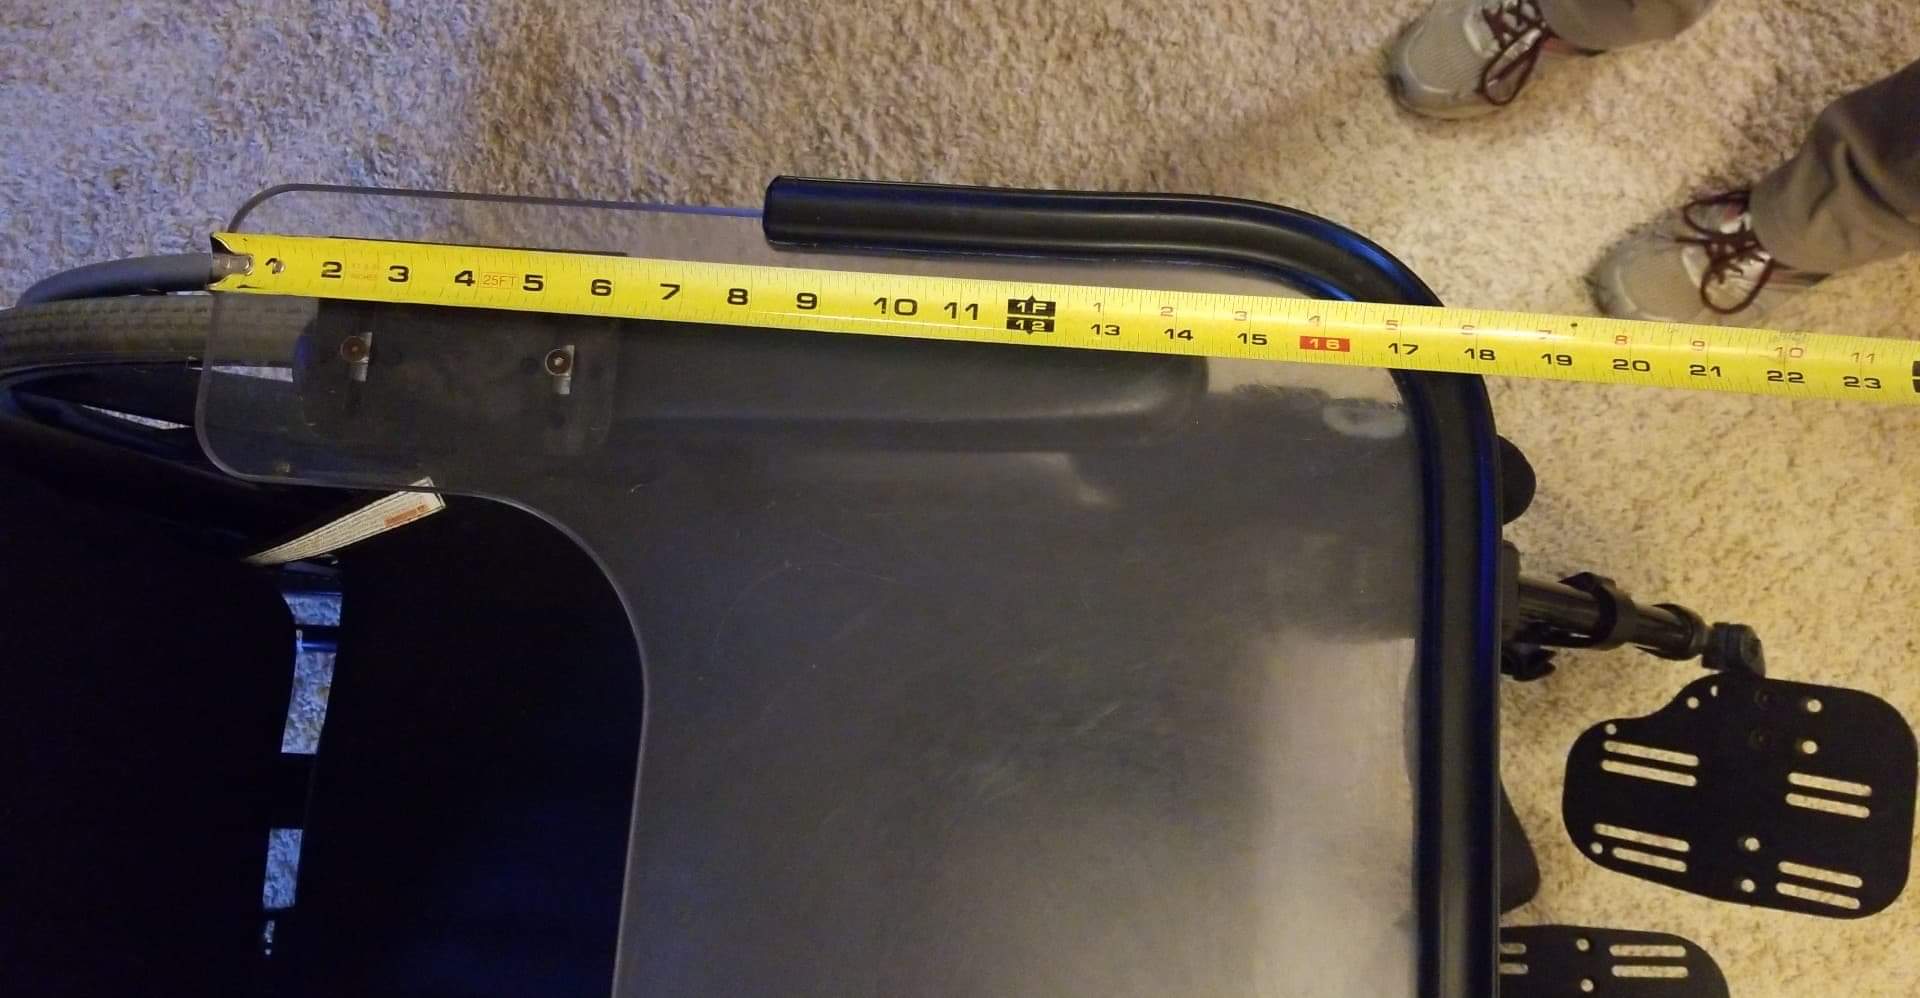
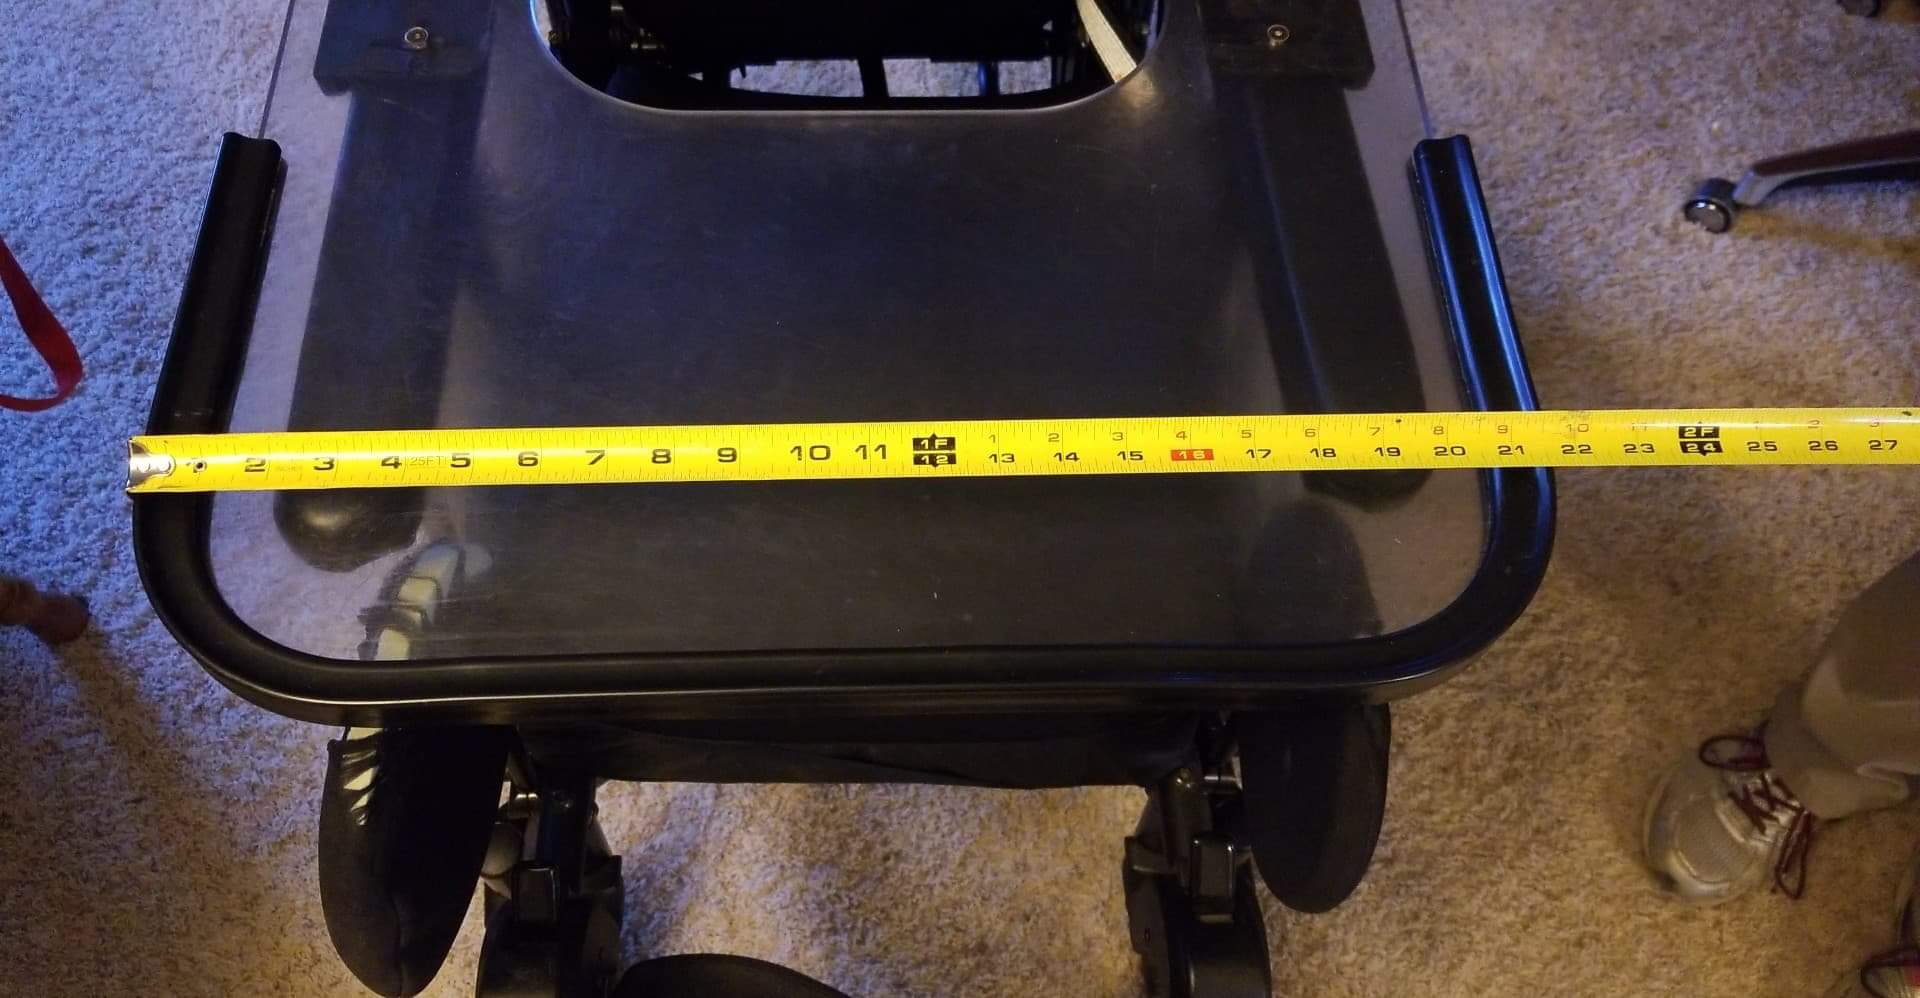

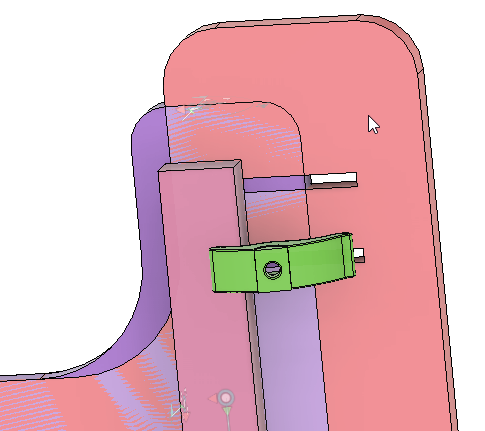
Can you check to see if they have the aluminum cam arms from the old chair/board?
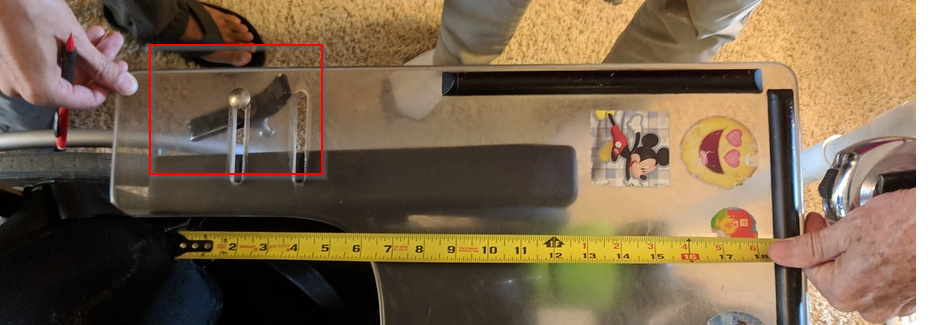
The new chair/board uses a totally different mounting system.
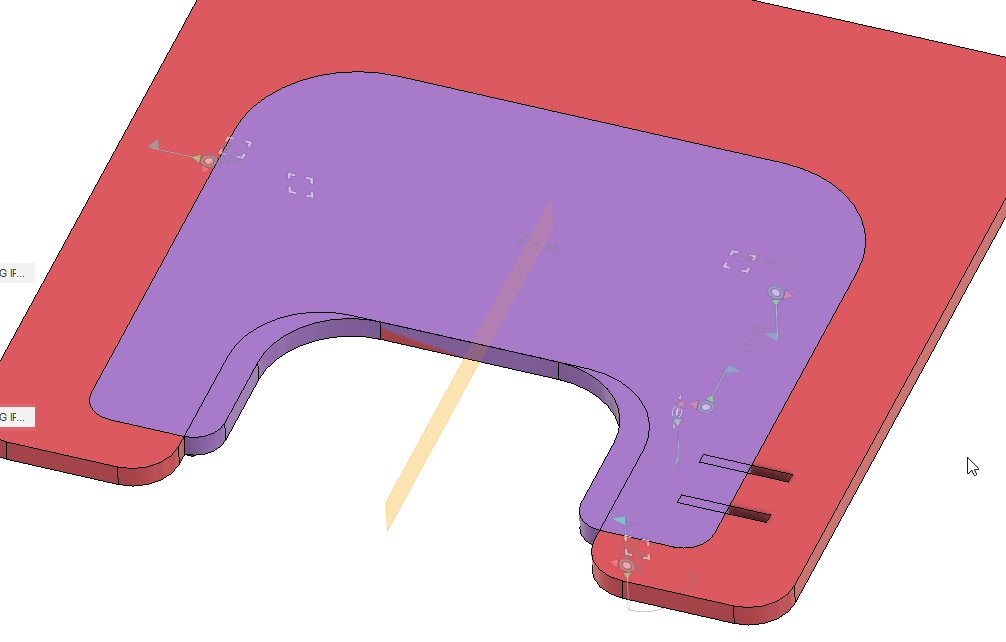
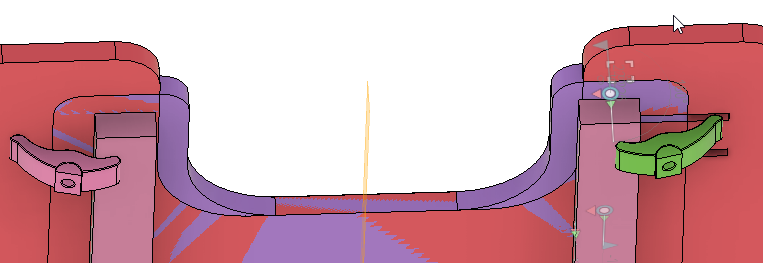
Red represents the existing board (as best I can pull from the past forum posts).
The only thing I can see is the inner edge of the board will be right on the edge of the new arm rests.
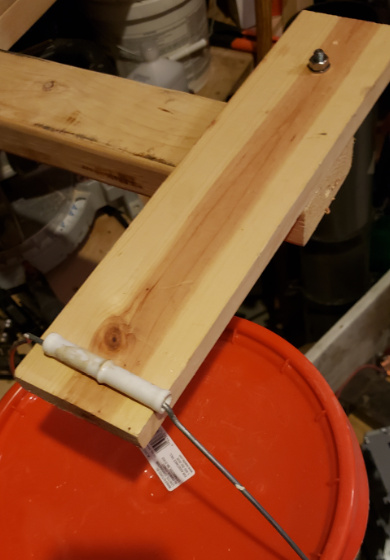
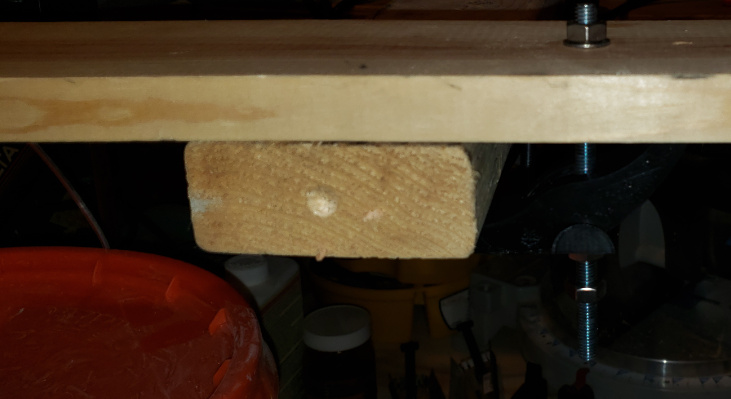
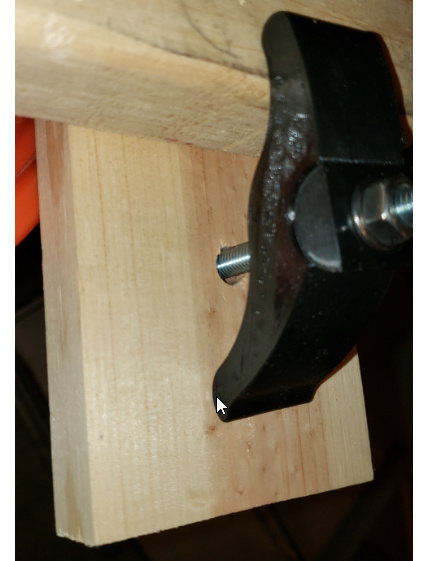
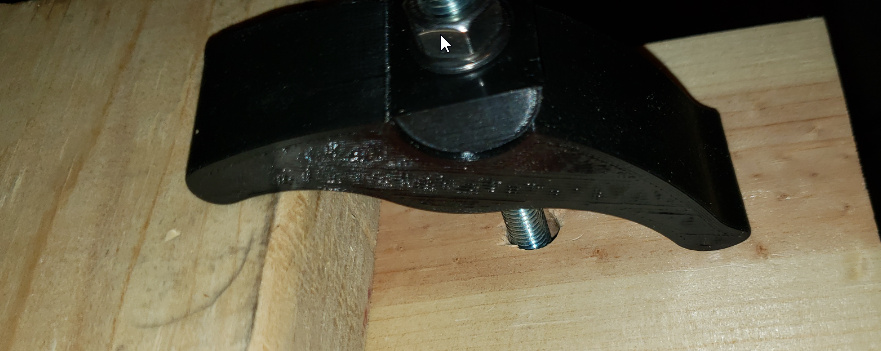
We need to find a set of clamps. This would be what we need. https://www.mcmaster.com/31415a11. They are super expensive. If anyone has time to do some googling or knows of something that would work. We never came up with a clamp last year. We used the existing one on the chair.
Looks like you could cut that on the band saw out of hedge or similar.
@tom.bloom - she does not have the 4 clamps that attach the table to the chair. 
The original chair only used 2 of the aluminum clamps.
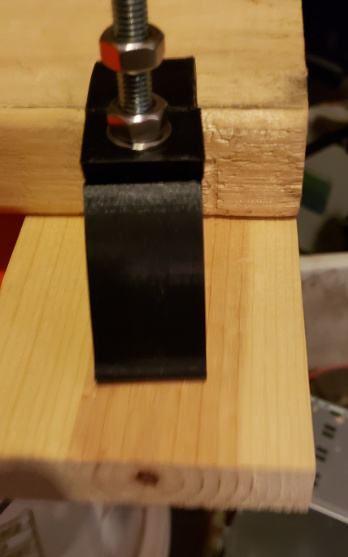
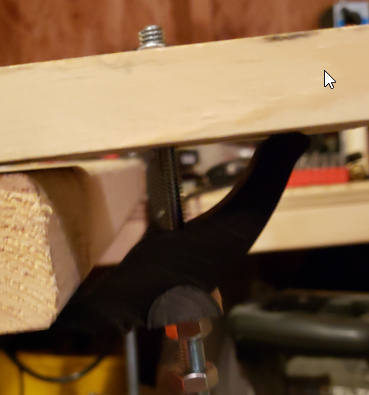
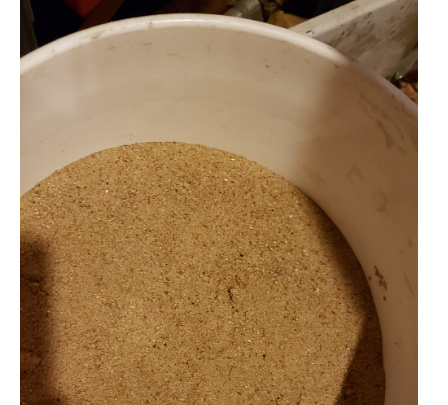
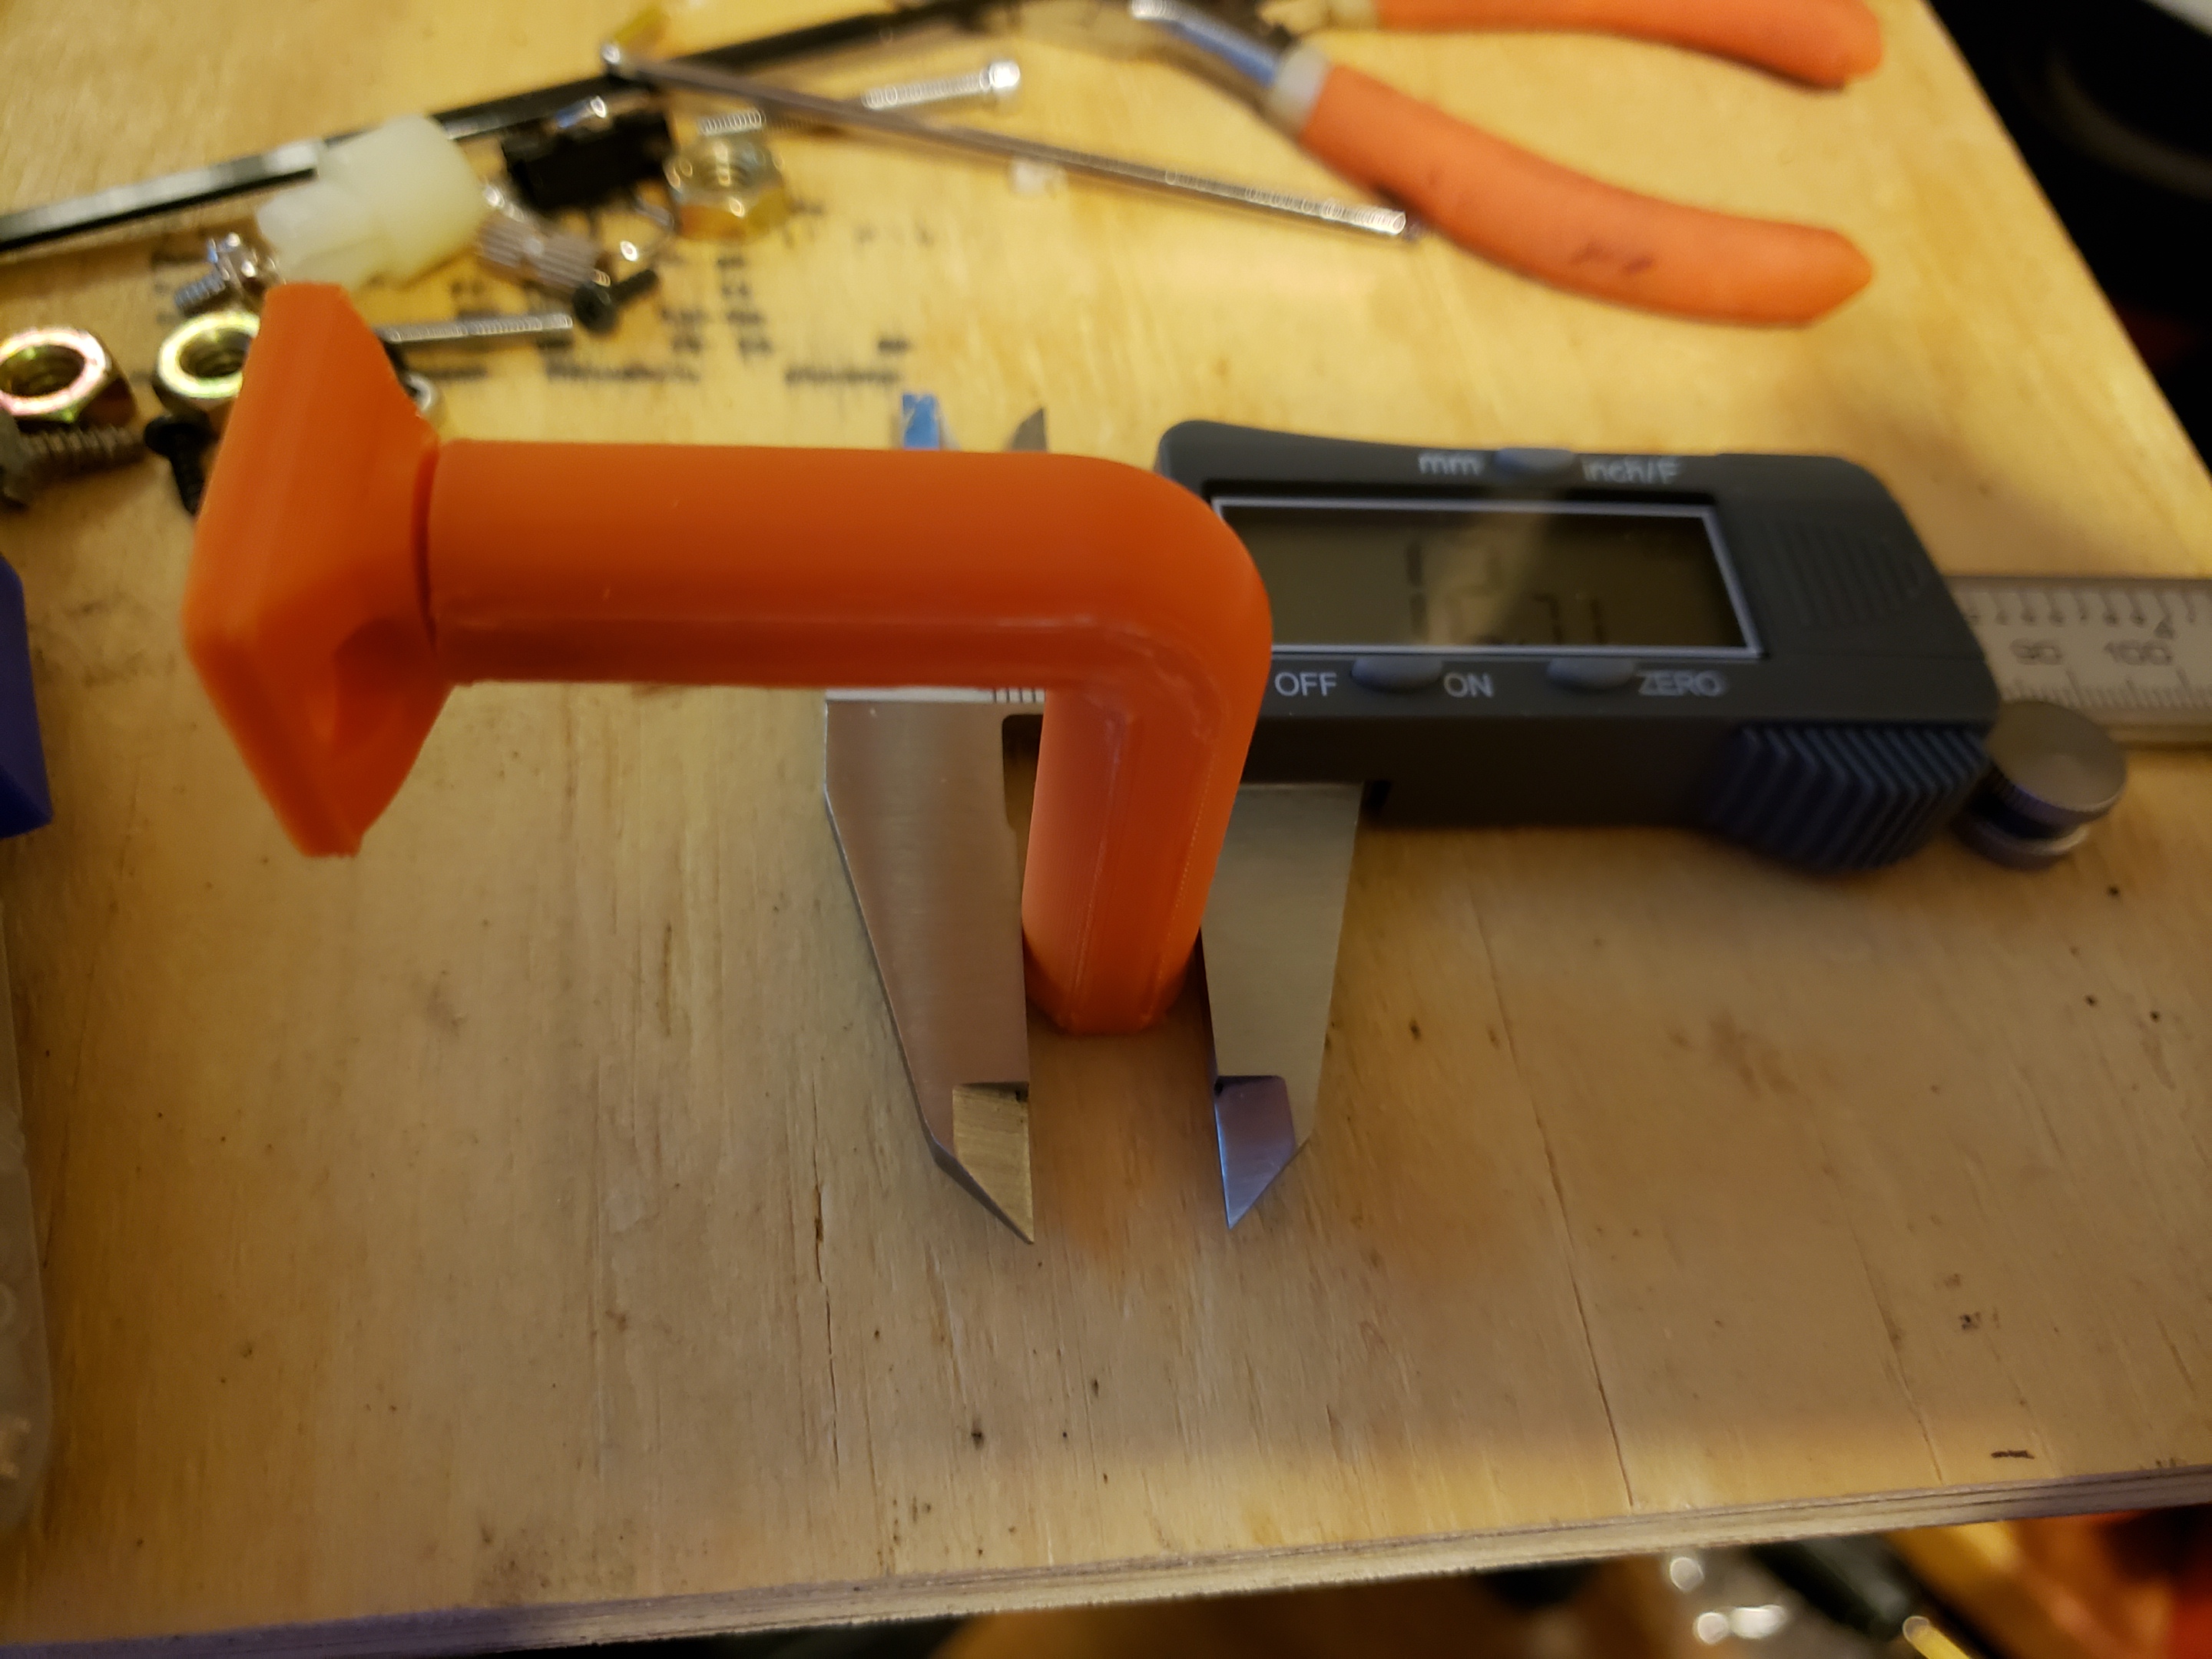
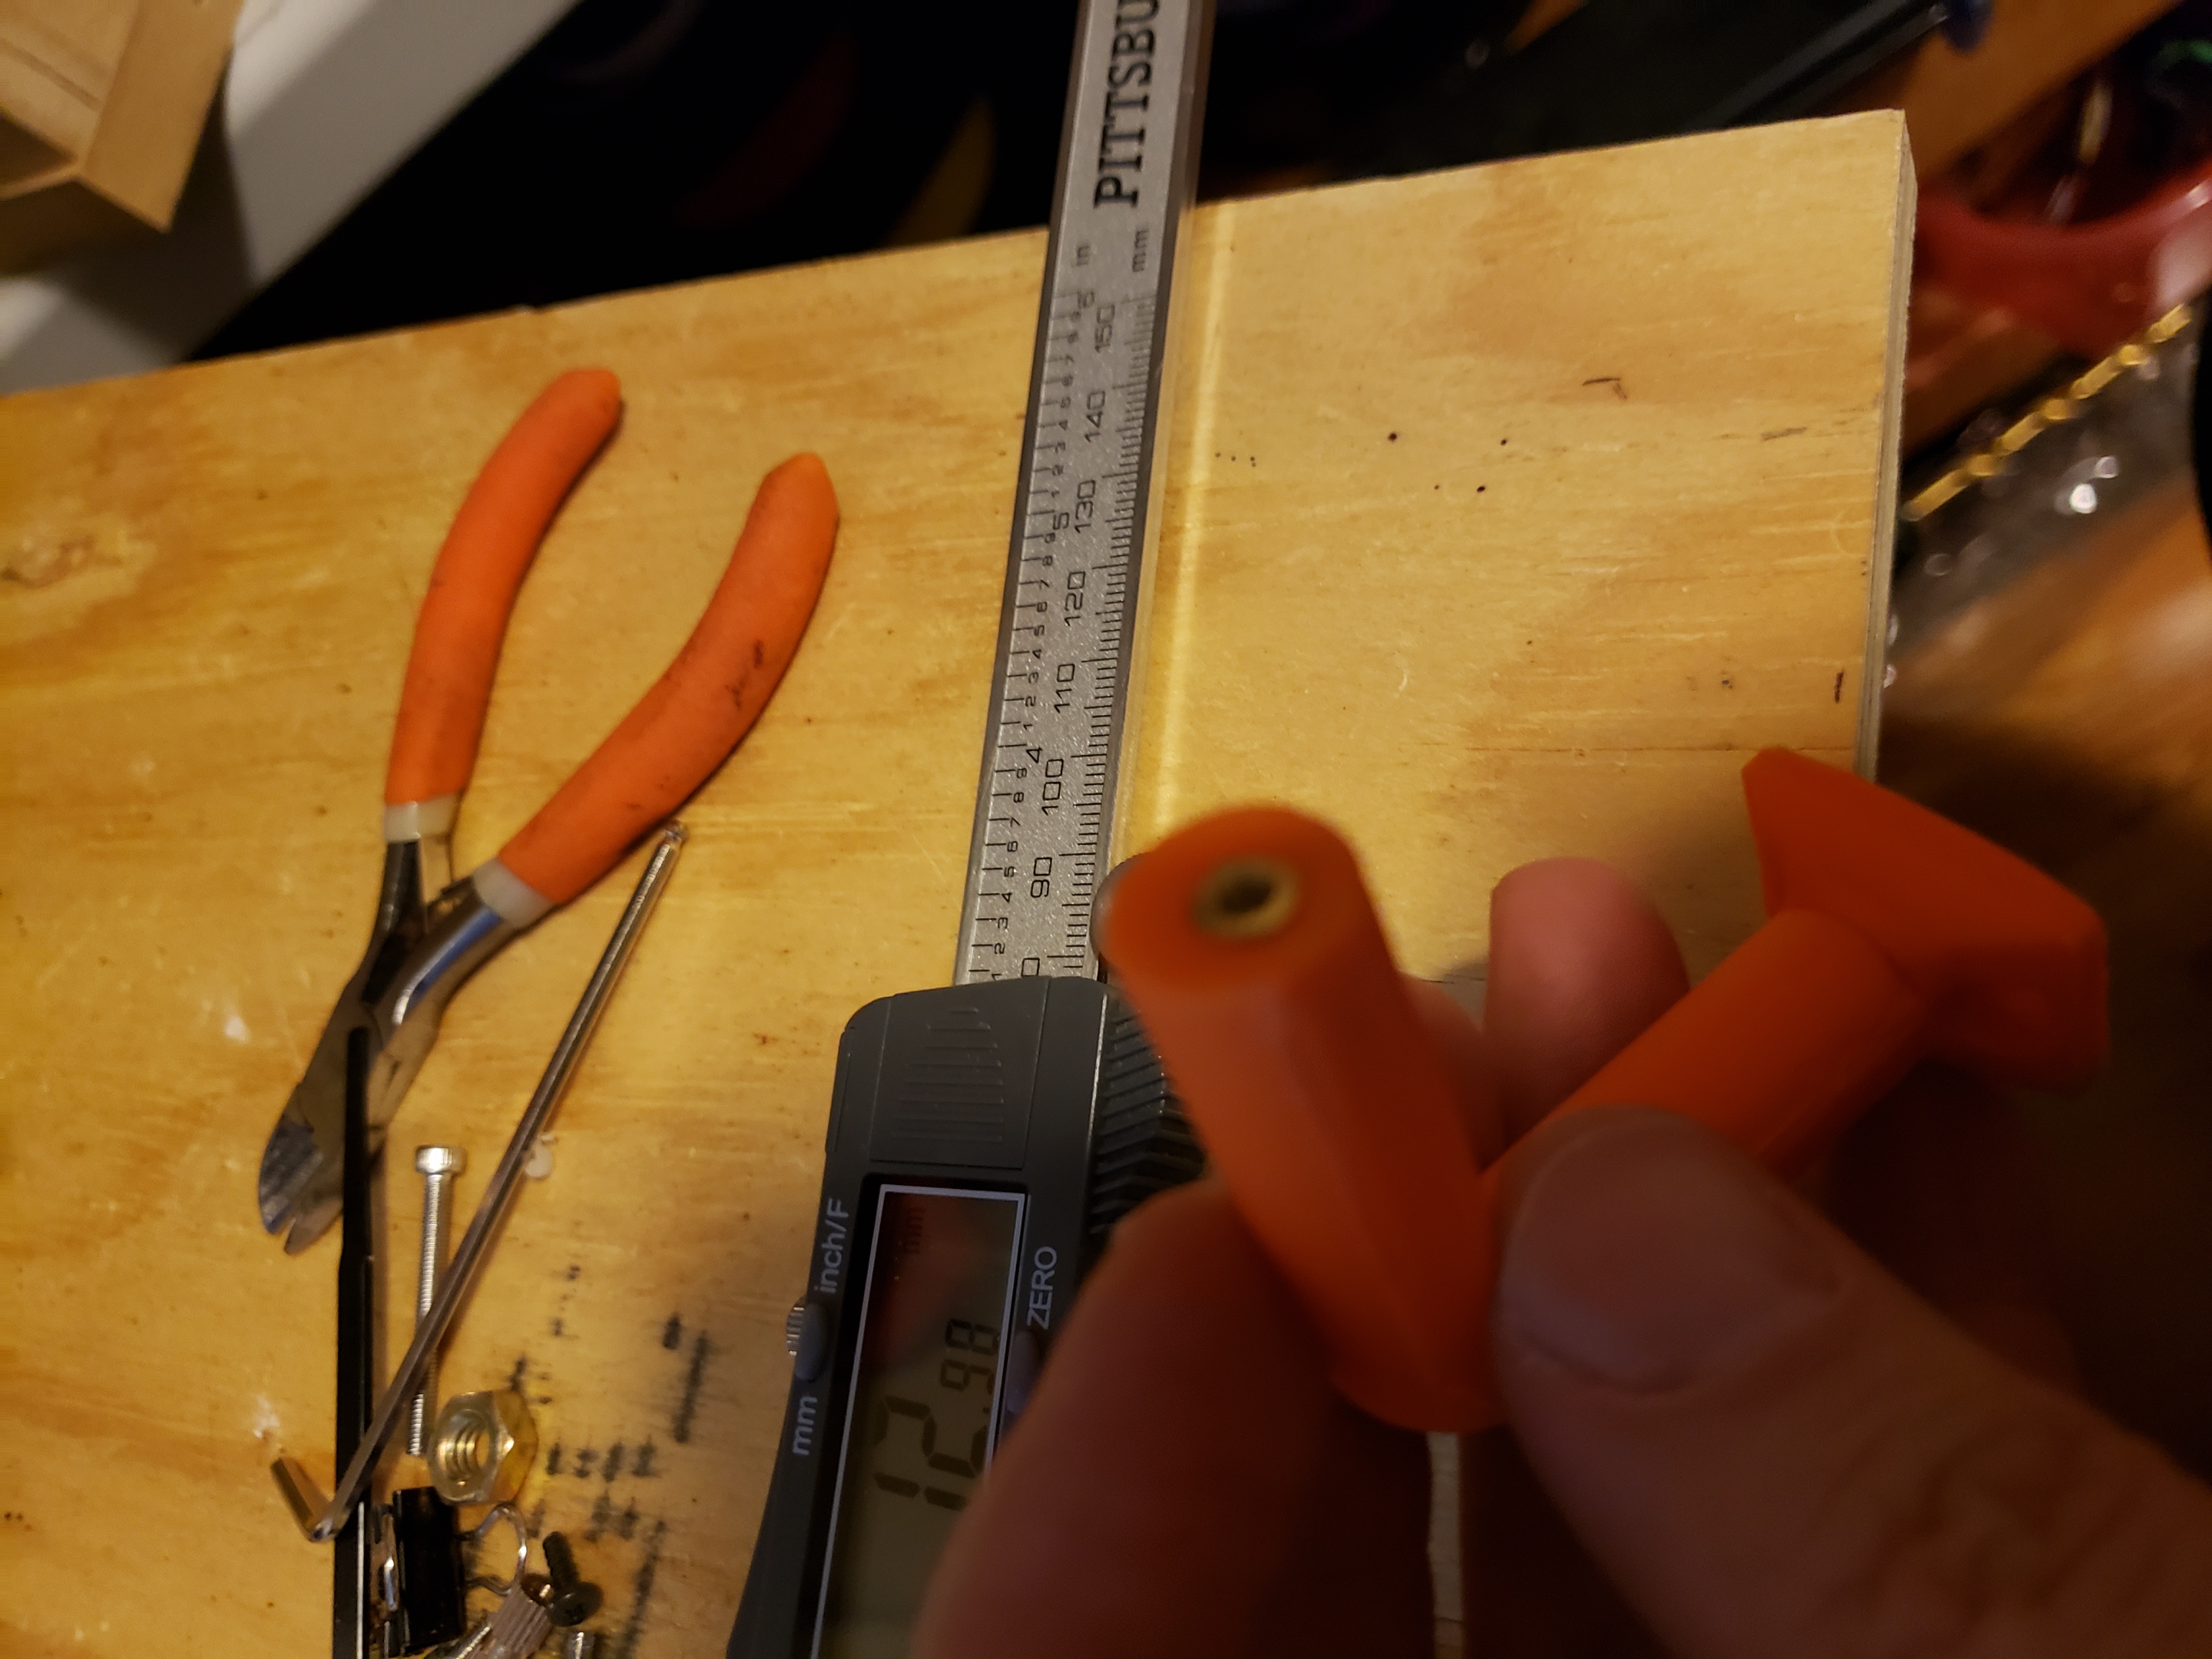
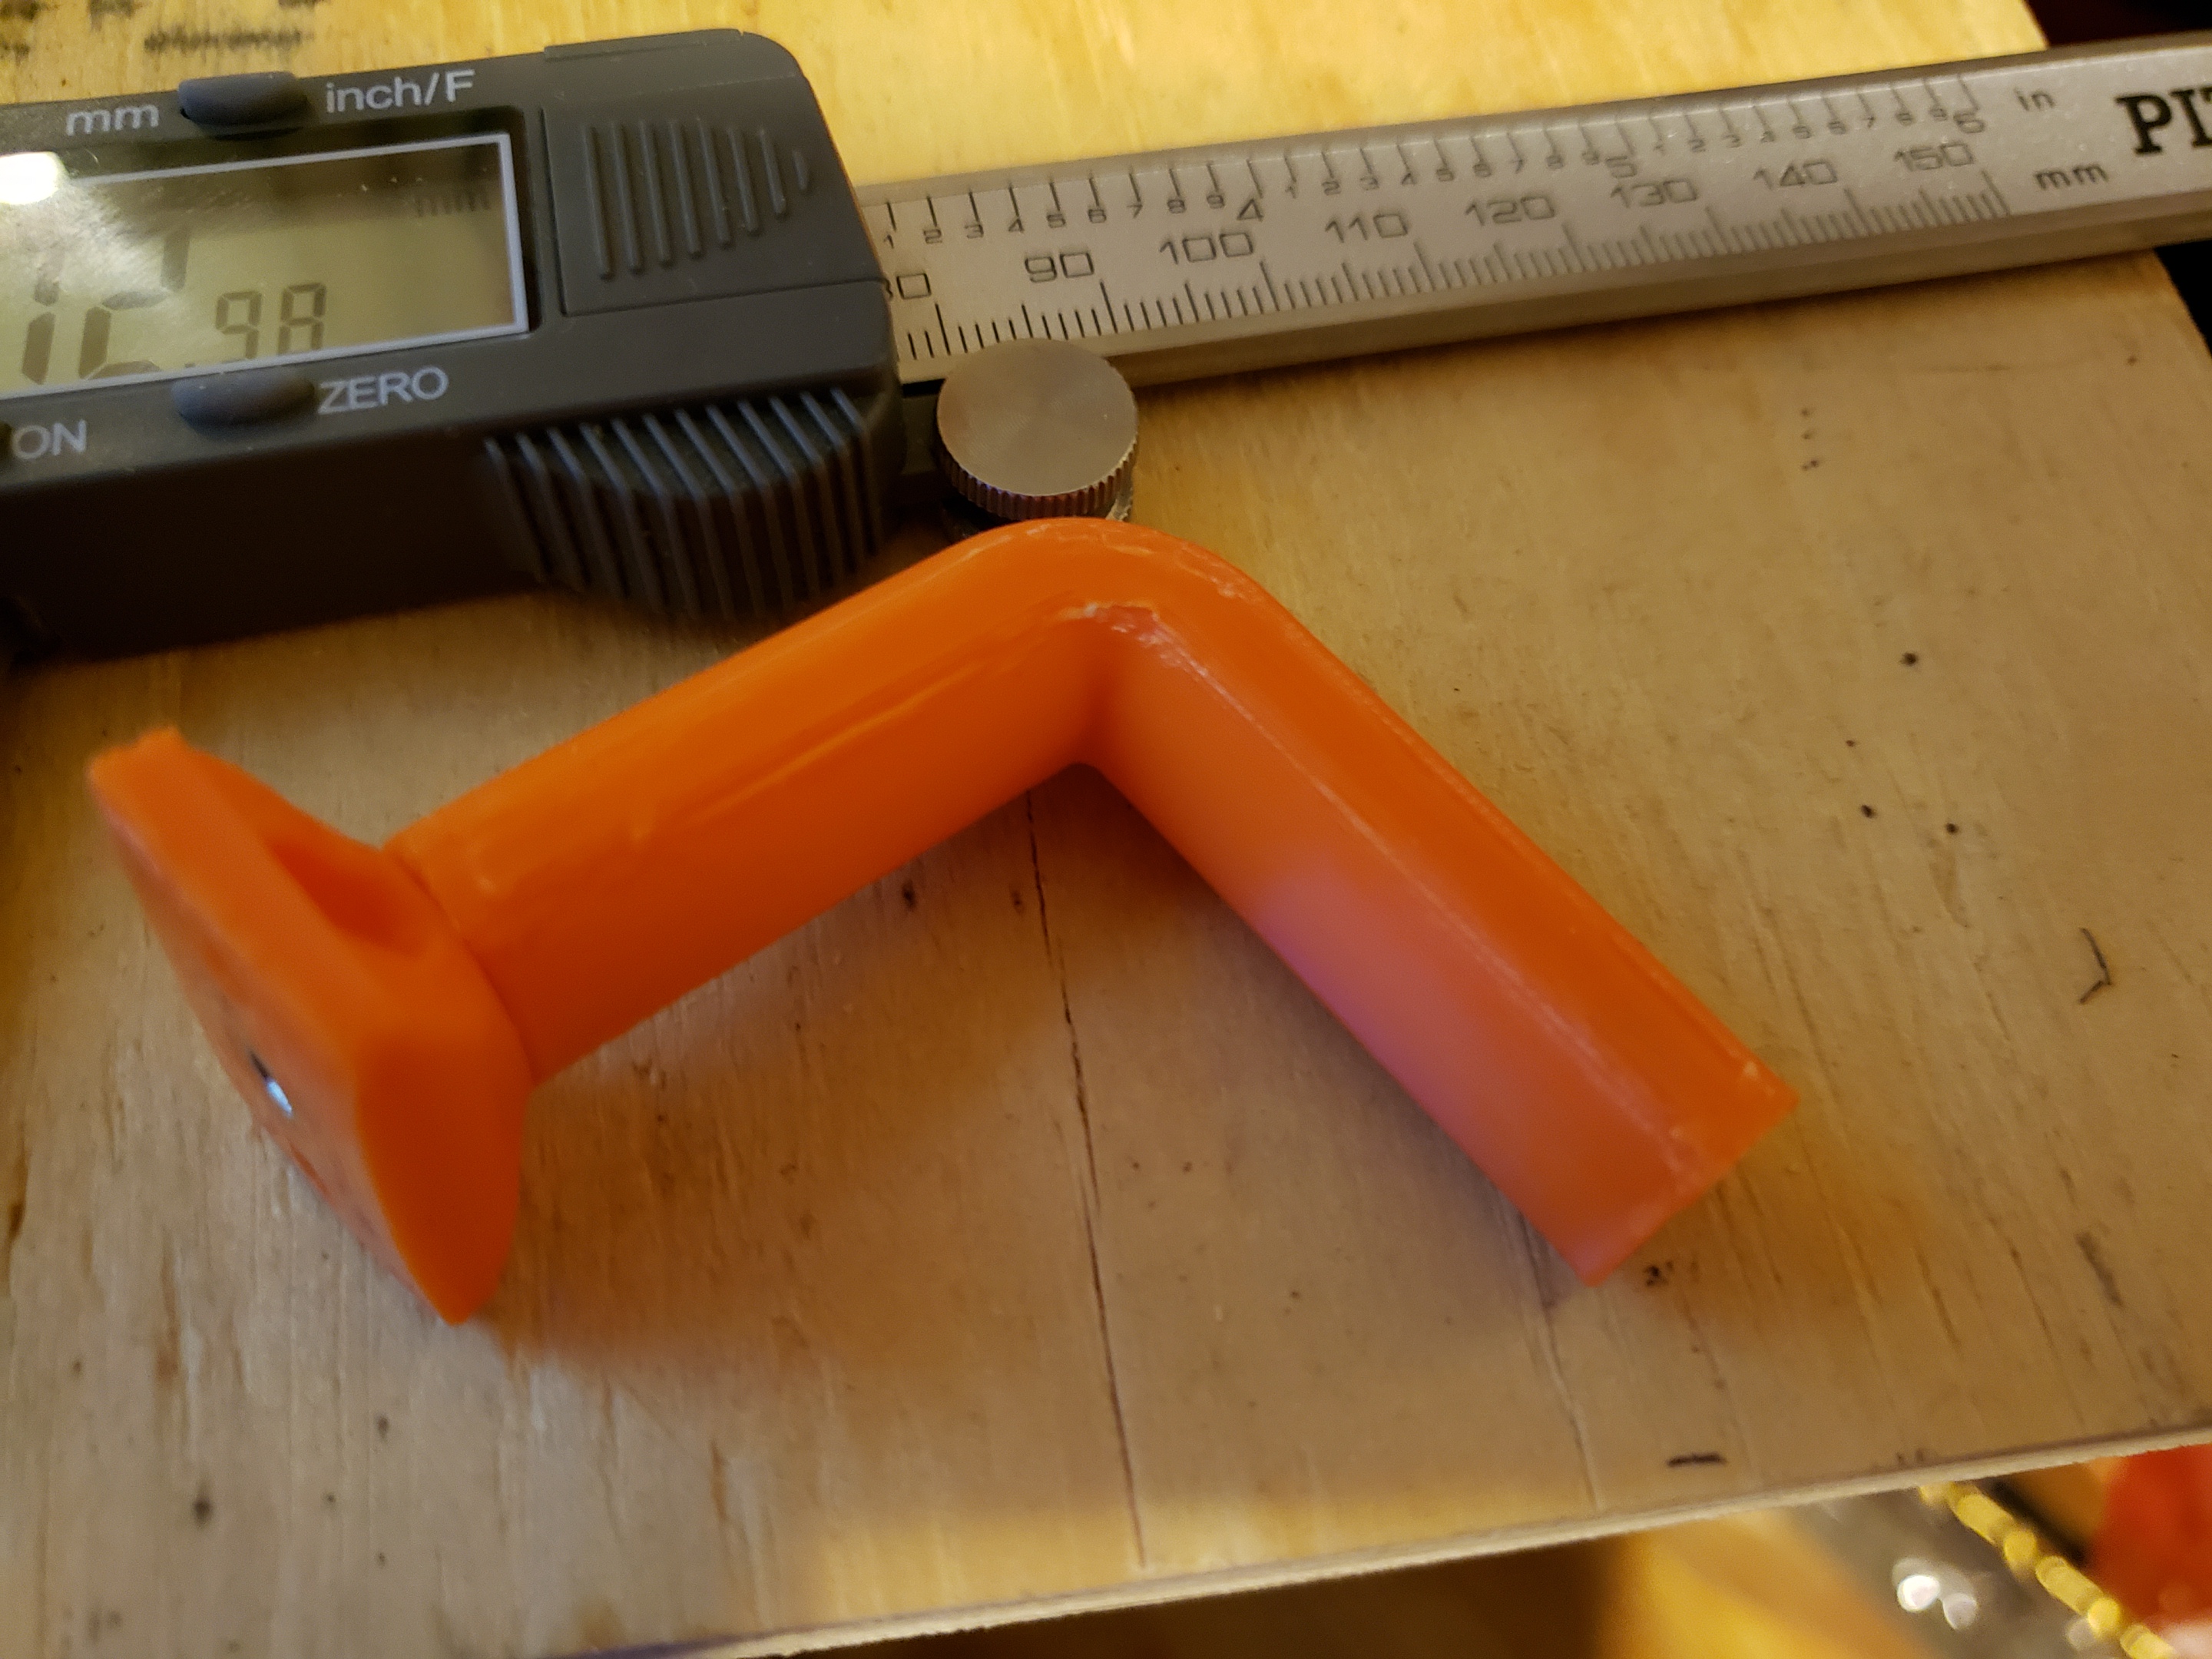
I tested a 3d printed version, and It seems like a possible solution. If someone can print this in petg. I tested a pla, and it did not explode with 50lb of sand.
I did the pla version in 20 cubic infill 3 perimeter/top/bottom 0.2mm layer.
clamp_swivel.stl (86.3 KB) calmp_body.stl (1.0 MB)