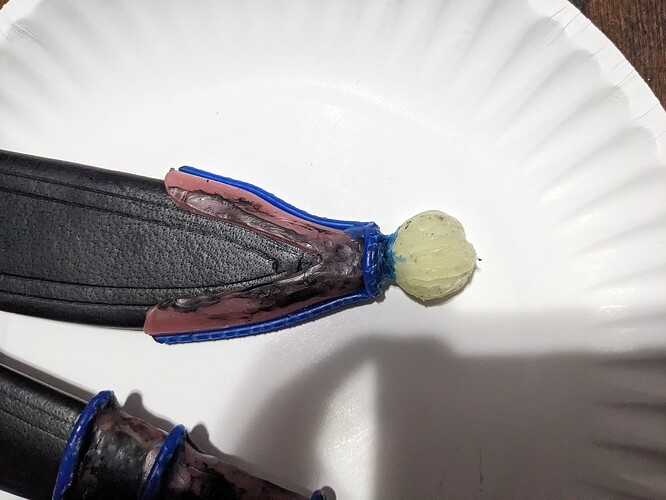
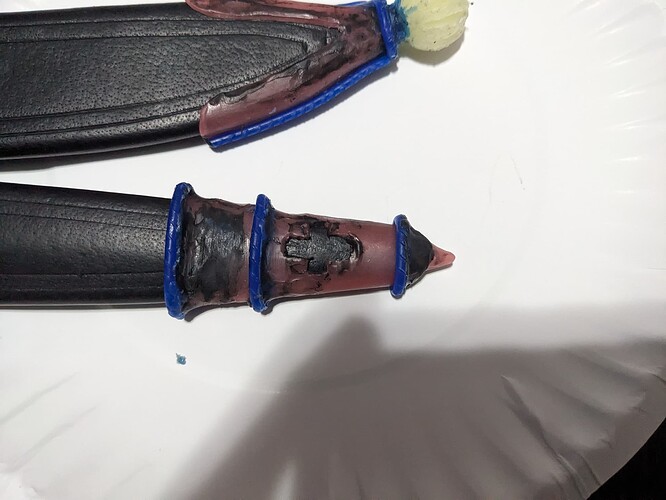
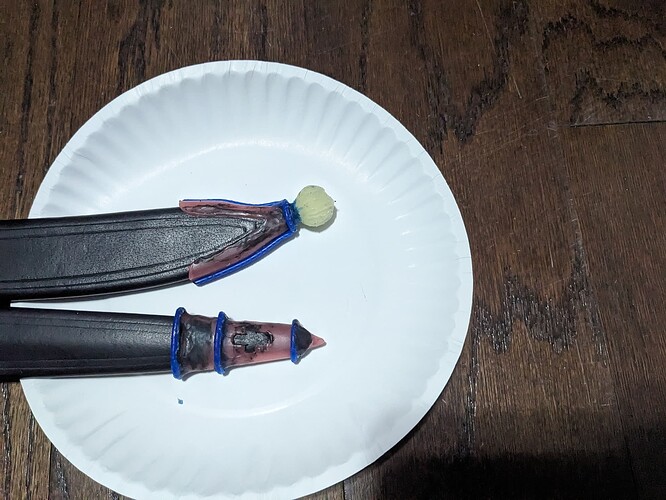
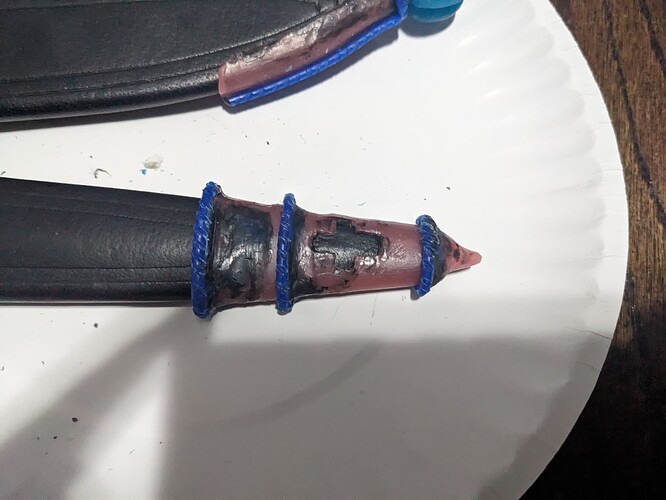
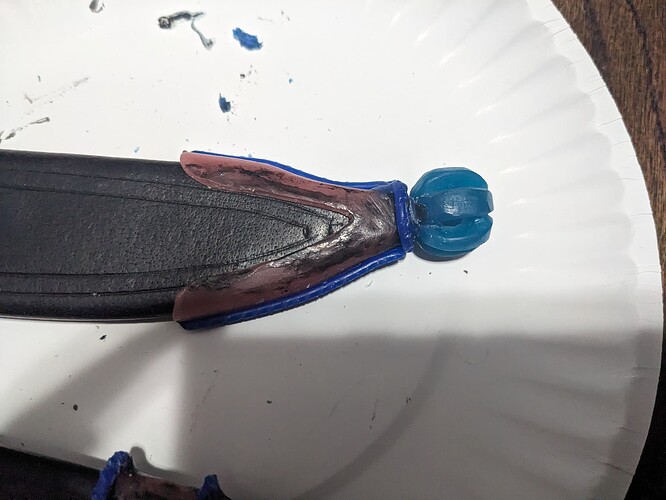
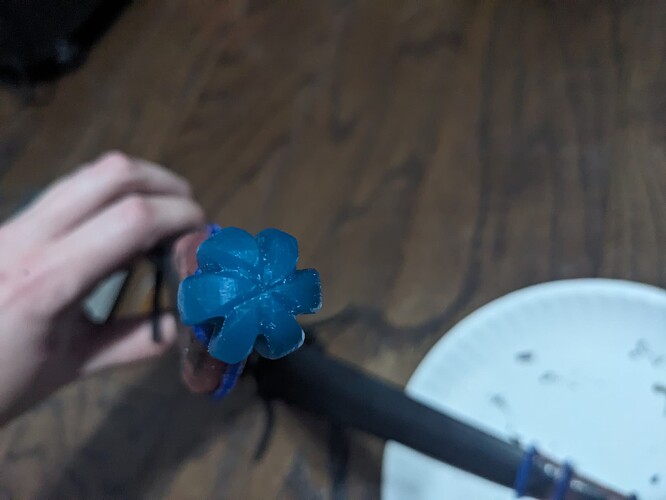
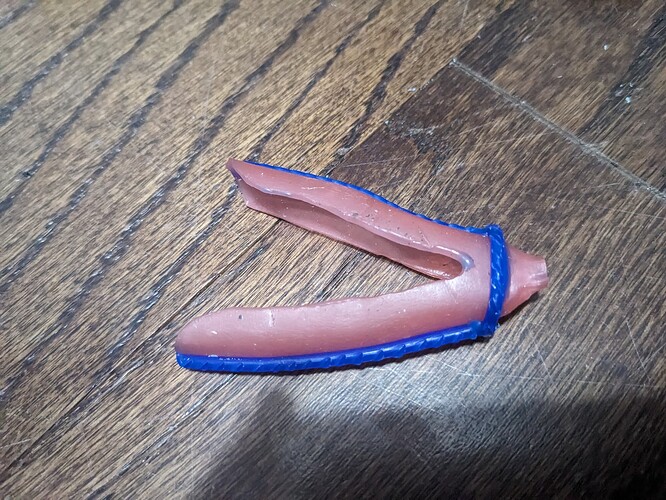
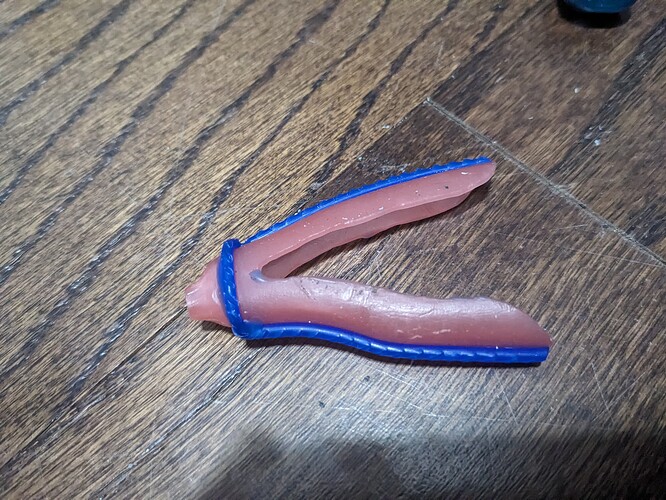
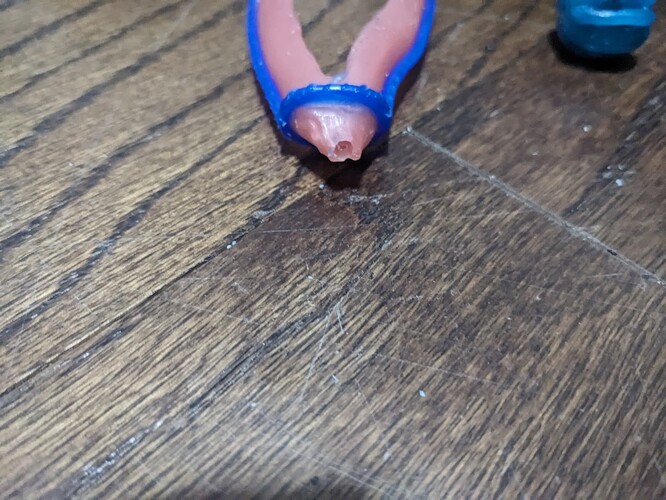
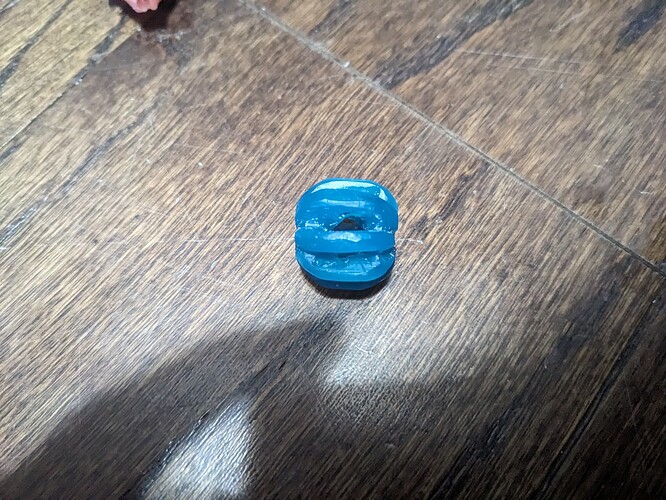
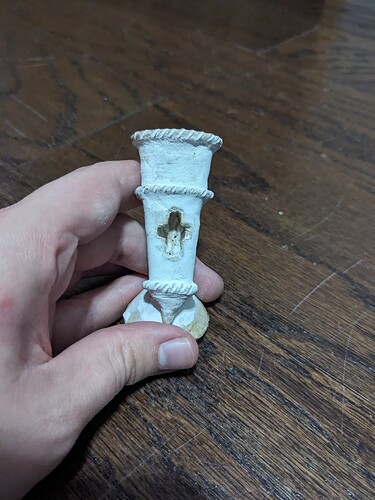
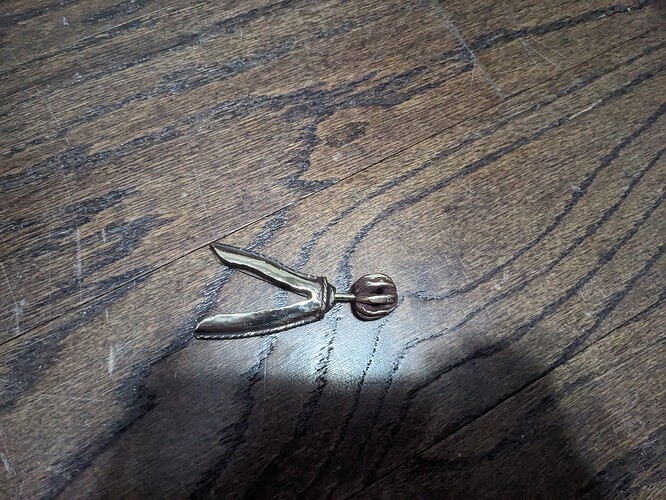
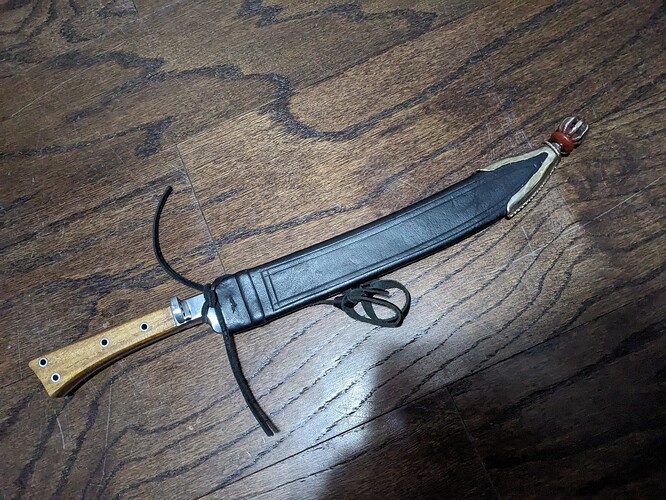
I am working on making chapes for my knife and dagger. Chapes are a metallic element on the end of a sheath or scabbard that protects the tip, hides any ugly seam joins, and adds a decorative element. So far I have them sculpted in wax about as well as my current skill, tools, and materials will allow, but the wax I carved the finial from is very soft and malleable which is making it difficult to carve, and I have had some difficulty attaching the wire wax to the sheet. At this point I think I will need to either cast it as it’s and do a lot of cleanup in metal, which would normally be harder than fixing it in metal but this wax clogs up my files almost immediately and does not respond well to carving tools at all, but I have plenty of ways to shape and polish brass or bronze, or I can order more suitable wax and start over. Either way, I think I will wait until the jewelry lab authorization coming up at the end of the month so I can see what else I will need to get these cast so I can get everything in one order.
Hmmm… what kind of wax are you using? (I know some folks use dental wax and I have had some wax specifically made for jewelry and it was pretty hard.)
I have a tool for wax carving (someplace in my basement?) that kind of melts the wax… have you tried anything like that?
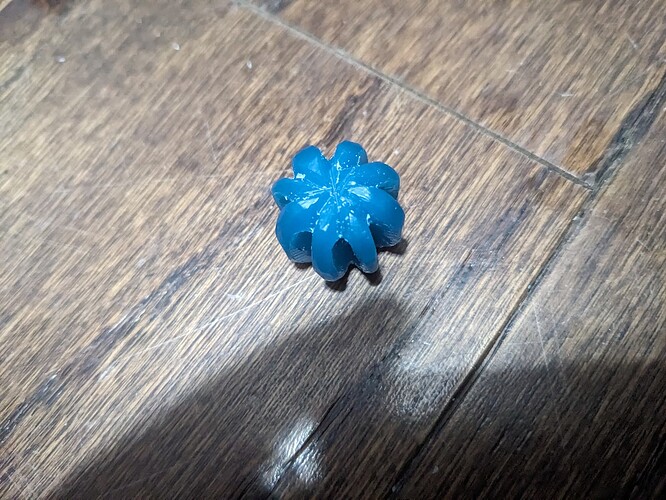
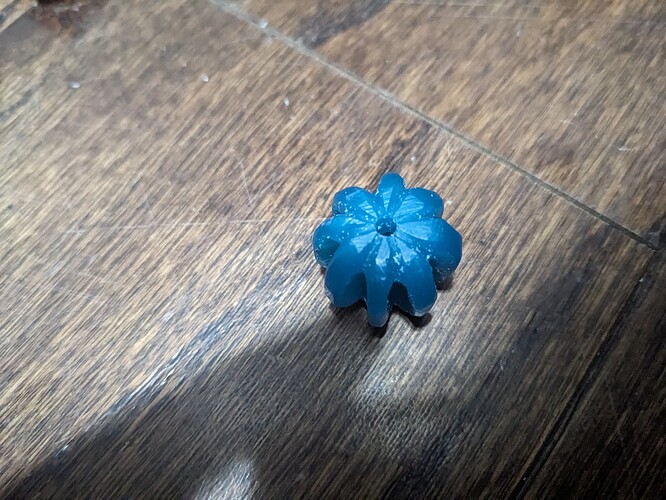
I am using 3 different waxes. One is a dental wax sheet (the pinkish red), which is softer than I would like for carving into it but it needs to be soft and flexible to mold around the sheaths, one is the wire wax, which is blue, it is also a bit softer than would be ideal for carving but I couldn’t shape it without that, I also melted the tip of the wire wax and used it as glue to hold the pieces together. The white wax used for the finial on one is by far the worst. Amazon labeled it as a sculpting wax but it is extremely soft and tacky, I was going for a ball with flutes running down it but whenever I try to carve the flutes the ridges between them stick to the picks and start to tear, and little bits of the wax that is supposed to be removed stick to the ridges and the result is a lot messier than I would like. I do have a tool that is supposed to melt the surface smooth, but it is one that you are supposed to heat in a candle flame and it very quickly gets so hot it melts the wax too much so the liquid wax is very thin and runs all over and forms drips, so it hasn’t been very effective at smoothing the parts that are still rough. It did do a better job closing up the seam on the back.
The tool I have somewhere is easier to use than the alcohol burner… it’s like a battery powered hot knife… but that wax might just be too soft…. Have you thought about leaving it in the fridge or freezer for a while? Then you might scraping it with a dental pick or another small tool…
···
On Tue, Dec 17, 2024 at 12:30 AM Cooper Cummings via MakeICT Forum <noreply@talk.makeict.org> wrote:
| Cooper
December 17 |
- | - |
I am using 3 different waxes. One is a dental wax sheet (the pinkish red), which is softer than I would like for carving into it but it needs to be soft and flexible to mold around the sheaths, one is the wire wax, which is blue, it is also a bit softer than would be ideal for carving but I couldn’t shape it without that, I also melted the tip of the wire wax and used it as glue to hold the pieces together. The white wax used for the finial on one is by far the worst. Amazon labeled it as a sculpting wax but it is extremely soft and tacky, I was going for a ball with flutes running down it but whenever I try to carve the flutes the ridges between them stick to the picks and start to tear, and little bits of the wax that is supposed to be removed stick to the ridges and the result is a lot messier than I would like. I do have a tool that is supposed to melt the surface smooth, but it is one that you are supposed to heat in a candle flame and it very quickly gets so hot it melts the wax too much so the liquid wax is very thin and runs all over and forms drips, so it hasn’t been very effective at smoothing the parts that are still rough. It did do a better job closing up the seam on the back.
Visit Topic or reply to this email to respond.
To unsubscribe from these emails, click here.
I have been storing it on the fridge, I have actually been working on these for a little whenever I find the time, but I finally got to the point where all the elements that I want on them are there, I just want to clean up the surface finish if possible and move on to getting these cast in brass or a yellow bronze.
Have you tried canning wax (food grade paraffin wax)? I think that stuff is pretty hard and smooth when it’s cool.
If I end up redoing it I will order wax from a jewelry supplier, wax made specifically for jewelers doing lost wax casting is very hard to the point of being almost like plastic, it can be filed without clogging the teeth and is less likely to warp. I couldn’t use that for the pieces that need to be bent, but it would be a lot better for the finial, which was giving me the most trouble.
It has been a while, but I have finally gotten a rod of hard jewelry wax as well as a saw and file designed for sculpting wax, as well as some yellow bronze casting grain to cast it with, and I had some time to work on these today. I made a new finial out of the hard wax that looks much nicer, the new wax is much easier to shape the way I want it because it doesn’t deform so easily, and the color shows details much better. It is kind of hard to tell because I couldn’t get a very good angle on it, but the finial is hollow in the middle so it forms a bit of a cage I also did a bit more work to clean up the rest of the chapes, the back and undersides could be cleaner but those won’t be visible when these are worn so I’m not too concerned about that. Next I need to get started on getting authorized for the casting equipment so I can get these poured.
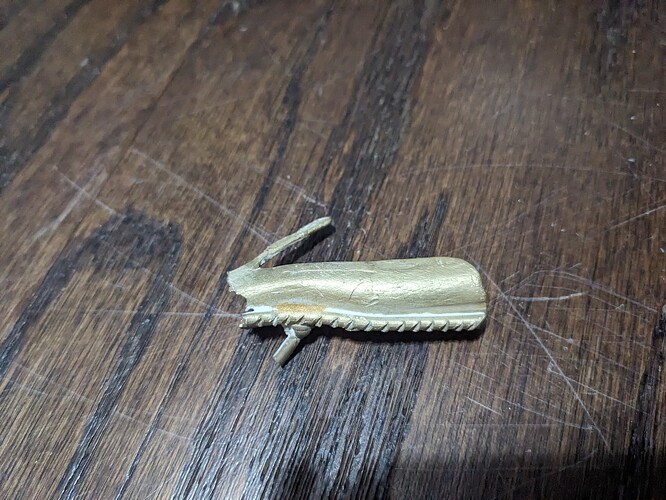
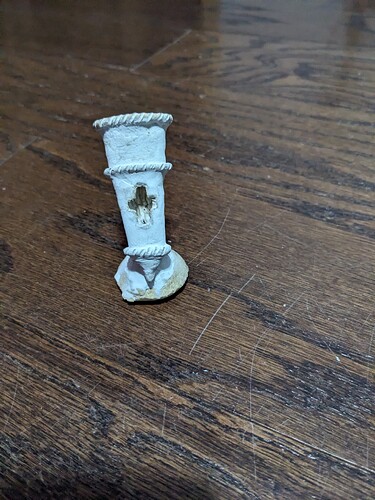
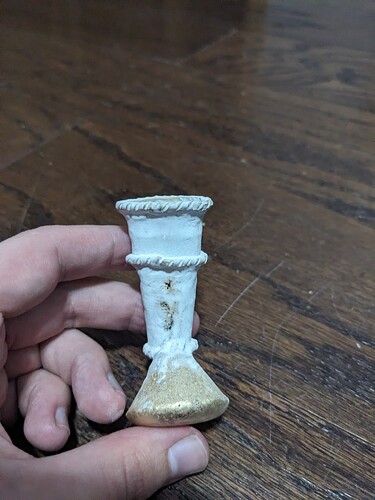
Here are some pictures of the wax chapes:
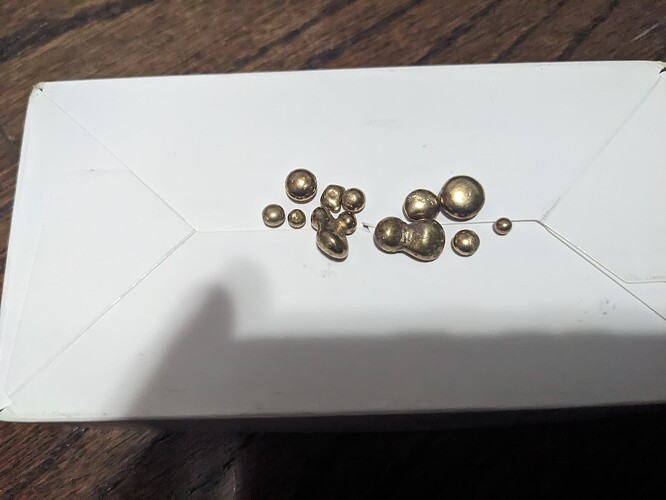
And here is the casting grain to give an idea of the color it should be once polished.
I attempted to cast the one with the finial yesterday, unfortunately the mold blew out during the pour and made a big mess of things. The part that survived looks good, the details show up well, but only about 1/3 of it ended up in the shape it was supposed to and the rest ended up at the bottom of the caster and was a pain to get cleaned out. I will probably still use this to practice cutting the sprue and polishing it, but this piece won’t be functional.
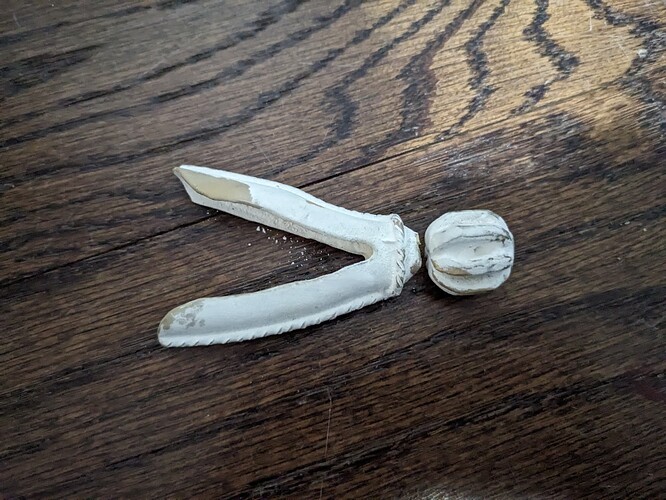
I will be attempting to pour the other one tomorrow, hopefully that one comes out better, the one that failed was really pushing the upper limits of the size of flask the burnout oven can fit (the caster can handle a significantly larger one, but the oven can’t burn out the wax, so anything longer than about 2 3/4" will be difficult unless makeICT can obtain a larger oven), the one I will be pouring is smaller and fits with a bit more investment between it and the walls of the flask so it should be less likely to blow out during casting. I remade the one that failed today, this time I am making it on two pieces so it should fit better. I also went with 8 bars instead of 6 on the cage this time which I think looks better and the detail shows in pictures much better. I left a 1/8" hole in the end of each piece, I should be able to join the pieces together with a brass pin and some solder.
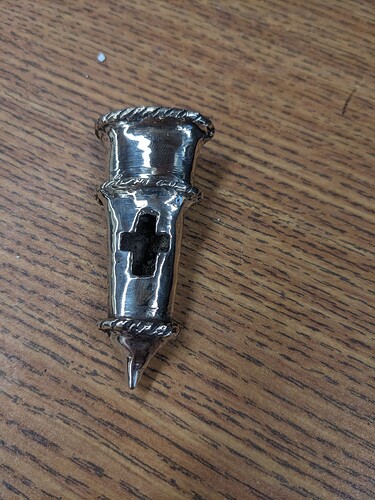
The caster is back up and running and I got one of my chapes poured today, I didn’t have time to clean off the excess investment or remove the plug, but it has come out well so far. There are a few small holes in the back where I apparently didn’t add enough filler to the seem in the sheet wax that forms the base of the piece, but that side would be up against my leg when the dagger is worn so it doesn’t need to look good, and the inside is often quite rough on surviving historical examples of sword and dagger hardware.
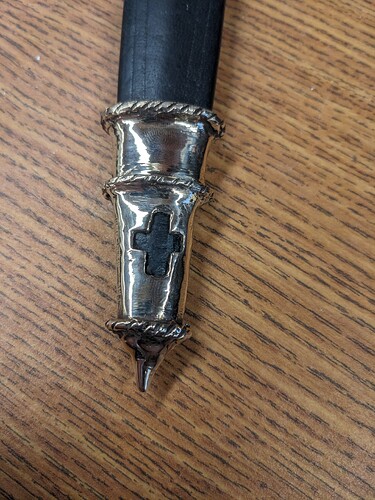
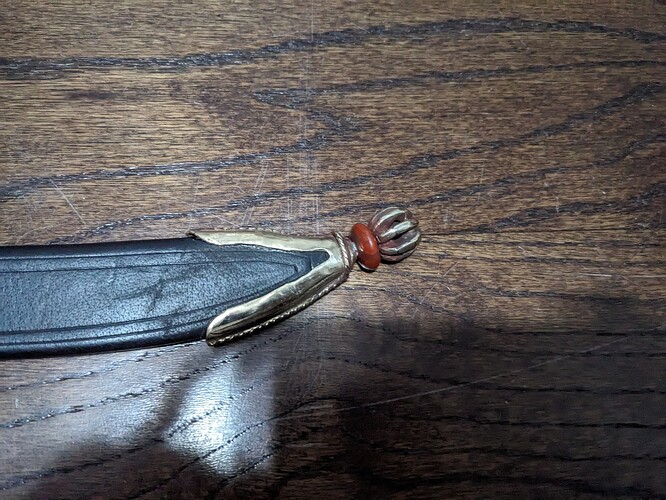
Yesterday I got the chape shown above cut from the sprue, then today I got it polished. I could do more polishing, but the level of finish on this is comparable to many surviving historical examples, so I don’t think I will, I just need to glue it onto the sheath now.
I also got the other one cast and cut from the sprue. It was made in two pieces to better fit the casting equipment. I will solder both halves to a brass pin to join them. I may also cut a stone bead and put it on the pin between the two if I can get the cab cutter authorization and make a bead I like.
I finally got around to soldering my pin into the finial and polishing the other one. The Pin isn’t soldered into the main body of the chape yet, I am waiting for the cab cutting authorization to be offered, then I plan to make a stone bead to put on the pin between the finial and body.
It has been a while since the last update, but the cab cutting authorization that I needed to finish up the other chape was available last Friday, I made a bead during the class and I was able to assemble the parts and to the last bit of cleanup today.
Nice
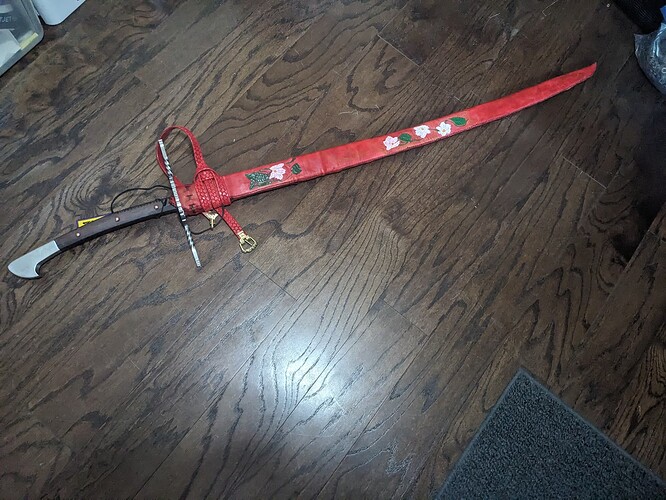
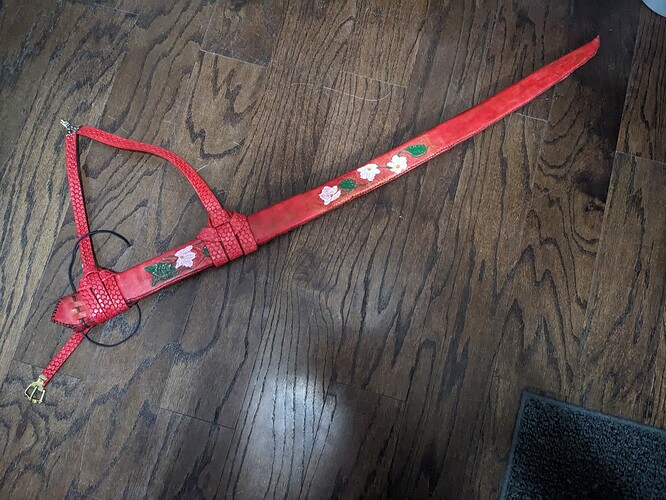
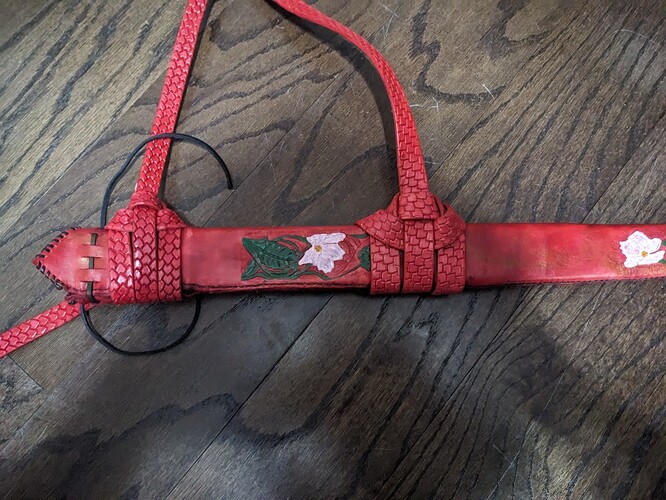
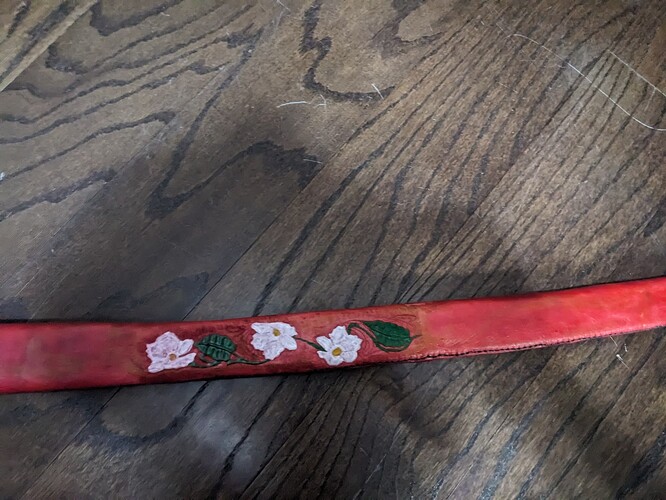
I got a new sword in last week and have spent the week making a scabbard for it, so it is time to make another chape. The tooling could have turned out cleaner and the leather wrap tighter, but this was my fist project doing either and I think it looks decent enough for a first attempt, and this would mostly be viewed at a distance. For anyone curious about the suspension system, the hook connects to a belt slider at the center of the back and the buckle attaches to the tail of the belt. It holds the sword steady at an angle and doesn’t let the end flop around too much. The black lace is for a peace tie, it is there to tie the blade into the sheath and show you have no intention of drawing it.
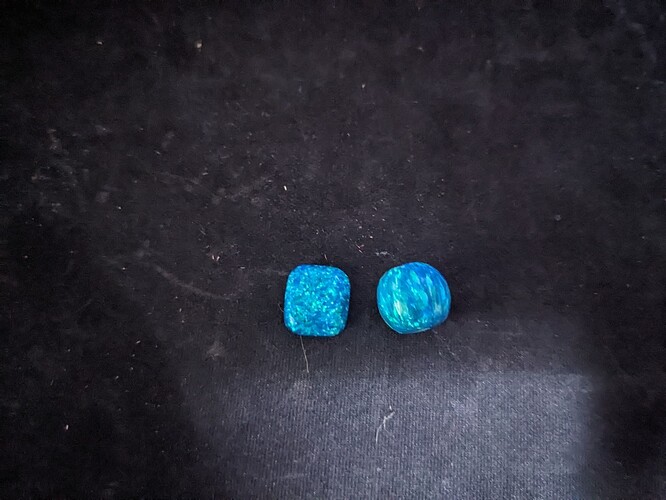
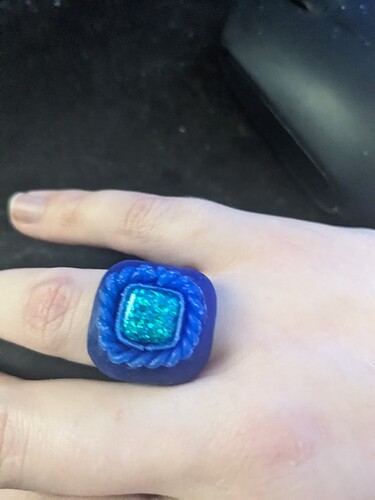
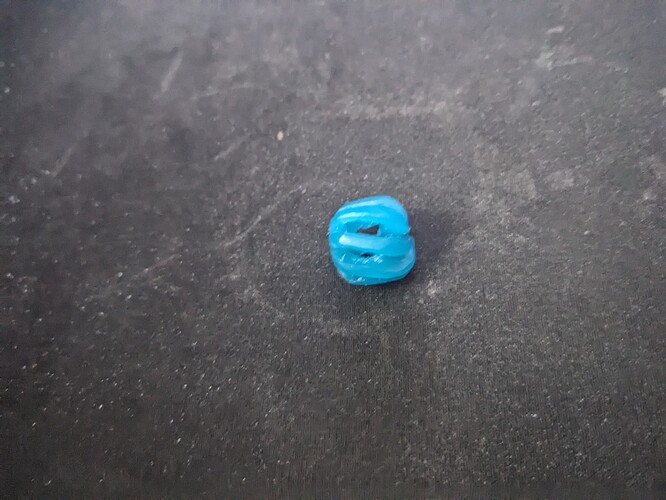
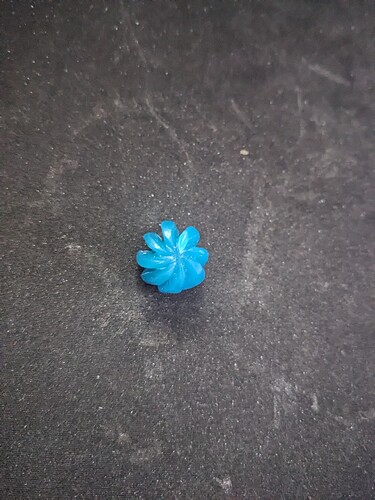
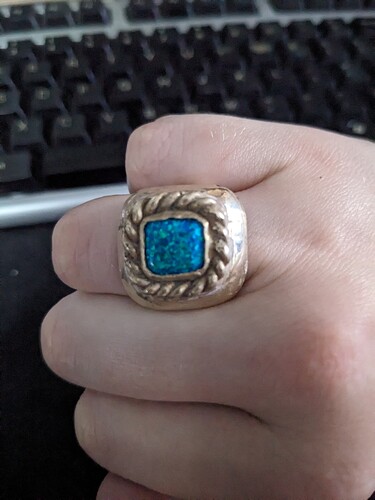
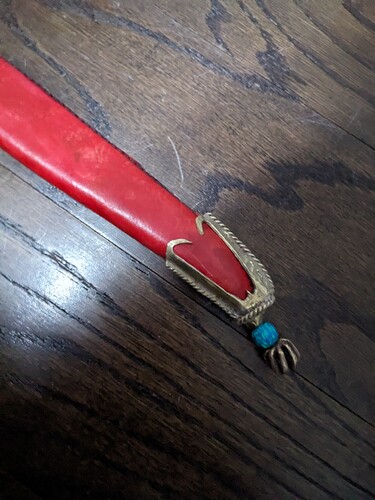
I have gotten a nice synthetic opal for the bead on this chape and cut it Wednesday, and I had just enough left over to make a small cabochon that I am planning to make into a ring. Unfortunately they don’t photograph well at all but they look much better in person and the material was fairly affordable (they were sold in 5-8g blocks for $7 a gram, I paid for a 5g and recieved a 6.3g so it was $30 for the two of these).
I am still waiting on some tools, wire wax, and ring blanks before I can get started on forming the chape but hopefully I will be able to get them made next week.
My shipment of supplies was delayed several days, but finally came in and I was able to get a ring carved, but the bezel and twisted wire components are currently just sitting on the body of the ring as I do not have a hot wire tool at home to join them properly. I have also carved a finial for the chape, but can’t finish the rest of it for the same reason. I am planning to get the ring components joined and make the body of the chape this evening if the weather isn’t too bad.
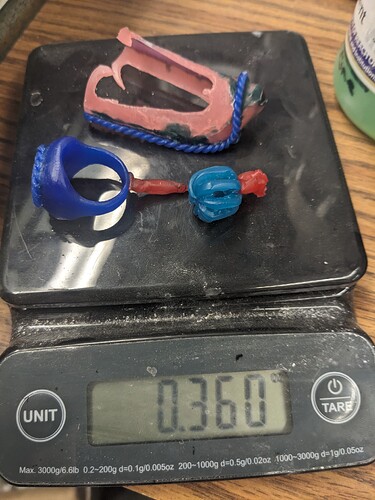
I forgot to take as many pictures as I would have liked, but I got a chape body made and assembled my ring today. Unfortunately the only picture I took was when I was measuring the weight of wax to see how much metal I will need when I do the casting, and the angles aren’t great.
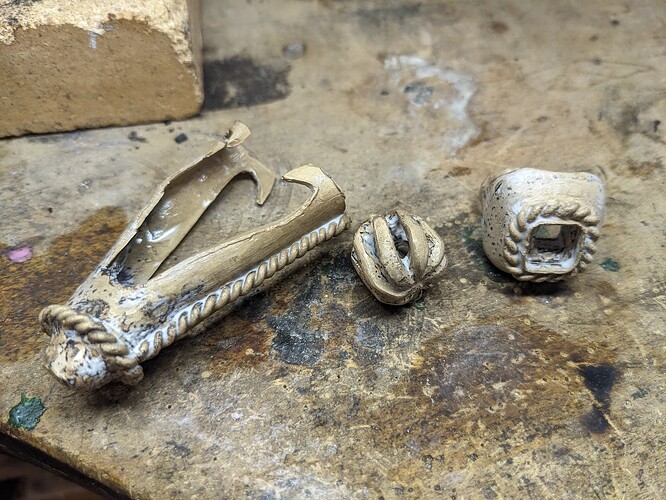
Yesterday I poured the ring and chape and got them polished and assembled. Unfortunately there were some issues with air bubbles in the investment, but those kinds of defects would have been relatively common in the appropriate period, so I can live with the flaws. I might go back and polish the ring some more, but these are just about done.
