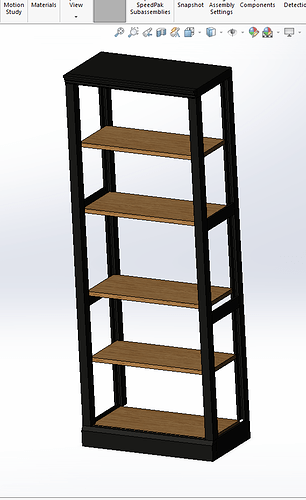
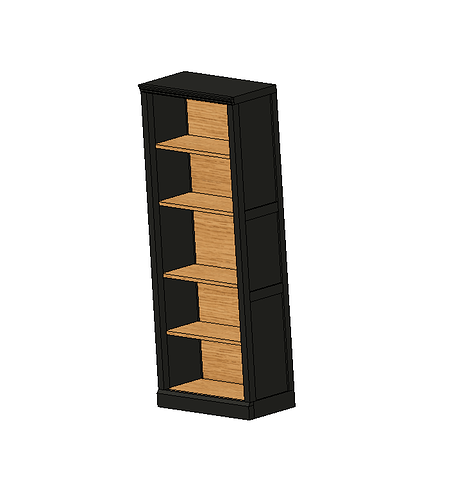
Thanks for the suggestions, here is a picture of the current frame. I might make some changes based on some suggestions.
A potentially strong alternative might be to start out with a piece of plywood and glue on strips of veneer with the size and grain orientation of your choice. Plywood has almost none of the humidity driven expansion/contraction of solid wood. Use PVA glue; and attach similar veneer on the opposite side (for stability). This will leave a plywood edge showing. The edge can be covered by gluing on strips of solid wood or veneer. If using solid for this, it should probably be thin, less than 1/16". If you want end grain showing on the shelf front edge, which is not so conventional, but consistent with your original idea; perhaps gluing on end slices, sized to match your top surface veneer, and of similar wood. I have not done this, but might attempt it with slices of perhaps 1/4" thickness. Then straighten the edge and reduce thickness by ‘ripping’ on the table saw. Further smoothing would call for sanding, I think, because jointers don’t like end grain, nor plywood. You could even join the edge treatment with tongue & groove (router table) then rip as above. Still a woodworking challenge, but likely to be strong and lasting.
This probably would have been a much better design method, now knowing what veneer is. I actually learned what veneer edge banding is today, and I will need some to fix a mess I made. am very happy with the results of store bought edge banding after a test piece, and I am glad I learned what it is. You basically just iron it on, and they sell a little razor blade trim jig for it. Will make life much much easier then trying to glue on veneer strips I cut myself ![]() .
.
I recently made some plywood shelves for a cabinet. Front edges were covered by 1/8" ripped strips, glued on. The roll of iron-on stuff would have been easier, but more expensive. And the available woods were not a match for the A-C pine veneer plywood. I’m also a little suspicious of store bought iron-on; how well does it last? But I’ve had little experience with it.
An intermediate was demonstrated recently on the PBS show, Classic Woodworking. They used strips of ordinary veneer for the edge of a round table. PVA glue was applied to both surfaces, then allowed to dry to the touch, about 20 min. The veneer was then applied by ironing on. “The heat reactivates the glue.” This idea allows the originally wet glue to soak into both surfaces, which seems likely to form a more durable bond. Heat also makes the wood more flexible, so it should bend to moderately curved surfaces without cracking.
This show also put veneer on the table top (and bottom, for balanced forces). They used wet glue, applied with a paint roller, then put it in a vacuum press for several hours. I don’t have a vacuum press, but might just use weights, or cauls made of plywood or 2x4s, with lots of clamps.
Hmm interesting. I just did a test piece last night and it was really easy, and came out good. Its very flexible as well. It was like $10 for 25’ of .75" oak veneer edge band. Same stuff is pretty much sold everywhere.
I’ve seen a lot of the YouTube users and others on TV who use that iron-on edge banding. I can’t speak to it from my own experience but with all those people using it, I would assume it must work really well. Some of them are very accomplished makers. I’d say it’s worth a try. If it tries to come off some day, I imagine it could be CA glued back into place and use that as a learning experience.
Someone return an iron to @Textiles Thursday evening they found in the woodshop. Please do not use the textile irons for veneer.
Used to find woodworking clamps in the metal shop. Besides the notion of not using stuff in areas they aren’t intended for, it’s stupid that people have to be told to put stuff back where they found it.
That iron was mine. The purple one. I left it there by mistake.
Then Textiles is missing the exact same model of iron.
I don’t care if textiles uses it, but I need to use it too. It was only like $20-40 at walmart. Maybe you guys can put in a request for more if you need them?
So something interesting happened about 4 weeks ago. You’re predictions were correct. One of the glue ups just cracked overnight from expansion. Luckily, I should be able to cover it up with trim. It was interesting to see this happen. I guess some things have to be learned the hard way ![]() . I plan to post a picture when I get a chance.
. I plan to post a picture when I get a chance.
Like I said, you’re doing the work and you’re learning. Good on you!

