I’m late in posting this info, but wanted to share this farm table I built at MakeICT. It’s something I never would have attempted without all the tools and, more importantly, people there who could provide advice and guidance! Thanks to all that helped! I owe Mike Hutton a special thanks because he provided a lot of advice through the process.
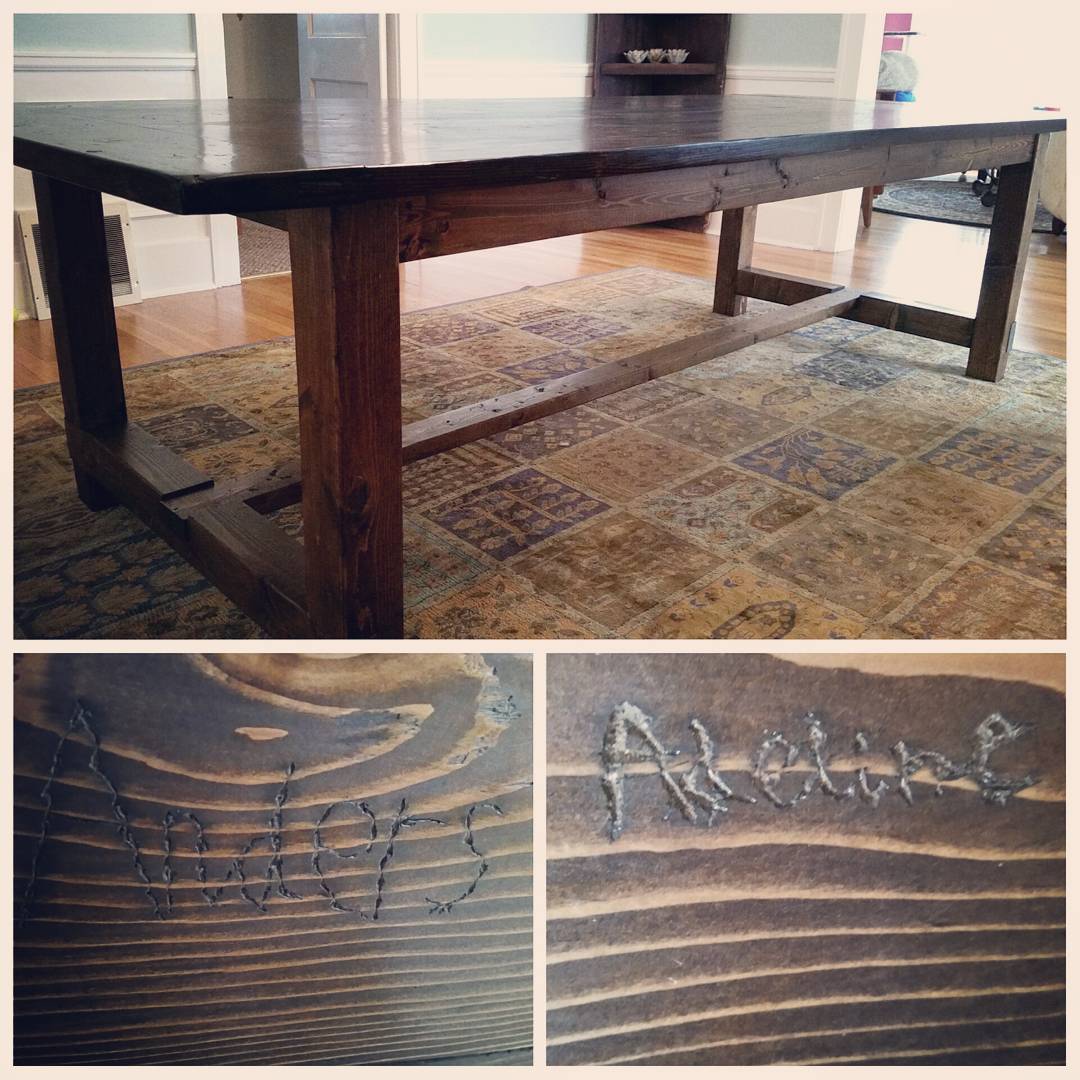
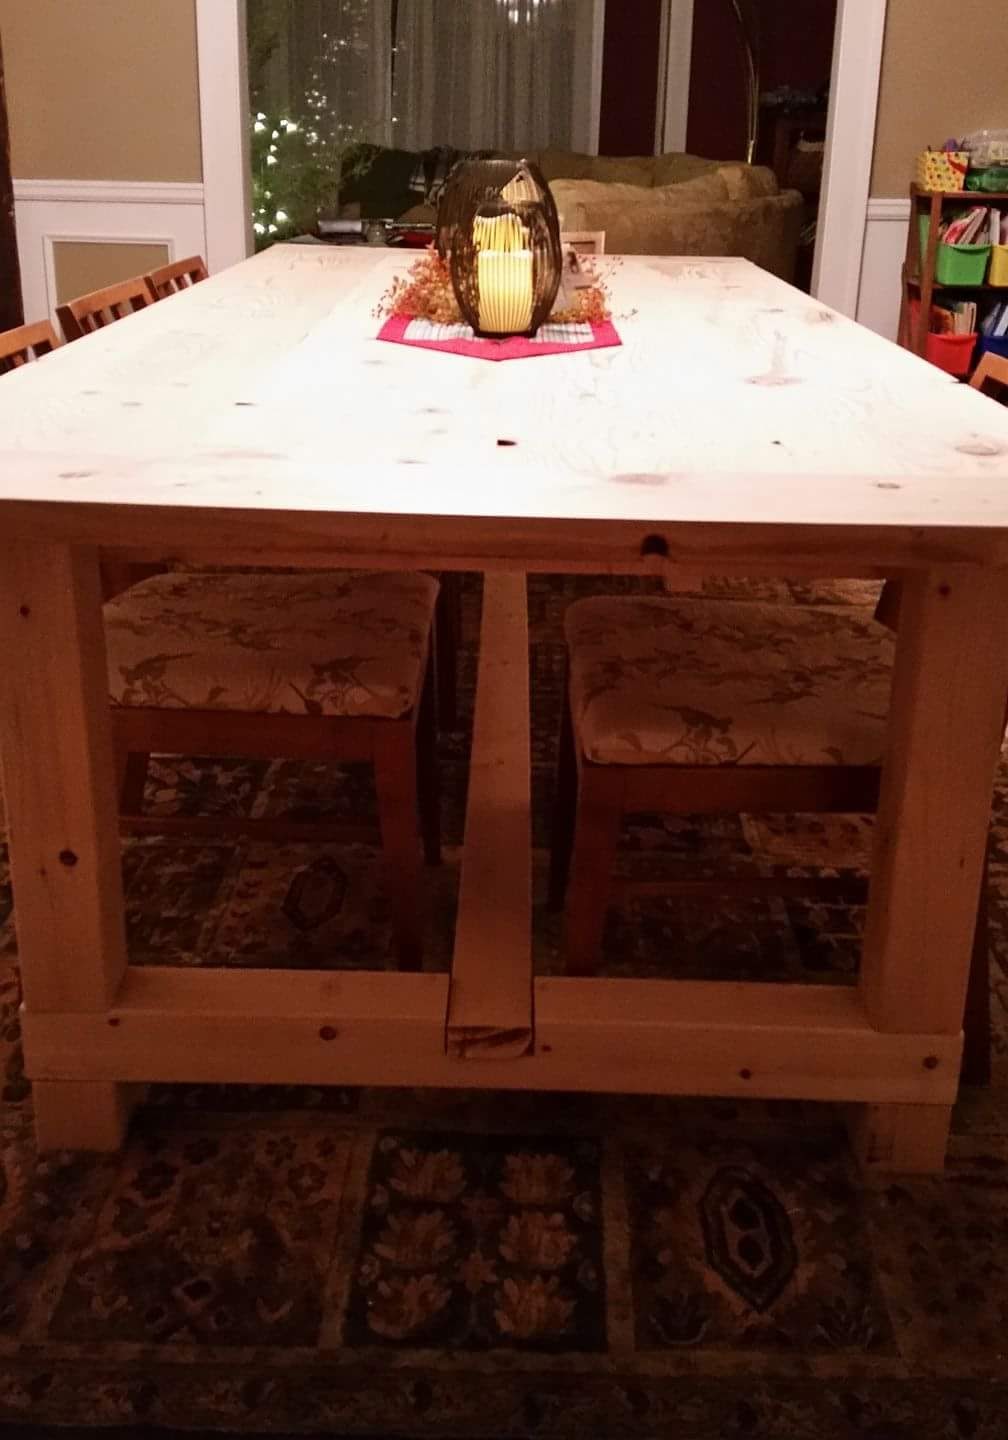
Here’s the final product if you don’t want to read/look through everything (I let my kids sign the bottom of the table since they were involved in the project):
My wife has wanted a “farm” table for our dining room for quite a while. I shopped around for some reclaimed wood, decided that was way too expensive (especially when I have torn down and burned my fair share of old barns in my day; dang it!), and settled on buying new wood and “distressing” it to achieve the goal.
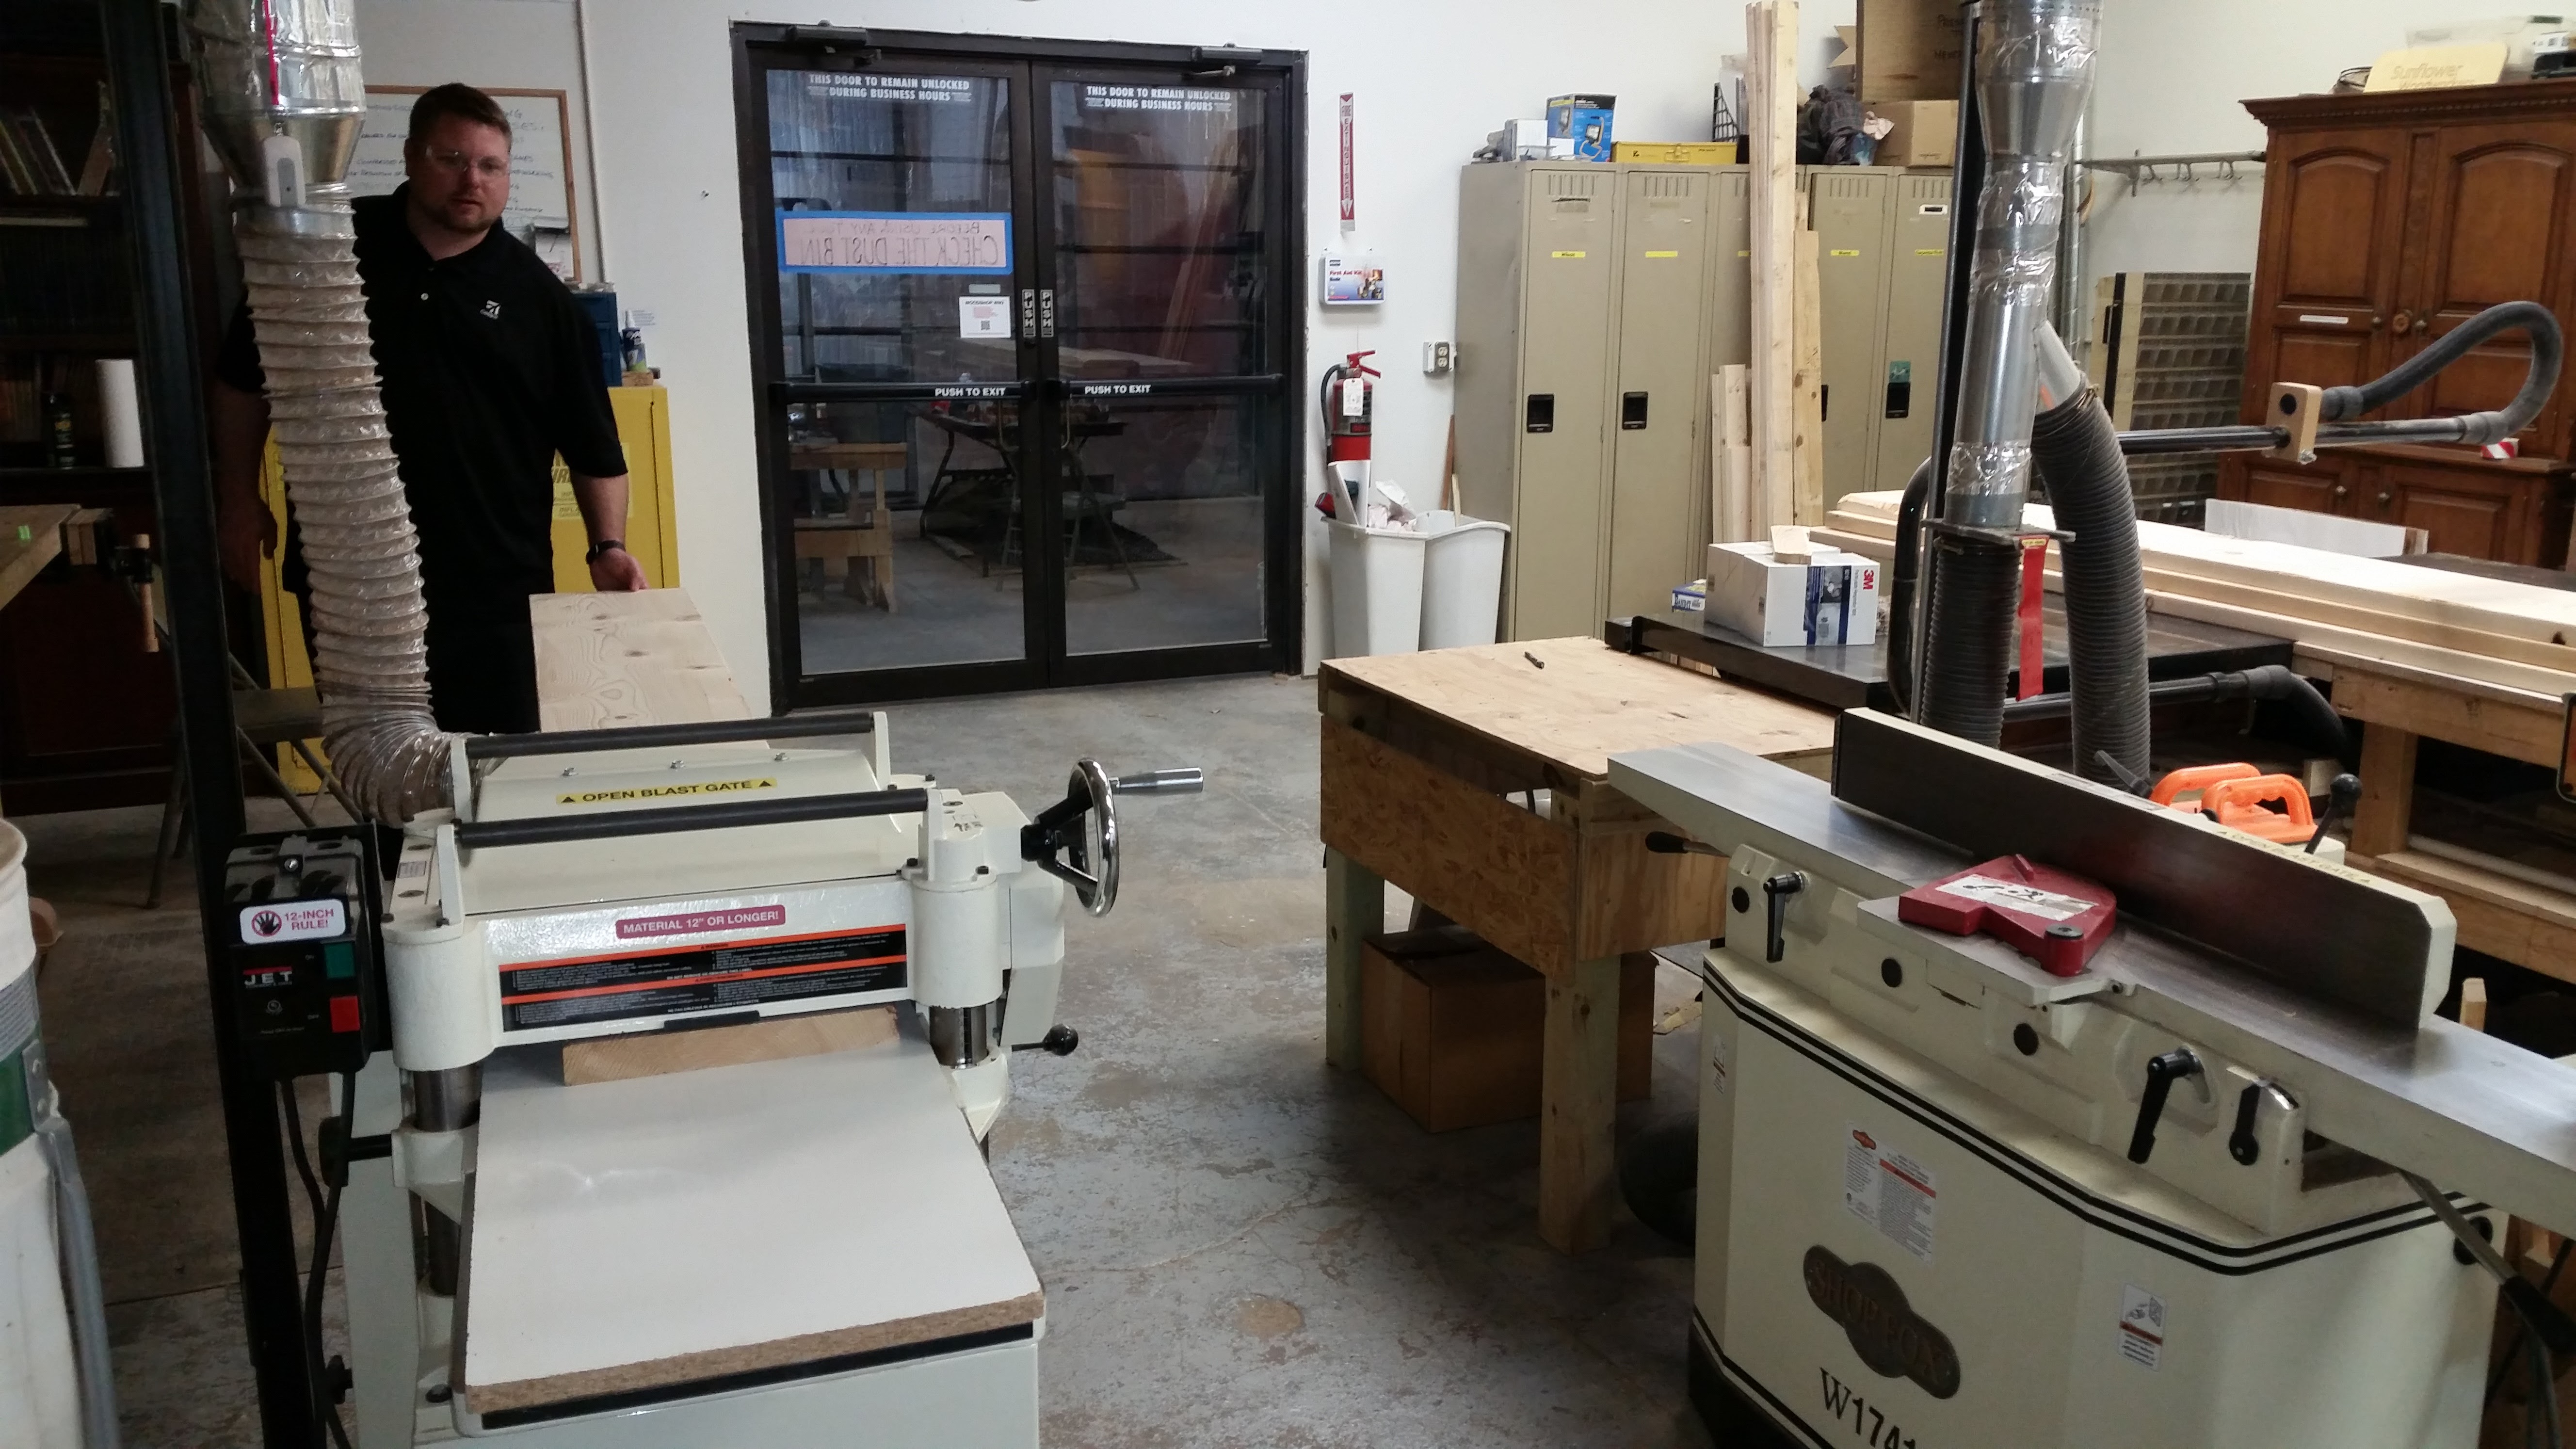
I started out with 4 pine 2x12’s, which I ran through the planer and jointer, and then glued together, using biscuits to keep everything lined up. Here’s Chris B helping me out on the planer!
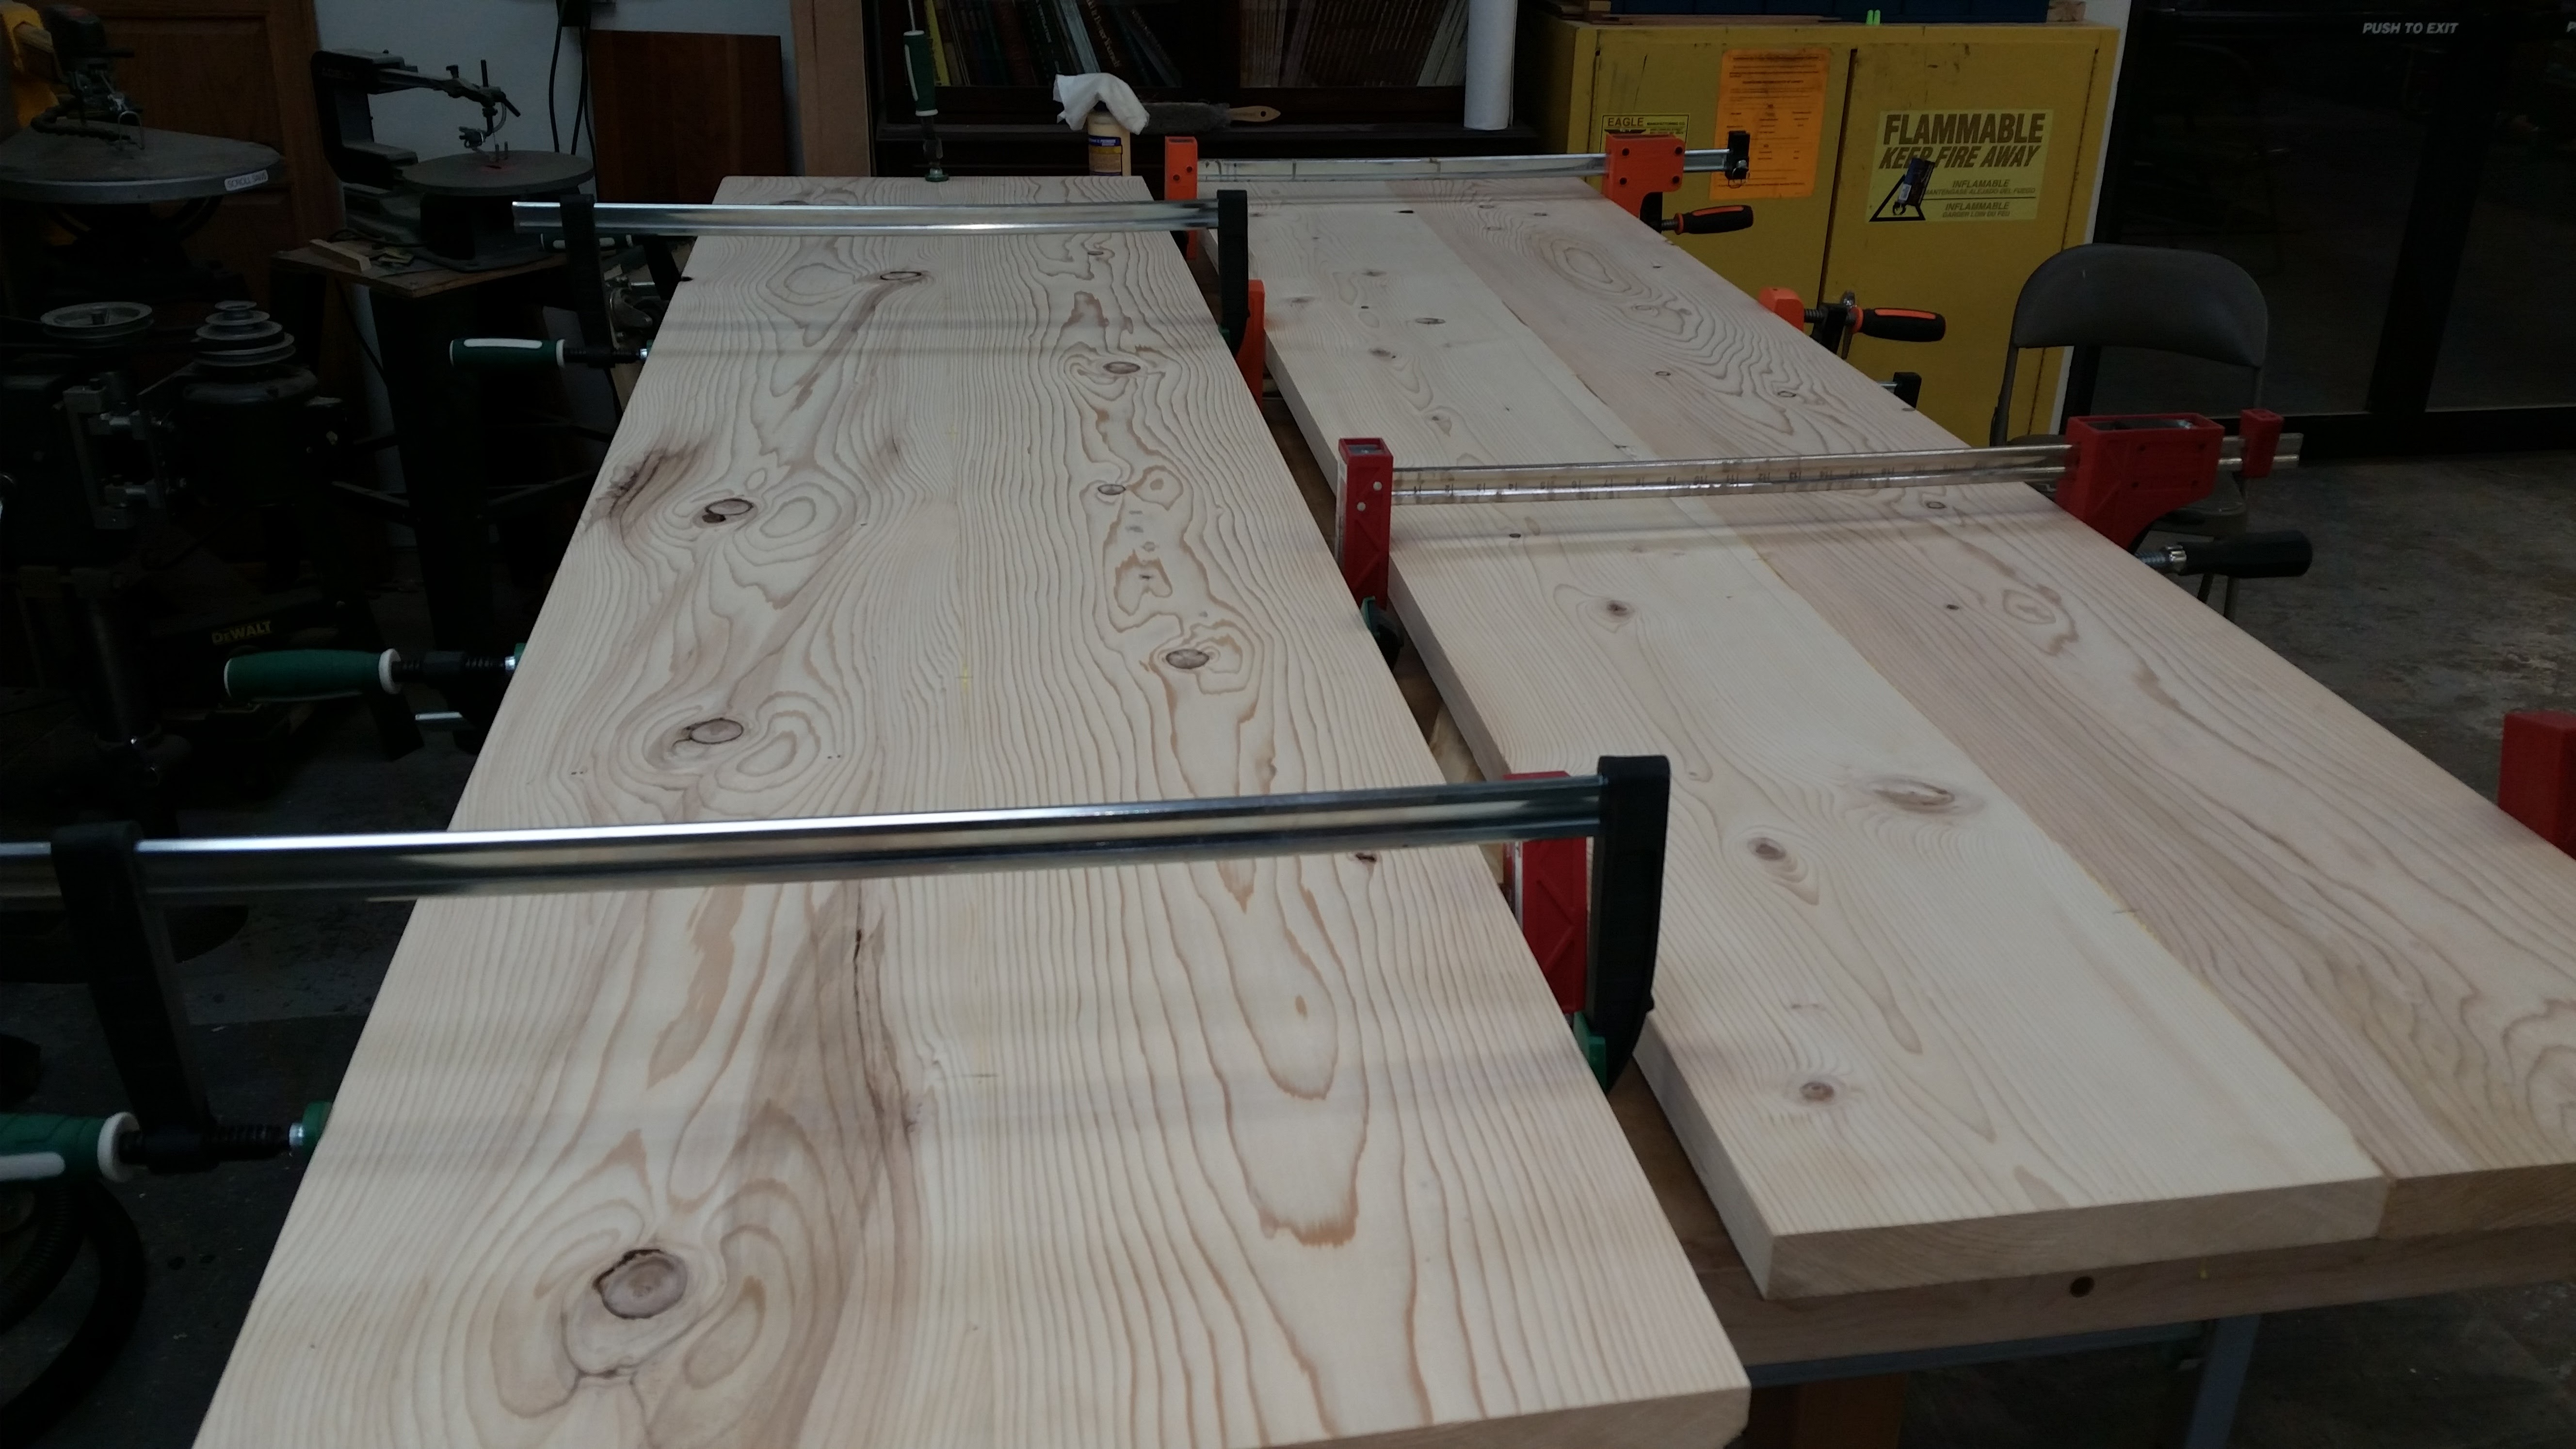
I glued all four 2x12’s together to make the top of the table. Here are the two halves drying before I glued them to each other.
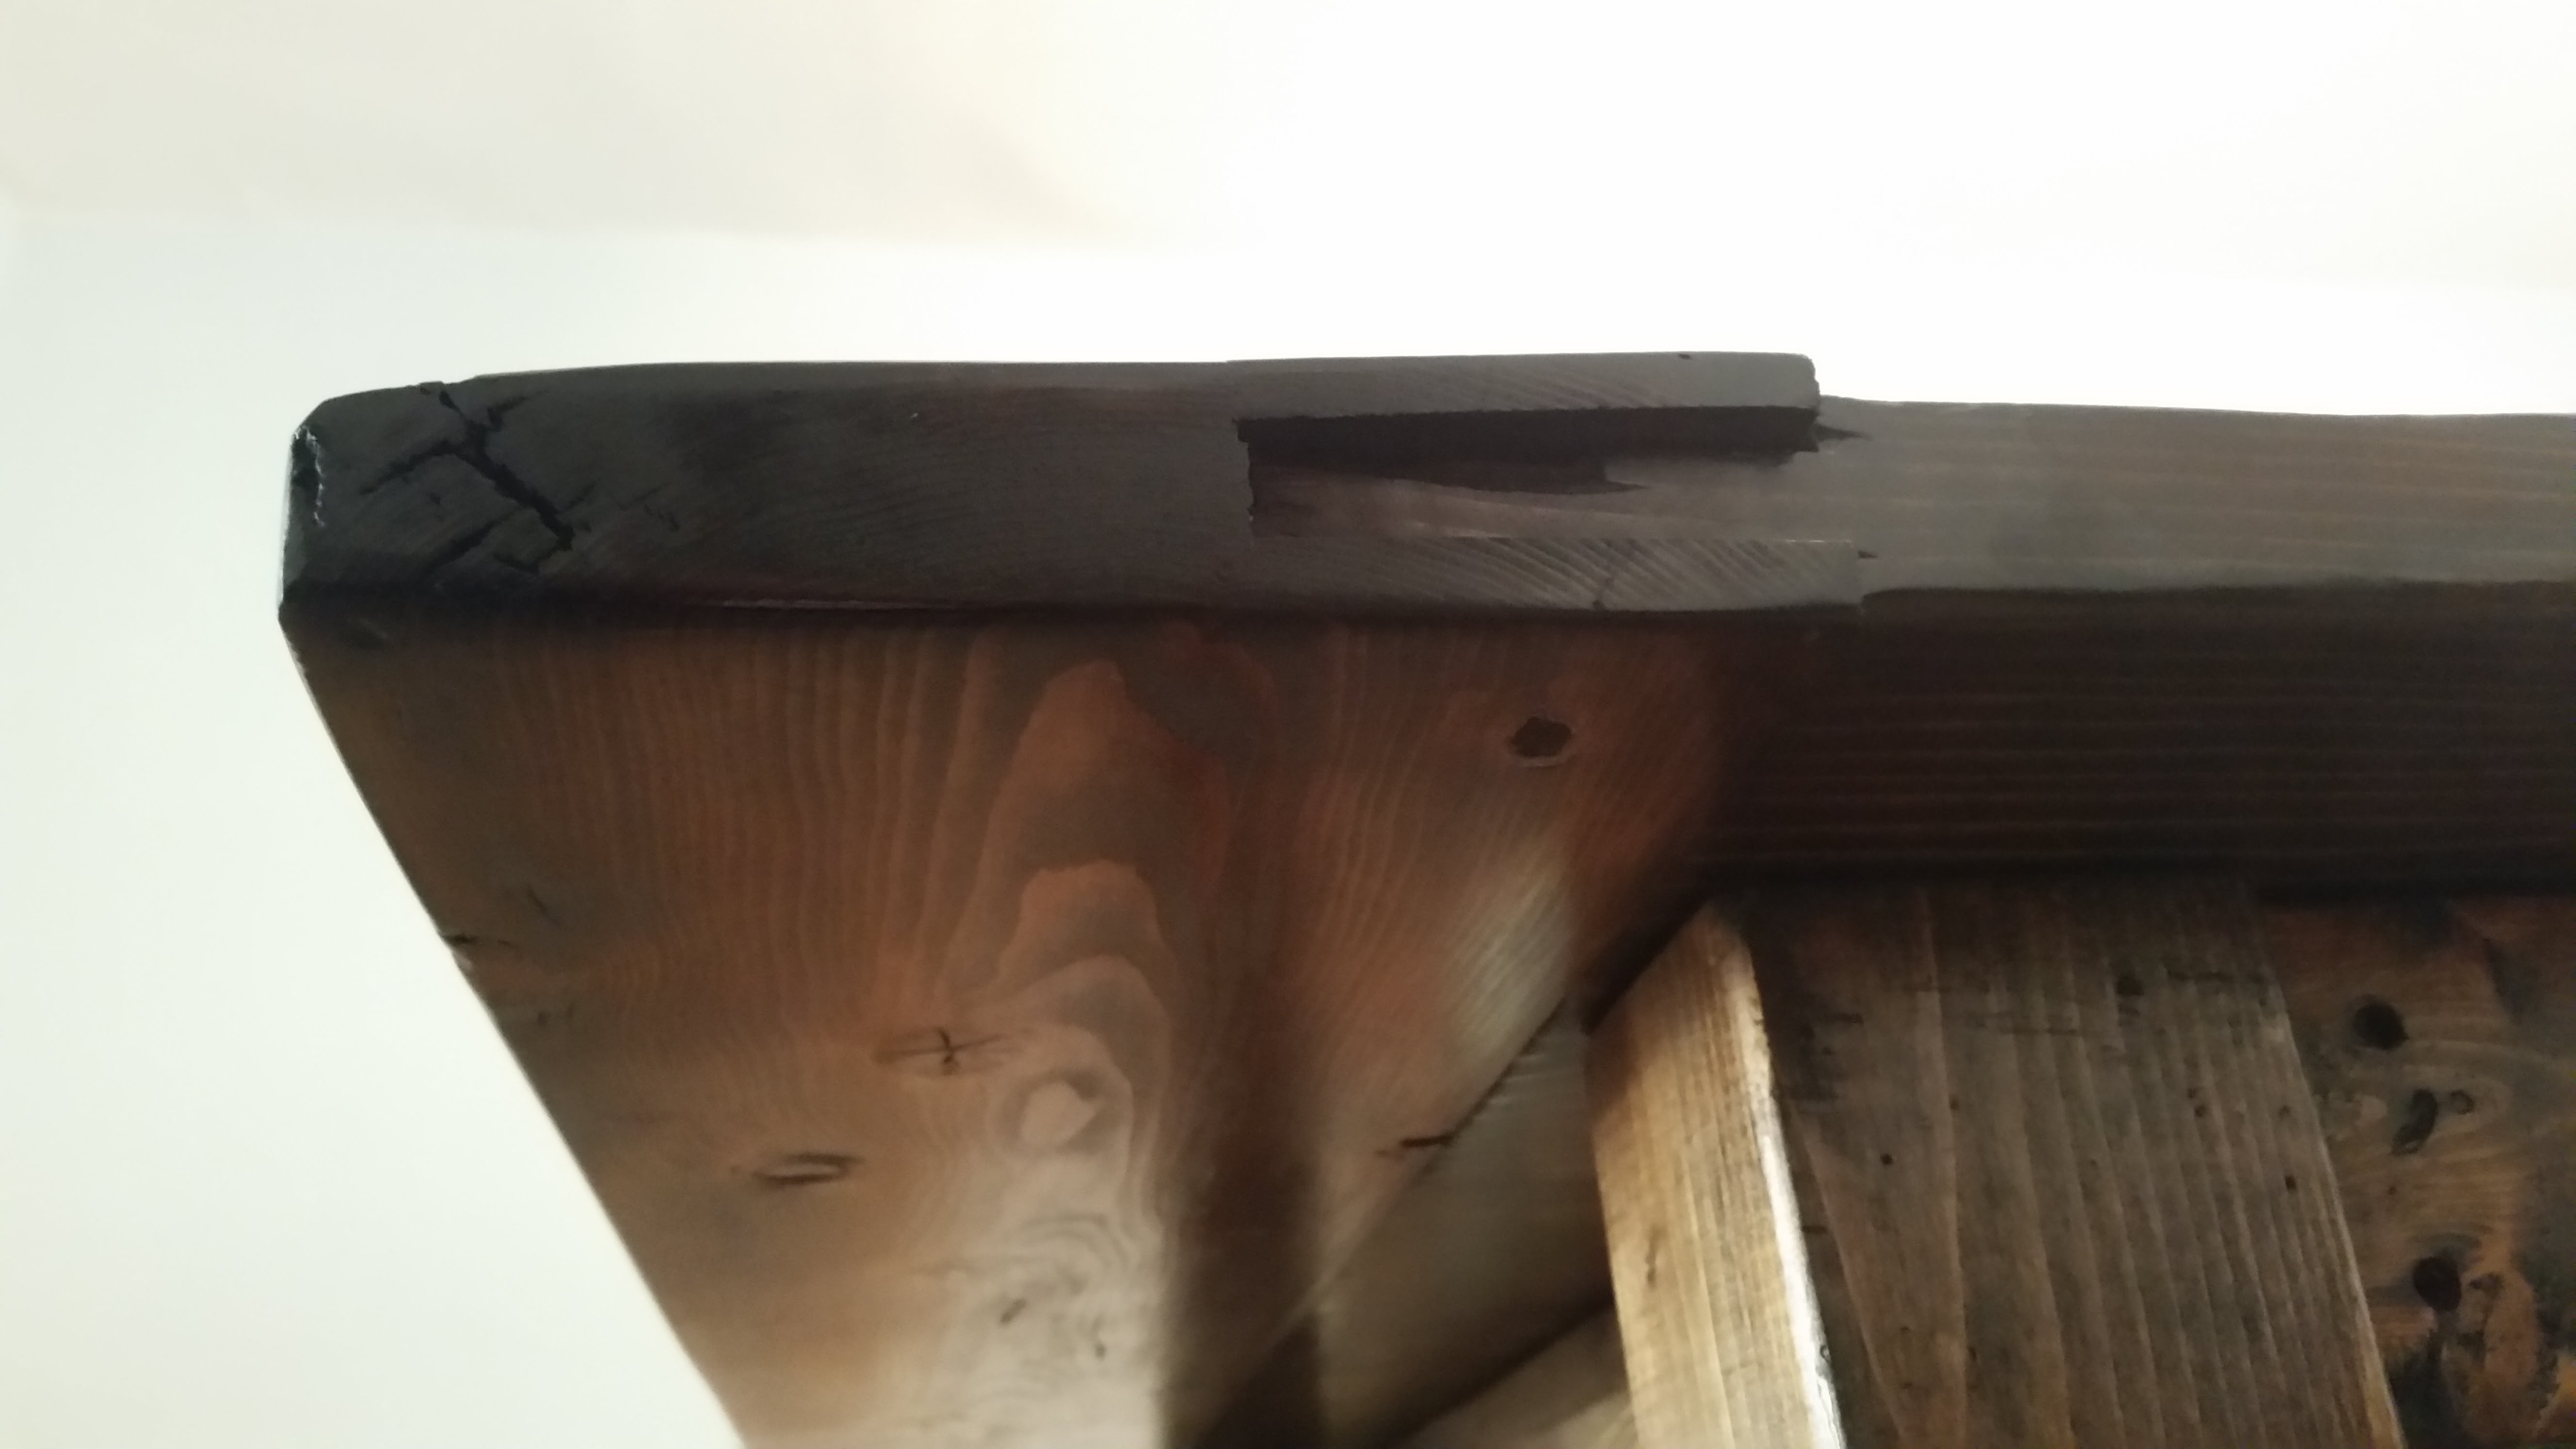
The most complicated part of this project was making floating breadboards for the ends of the table top. Mike convinced me to build this table without any screws in it because wood will constantly expand and contract with atmospheric changes and screws won’t move with the wood, which may result in the boards cracking. The breadboard is what finishes off the end of the table, but since the wood grain is perpendicular to the main part of the table, it needs to “float”. I’m glad I took his advice, because it does move a lot! I failed to take good pictures of the build process, but the photo below is the end result of the floating breadboard. I used a router to make a tongue on the main part of the table and slid it into a groove I cut on the breadboard. I used dowels to anchor the breadboard, but only glued the center one. The rest are floating in a slot so the main table can expand and contract. When I built the table, the breadboard was flush with the main part of the table top, so you can see how much it moves around by the photo!
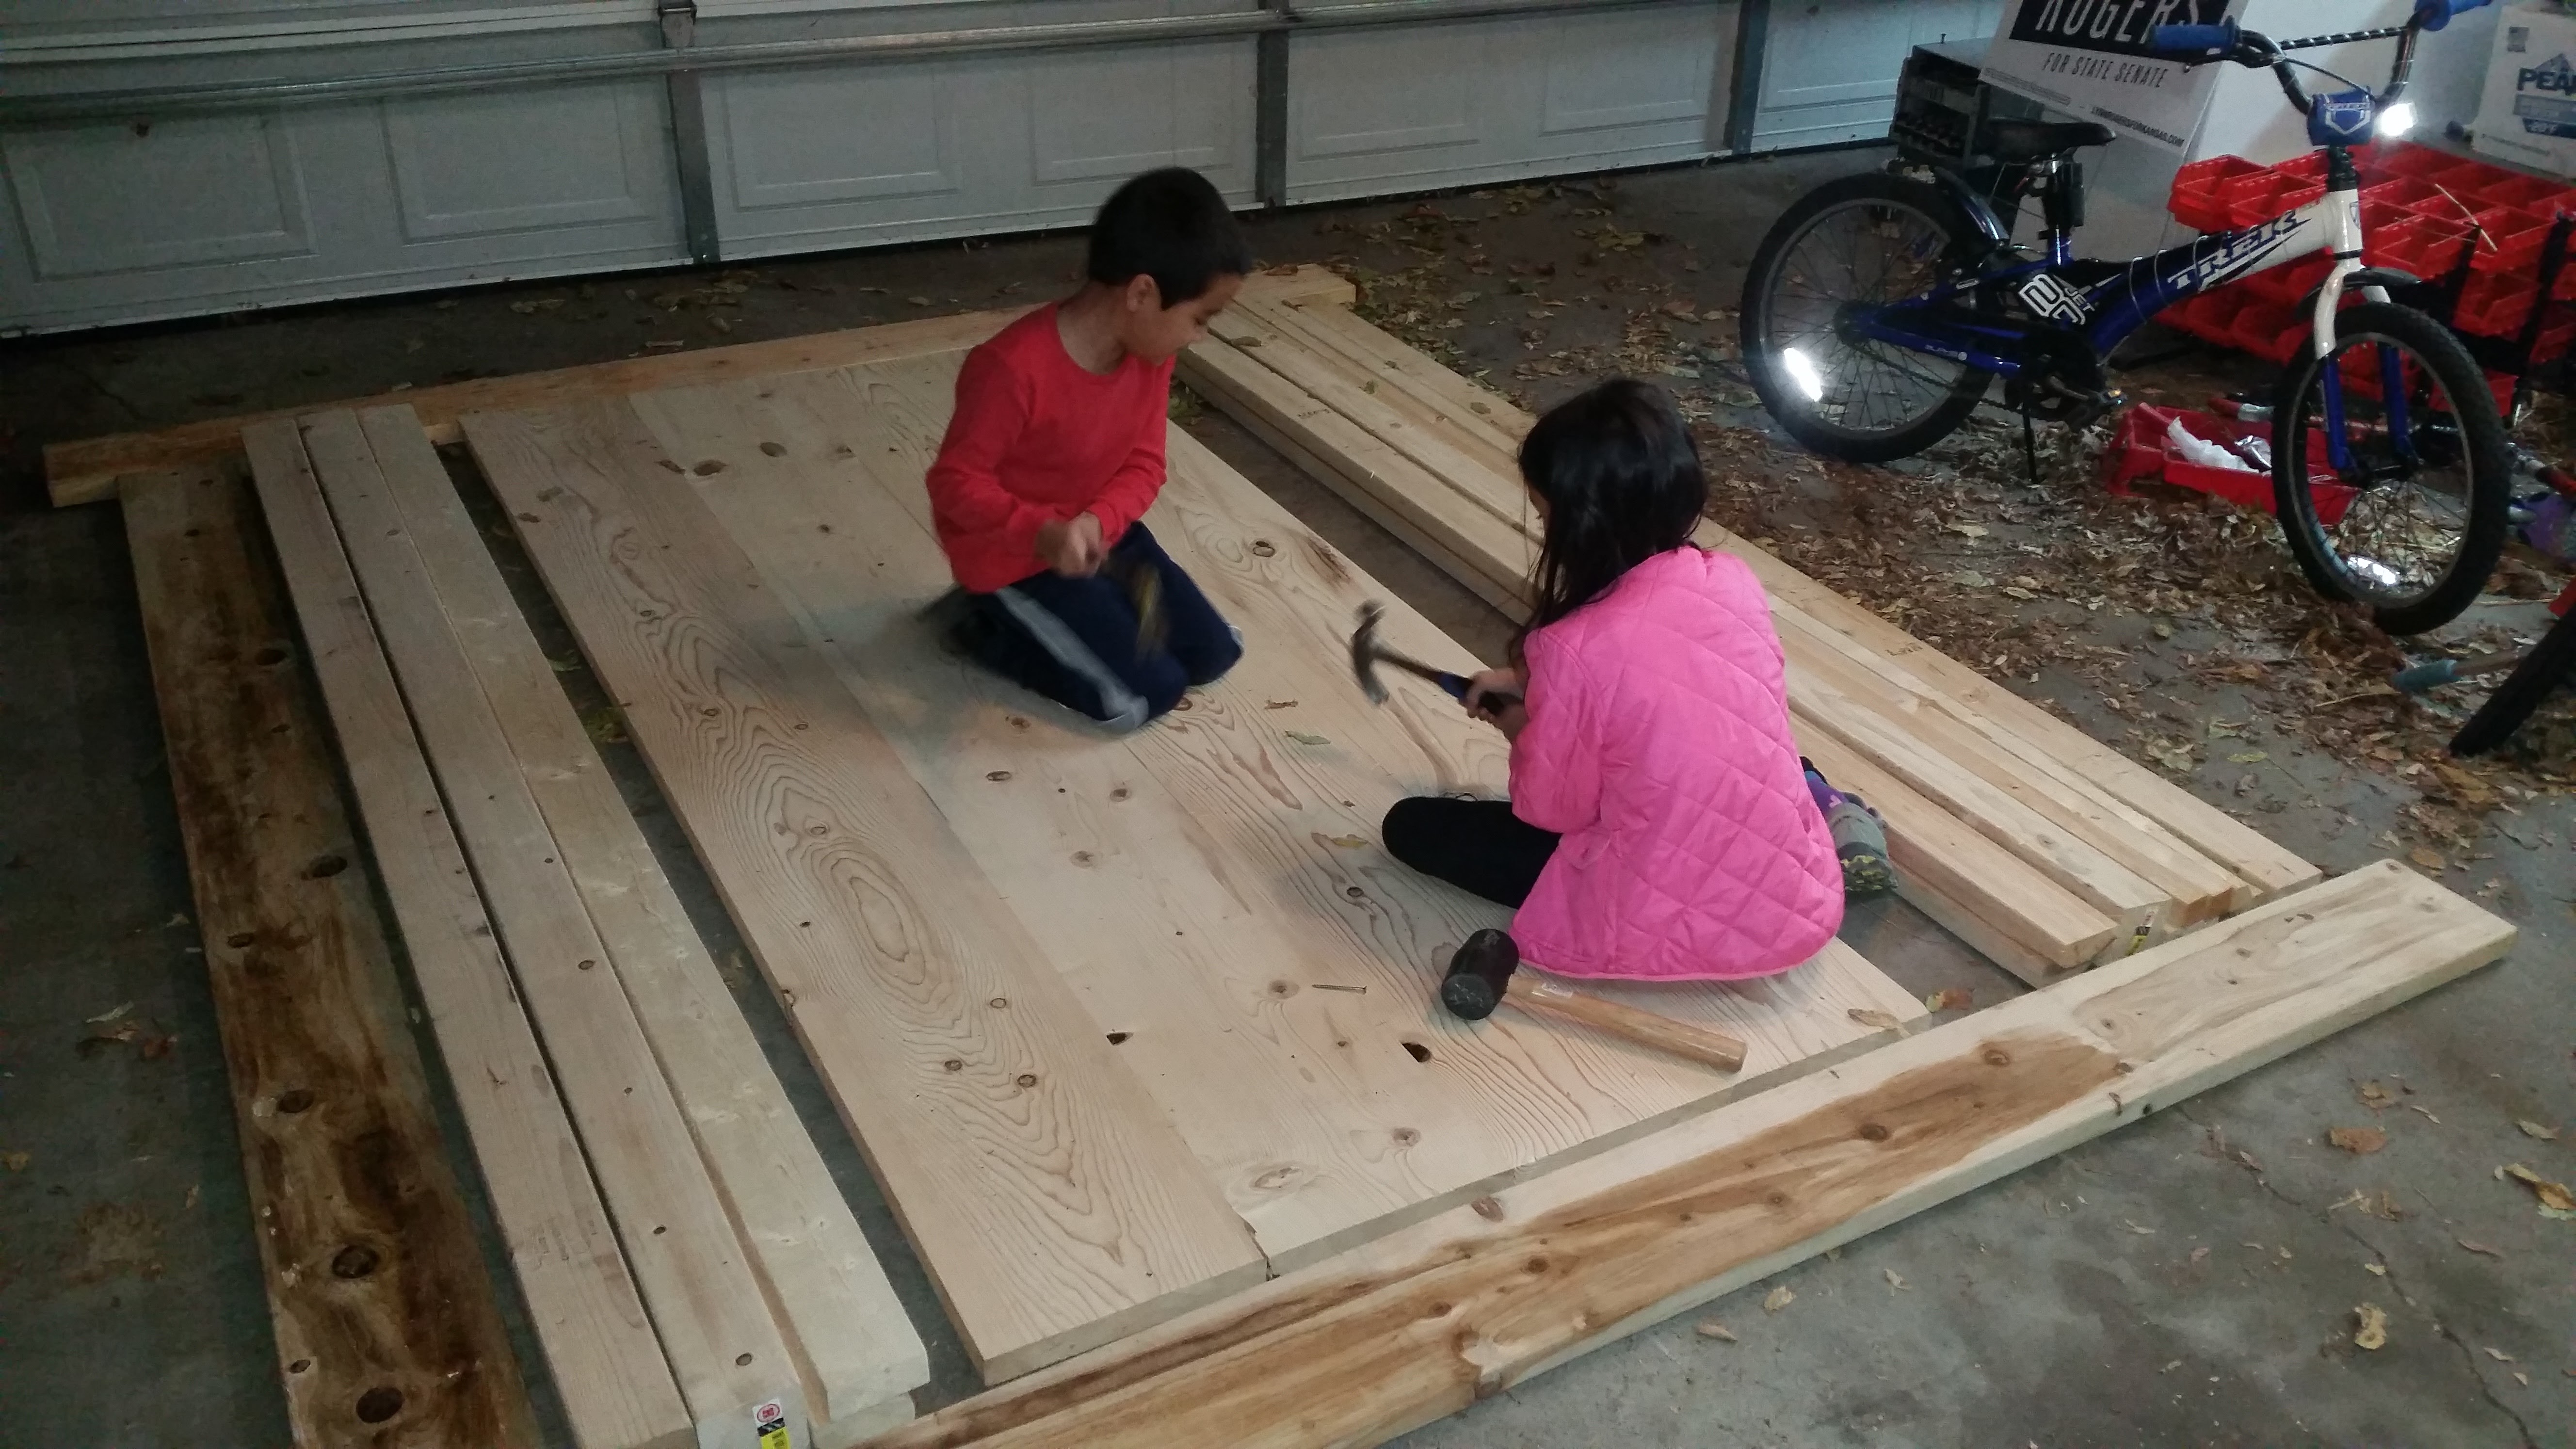
I gave my kids hammers, nails, screws, and rocks and let them loose on the table top to “distress” it. It made me sick to my stomach… but it worked out in the end. If I did it again, I would definitely use rocks more than anything else as that gave the most “natural” effect without making it look obvious that you just beat on it with a hammer.
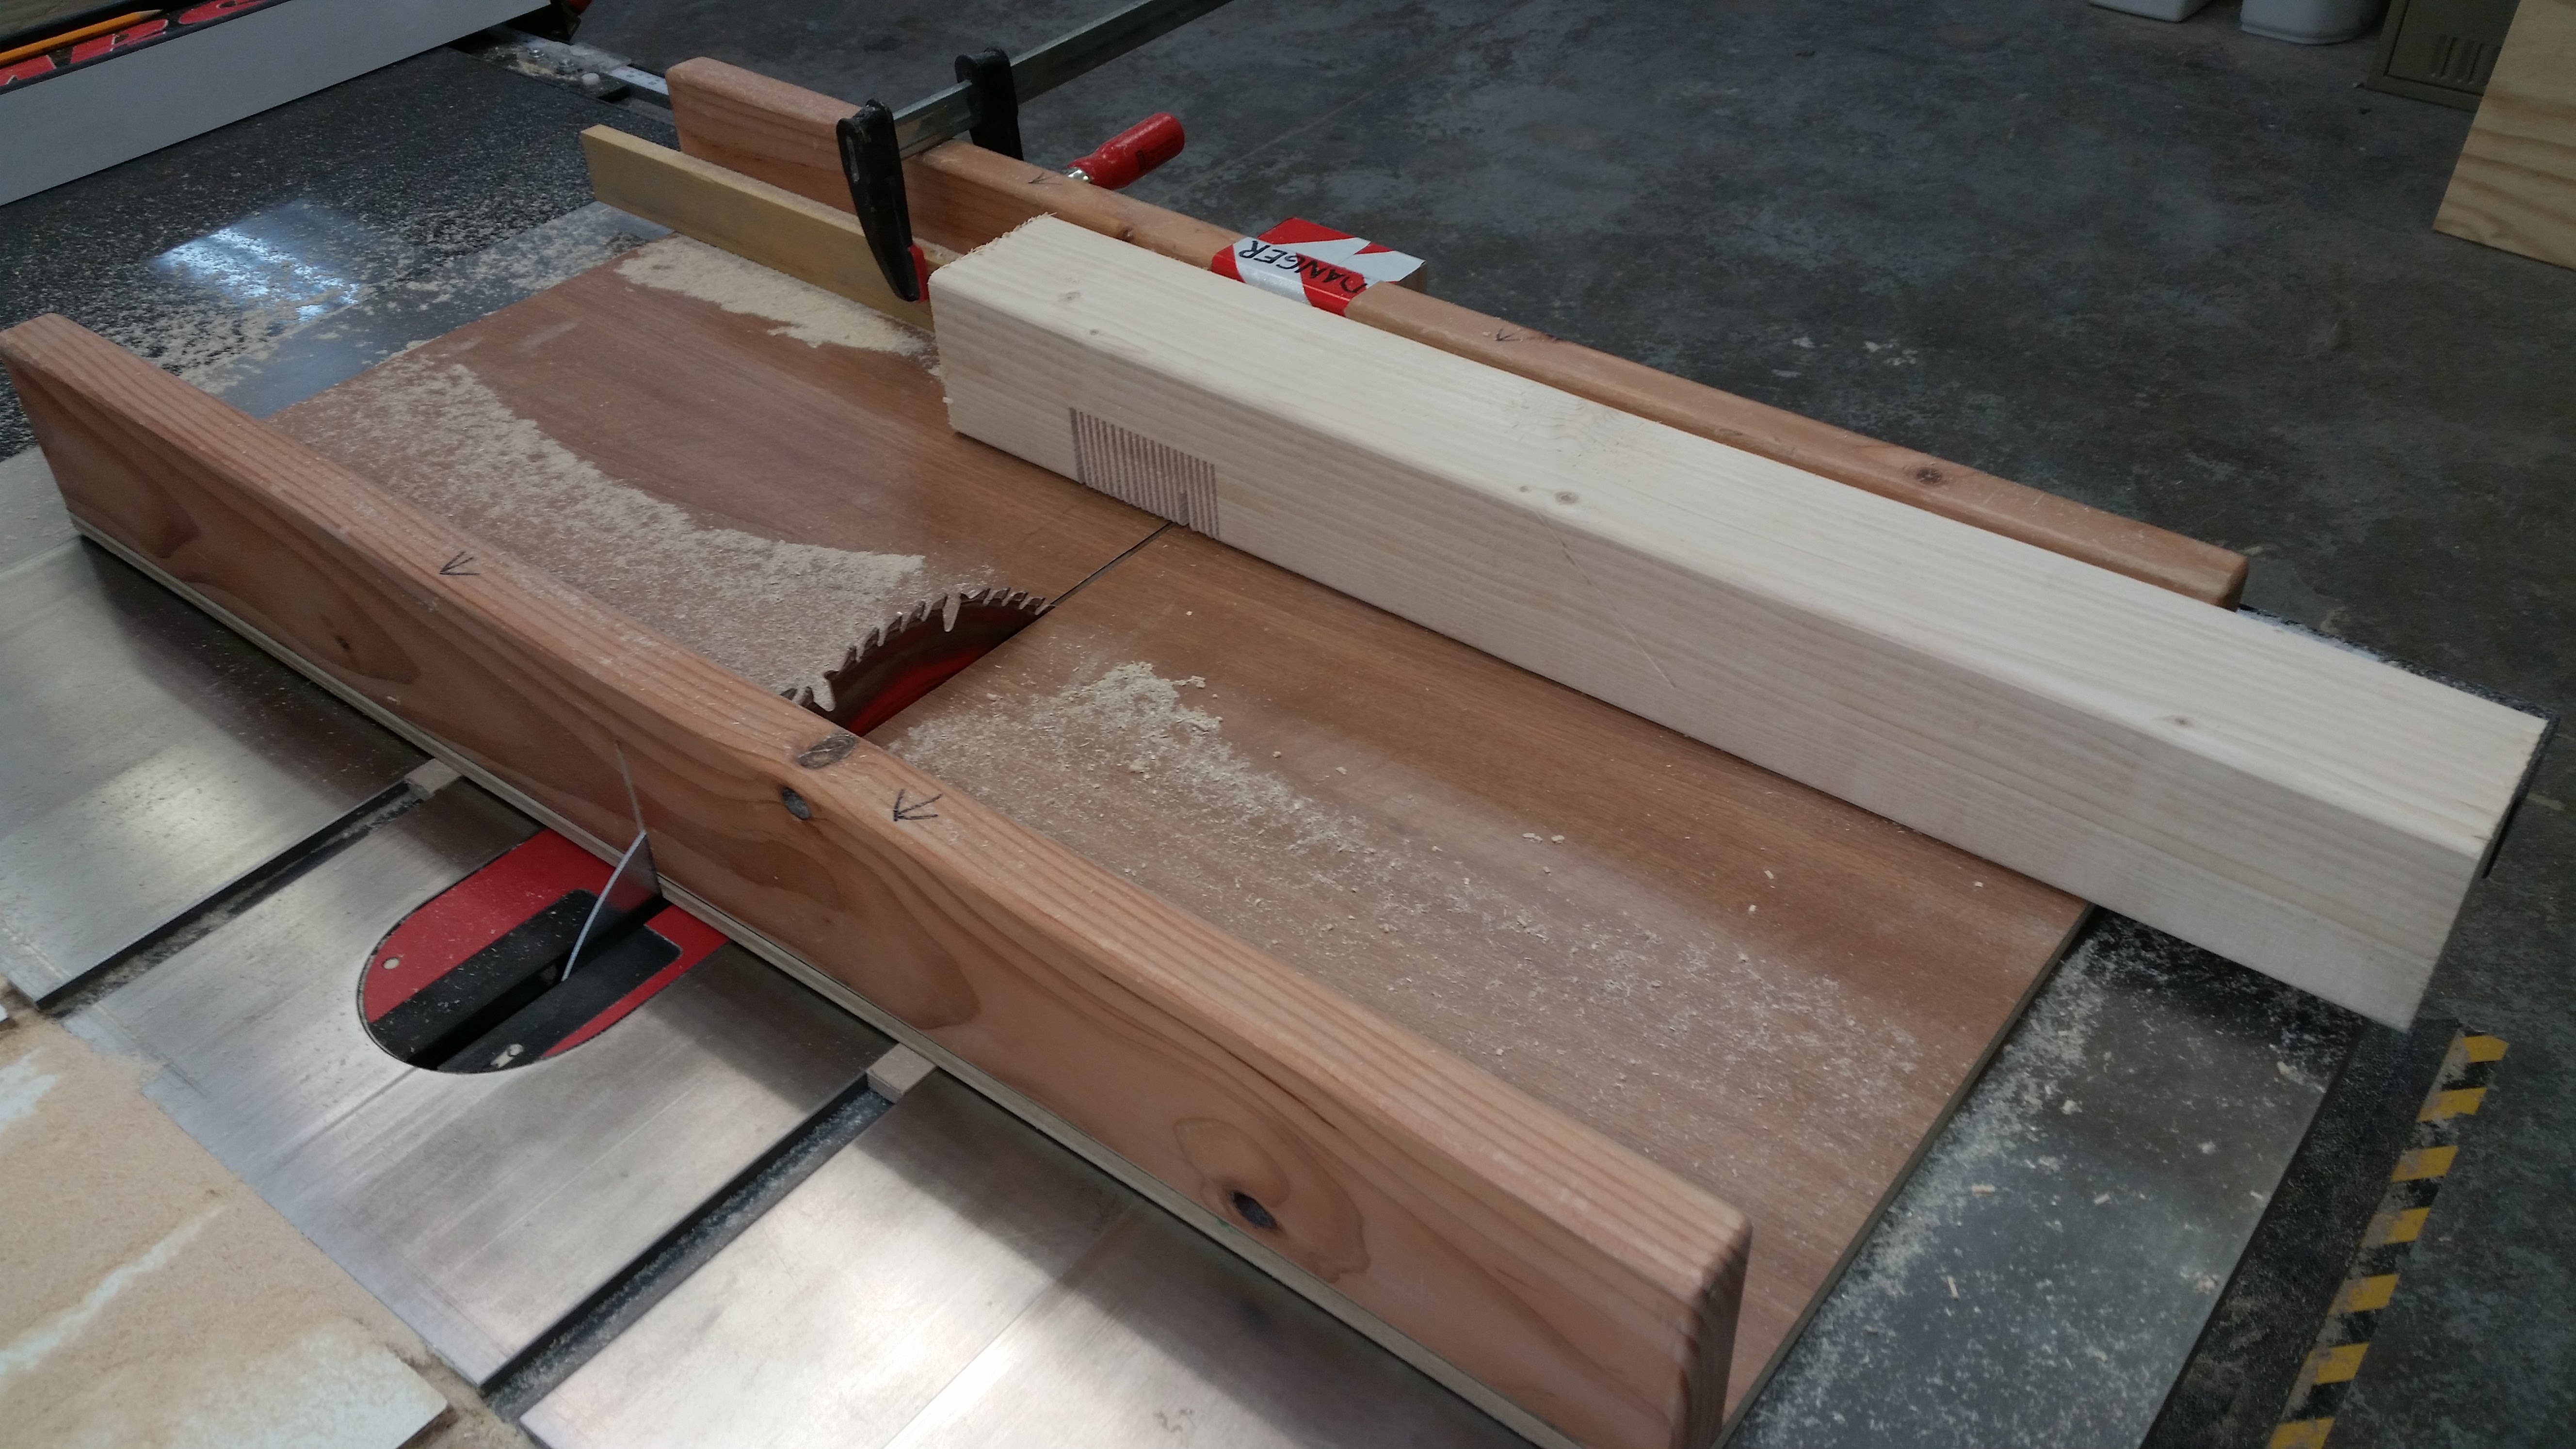
For the base, I built a simple frame out of 4x4 and 2x4. I learned how to use the tablesaw in new ways during this part! In this photo you can see how I made several cuts in a 4x4 in preparation for gluing the vertical and horizontal pieces together.
This table was a gift for my wife for her birthday, but I only got the table built and hadn’t started sanding and staining by the time her birthday came around. So I surprised her with this (only to take it back to the garage right after):
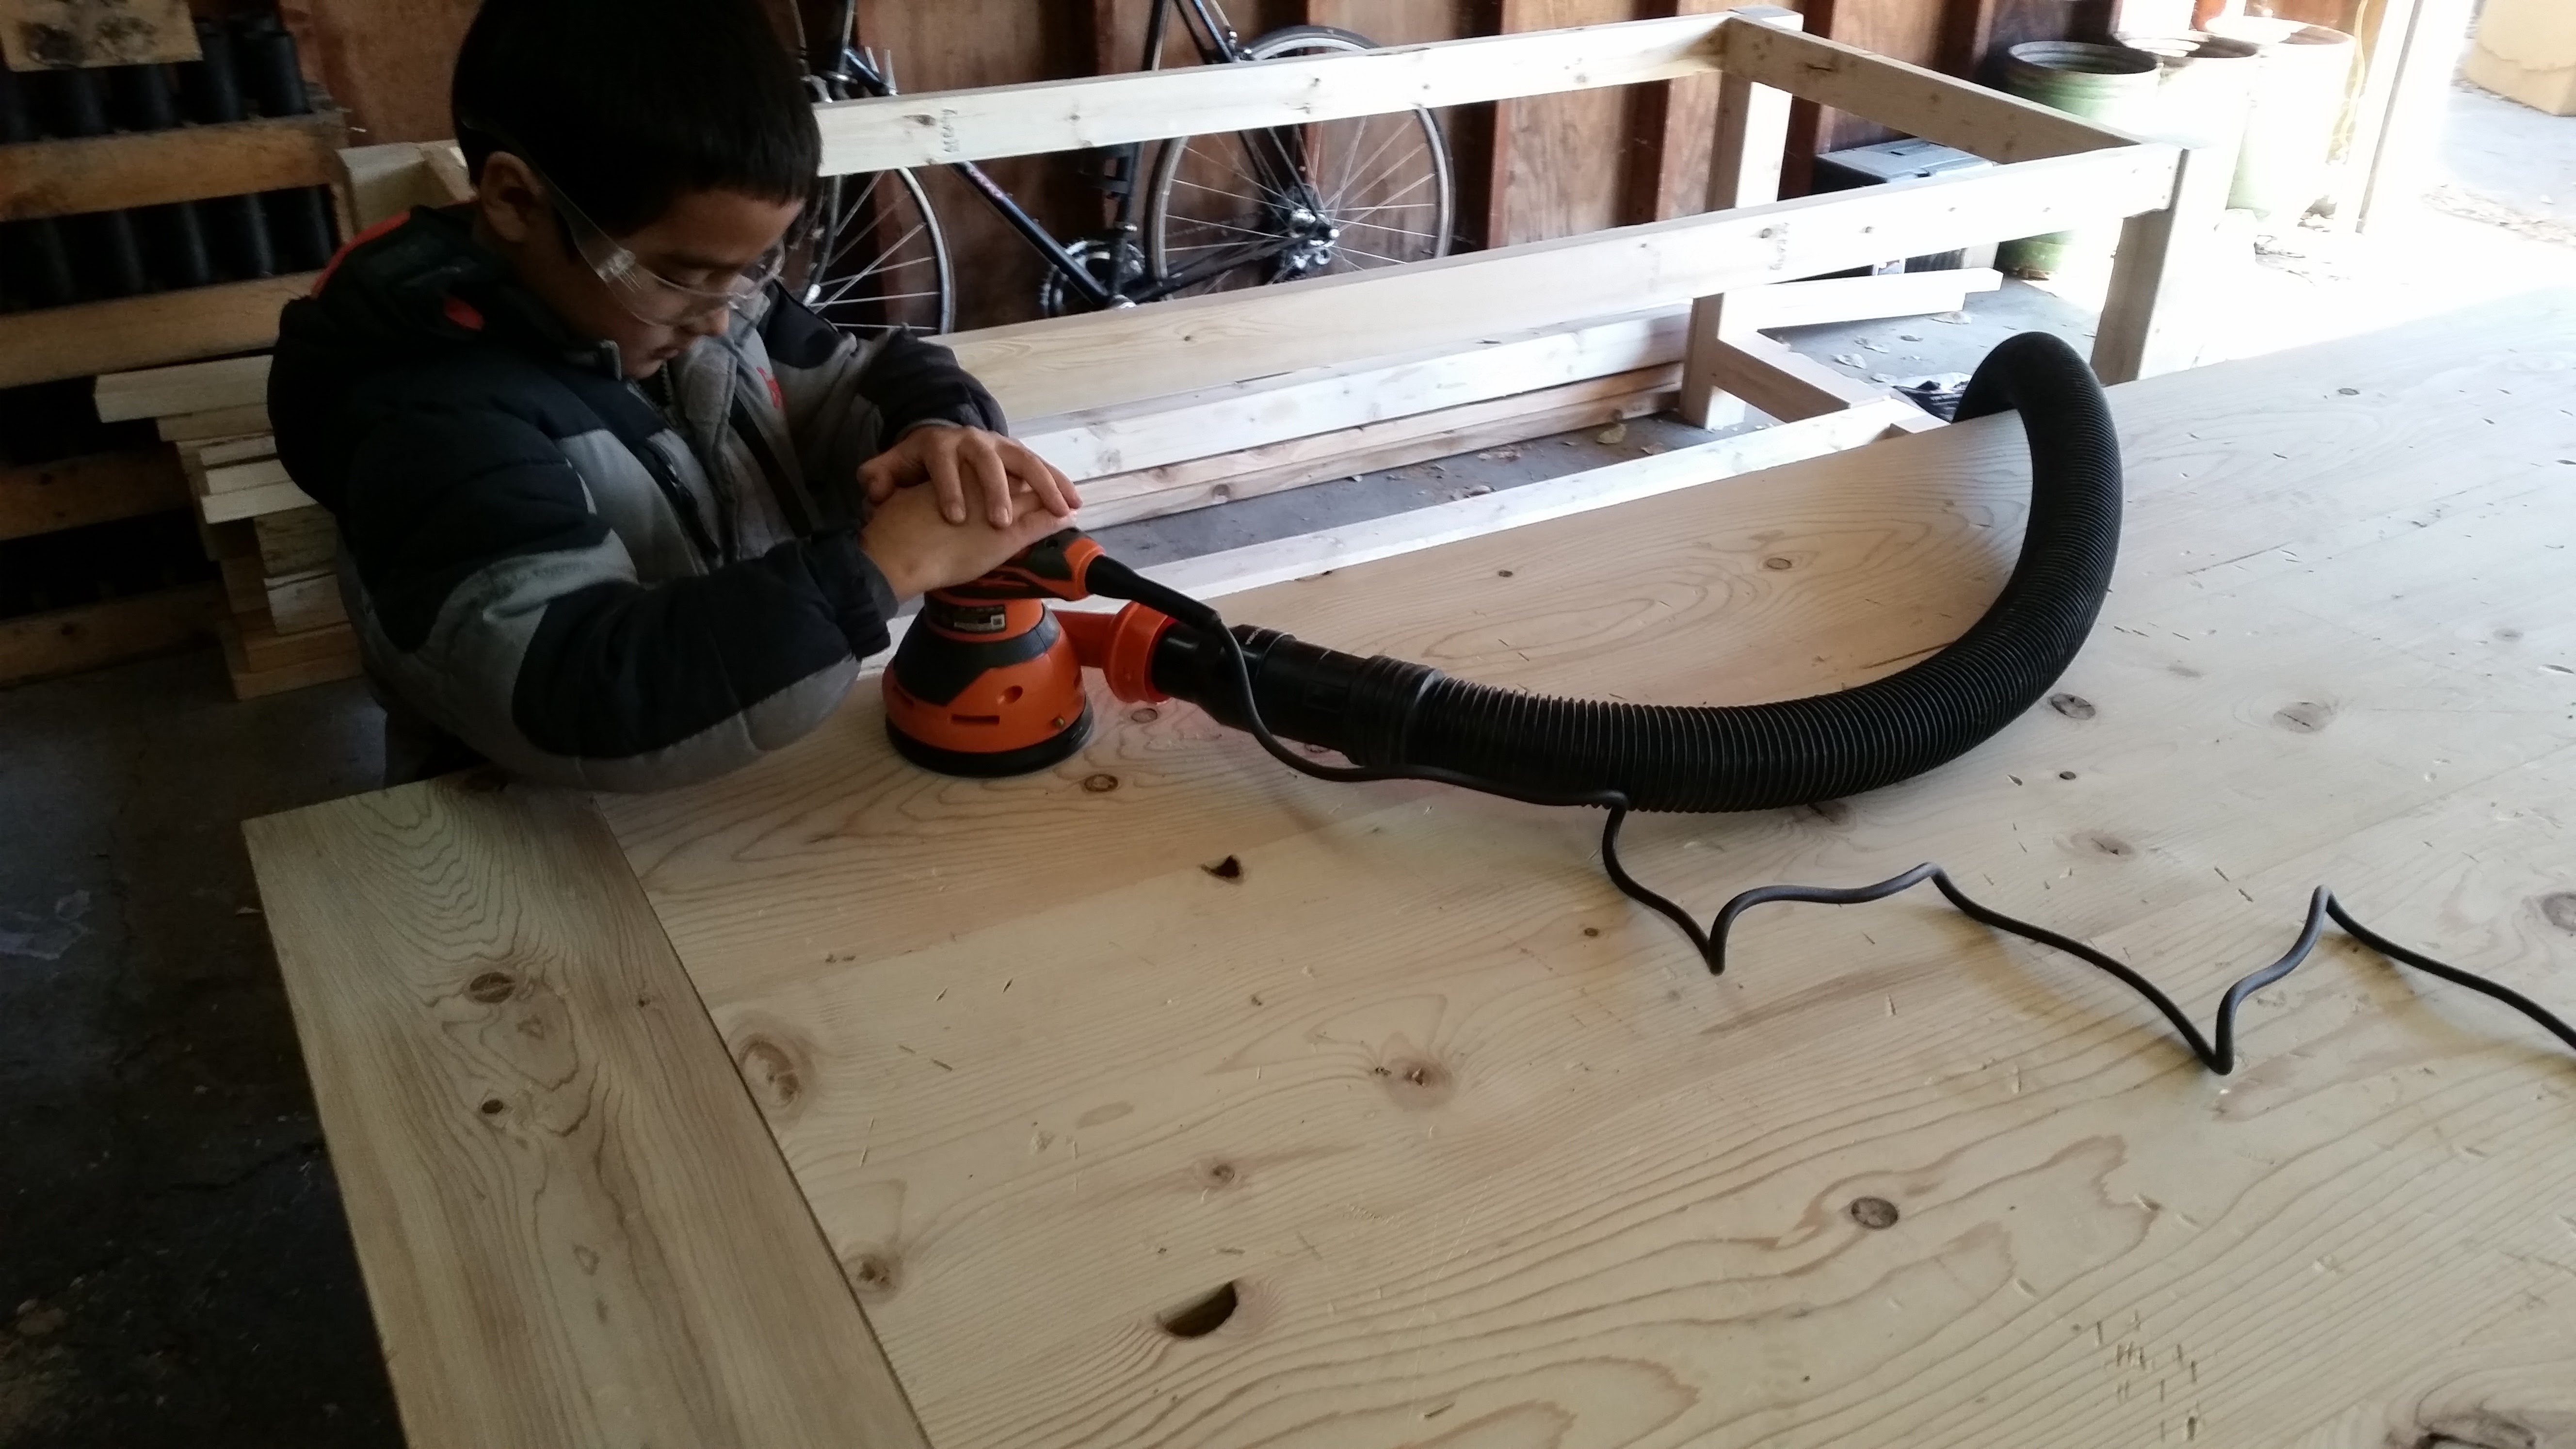
The kids helped me sand and stain the table and eventually we got it in the house again.
Now I need some chairs…
